How to add different signatures to internal and external emails
Learn how to configure CodeTwo Email Signatures 365 to add different signatures to messages sent to internal recipients and different to messages sent outside your organization.
Email signatures used in internal and external correspondence serve different purposes. For example, when sending an email to your colleagues, there’s no need to include the company information, a marketing banner or legal disclaimer in a signature. Bear also in mind that Exchange Online mailboxes have limited space, so it would be a good idea to remove any graphics from signatures added to internal emails.
For example, an internal email signature could contain the following sender’s information only:
- full name,
- job title,
- department name,
- contact info/extension number,
- other (preferably non-graphic) details.
An external email signature typically includes the following details:
- full contact information (sender’s name, job title, phone number, company address, etc.),
- company logo,
- marketing banner,
- links to social media profiles,
- legal disclaimer,
- and more.
New to CodeTwo?
Learn more about signature modes our solution can work in. See how to set up your first signature rule and design an email signature template.
Use the links below for setup instructions, based on the type of CodeTwo signatures you’re using:
Cloud (server-side) signatures:
Outlook (client-side) signatures:
Set up cloud signatures for internal emails
Add a new cloud (server-side) signature rule (Fig. 1.) and name it, e.g. Internal signature.
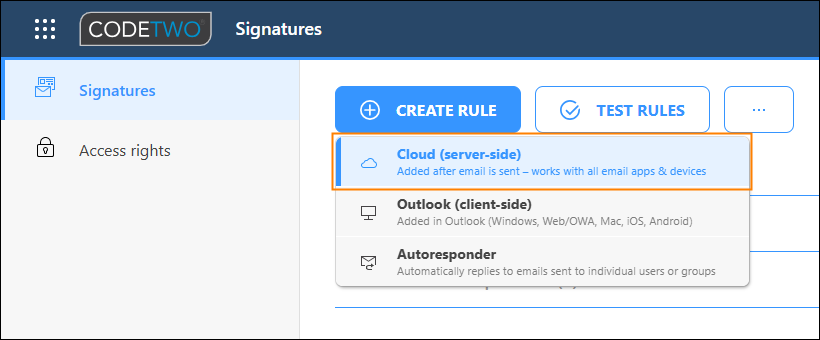
Fig. 1. Adding a new cloud (server-side) signature rule.
In the Recipients step, select Add > Internal recipients (Fig. 2.).
For tenants with multiple domains, emails exchanged among those domains are treated as internal.
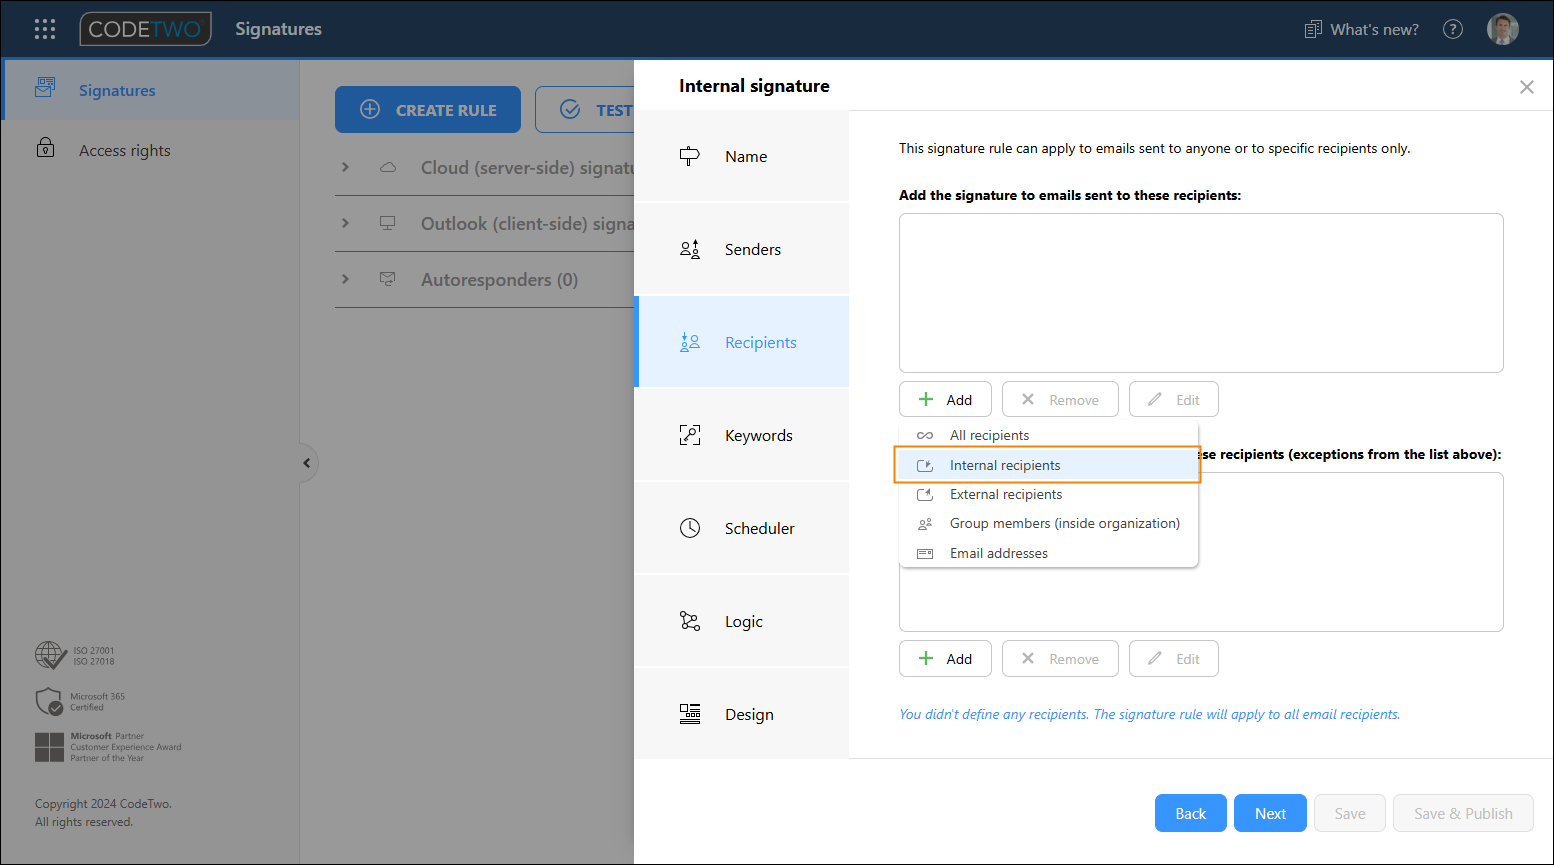
Fig. 2. By using this option, the selected cloud signature rule will be applied to internal emails only.
In the Logic step, leave the default options selected (Fig. 3.):
- If this rule is applied > Do not process any more rules
- If this rule is not applied > Process the next rule on the list
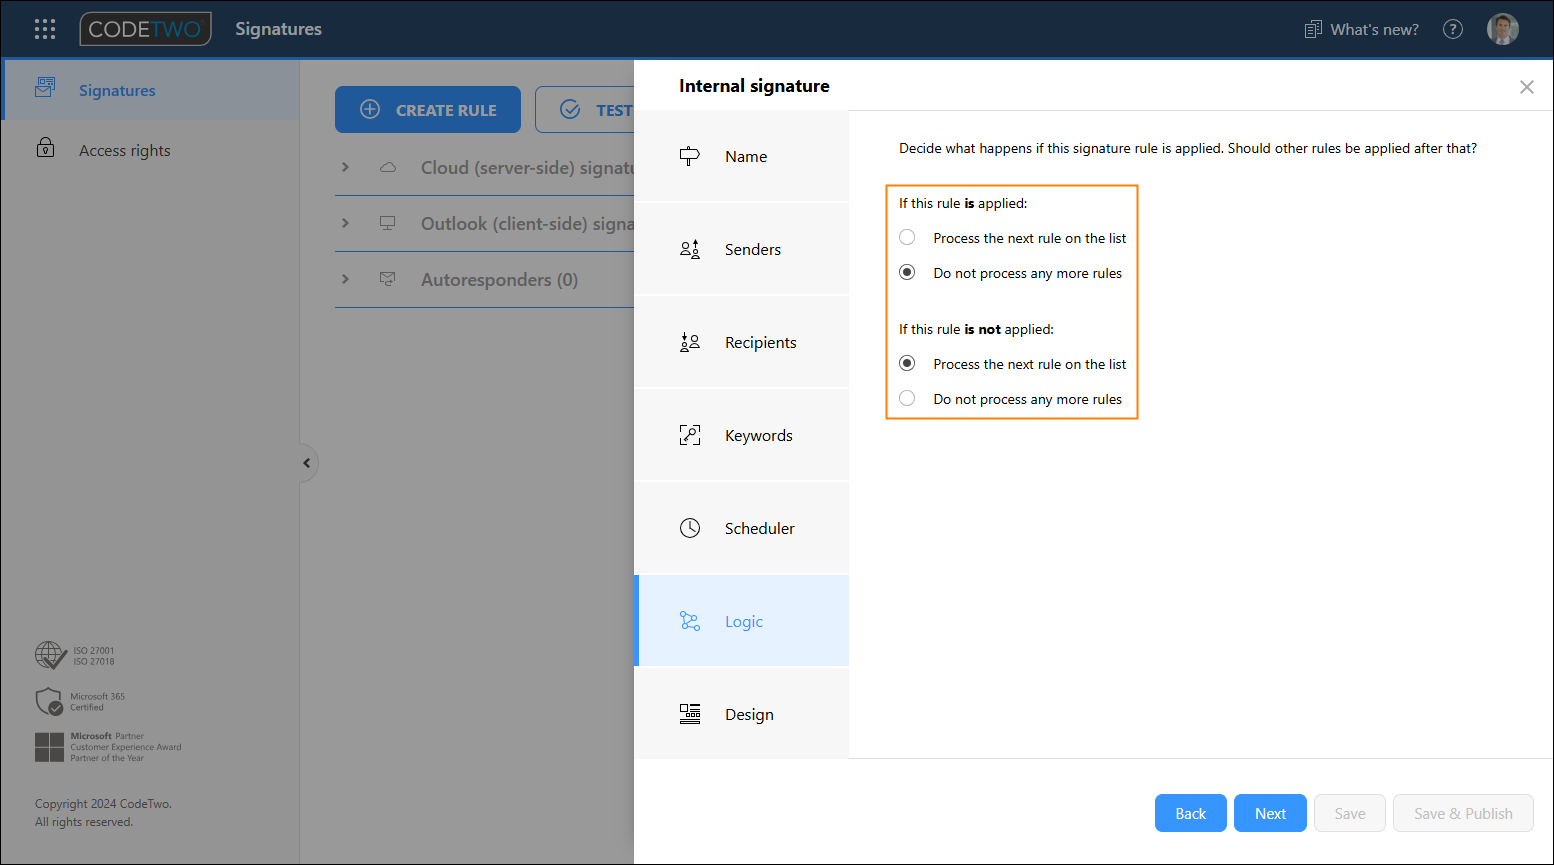
Fig. 3. Select these options to allow the program to execute another signature rule, configured for emails sent outside your organization.
In the Design step, click Edit signature to open the signature template editor. Select one of the existing templates or create a new signature template that will be used for internal correspondence only (Fig. 4.). Learn more about how to create a signature template
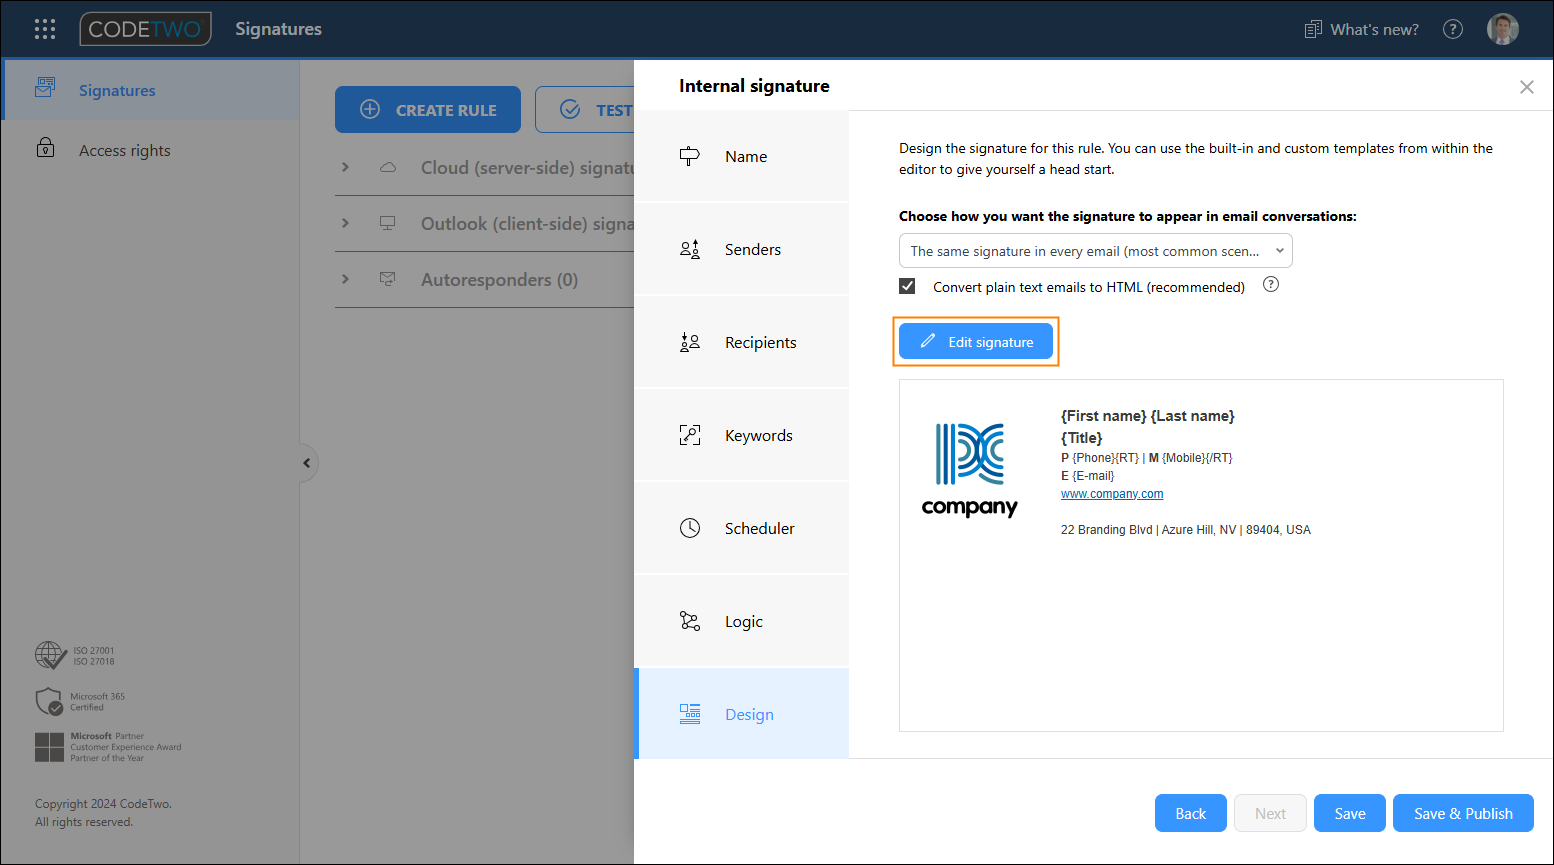
Fig. 4. Creating a signature template for internal emails.
Once done, submit your changes by clicking Save. Next, configure the signature template for external emails – you’ll publish (go live with) both the internal and external signatures later.
Set up cloud signatures for external emails
Add a new cloud (server-side) signature rule, as shown in Fig. 1., and name it, e.g. External signature. Place the new signature rule under the rule configured for internal emails. Next, in the Recipients step, select Add > External recipients (Fig. 5.).
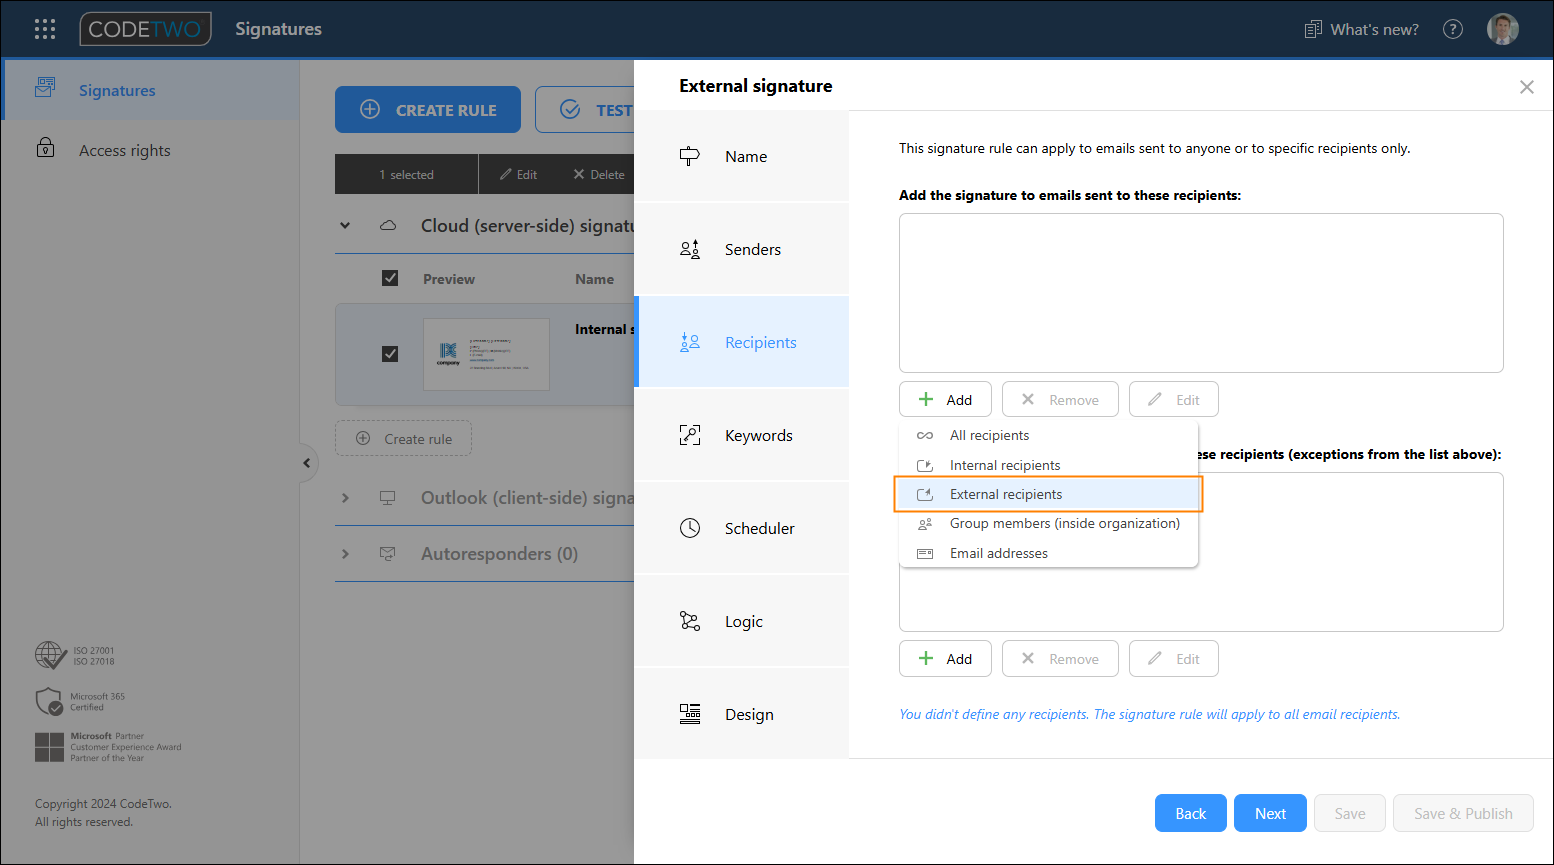
Fig. 5. Thanks to using this option, the selected cloud signature rule will be applied to external emails only.
In the Logic step, leave the default options selected, as shown in Fig. 3., or adjust the settings to your needs.
Go to the Design step and create a new signature template that will be used for emails sent outside your organization (Fig. 6.).
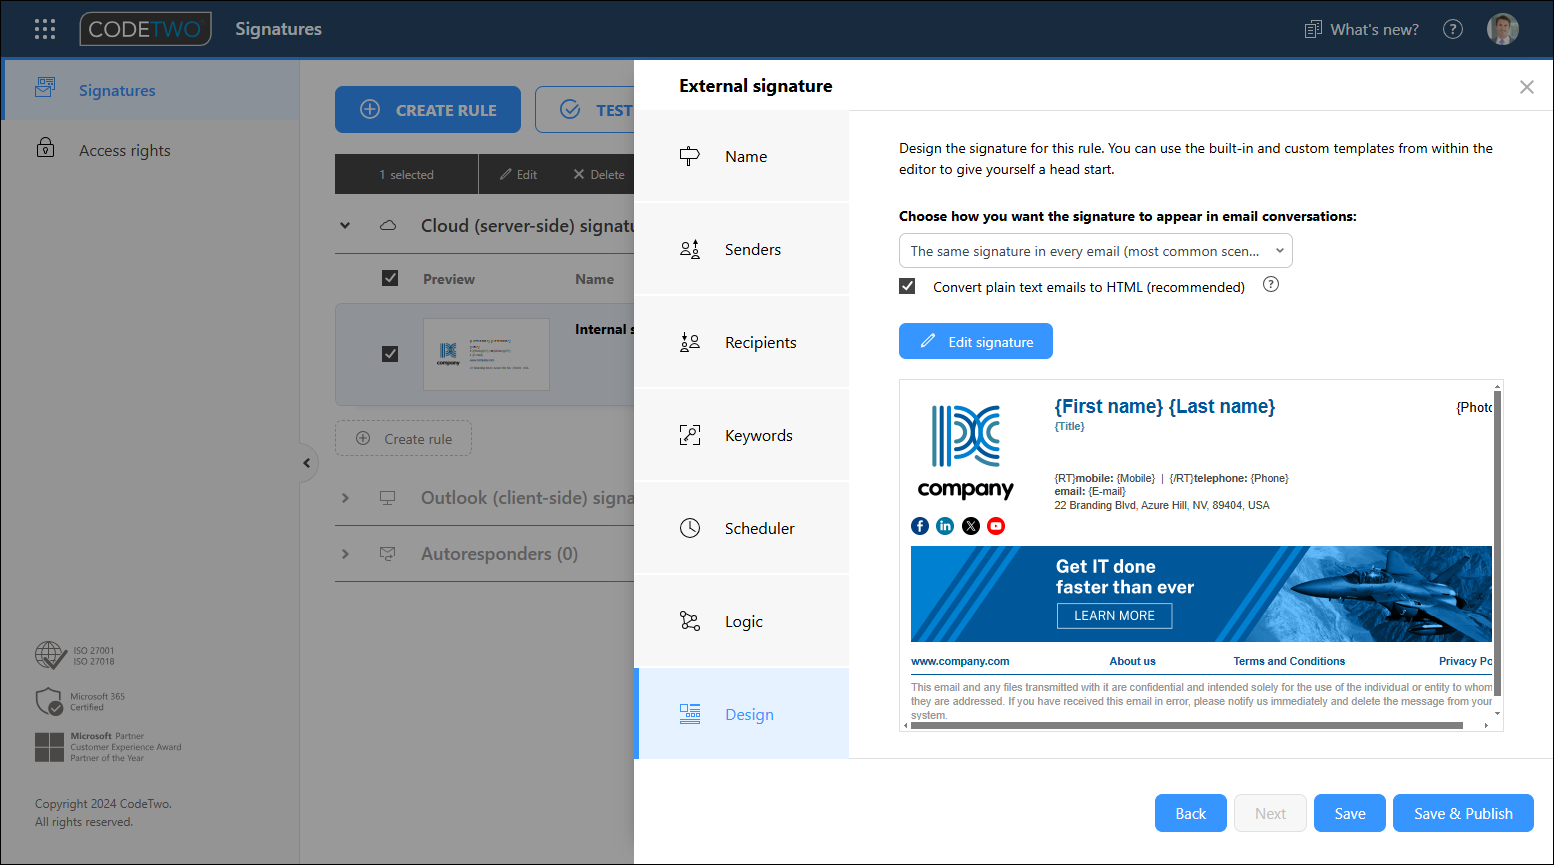
Fig. 6. Creating a signature template for external emails.
Click Save to apply your changes.
In the Signatures app’s main window, select both signature rules and click Publish selected to make them available for your users (Fig. 7.).
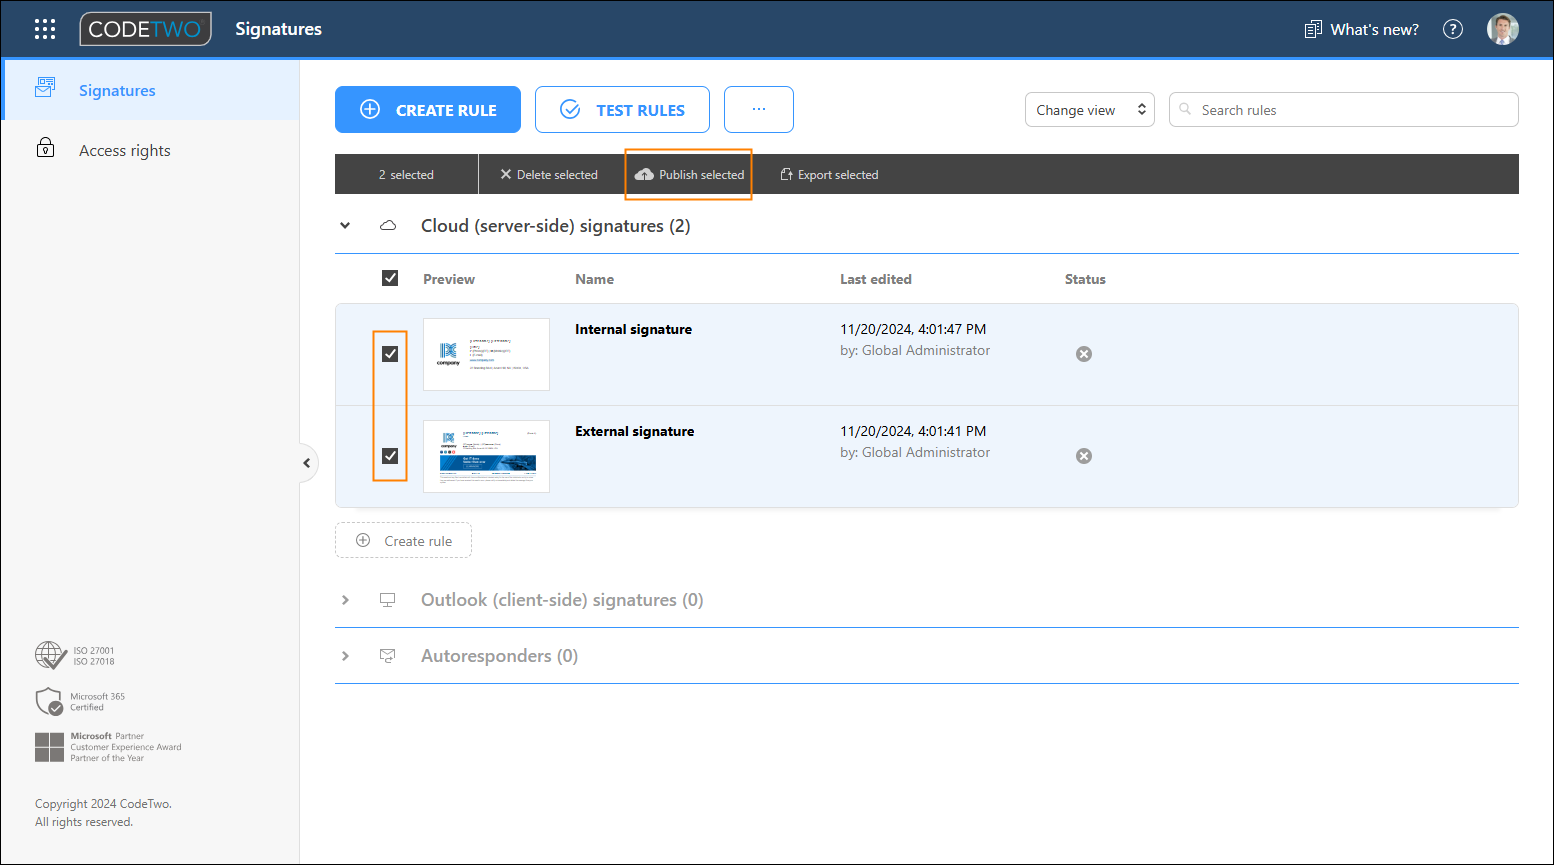
Fig. 7. Publishing the prepared signatures.
Tip
If you want to limit the scope of senders (users who will get a specific email signature), make additional changes in the Senders step. Learn more
Set up Outlook signatures for internal emails
Watch our quick video below or read on for step-by-step instructions.
Create a new Outlook (client-side) signature rule (Fig. 8.). Provide a descriptive name, for example Internal signature.
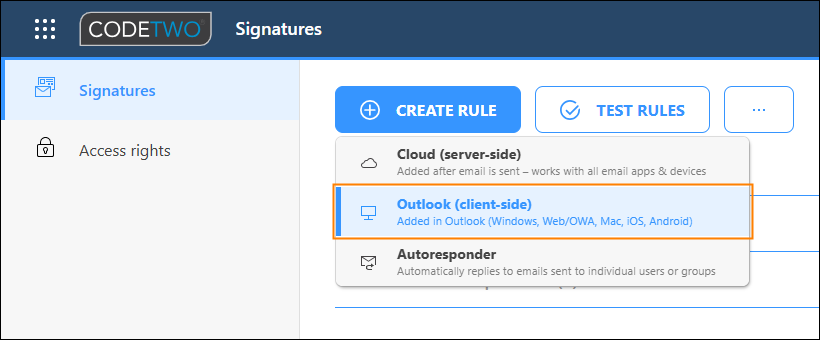
Fig. 8. Adding a new Outlook (client-side) signature rule.
In the Recipients step, select Add > Internal recipients only (Fig. 9.). Note that this rule will be triggered only if all recipients are internal – will not be triggered if at least one recipient is external.
For tenants with multiple domains, emails exchanged among those domains are treated as internal.
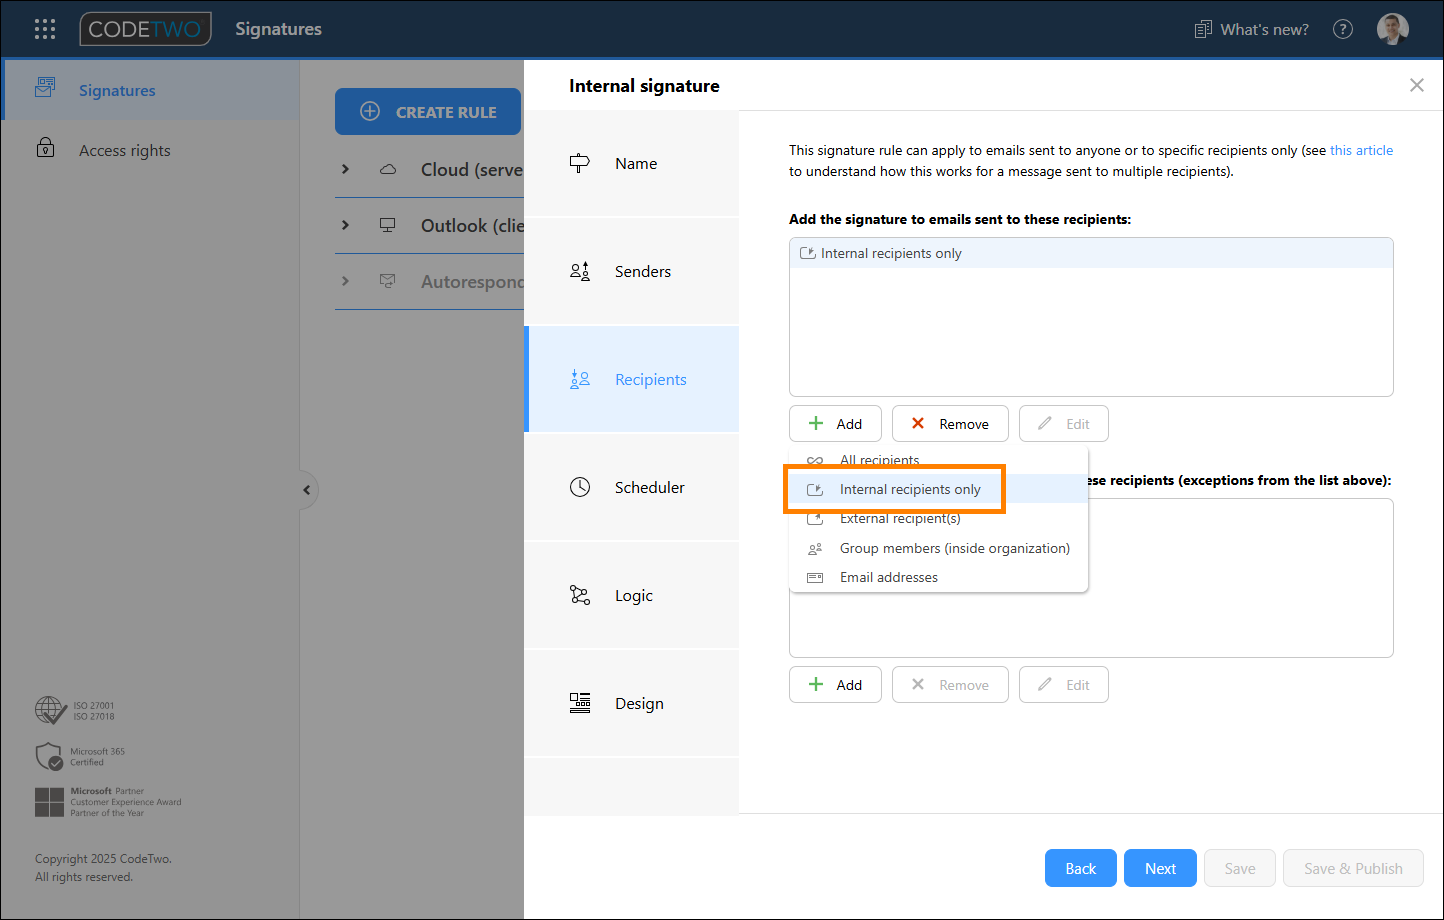
Fig. 9. By using this option, the selected Outlook signature rule will be applied to internal emails only.
In the Logic step, leave the options shown in Fig. 10. as selected. This way, the signature will be added automatically to an email composed in Outlook. If you want to set up different internal signatures for new messages and replies/forwards, see this article for additional steps.

Fig. 10. Select these options so that your signature is automatically added to internal emails.
Go to the Design step and click Edit signature to select or create a signature template for internal emails (Fig. 11.). Learn more about how to create a signature template in the signature template editor
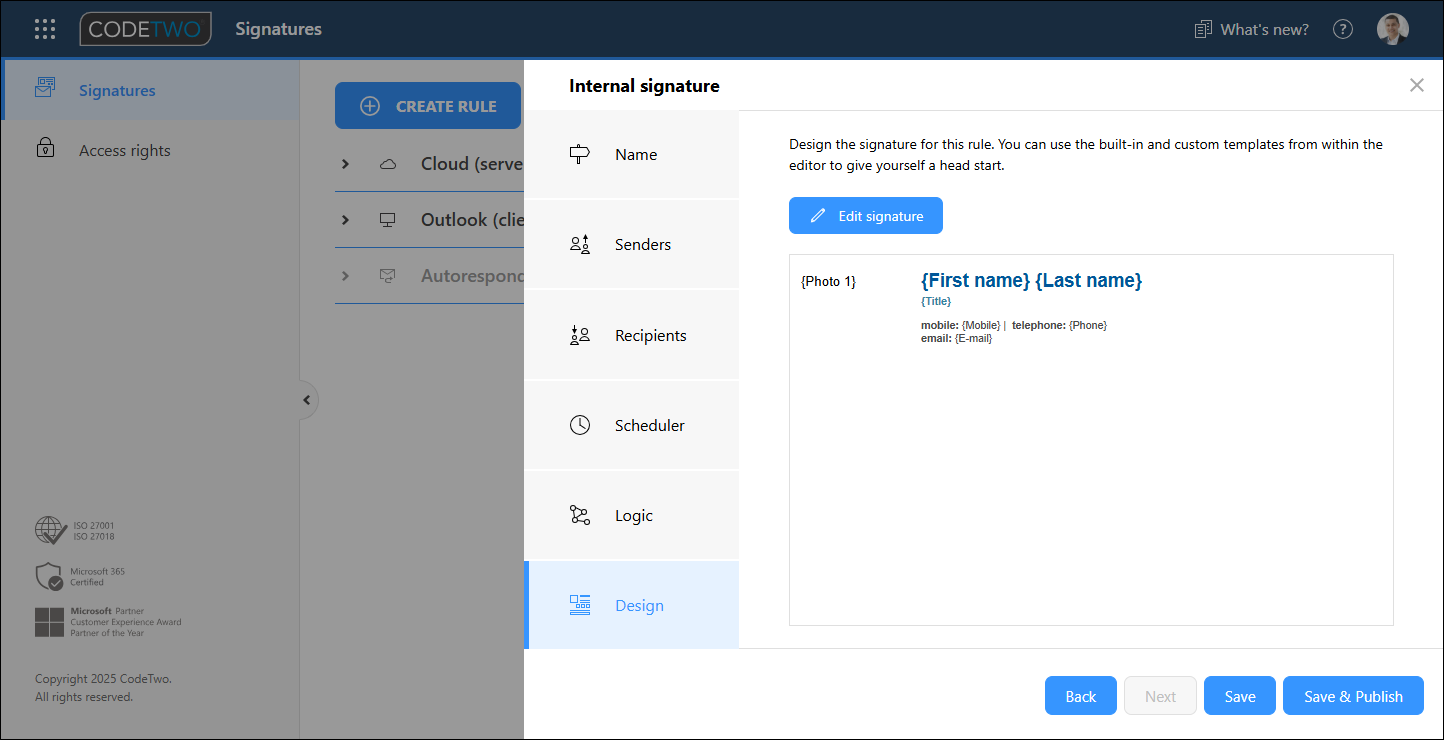
Fig. 11. Setting up a signature template that will be added to emails sent within your organization.
Once ready, click Save & Publish to apply the new internal signature in your organization.
Tip
If you want to limit the scope of users in your organization who will have access to the newly created internal signature template, specify them in the Senders step. Learn more
Set up Outlook signatures for external emails
Create a new Outlook (client-side) signature rule (Fig. 12.). Name it e.g. External signature, so that your users can easily distinguish it from the internal signature.
Fig. 12. Adding a new Outlook (client-side) signature rule.
In the Recipients step, select Add > External recipient(s) (Fig. 13.). Note that this rule will be triggered only if at least one recipient is external.

Fig. 13. By using this option, the selected Outlook signature rule will be applied if at least one external recipient is selected in the email’s To or Cc field.
In the Logic step, leave the options shown in Fig. 14. as selected. This way, the signature will be added automatically to an email composed in Outlook. If you want to set up different external signatures for new messages and replies/forwards, see this article for additional steps.
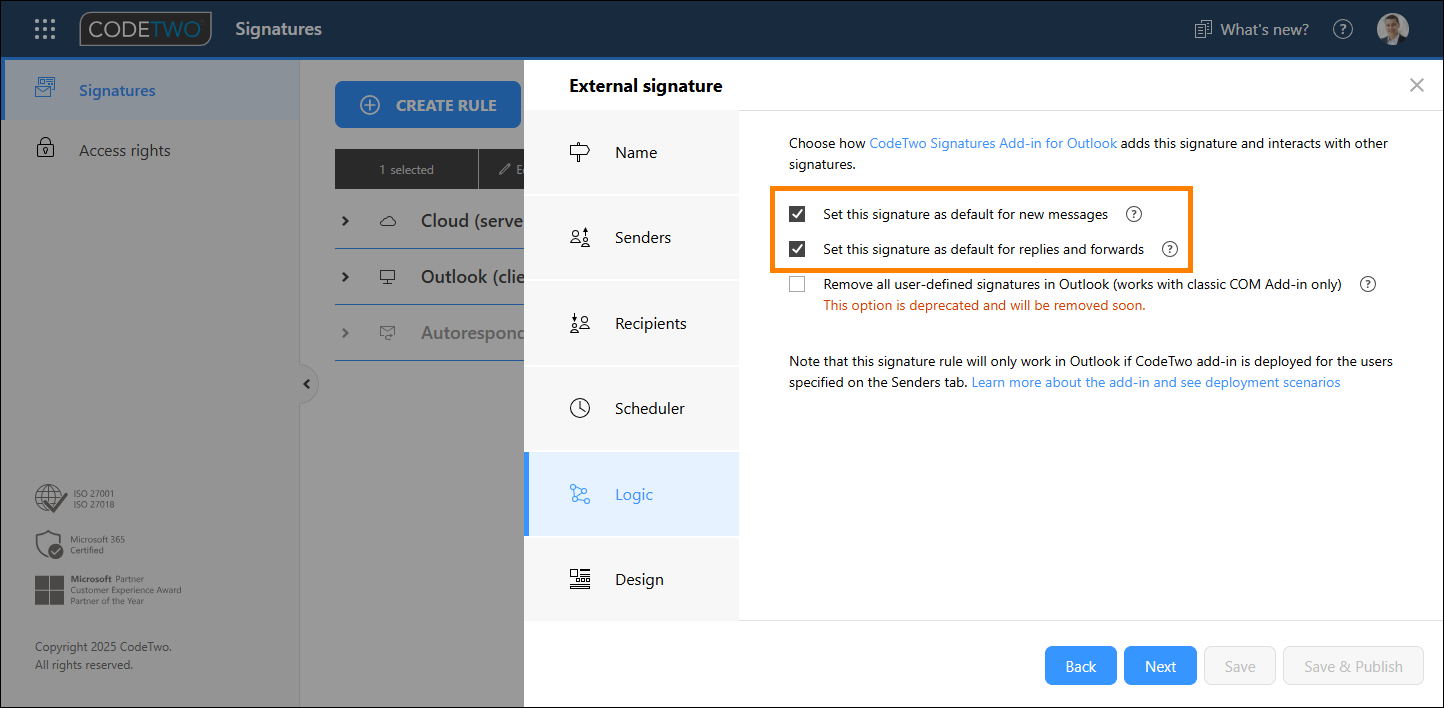
Fig. 14. Select these options so that your signature is automatically added to external emails.
Go to the Design step and click Edit signature to select or create a signature template for external emails – one that includes all the necessary contact details and graphics (Fig. 15.). Learn more about how to create a signature template in the signature template editor
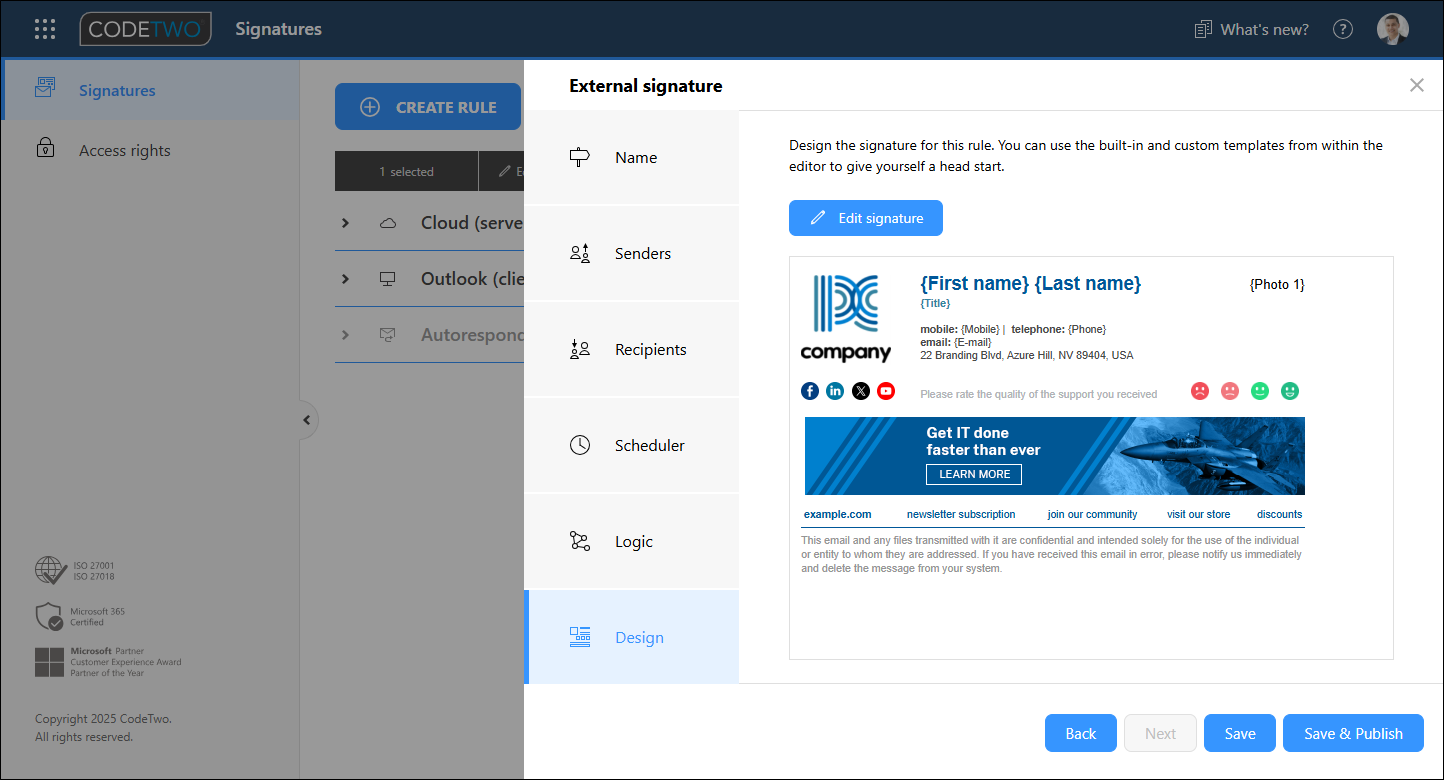
Fig. 15. An Outlook signature template used for external messages.
Once ready, click Save & Publish to apply the new external signature in your organization.
Tip
If you want to limit the scope of users in your organization who will have access to the newly created external signature template, specify them in the Senders step. Learn more
Result
If you use the program in cloud (server-side) mode, the correct signature (internal or external) is automatically added to an email based on its recipient(s), as shown in Fig. 16. The signature is added after the email is sent, but users can view their signature by using the CodeTwo Signatures Web Add-in for Outlook.
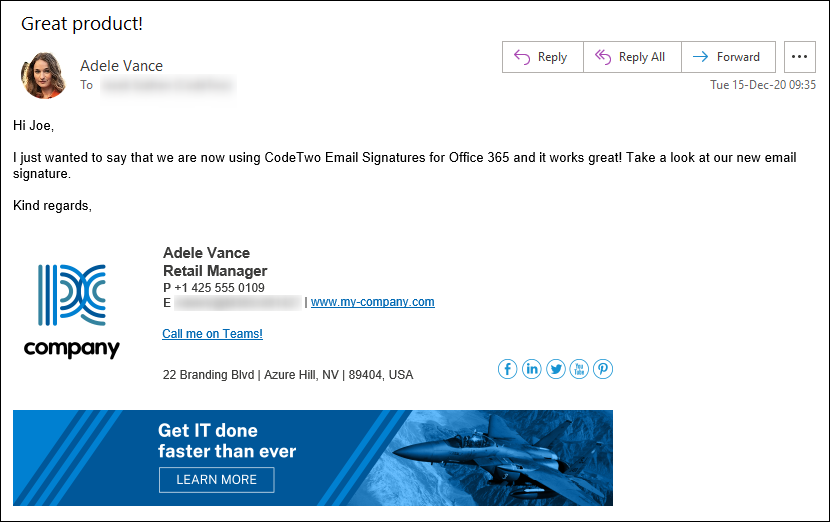
Fig. 16. An example of a signature added to external email in cloud (server-side) mode.
In Outlook (client-side) mode, the signature will auto-update while composing an email in Outlook based on selected recipients. For example, the external signature will be added if at least one recipient is external, as shown in Fig. 17.
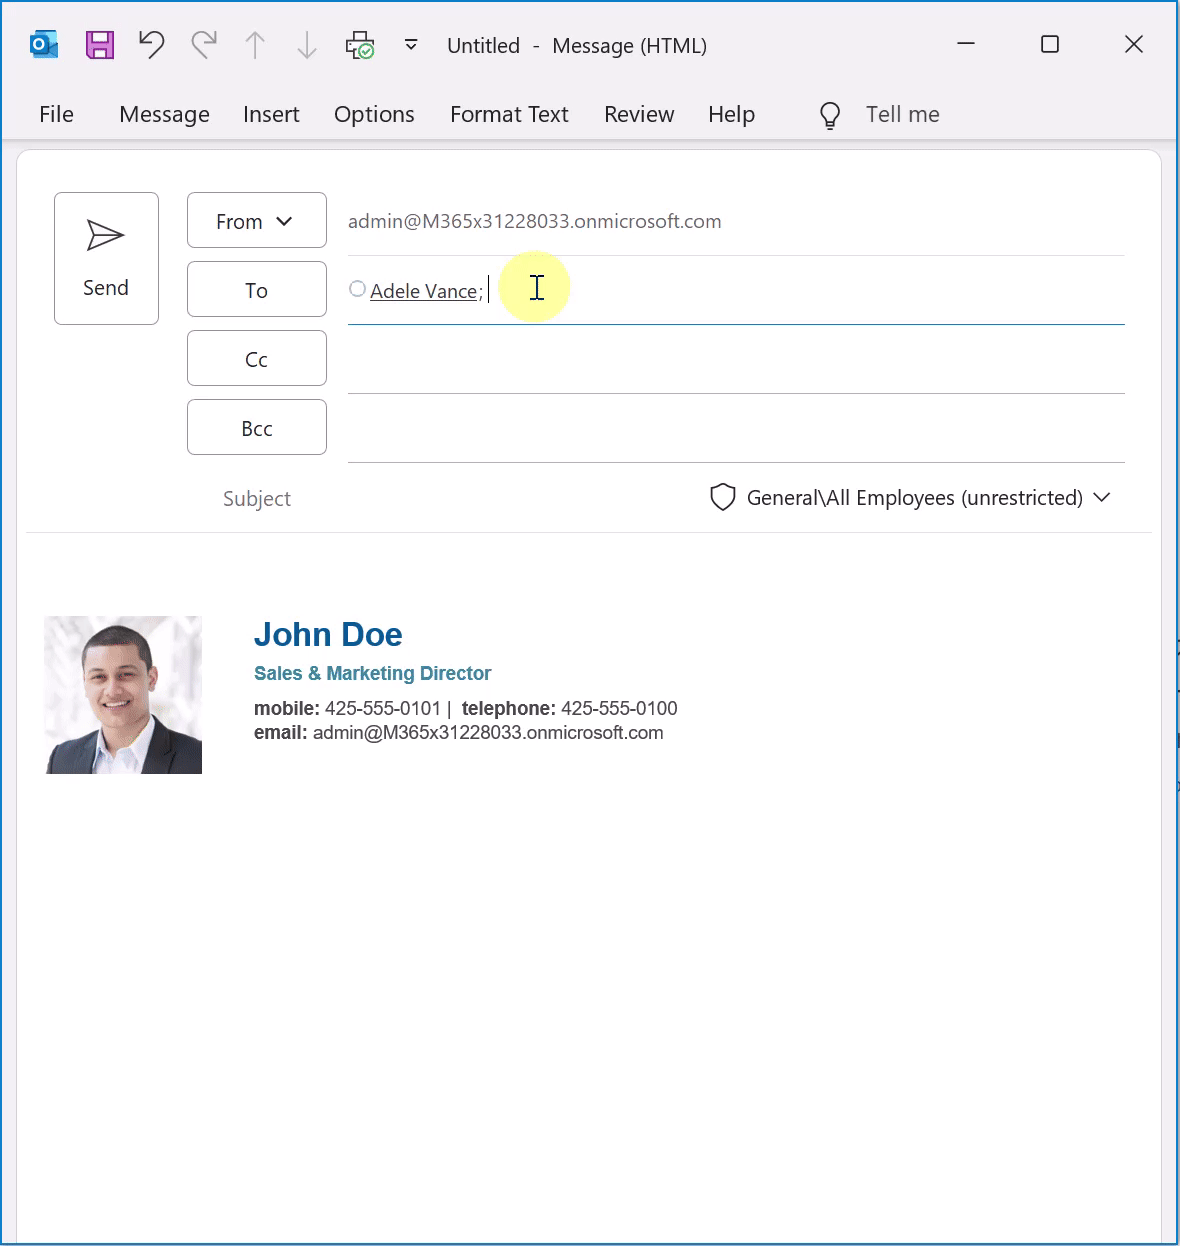
Fig. 17. Outlook (client-side) email signature automatically updates based on selected email recipients.
Sending emails to multiple recipients
If you send an email to multiple recipients to whom different signature rules apply, CodeTwo will behave differently depending on what type of signatures are added to this email:
- cloud (server-side) signatures – your message is split into several copies so each recipient gets the correct signature. Learn more about message splitting
- Outlook (client-side) signatures – the CodeTwo add-in checks all email recipients against your Outlook rules and inserts a signature based on the first rule whose conditions are met. All recipients get the same signature. See this article for more details and examples
In this article