Integration with Microsoft Bookings
Microsoft Bookings is an online booking service that lets a company create a shared booking interface for multiple users. For example, a healthcare center can create and configure a centralized booking page that will be used by patients and the physicians who work for the center. You can also use Bookings to let your customers or associates book time with you instead of sending them a meeting link. A built-in integration with Teams, Calendar and other Microsoft 365 apps makes Bookings a useful tool. Plus, adding a Booking link into email signatures managed by CodeTwo Email Signatures 365 is a smart move. It lets you:
Being a Microsoft product, Bookings syncs with other Microsoft 365 apps, such as Calendar or Teams. You can also easily integrate a link to your booking page into email signatures managed by CodeTwo Email Signatures 365 to:
- redirect recipients to an intuitive booking interface;
- ease up booking demos, appointments and other types of meetings
- save time otherwise spent on long email conversations to arrange for all the details.
If you want to add a booking page link to email signatures, you need to set up the integration in both Microsoft Bookings and CodeTwo Email Signatures 365. Note that Microsoft Bookings is available only with the selected Microsoft 365 business plans.
Microsoft Bookings configuration
Microsoft Bookings currently includes two main options:
- Personal Bookings pages (also known as Bookings with me) which let people book time slots with specific people in an organization. See how to configure this type of page
- Shared Bookings pages which let people book appointments with any available staff added in the Bookings page wizard. Read on to configure this type of page.
If you need a comprehensive guide on setting up Microsoft Bookings, we recommend watching this walkthrough video.
Initial setup & configuration basics
To start using the service, you need to sign in to the Microsoft Bookings web app with your Microsoft 365 credentials. The app is available at https://outlook.office.com/bookings/homepage . You can also access it via the app launcher in the Microsoft 365 portal (Fig. 1.).
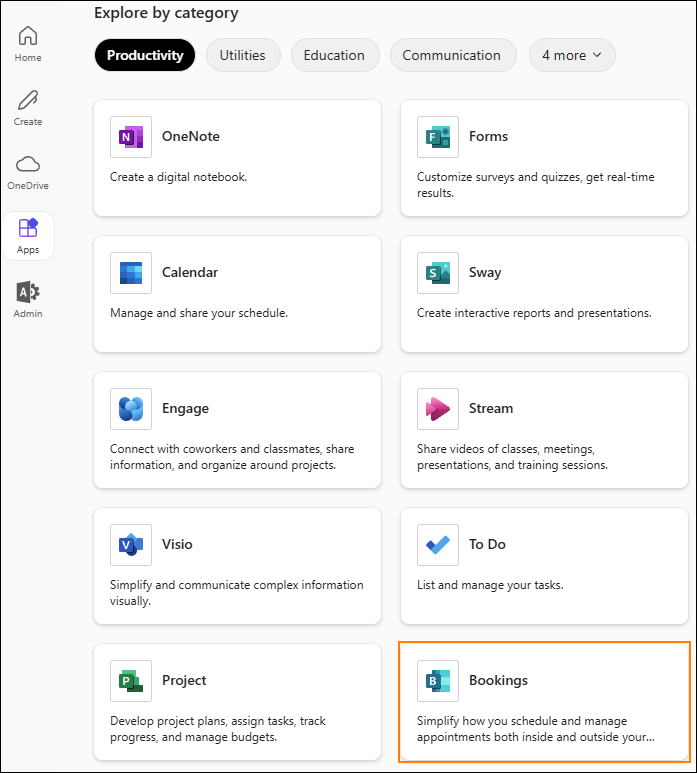
Fig. 1. Accessing Microsoft Bookings from the app launcher in Microsoft 365.
If you haven't used Microsoft Bookings yet, you will need to create a booking page first.
To create it, click Create booking page (Fig. 2.).
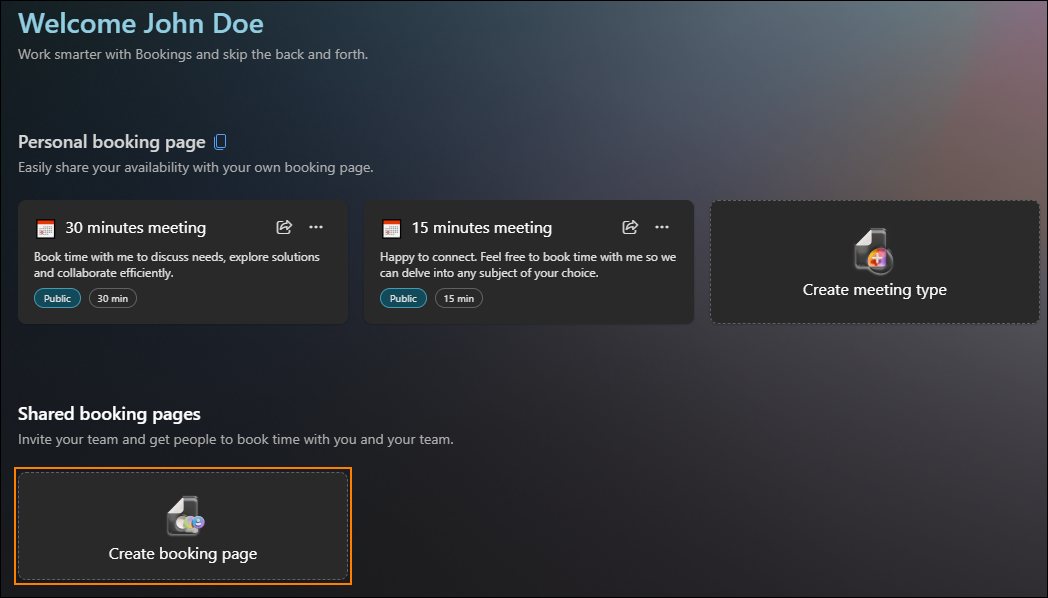
Fig. 2. Adding a new booking page.
Clicking the button launches the Booking page creation wizard (Fig. 3.). The wizard lets you:
- Provide basic information about your business, like business type and business hours.
- Add a logo.
- Add staff available to book meetings with.
- Define the default length of an appointment.
- Choose availability (internal/external users).
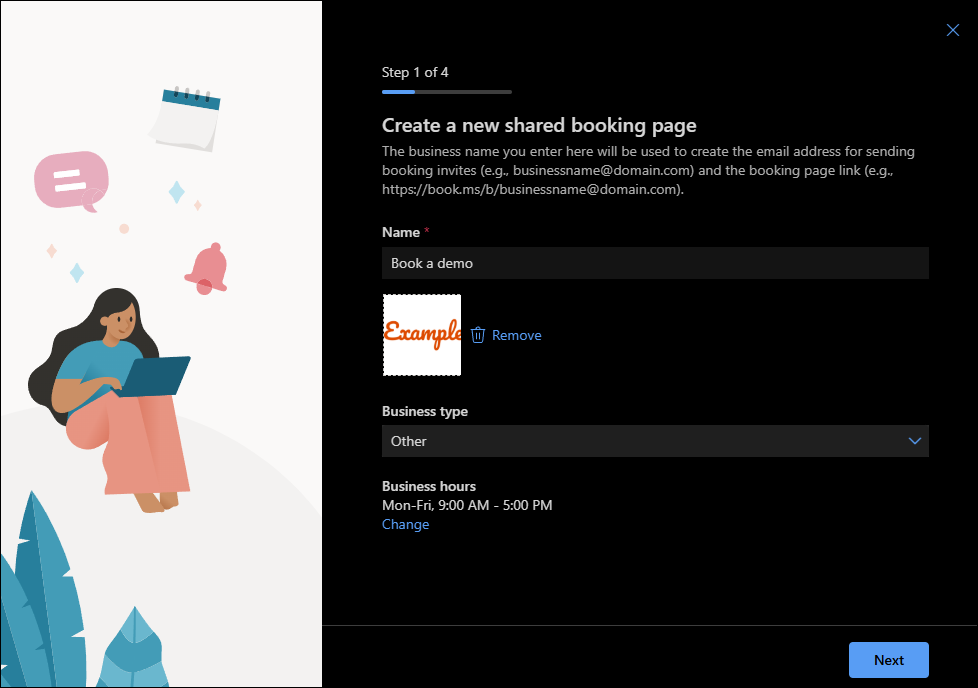
Fig. 3. Booking page creation wizard.
After you finish configuration and click Create at the final step of the wizard, , your page will be created and made available on the main Bookings page.
To copy a link to the booking page, click Share > Copy (Fig. 4.).
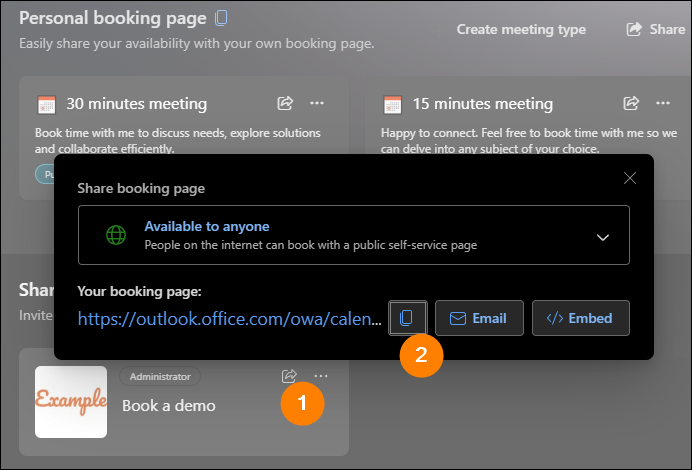
Fig. 4. Copying the link to a booking page.
How to add the booking page link in CodeTwo Email Signatures 365
Now that your booking page is up and running, it’s time to configure CodeTwo Email Signatures 365.
Decide which signature rule you want to add the booking page link to. This can be, for example, a company-wide signature that applies to all users or a signature assigned only to users who have individual booking pages configured.
- Go to app.codetwo.com and sign in using your admin credentials.
- Click your chosen signature, go to the Design step, and click Edit signature.
- Once the template editor opens, put the cursor in the place where you want to add the link. If necessary, add a new line to the signature by pressing Shift + Enter. Next, click Meeting link on the editor’s ribbon (Fig. 5.).
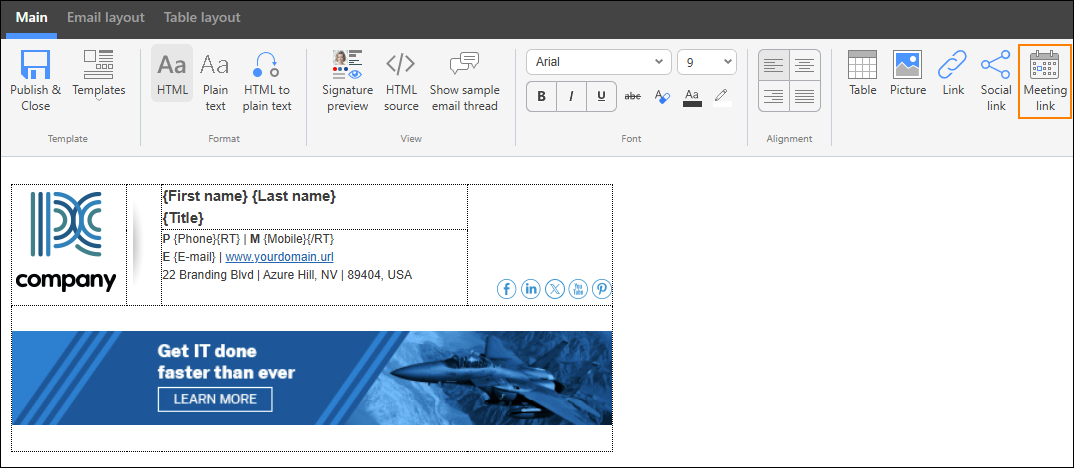
Fig. 5. Inserting a meeting link.
- In the window that opens, configure the meeting link as follows (Fig. 6.):

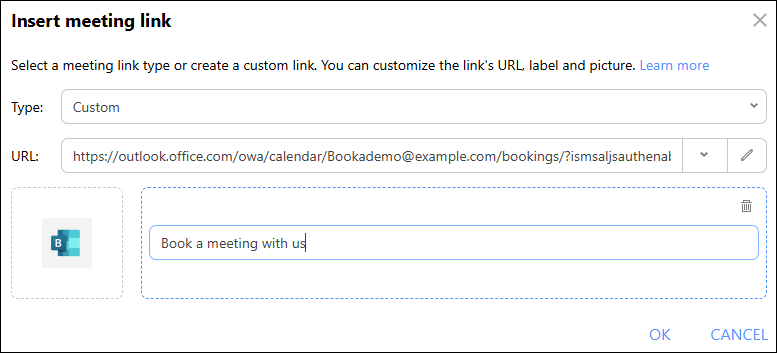
Fig. 6. Configuring the link to your Bookings page in CodeTwo.- Type: choose Custom.
- URL: paste the link you copied from the booking page dashboard, e.g. https://book.ms/b/[email protected]. Keep in mind that book.ms links are redirected to, for example, https://outlook.office.com/owa/calendar/{Email}/bookings.
- Add image and Add label: those let you decide whether to add the link to an image, text or both.
- Click OK when finished to insert the booking page link into your signature template.
- Save your changes to the signature template and close the editor.
- Finally, click Save & Publish in your signature rule to go live with your change.
From now on, every email recipient will be able to use the link in the signature to access the booking page and easily book appointments (Fig. 7.). A scheduled appointment will be added to calendars for both parties. Availability is synchronized with your team’s calendars, so there’s no risk of double-booking. There’s an option to choose a specific person, or anyone who’s been added to the Bookings page staff.
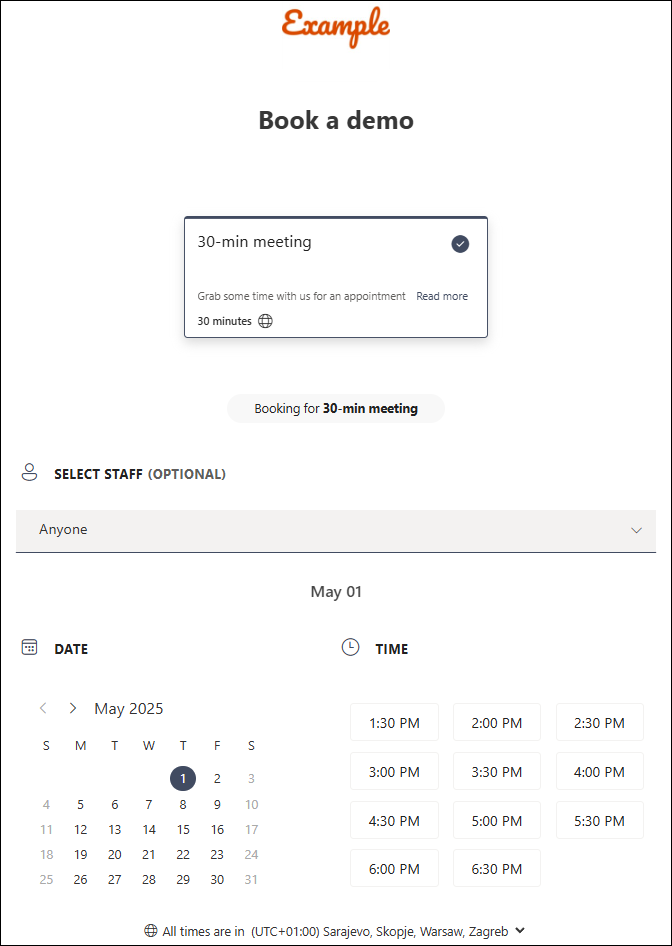
Fig. 7. Accessing the company-wide booking page via the link in the email signature.
In this article