Integration with Personal Bookings
Microsoft 365 offers two online scheduling services: Microsoft Bookings and Personal Bookings (also known as Bookings with me). Adding Personal Bookings links into CodeTwo signatures requires more manual work than adding links to shared Microsoft Bookings pages. If you need the service that’s business-oriented and gives an IT admin full control in terms of configuration, go for Microsoft Bookings, especially since shared bookings still allow your customers to choose a specific person to book a meeting with. You can learn how to integrate Microsoft Bookings with CodeTwo Email Signatures 365 from this article.
Personal Bookings or Bookings with me is an online booking service that lets Microsoft 365 end users create a personal booking interface they can use to manage appointments on their own. The interface is called a booking page and it can be accessed by co-workers or external users (customers). Once you send them a link to the booking page, they can easily book a meeting with you.
Bookings with me is available with the Microsoft 365 business plans listed here. As a native Microsoft solution, it integrates with your mailbox, calendar, and Teams.
Adding a booking page link to your email signature(s) managed by CodeTwo Email Signatures 365 can be a good idea to:
- let others quickly check your busy/free times and arrange a meeting with you,
- avoid the chore of configuring meetings and sending meeting links manually,
- save time otherwise spent on long email conversations to arrange for all the details.
To add the link to an email signature, you need to set up both Personal Bookings and CodeTwo Email Signatures 365. This integration requires a little bit of cooperation between an admin and end user(s).
Configure Personal Bookings
The Personal Bookings interface is quite simple.. For the sake of the presentation, we’ll focus only on the essential steps of configuration, without exploring all the options.
Bookings with me is configured by end users. To start the configuration, a user needs to sign in to Outlook on the web (OWA), click the calendar icon on the left, and click Create booking page (Fig. 1.).
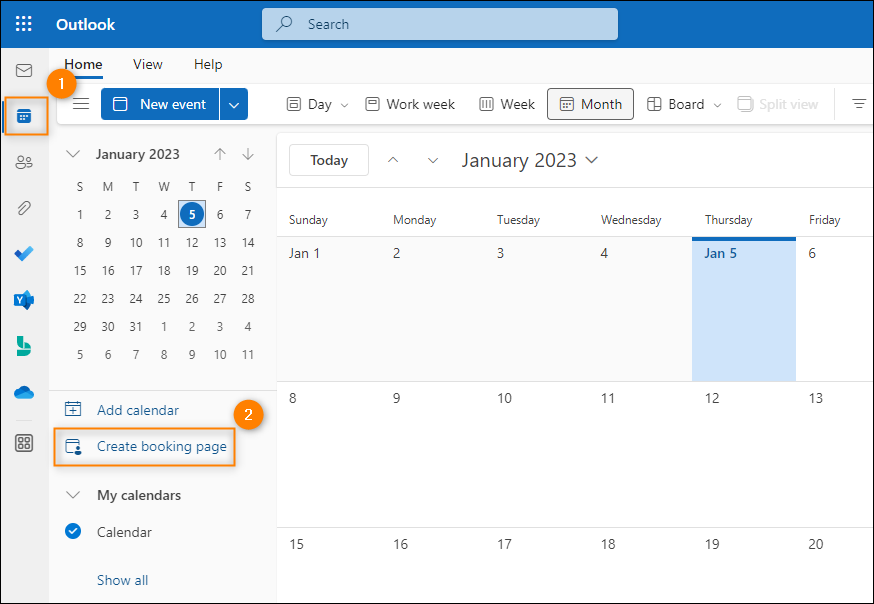
Fig. 1. Accessing the Bookings with me dashboard.
Next, the user creates a Public (A) or Private (B) meeting (Fig. 2.). Public meetings are available to anyone who has a link to the booking page. Access to private meetings is more restricted and requires sending a direct link to such a meeting.
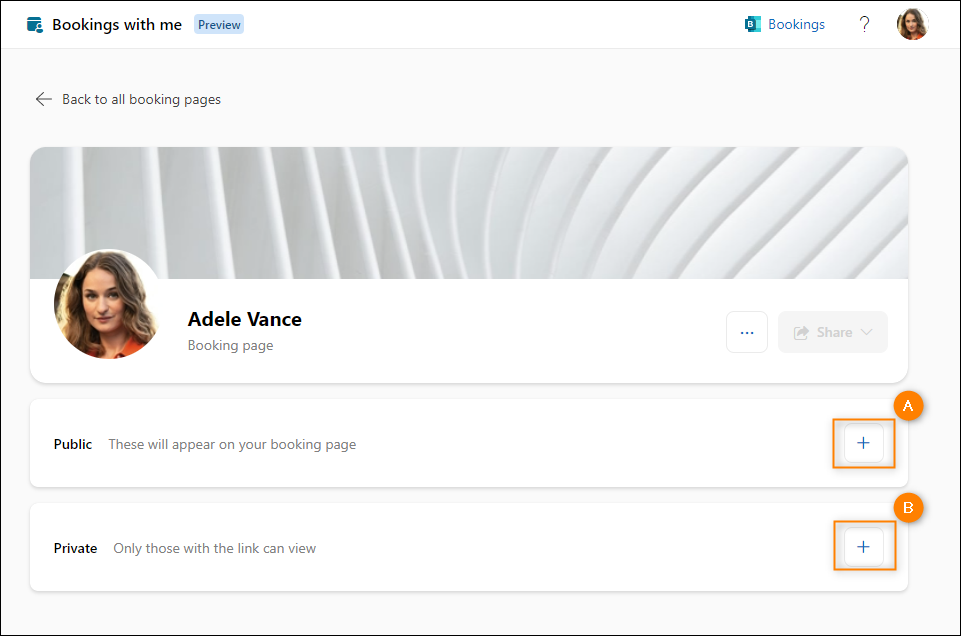
Fig. 2. The empty Bookings with me dashboard – you need to add either a public (A) or a private (B) meeting.
Clicking a plus sign, starts a meeting creation wizard (Fig. 3.). The user needs to name the meeting, give it a relevant description, set the duration & hours when co-workers/customers can book the meeting. Advanced options include buffer time before and after the meeting.
Once everything’s ready, click Save to submit all the changes.
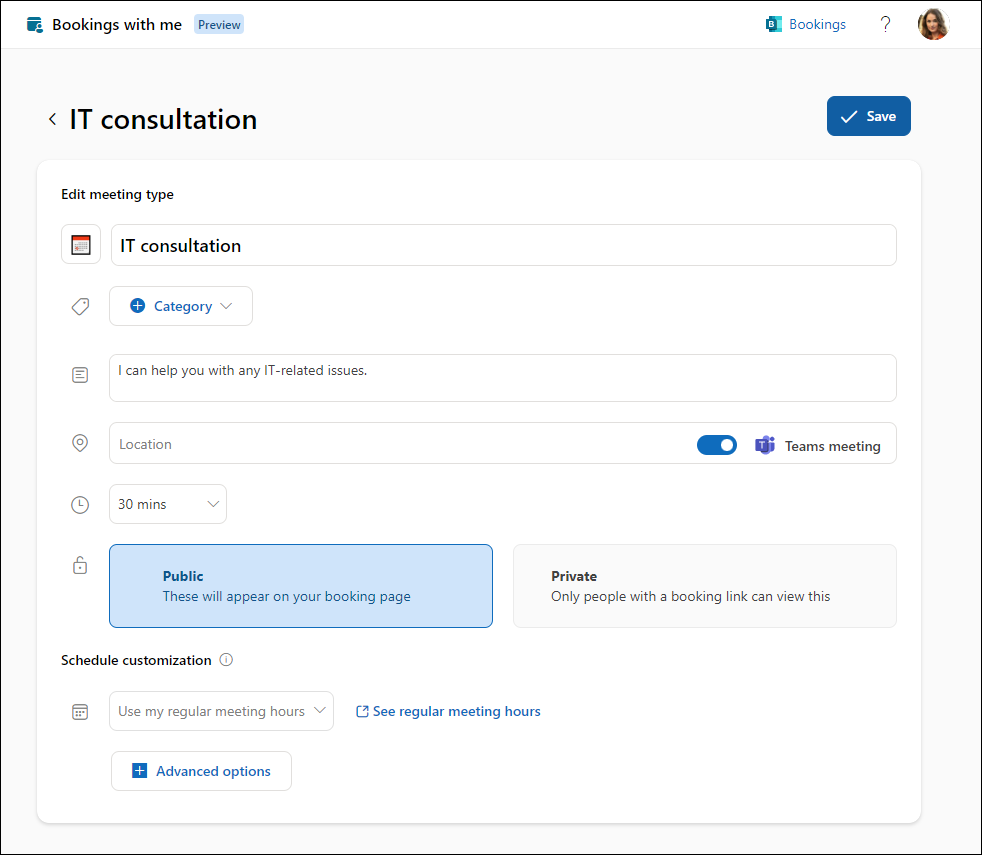
Fig. 3. Configuring a new meeting.
As soon as the user creates their first meeting, their booking page goes live. The meeting link becomes available under the Share button. Clicking the ellipsis button lets users edit their page’s banner image or disable the booking page (Fig. 4.).
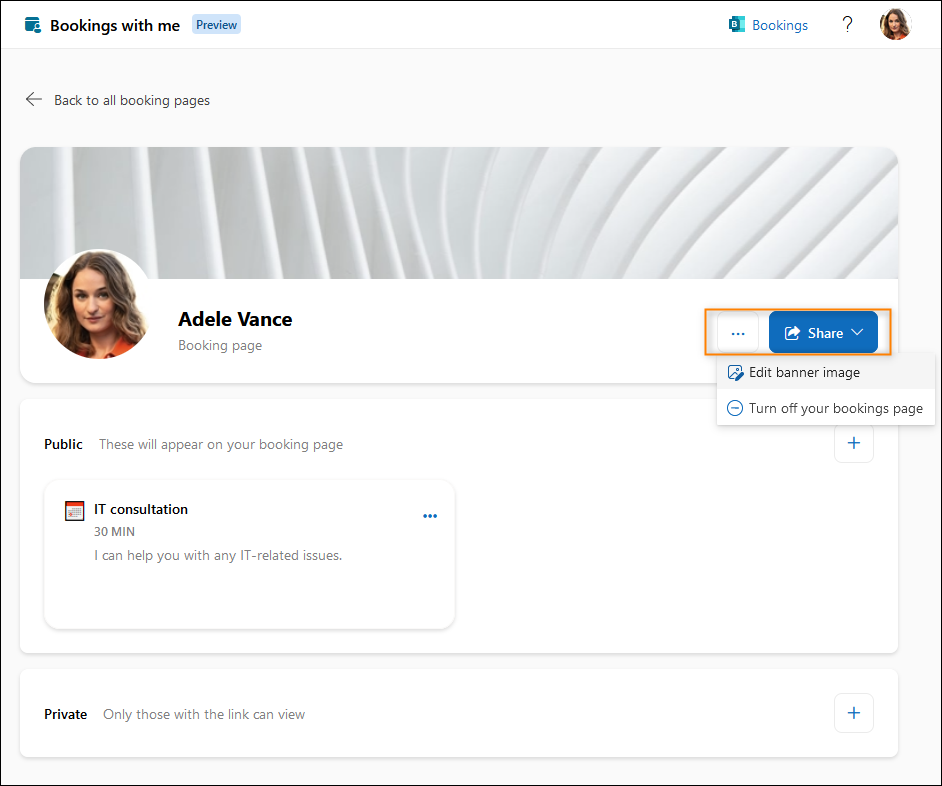
Fig. 4. Buttons that let you edit and share your booking page.
It’s possible to create multiple meeting types.
Add the booking page link to an email signature
Integrating a booking page link into an email signature requires an admin and end user(s) to complete certain steps in CodeTwo Email Signatures 365.
Admin's part
Create a custom attribute
First, you need to create a CodeTwo custom attribute that each user will be able to use to store their booking page link.
To do it, sign in to the Attributes manager with Microsoft 365 global admin credentials.
Next, create the attribute according to these instructions, naming it e.g. Bookings with me link. Once the attribute is created, remember to click Save to apply your changes (Fig. 5.).
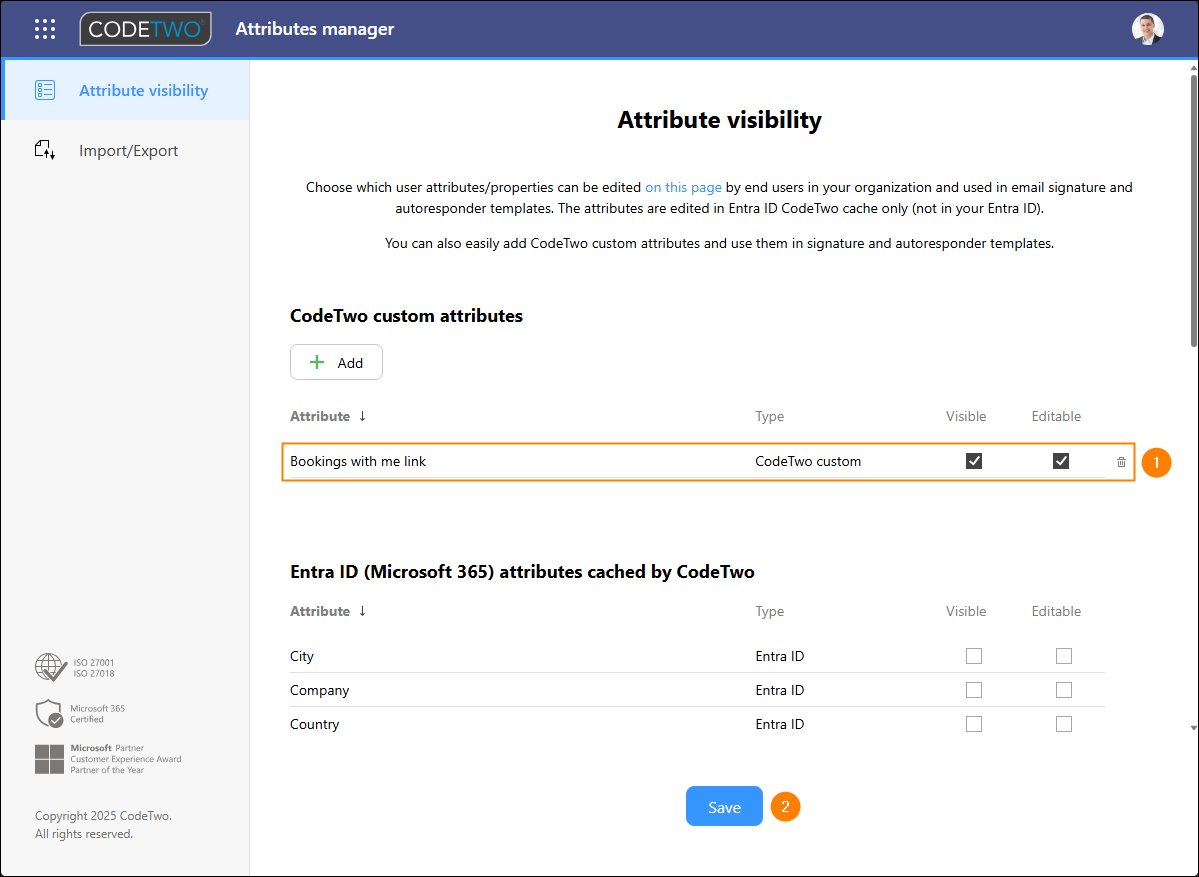
Fig. 5. Creating the custom attribute to store a booking page link.
Add a linked text to a signature template
Now, it’s time to modify a selected signature by adding a text that will turn into a clickable booking page link.
- To start, sign in to app.codetwo.com.
- On the signature rules’ list, choose the signature which you want to add the booking page link to. It can be, for example, a company-wide signature that applies to all users, or a signature for a group of users that are allowed to create booking pages in your organization.
- To go straight to editing the signature’s design (template), hover your mouse cursor over the signature’s thumbnail and click Edit signature (Fig. 6.).
Info
If you use Small as your preferred signature rule list view, you need to click your chosen signature, go to the Design step, and click Edit signature.
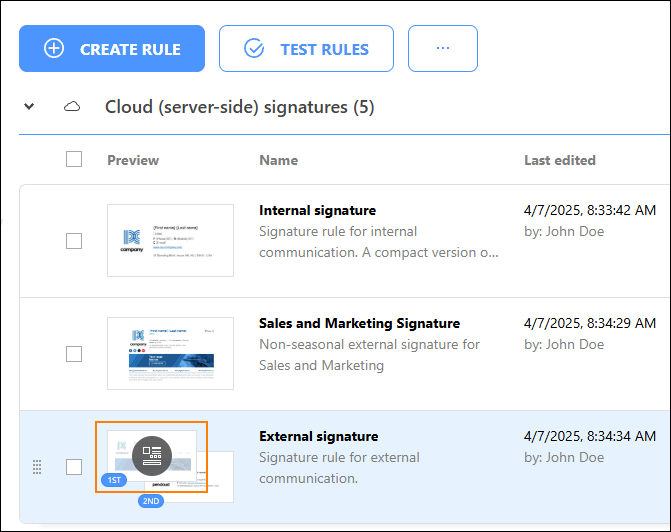
Fig. 6. Opening the selected signature template for editing.
- Once the template editor opens, put the cursor in the place where you want to add the link. If necessary, add a new line to the signature by pressing Enter.
- Type the text that will be linked to email sender’s booking page, for example Book a meeting with me (Fig. 7.). You can also use the tools available on the Main tab of the editor to style the text to match the signature’s design. Learn more
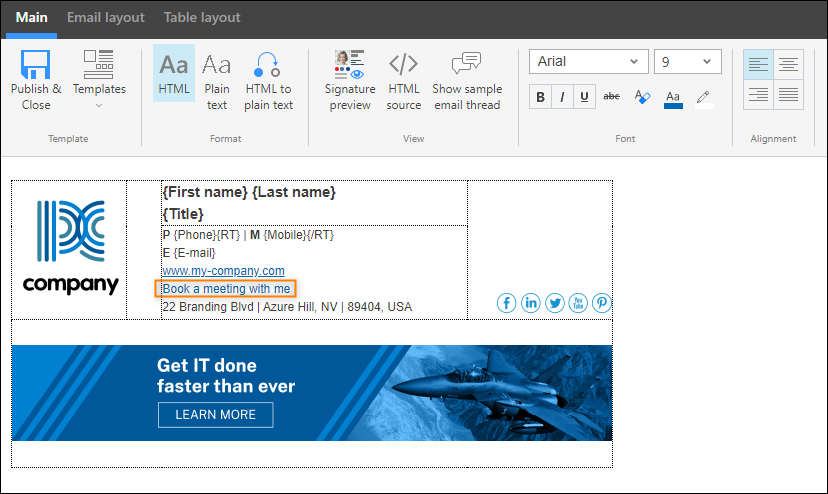
Fig. 7. Typing the text to be linked to user’s booking page.
- Next, click HTML source on the editor’s ribbon (see Fig. 7.) to open signature’s HTML code for editing.
- In the HTML source code view window, modify the code as follows:
- Locate the text you typed in step 5, e.g. by using the Find text feature (Fig. 8., item 1):
Book a meeting with me
- Change the text the following way:
<a href="{Bookings with me link}">Book a meeting with me</a>as shown in Fig. 8., item 2. {Bookings with me link} is the name of the custom attribute you created in this section. You can insert the attribute into the source code by typing it manually or by selecting it from the menu: Placeholder > Message Sender > Additional attributes (Fig. 8., item 3).
- Save your changes by clicking Apply & Close (Fig. 8., item 4).
- Locate the text you typed in step 5, e.g. by using the Find text feature (Fig. 8., item 1):
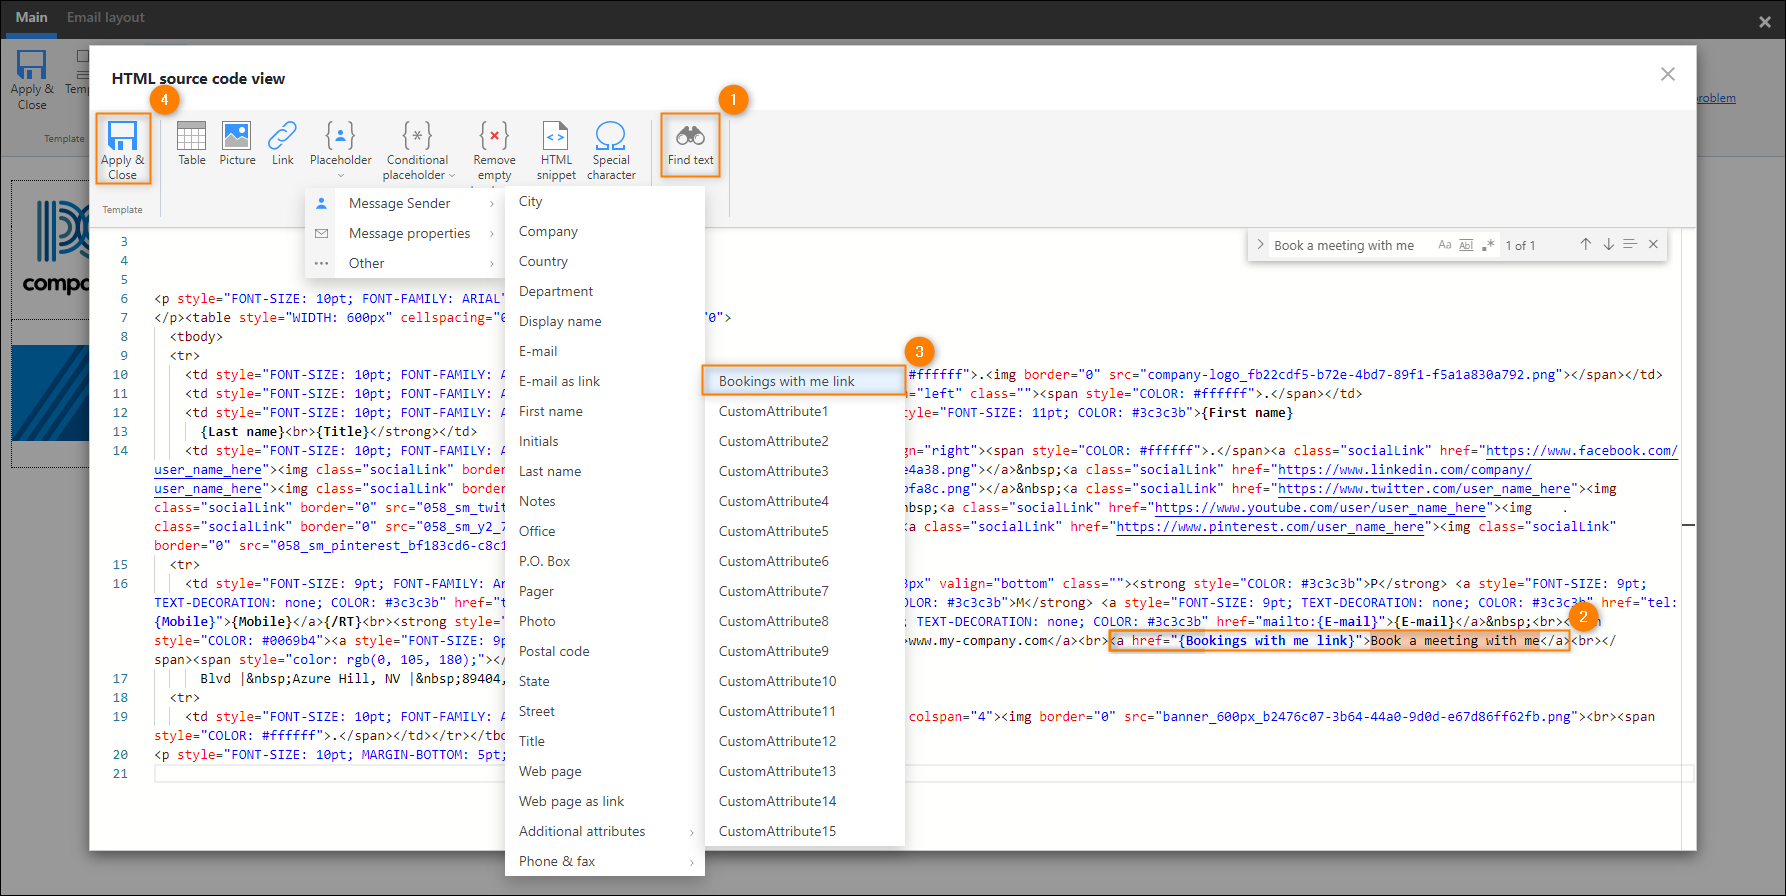
Fig. 8. Adding the custom attribute that will turn into a link in an email signature.
- Once you’re back in the editor, highlight your (linked) text, click Remove if blank, and move the closing RT tag ({/RT}) to the next line, so that your design looks as shown in Fig. 9. Thanks to that, if a given end user doesn’t configure a booking page, the line with the linked text will be removed from the signature and its design won’t be affected in any way. Learn more about this feature

Fig. 9. Using the Remove if blank feature to remove placeholders with no value in Entra ID.
- Save your changes by clicking Publish & Close (or Apply & Close > Save & Publish if you opened the editor from the signature rule editing pane).
End user’s part
Finally, for the integration to work, an end user needs to copy their booking page link and paste it into CodeTwo’s User info editor as a value for the custom attribute created by the admin. Here’s how it goes:
- Access your Bookings with me dashboard via Outlook on the web (OWA), as shown in Fig. 1. at the beginning of this article.
Info
If you’ve already configured your booking page, you’ll see Edit booking page instead of Create booking page.
- Click the Share button and select Copy link (Fig. 10.).
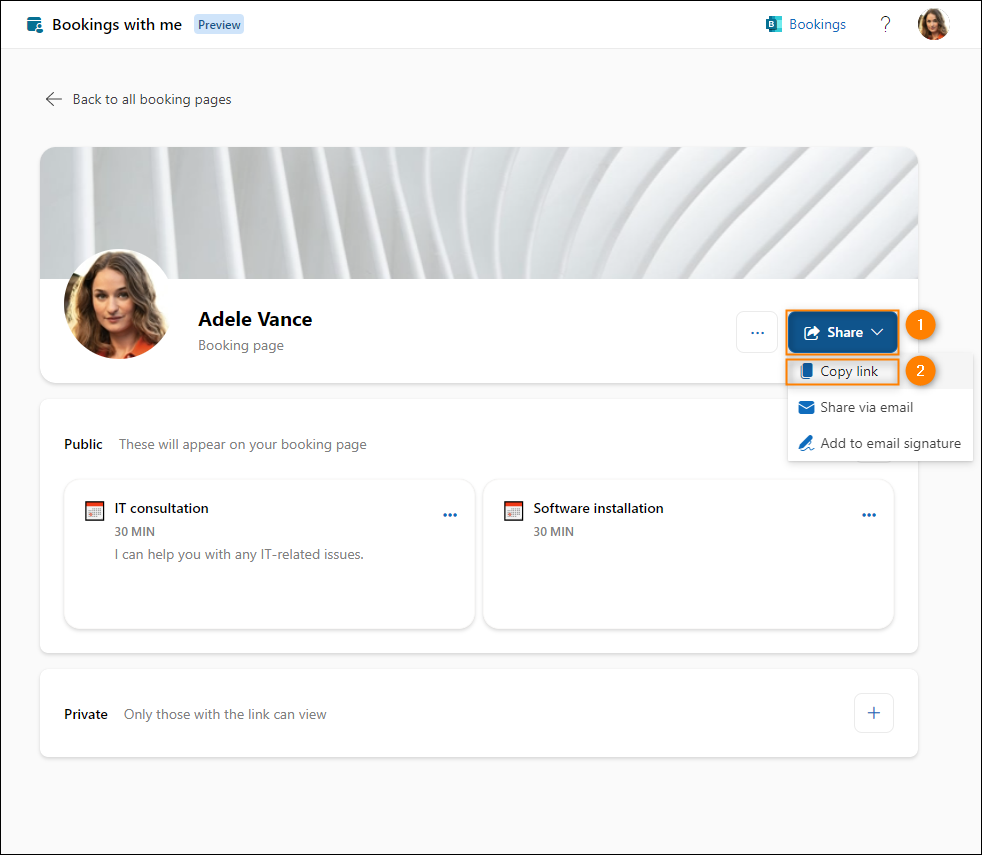
Fig. 10. Copying a link to a booking page.
- Now, sign in to user.codetwo.com, using your Microsoft 365 credentials.
- Paste the link into the text box that’s next to the custom attribute designed for storing the link (in this example: Bookings with me link) and click Save & update to apply the change (Fig. 11.).
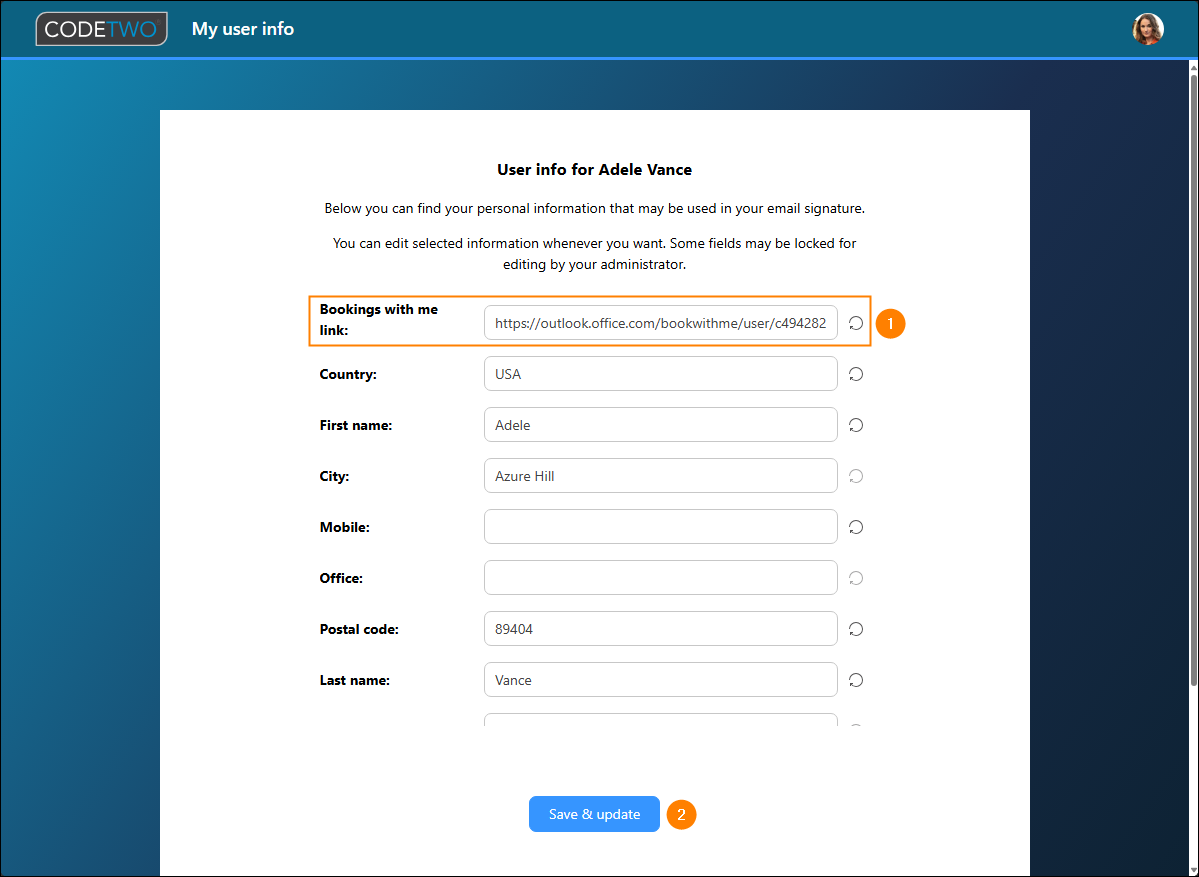
Fig. 11. Pasting the booking page link as the value of the custom attribute.
The final result
Once all the configuration steps are completed, a link to end user’s booking page will be included in their signature. When an email recipient clicks the link, they will be able to book a meeting with the end user (Fig. 12.).
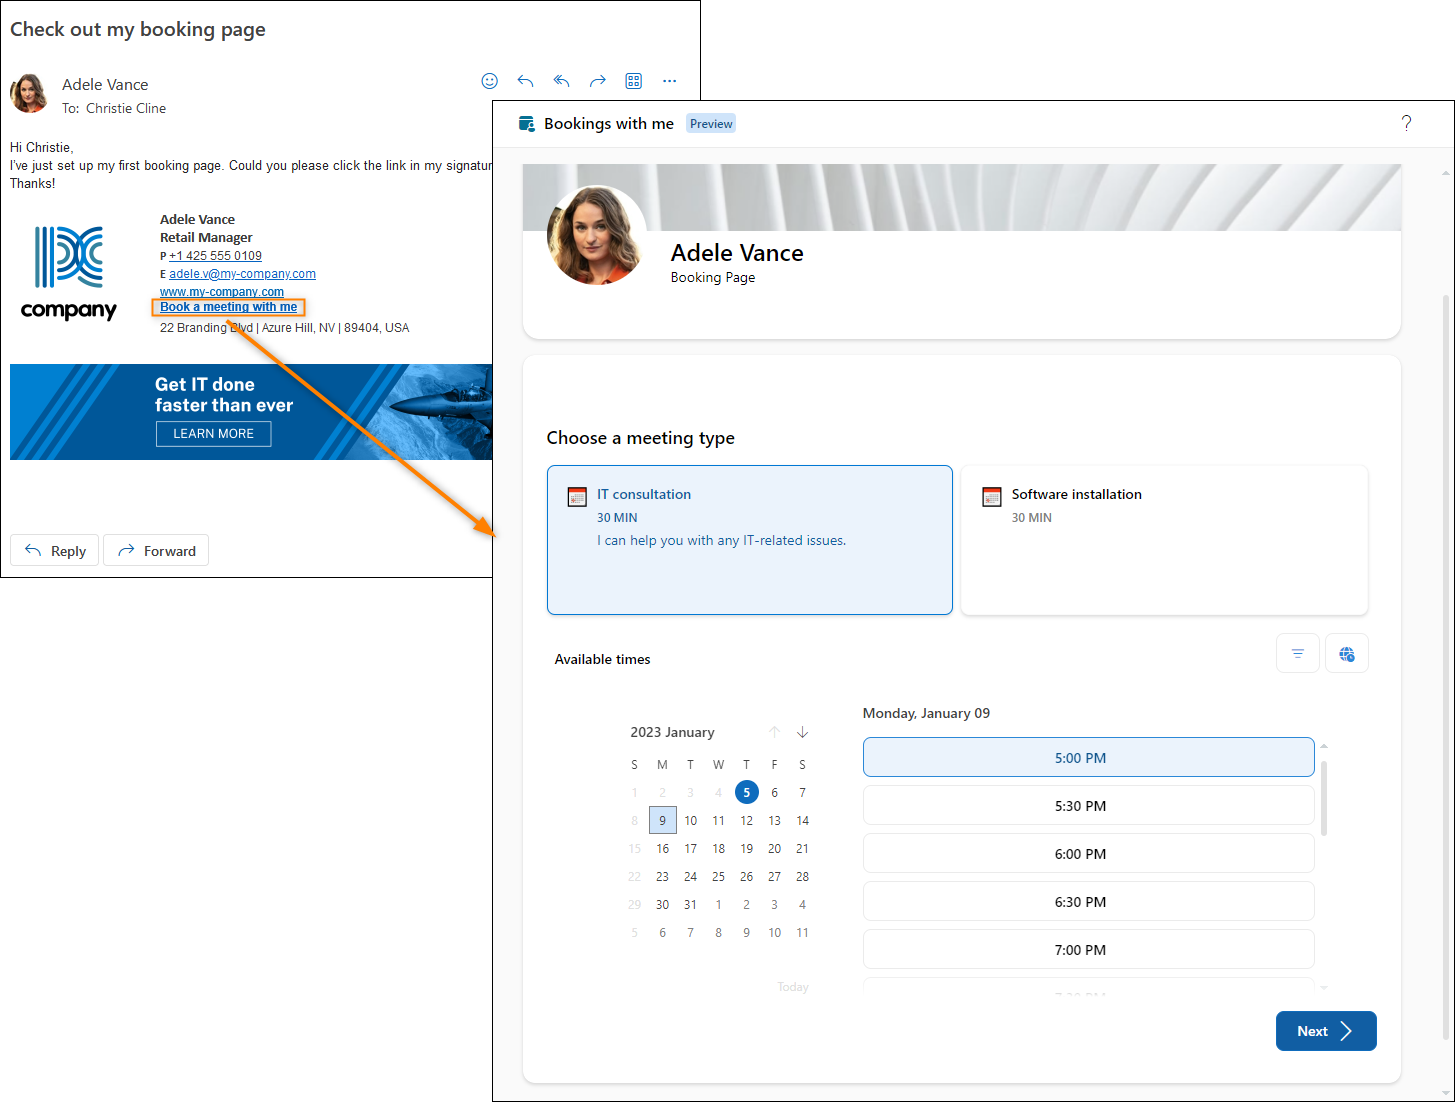
Fig. 12. Accessing end user’s booking page from an email signature.
See also
In this article