Integration with Acuity Scheduling
Acuity Scheduling (previously Squarespace Scheduling) is an online assistant which makes planning and filling out your online schedule easier and quicker. By providing a link to your Acuity online calendar, you can allow your recipients to book meetings, demo sessions or services with you. Acuity Scheduling also lets you sync the online calendar to the Microsoft 365 calendar, so that all meetings are automatically updated in the familiar interface.
Integrating Acuity meeting links into email signatures managed by CodeTwo Email Signatures 365 is a good way to:
- Funnel all or chosen recipients to an effective conversion method.
- Give your leads another way to learn more about your products or services.
- Eliminate the need for back-and-forth emails, just to set up a date for a meeting.
If you want to add Acuity meeting links to your users’ email signatures, you need to set up the integration in both Acuity Scheduling and CodeTwo Email Signatures 365.
Acuity Scheduling configuration
The following guide shows only how to set up your Acuity account to handle the integration. If you want to learn more about configuring this tool, visit Acuity Scheduling Help Center.
There is more than one way to use meeting links in email signatures. Here, we will show how to add meeting links to individual users’ calendars. This way, recipients can check your users’ availability and book meetings with them. To do that, we need to first create a calendar for each user who will need a meeting link and format the meeting link in a unified way.
Modify your meeting link base
By default, Acuity Scheduling meeting links have the following format:
https://app.acuityscheduling.com/schedule.php?owner={ID}
Acuity Scheduling lets you change the link format so that it suits your company more than the version generated automatically.
- Sign in to your Acuity Scheduling account and go to Scheduling Page Link. In the General Scheduling Page section, click CHANGE LINK NAME (Fig. 1.) to modify the link’s base.
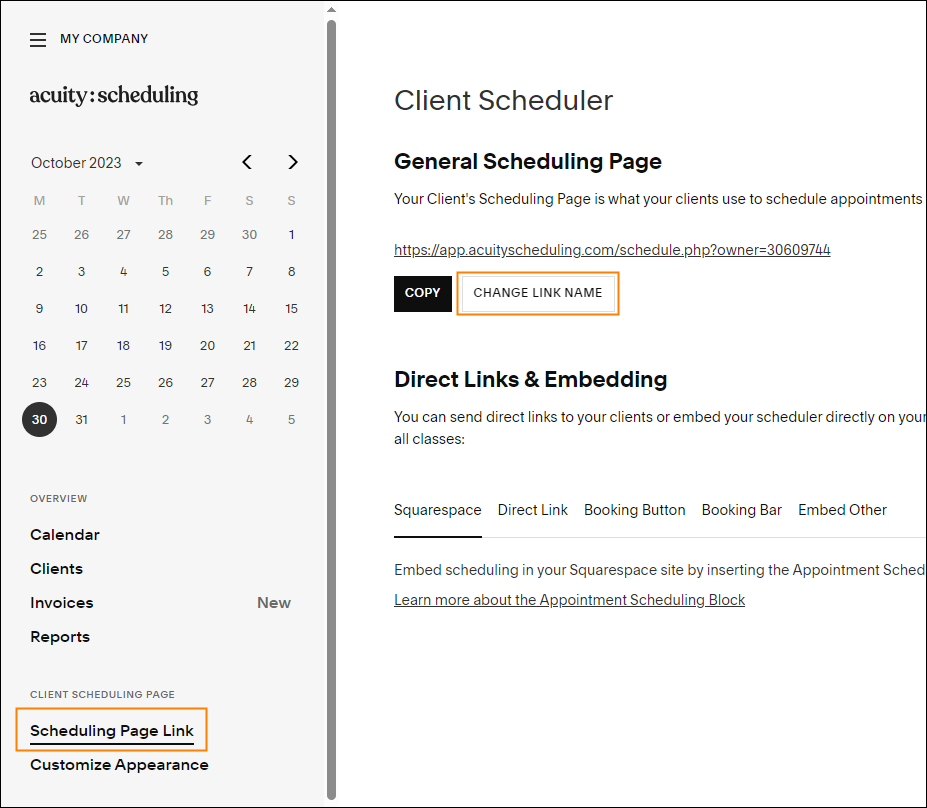
Fig. 1. Changing the link format.
- Enter a value that suits your company. The default scheduling page link format will change into, for example https://sample-company.as.me (Fig. 2.). If you add this link into your signature template, anyone who clicks it will be able to see all your publicly available calendars.
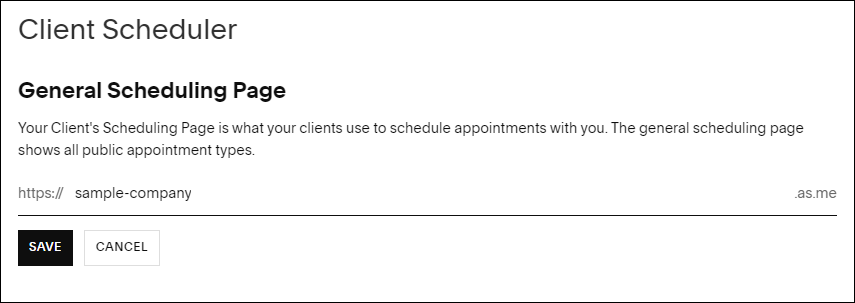
Fig. 2. Custom meeting link format.
Set up individual calendars for your users
At the time of writing, Acuity Scheduling doesn’t have a way to create calendars in bulk by importing user data from Entra ID (Azure AD) or CSV. It means that you need to create an individual calendar for every user who is going to have the scheduling link added to their signature, and it’s done as follows:
- Go to Availability > Calendars. Click ADD NEW CALENDAR (Fig. 3.).
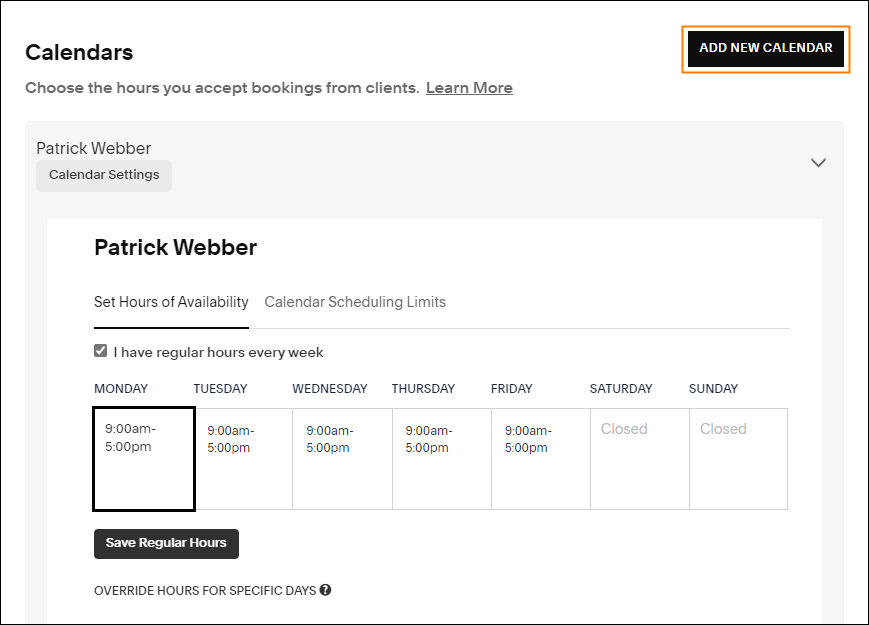
Fig. 3. Adding an individual user calendar.
- Next, name the calendar and configure its settings, including the user’s email to receive booking notifications and replies from clients (Fig. 4.).
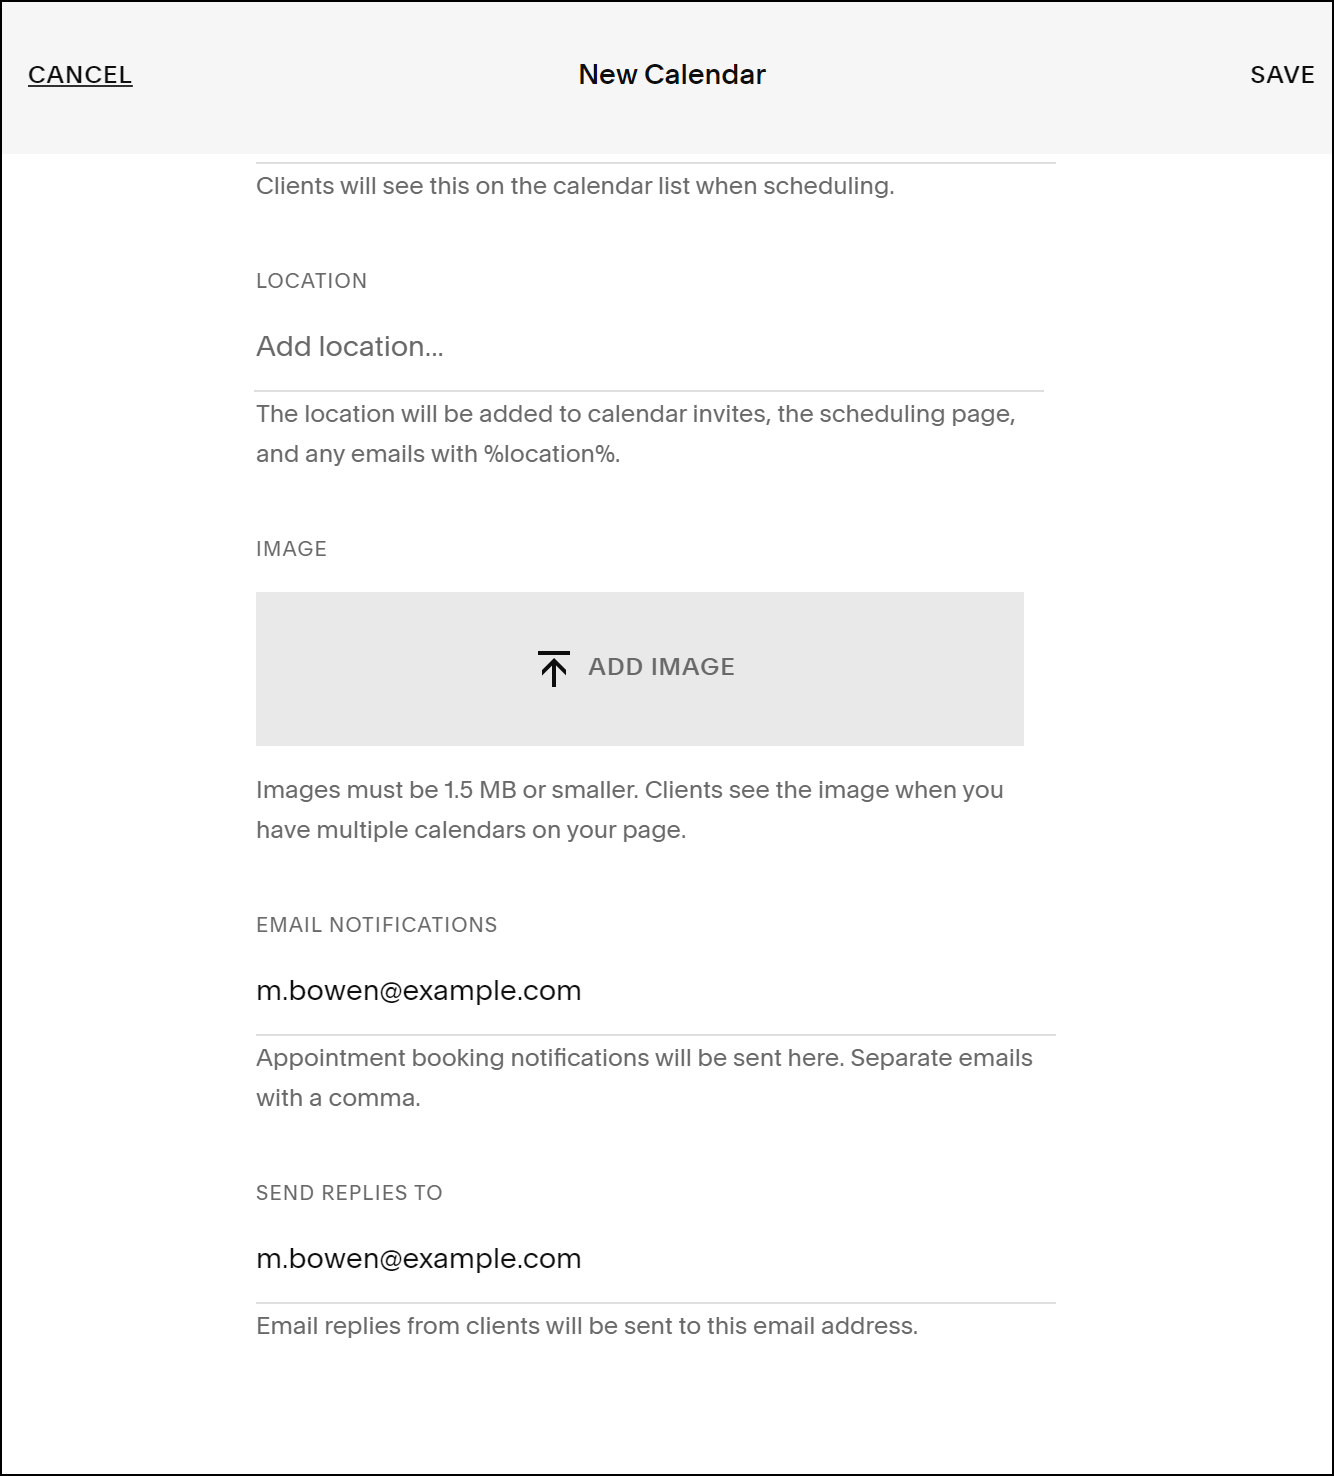
Fig. 4. Configuring user’s email to be used with the calendar.
- After creating an individual calendar for a user, click Direct Scheduling Link (Fig. 5.) to edit the link to the calendar.
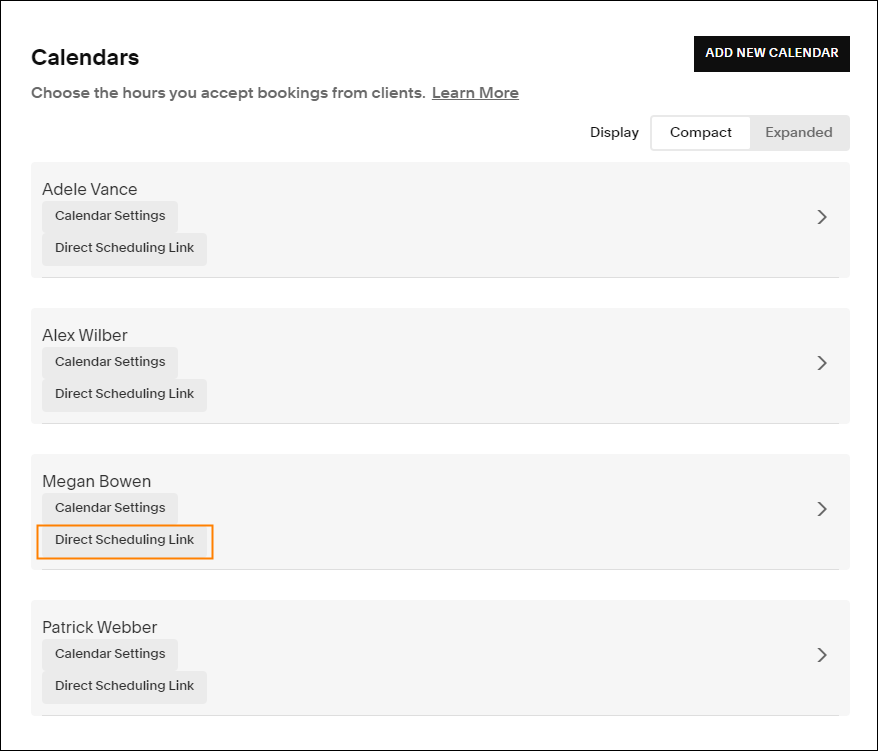
Fig. 5. Changing the direct calendar link.
- The direct link to a user’s calendar starts with the value set up in step 2 (Fig. 2.), the link base. The editable part comes after the link base. One way to integrate individual links with email signatures in CodeTwo is to use first and last name of a user, for example, megan-bowen (Fig. 6.). If you use the same format for all individual user calendars, you will be able to use {First name} and {Last name} placeholders in your email signature template for an easy integration.
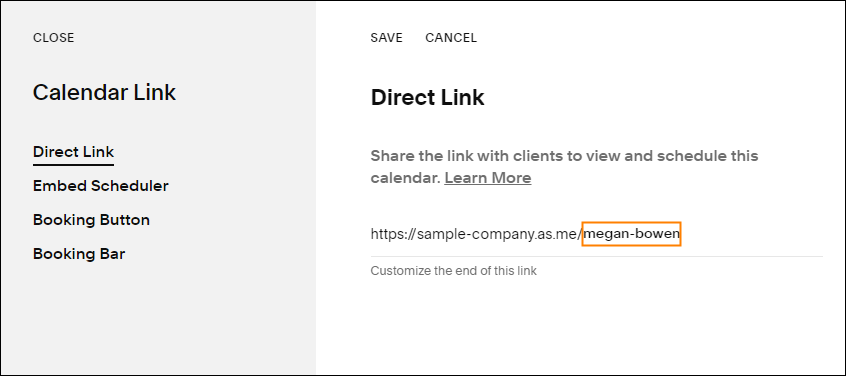
Fig. 6. Individual direct link format.
Adding calendar links in CodeTwo Email Signatures 365
After setting everything up in Acuity Scheduling, it’s time to configure CodeTwo Email Signatures 365.
- Go to app.codetwo.com and sign in.
- Choose a rule with the email signature to which you would like to add the meeting link or create a new one. Learn more about creating signature rules
- Go to the Design step and click Edit signature (Fig. 7.).
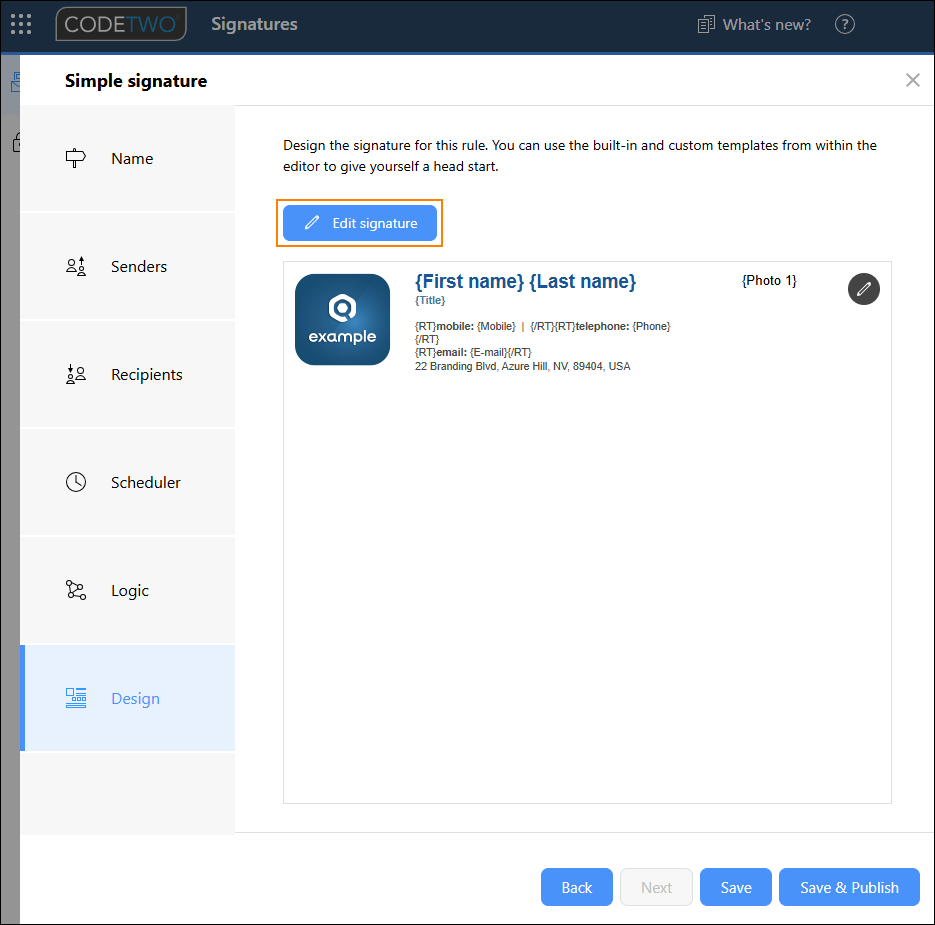
Fig. 7. Edit email signature template.
- Move your cursor to the place where you want to insert the scheduling link. Next, click Meeting link on the editor’s ribbon (Fig. 8.).
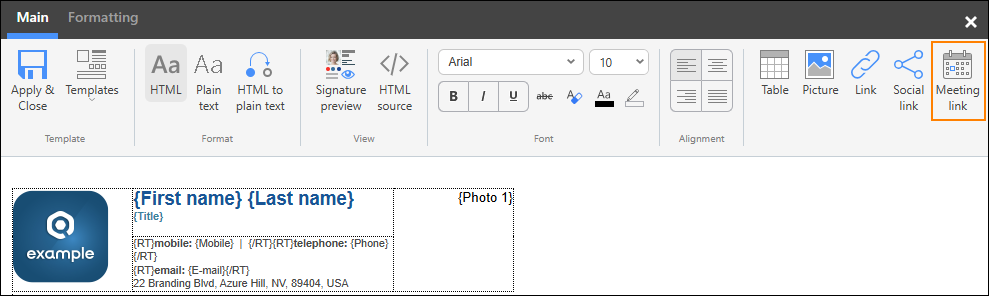
Fig. 8. Inserting a meeting link.
- In the Insert meeting link window (Fig. 9.) that opens, set up the meeting link format to match your Acuity Scheduling settings. Here’s how to configure it:
- Type: select Custom.
- URL: enter the URL you have set up in Acuity Scheduling (Fig. 6.), using your direct meeting link base and individual parameters. For example, if my sample user’s link is:
https://sample-company.as.me/megan-bowen
the correct format would be:https://sample-company.as.me/{First name}-{Last name}Click to select and insert the correct placeholders.
 - Add image and Add label: these options let you decide whether to link an image, a text, or both.
- When you're done, click OK to insert the meeting link into your signature template.
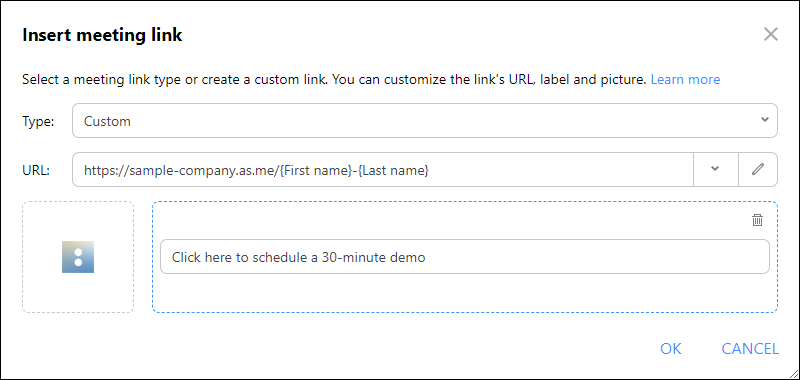
Fig. 9. Insert meeting link options.
When you save the new email signature template and the email signature rule, changes are immediately applied. Whenever the rule adds a signature to a message, it will include a link to a personal calendar of a sender. Whenever a recipient clicks the link, it will take them to the scheduling page where they will be able to book a meeting according to the user’s availability.
In this article