Integration with Calendly
Calendly provides an easy way to schedule meetings. Instead of long email conversations just to decide on a particular time slot, recipients can simply click a scheduling link and pick time which suits everyone.
Adding a Calendly meeting link to an email signature template in CodeTwo Email Signatures 365 is an easy way to:
- provide all users with their individual meeting links which make both scheduling and rescheduling process much easier,
- encourage all email recipients to book a meeting to learn more about your products or services,
- save time otherwise spent on scheduling a meeting via email conversations.
Calendly setup
Before you add a meeting link to CodeTwo Email Signatures 365, you need to set up your Calendly account.
After successful configuration, each of your teammates will be assigned their own, unique scheduling link. There are different ways to set those links up, but one of the easiest is to use the following format:
https://calendly.com/{First Name}-{Last name}/{Meeting type}
Additionally, Calendly lets you configure different types of meeting scheduling links:
- Round Robin Scheduling – lets you automatically assign meetings to your teammates, based on various criteria.
- Group meeting invites – let you organize a group meeting in a time slot that suits best for all the participants.
Learn more about setting up Calendly
How you set up Calendly and CodeTwo Email Signatures 365 depends primarily on your needs. In this guide, we’re showing an example on how you can integrate those tools, so that each teammate automatically gets their own scheduling link in their email signature.
How to add an individual Calendly scheduling link to CodeTwo Email Signatures 365
In this part, we assume that you are using the following scheduling link format:
https://calendly.com/{First Name}-{Last name}/{Meeting type}
To add a Calendly scheduling link to an email signature template, follow the steps below:
- Visit app.codetwo.com and sign in.
- Choose the email signature rule to which you would like to add a scheduling link.
- Go to the Design step and click Edit signature (Fig. 1.).
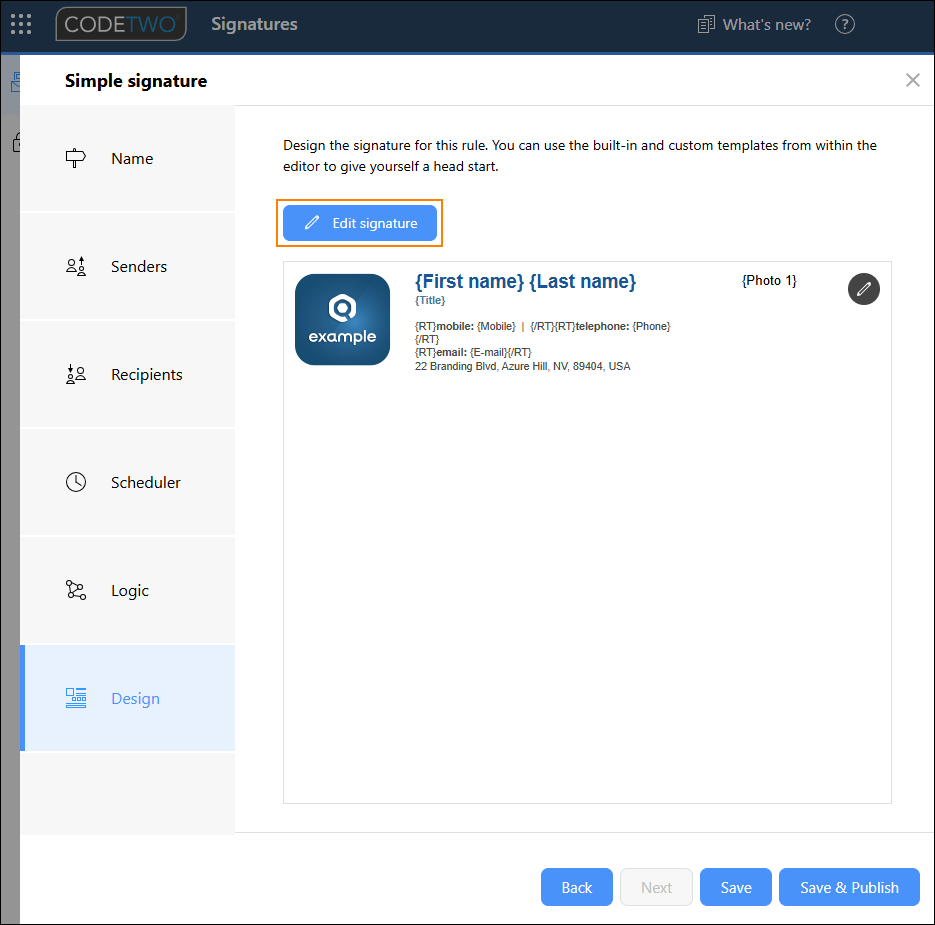
Fig. 1. Editing an email signature template.
-
Click a place in the template where you want the meeting link to appear. To add the link, use the Meeting link button (Fig. 2.).

Fig. 2. The meeting link button.
- In the window that opens (Fig. 3.), select Calendly booking page as your meeting link type. Next, in the URL field, modify the link so that it matches the format you have set up in Calendly. This way, CodeTwo can automatically update the link based on who sends the email:
- Replace user_id_here with the following pattern {First name}-{Last name}. Click
 to select and insert the appropriate placeholders.
 - Replace meeting_type_here with the meeting type configured in Calendly, e.g. 15min.
- Replace user_id_here with the following pattern {First name}-{Last name}. Click
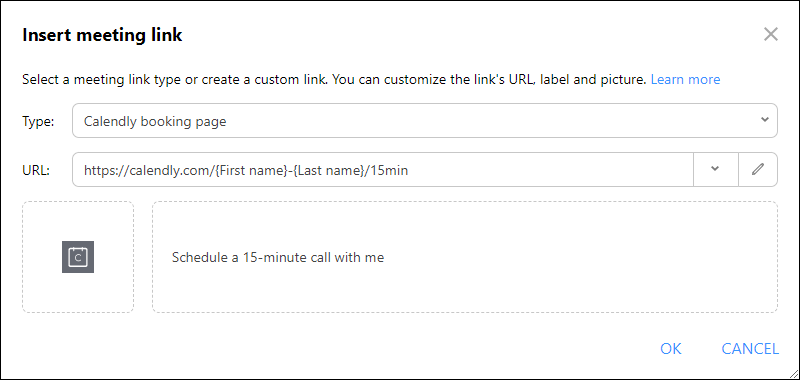
Fig. 3. Setting up a Calendly meeting link.
- Optionally, you can customize the icon and text label (e.g. Schedule a 15-minute call with me, as shown in Fig. 3.) that will link to your Calendly scheduling page.
- Finally, click OK to insert the meeting link into your email signature template.
- When you are back in the signature editor, you can use the Signature preview button to see how the signature with the link would look like for a certain user (Fig. 4.).
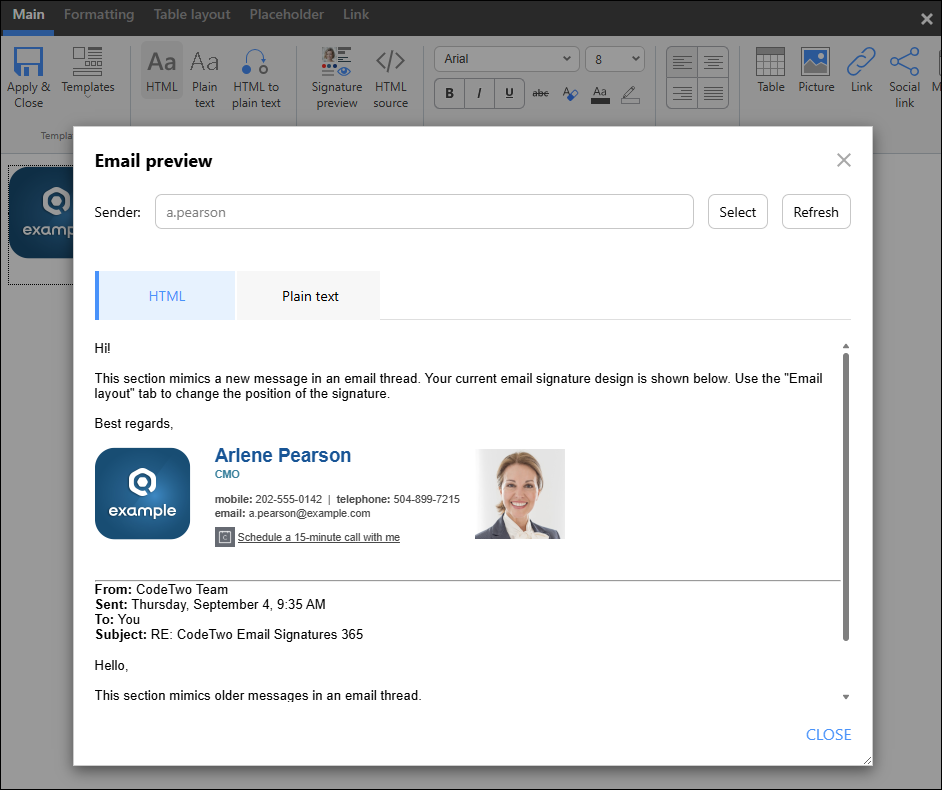
Fig. 4. Email signature preview with a Calendly meeting link.
- When your recipient clicks the meeting link, they will be redirected to the scheduling page (Fig. 5.), where they can choose from available time slots, schedule a meeting without any back and forth, and easily add the event to their calendar.
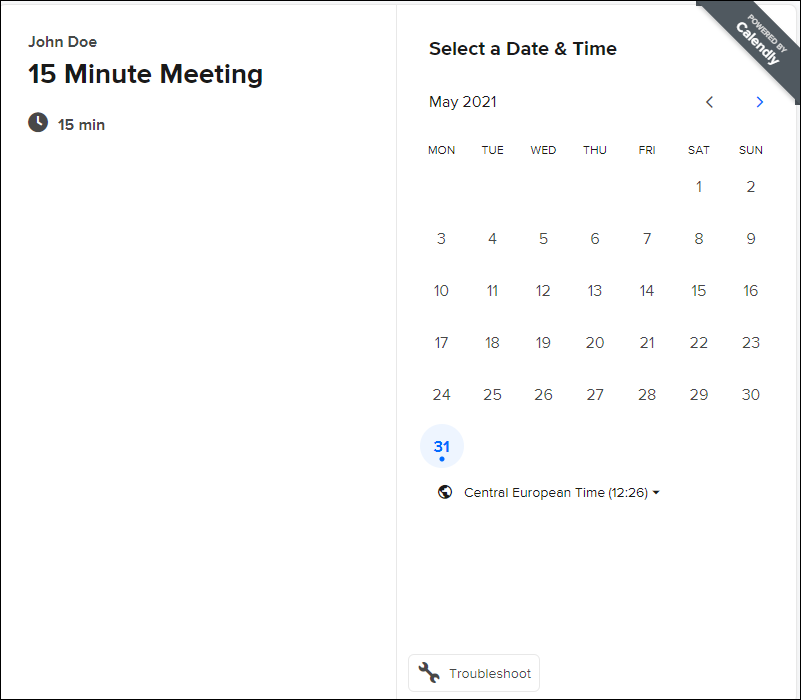
Fig. 5. A Calendly scheduling page.
In this article