This software has been discontinued. If you are looking for a way to manage email signatures and disclaimers in your Exchange Server organization and are using Exchange SE or Exchange 2019/2016 (until they’re supported by Microsoft), try out CodeTwo Email Signatures On-prem.
If you need to manage email signatures, disclaimers and marketing campaigns centrally in Microsoft 365 (Office 365), see our world-leading cloud solution: CodeTwo Email Signatures 365.
How to insert marketing banners to outgoing mail
Creating signatures including some rich media on bare Exchange Server may sometimes be troublesome because it most often requires installing add-ins to enrich your content. CodeTwo Exchange Rules Pro lets you create professionally looking signatures/disclaimers including most types of rich media like graphics, banners, photos, etc. using the built-in template editor in just a few clicks.
Overview
To configure the program to include a personalized signature with a marketing banner to the outgoing mail sent by members of a particular department, you need to:
Add a new rule with the Insert signature or Insert disclaimer action:
- Add and configure the Message direction condition in the following way: Message direction is outgoing.
- Add and configure the Sender condition as follows: Sender belongs to AD group [group name].
- Leave the default logical And relationship between the conditions.
Demonstration
Add a new rule to the list of rules using the + Add button. Name your rule and describe it (Fig. 1.).
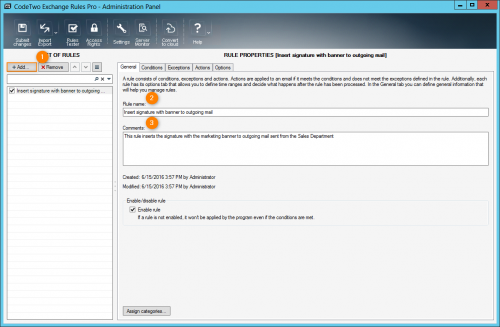
Fig. 1. Adding and describing a new rule.
Go to the Conditions tab and select Message direction is outgoing (Fig. 2.).
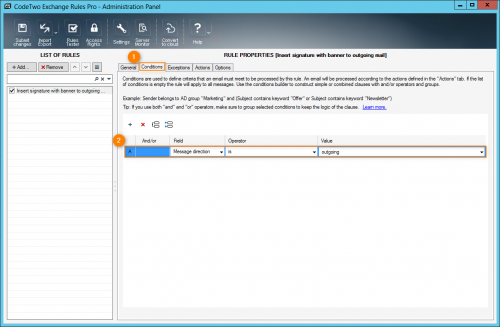
Fig. 2. Setting the condition to Message direction is outgoing.
Next, add a second condition by clicking the + button. Configure the new row in the following way: Sender belongs to AD group. In the next step, click Edit and choose a group whose members will be encompassed by the rule (Fig. 3.).
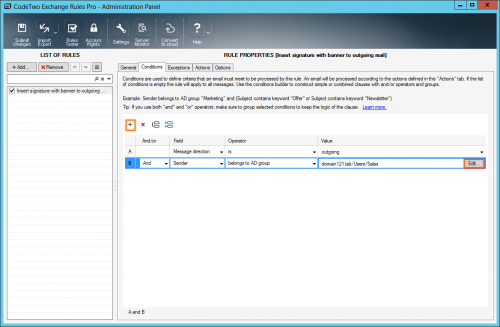
Fig. 3. Adding the second condition.
Move to the Actions tab, click Add and choose Insert signature from the list. After the action is added to the list of actions, click Edit (Fig. 4.) to open the template editor and compose your signature template including the marketing banner (Fig. 5.).
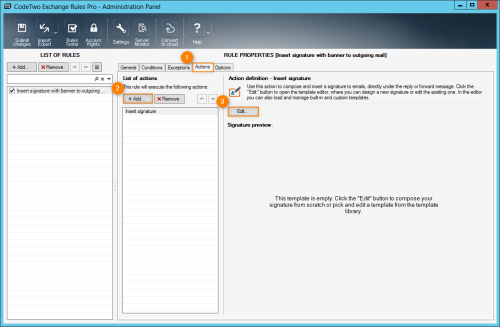
Fig. 4. Opening the editor to design a signature.
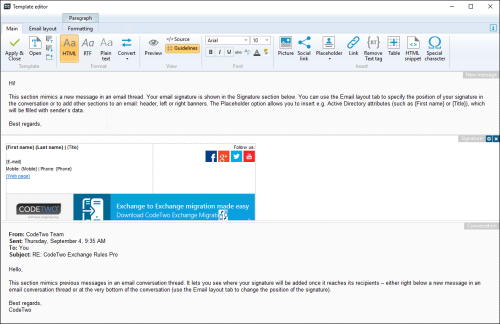
Fig. 5. Designing a signature template in the editor.
Info
Please note that you can either make use of the ready-made banners using the template library or create them from scratch via the template editor. Inserting a picture that will act as your banner using the editor is easy: just choose the Picture button on the editor's ribbon and select a picture either from a local library or an online resource. In addition, the editor offers many ways to design your banner, e.g. you can link the banner to a specific website using its context menu, you can decide about a place within the template where the banner will be included (top, bottom, side banners) and customize its width (refers to the top and bottom banners only and enables you to narrow or widen them). You can also insert the {Rotating text} and the {Rotating image} placeholders to promote various content.
Finally, save your settings in the Administration Panel via the Submit changes button in the upper-left corner (see Fig. 4.).
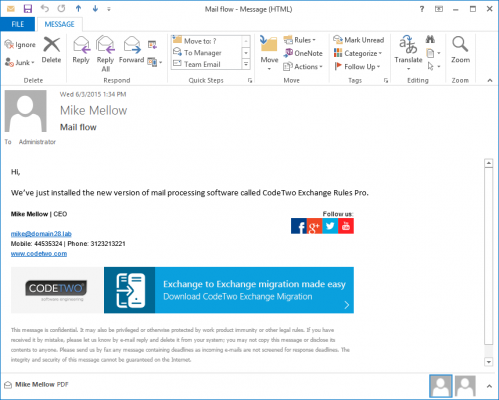
From now on, each outgoing message sent from the previously defined group will have a personalized signature and the marketing banner (Fig. 6.).
In this article
