This software has been discontinued. If you are looking for a way to manage email signatures and disclaimers in your Exchange Server organization and are using Exchange SE or Exchange 2019/2016 (until they’re supported by Microsoft), try out CodeTwo Email Signatures On-prem.
If you need to manage email signatures, disclaimers and marketing campaigns centrally in Microsoft 365 (Office 365), see our world-leading cloud solution: CodeTwo Email Signatures 365.
Create similar signatures for different departments
CodeTwo Exchange Rules Pro allows you to quickly and easily adjust email signatures so that they are suitable for different departments – the program is equipped with a feature that lets you clone signature rules.
Let us say the signature of your employees working in Customer Support Team should only contain a general phone number that is common for the entire department. On the other hand, people who work in the Sales Team (dedicated to handle the cases of the most important customers) might want to include their direct number. Still, the signature layout must remain similar to keep a professional look of the correspondence.
Overview
To achieve such a behavior you can create a rule for the first department and set the right conditions. After that, you can clone the rule and make necessary changes, so that it fits the other department:
- Add a new rule with the Insert signature or Insert disclaimer action:
- add and configure the Sender condition, e.g. Sender belongs to AD group "Customer Support Team",
- optionally, add the condition Message direction is outgoing, if you wish to apply the signature only to the emails coming out of your company.
- Select the first rule on the rules list. Right-click it and choose Clone.
- Make necessary changes to the newly created rule, to meet the requirements for the other department:
- change the design to adjust the signature appearance,
- change the Sender's condition to point to the other department, e.g. Sender belongs to AD group "Sales Team".
Demonstration
Add a new rule to the list of rules using the Add button. Name the rule and describe it (Fig. 1.).
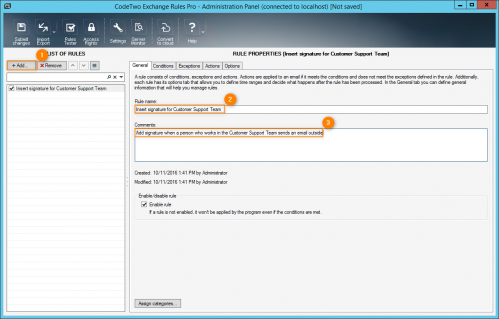
Fig. 1. Adding and describing a new rule.
On the Conditions tab, add Sender belongs to AD group and point to a group that should receive the signature. If you wish to add the signature only when your users are sending messages outside of your company, append the Message direction is outgoing condition as well. Ensure that the conditions are bound with the And logical operator (Fig. 2.).
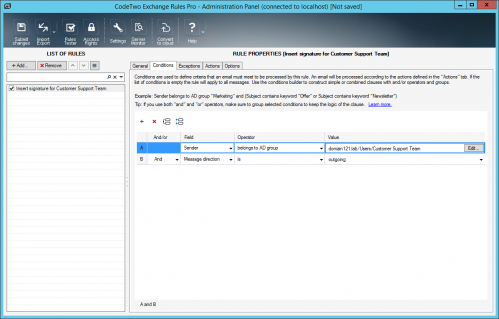
Fig. 2. Assigning the conditions.
Go to the Actions tab and click +Add. From the list, choose either Insert signature or Insert disclaimer. Hit Edit to create your signature from scratch or choose a predefined template. Let us say, we need to provide a common number for the entire Customer Team (Fig. 3.).
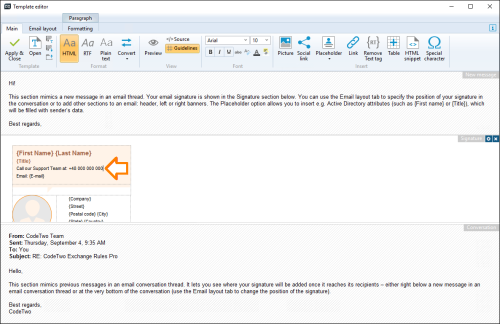
Fig. 3. Providing a common telephone number.
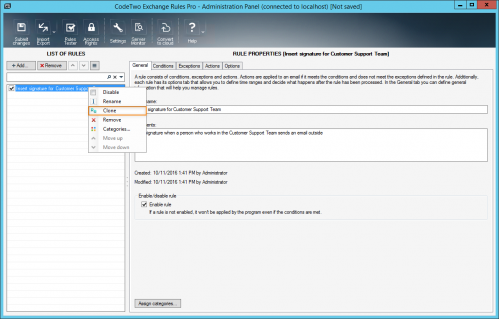
Now the rule is ready to be saved. However, we need to create another one that will be quite similar but adjusted for the Sales people. To achieve this, right-click the rule on the rules list and choose Clone (Fig. 4.).
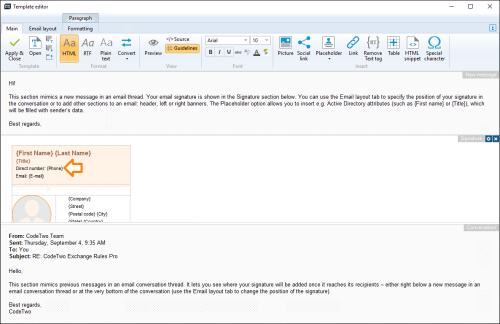
On the General tab, you can rename the rule and change its description. Once this is done, go to the Actions tab and hit Edit. Now modify the design so that it meets all the requirements for Sales Team. Let us say, we have to include a direct number for every person who works in Sales Team (Fig. 5. and Fig. 6.).
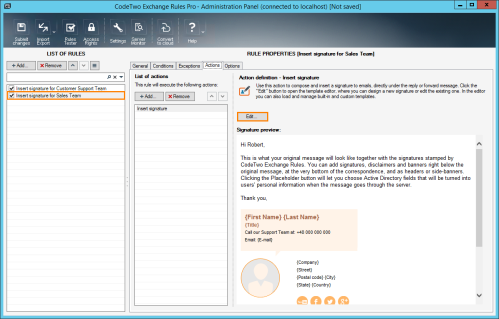
Fig. 5. Opening the template editor.
Last but not least, we have to modify the conditions prior to submitting the changes. Open the Conditions tab of your second rule and change the value of Sender belongs to AD group to the other group, e.g. Sales Team (Fig. 7.).
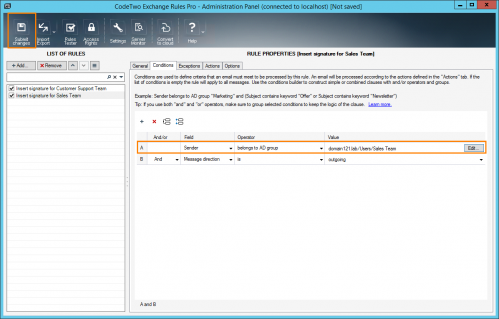
Fig. 7. Changing the condition and saving the changes.
Finally, hit Submit changes to apply the new settings. From now on, if the user works in Customer Support Team, the signature will include only the common number. However, if a person works in Sales Team, the signature will come out with the direct number.
In this article
