This software has been discontinued. You can check the list of
currently available CodeTwo products here.
Outlook sharing
To access this tab open the Administration Panel (Start menu, All Programs, CodeTwo, Public Folders Syncing Master), click Administration panel and choose the Outlook sharing tab (Fig. 1.).
This tab contains all the options and settings associated with the shared Outlook data. Using this tab you can e.g. manage data, set access data rights, create copies and move data onto the other Syncing Master. Furthermore, there are also synchronization settings available.
Navigate between the below-listed sections to learn more about:
Access rights
The administrator can define data access rights for public folders' users and shared personal folders.
To use the Access rights tab, open the Administration Panel (Start menu, All Programs, CodeTwo, Public Folders Syncing Master), click Outlook sharing and the Access rights.
The personal folders' access rights may be also managed by their owners via MS Outlook. Learn more
The Access rights window consists of 2 panels (Fig. 1.). In the left panel (Folder tree) there is a current structure of public folders and the shared personal folders. In the right panel (Access rights to the selected folder), there are current folder access rights assigned to particular users. Please note that the access rights always correspond to the one currently chosen folder from the Folders tree.
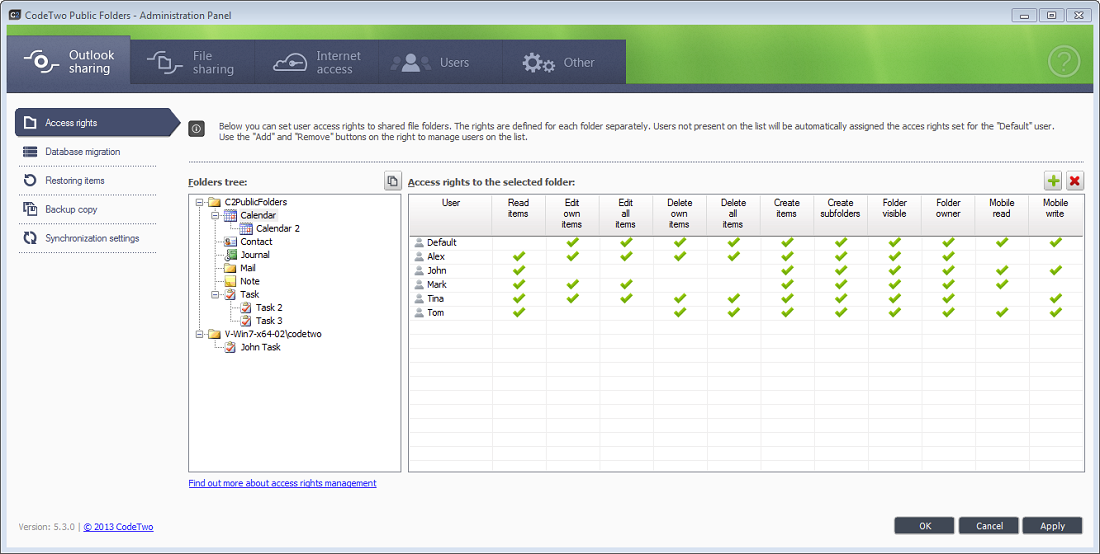 |
| Fig. 1. Public and shared personal folders management window. |
On the folder list, there are both public and all currently shared personal folders. All public folders can be found in the C2PublicFolders tree. In the other folder trees apart form the public ones, there are personal folders. Those folders, which are shared by other users, are located in a separate tree which name consists of the domain or computer name (if there is no domain name) and the username.
The administrator cannot share or stop sharing any personal folders apart from his own. It can only be done by the owner of a personal folder in MS Outlook (learn more). Therefore, the administrator can only change access rights to the shared personal folders.
By default, after the installation of CodeTwo Public Folders each user has full access rights to every public folder located in the C2PublicFolders tree. Furthermore, users can create, edit and delete every item and folder. To restrict users' rights (they have to be added to the right panel first), define their access rights by checking/unchecking appropriate options on the panel. Every CodeTwo Public Folders user is identified by his/her user name, which is defined while the user's account is created.
Learn more about creating users' accounts
There are following buttons available in this tab:
| Add user | |
| Remove user | |
| Copy rights |
To define user's access rights, add a user to the users' list by clicking New (decide whether it is a Standard user or an Active directory user). In the window that shows define the user's name and password. If you decide to add Active Directory user, you can add several different users at once (you cannot do it with the Standard User). The user will be added to the list after confirming his/her credentials by clicking OK. When the user's account is ready, define the access rights to the chosen folders by checking/unchecking particular rights next to the user name. Remember that the rights to a particular folder will be granted by marking a folder from the left panel.
On the users' list, there is always a Default user assigned to every folder. Its access rights define the default rights to the currently chosen public folder. Each user, who is not added to the access rights list of a particular folder, has a default right to this folder (the same rights as the Default user).
To remove a user from the list, mark the username and click Remove user. The user is going to be removed from the list and from now on he/she will be assigned default access rights to the selected folder.
The Copy rights option allows to copy recent folder's access rights to all its subfolders. For instance, if you want all public folders to have the same access rights, first define the C2PublicFolders folder rights and then click the Copy rights button. From that moment, those rights will correspond to all public folders.
In order to save all the introduced changes, click OK or Apply at the bottom of the Access rights right panel. Otherwise, the changes WILL NOT be saved.
In the table below you will find folder access rights that may be granted to users:
| The access right name | Description |
|---|---|
| Read items | A user can only read folder items. If he / she does not have this right, he / she will only see an empty folder. |
| Edit own items | A user can edit folder items but only those created by himself. |
| Edit all items | A user can edit all folder items. |
| Delete own items | A user can delete folder items, but only those created by himself. |
| Delete all items | A user can delete all folder items but not the folder itself. To remove the folder, a particular user has to have "Folder owner" rights assigned |
| Create items | A user can create new folder items. |
| Create subfolders | A user can create new subfolders in a particular folder (it applies only to public folders). As far as the shared personal folders are concerned, only a user who has created the particular folder has a right to create subfolders in it. Other users are not authorized to do that. |
| Folder visible | A folder is visible to users. If a user does not have this right, he/she will not be able to see either a folder or its subfolders. |
| Folder owner | If a user has been assigned this right, he/she will be eligible to delete, rename or define other users rights associated with the particular folder. Every folder needs to have at least 1 owner. As far as the personal folders are concerned, the user who shares a particular folder needs to be its owner. |
| Mobile read | A user can only read items in the folder on a mobile device. If he/she does not have this right he/she will not see the folder. |
| Mobile write | A user can read folder items, edit them and create new ones on a mobile device. If he/she does not have this right he/she will only be able to read the items (in case of having Mobile read access) or will not see the folder at all. |
It's worth notice that most of the rights are independent. For example, a user can have the right to "Create items" but not to "Read items". In this situation after the item is created, it will be visible to the user until the MS Outlook is reopened.
On the other hand, the rights to "Edit own items", "Edit all items", "Delete own items" and "Delete all items" depend from one another - it derives from their nature. A user can have a right to "Edit all items" but does not have a right to "Edit own items". The same situation is with deleting items.
Restoring items
The administrator of the CodeTwo Public Folders Syncing Master does not have to worry that users will unintentionally delete important data. Each folder and item deleted by a Outlook Addin user from the C2PublicFolders tree can be restored from the program's Administration Panel.
Open the Start menu, All Programs, CodeTwo, Public Folders Syncing Master, Administration Panel, click Outlook sharing and choose Restoring items (Fig. 2.).
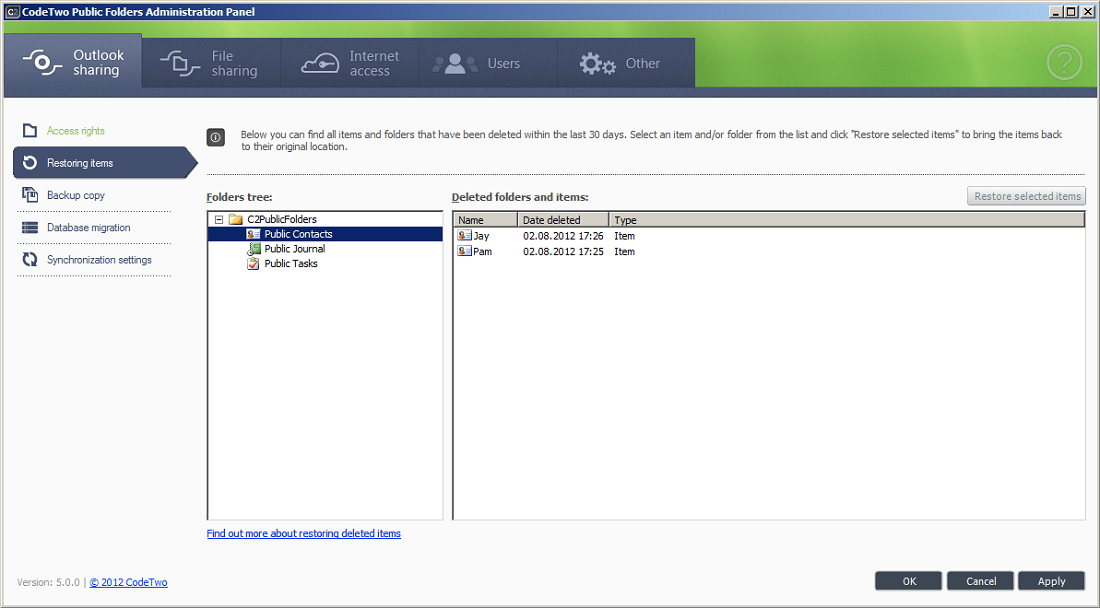 |
| Fig. 2. Restoring items window. |
To restore the deleted item, find its location on the list of the Folder tree and click on it. After that, mark the appropriate item (or items) in the Deleted folders and items window and click the Restore selected items button. The chosen items will be restored in their previous location.
In the same way you can restore deleted folders. Just remember: to restore a folder you have to mark the parent folder of the deleted folder in the Folder tree window. Only then, the deleted folder will appear in the Deleted folders and items window.
Backup copy
The CodeTwo Public Folders database is modified in a real time along the changes introduced by the Outlook Addin users. However, it might happen that we loose a part or, even worse a full database due to, for example, a local drive failure. Furthermore, some important item's content may be also unintentionally removed. To prevent data loss it is adviced to regularily create database backup copies. The program lets you create the backup manually in a simple way or set the automatic backup creation within the defined time frames.
To open this option go to the Start menu, All Programs, CodeTwo, Public Folders Syncing Master, choose Administration panel, Outlook sharing tab and click Backup copy (Fig. 3.).
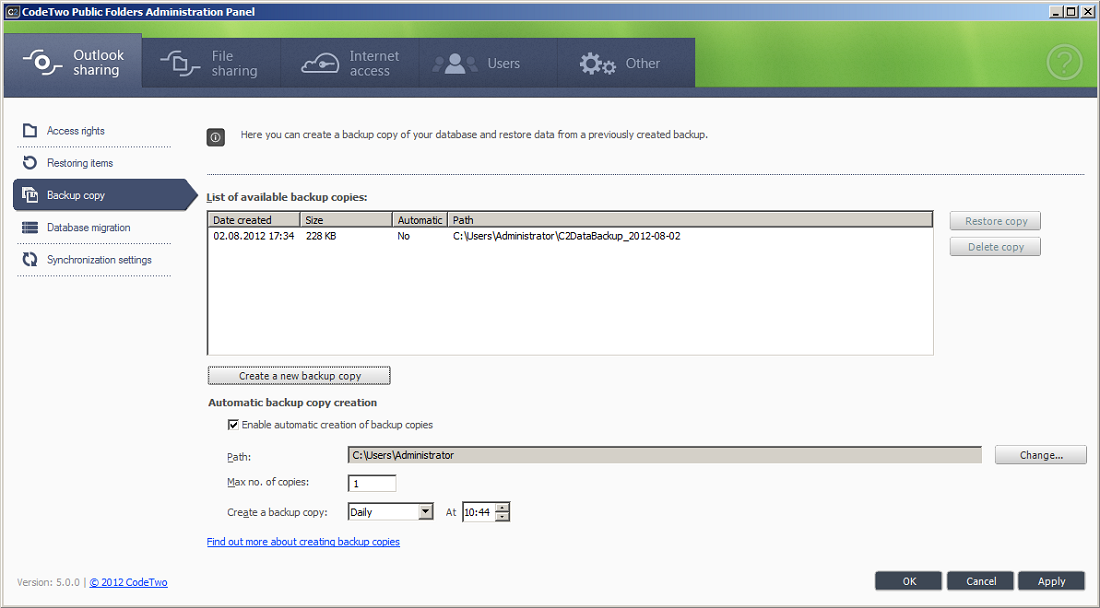 |
| Fig. 3. Backup copy window. |
All database copies currently stored by the program can be found in the List of available backup copies window. In this window you will find such information as: its creation date, size, exact location and whether the copy was created manually or automatically.
To manually create database copy, you just need to click the Create a new backup copy button. After you choose the proper saving location and click OK, the copy will appear on the list of available backup copies.
The Automatic backup creation option lets you setting the automatic backup creation. After you check the Enable automatic creation of backup copies box, you have to set the additional settings in the next, editable fields. Before you choose the storing location for you backup (the Change button), make sure that you have a sufficient space on your hard drive.
Then define the maximum number of copies that will be saved on the drive. If the number of copies exceeds the limit, the oldest one will be removed and replaced with newest.
The last step is to set up the frequency of backup copies' creation. In the Create a backup copy field, you may decide whether the copy will be created daily, weekly or monthly. Besides that, you will also have to define the time for your backup creation.
If such a need arises, you can overwrite the current database with the backup copy. To do this, mark the chosen copy in the List of available backup copies and click Restore copy. A window will display warning that all current data will be overwritten by the backup copy data (Fig. 4.). If you decide to restore the backup copy, database will go back to its state when the backup was created. All data changed or created after the backup creation will be lost so use this option only when absolutely necessary.
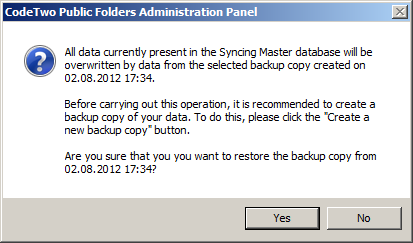 |
| Fig. 4. Warning message saying that the current database will be overwriten by the backup copy data. |
If a particular backup copy is no longer needed, you can delete it from the list by using the Delete copy button. It means that this copy will be permanently removed from the hard drive and will no longer appear on the list.
Database migration
When we decide to change a computer hosting the Syncing Master of CodeTwo Public Folders, it is necessary to migrate the current database to a new computer. The program lets you move it in a fast and simple way by using Database migration option.
To migrate the database, go to the Start menu, All Programs, CodeTwo, Public Folders Syncing Master, click Administration panel, Outlook sharing tab and choose Database migration (Fig. 5.).
 |
| Fig. 5. Database migration tab. |
To migrate the database in a fast and simple way, follow the instructions step by step.
First, copy the current database by clicking the Export database button. The backup copy will be saved in the chosen location.
In the next step, you have to move the database copy onto a new computer, which from now on will host the Syncing Master. Remember that the Syncing Master has to be installed on this machine before you make these changes. After you copy the database onto a new computer (or plugin the external drive with the copy), open the Administration panel, then click Outlook sharing and choose Database migration. After that, click Import database, enter the database copy access path and confirm the migration.
After the copying process is finished, start the procedure of reconnecting the Client Apps from the previous to the current Syncing Master. Note, that after the reconnection to the new Syncing Master, users will see exactly the same data as before.
Synchronization settings
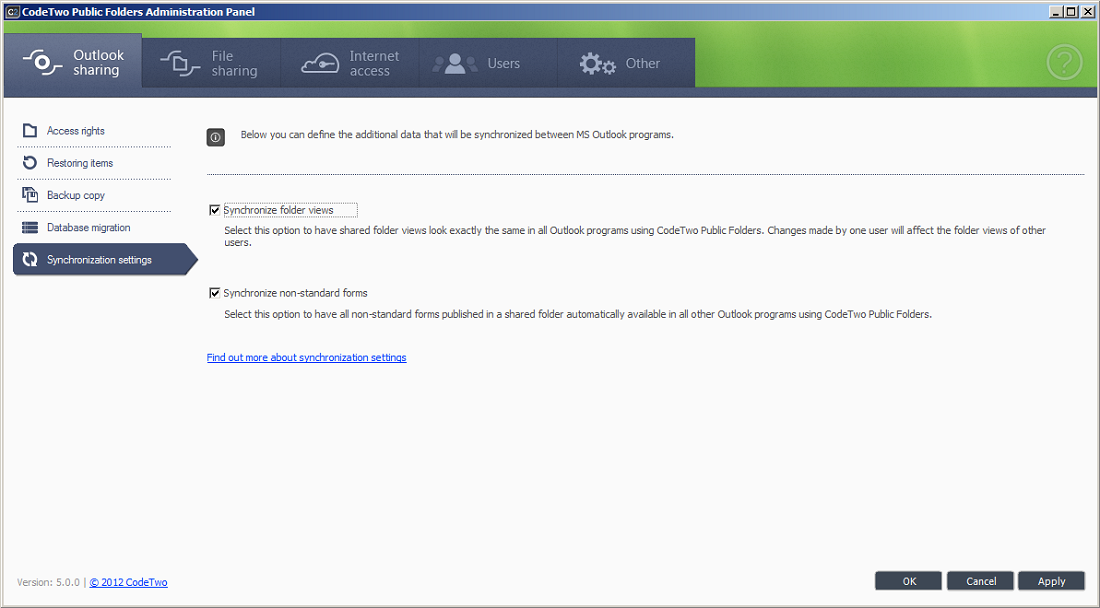
Here you can define which additional data should be synchronized between Outlook Addins (Fig. 6.).
To access this tab go to the Start menu, All Programs, CodeTwo, Public Folders Syncing Master, click Administration panel, Outlook sharing tab and choose Synchronization settings.
 |
| Fig.6. Synchronization settings window. |
After ticking the Synchronize folder views option, all the shared folders will look exactly the same in every Outlook using CodeTwo Public Folders. If one user changes the folder's view, it will also affect the way how the other users will see it.
If you check the second option (Synchronize non-standard forms), the non-standard forms published in the shared folder will be automatically enabled to all other Outlook programs using CodeTwo Public Folders.
All the synchronization settings changes should be confirmed by clicking Apply.
Warning
If you encounter any problems with the view synchonization between Outlook Addins, please refresh your view in the following way:
Outlook 2010
- In the Outlook 2010 ribbon choose the View tab and click Change view.
-
From the context menu choose the Manage views option.
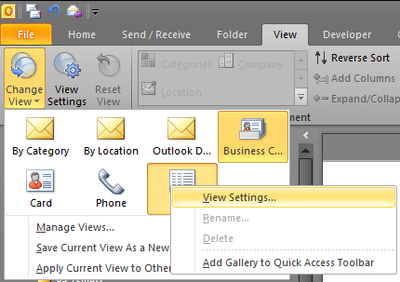
Fig. 7. From the context menu choose the Manage views... option. -
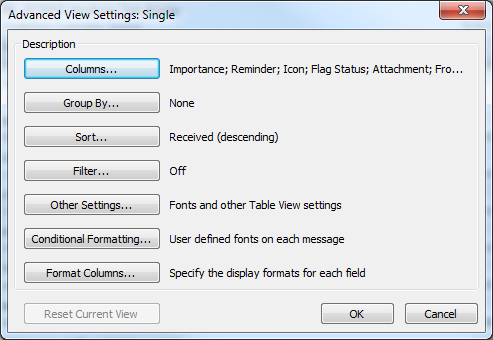
A window will display, where you would be able to customise your view.
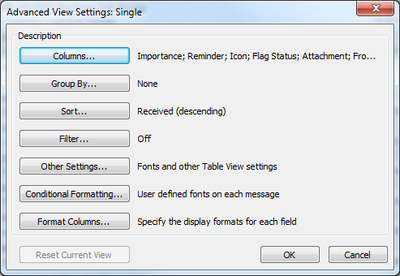
Fig. 8. A window will display, where you would be able to customise your view. - In the view settings window make sure that the configuration suits your needs and confirm the changes by clicking OK.

Outlook 2007
-
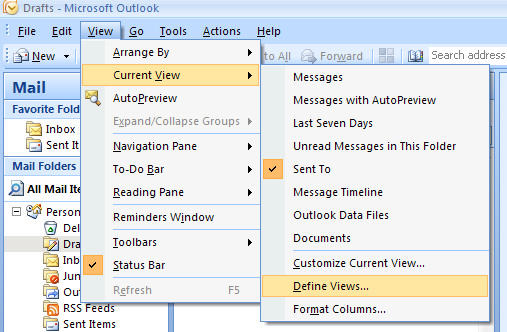
In the main toolbar of Outlook 2007 choose View, Current view, Define views.
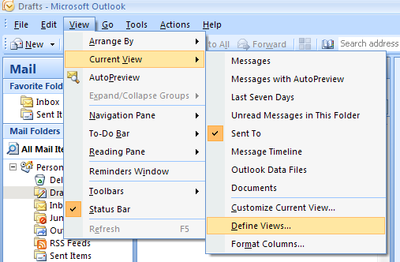
Fig. 9. In the main toolbar of Outlook 2007 choose View, Current view, Define view... -
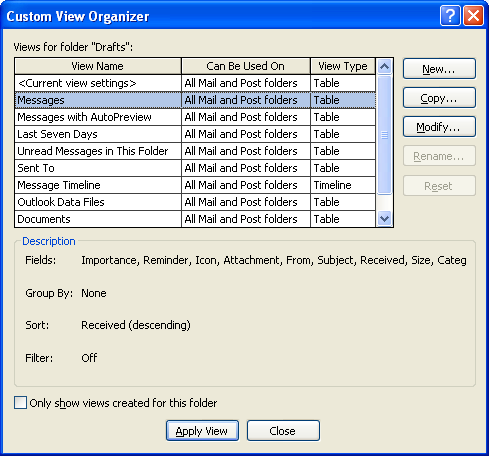
A list of available views will display.
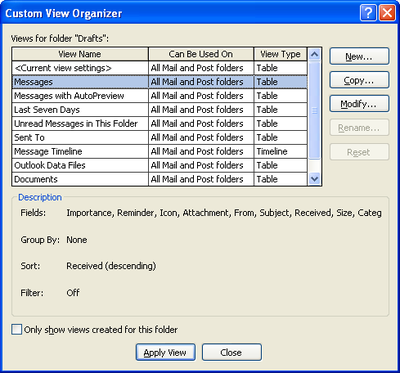
Fig. 10. A list of available views will display. - Find the synchronized folder view on the list and click Modify.
-
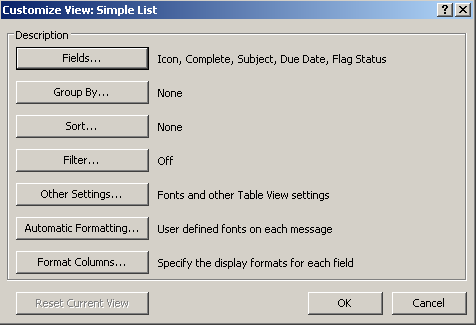
A window will display in which you will be able to modify your view in any way you want.
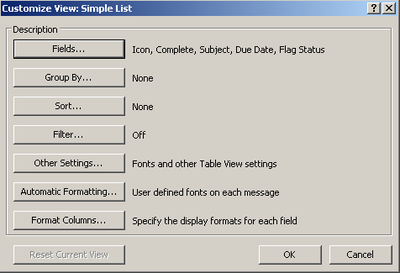
Fig. 11. A window will display in which you will be able to modify your view in any way you want. - In the view settings window make sure that the configuration suits your needs and confirm the changes by clicking OK.
After the introduced changes, your folder view will be synchronized once again with other Client Apps.