Creating a new connection to SharePoint Online
CodeTwo Backup allows you to connect to multiple SharePoint Online (Microsoft 365) servers. You can configure the connection when creating a new backup job or directly from the program's Dashboard, by clicking the Settings (![]() ) button on the Defined server connections card and selecting New > SharePoint connection (Fig. 1.).
) button on the Defined server connections card and selecting New > SharePoint connection (Fig. 1.).
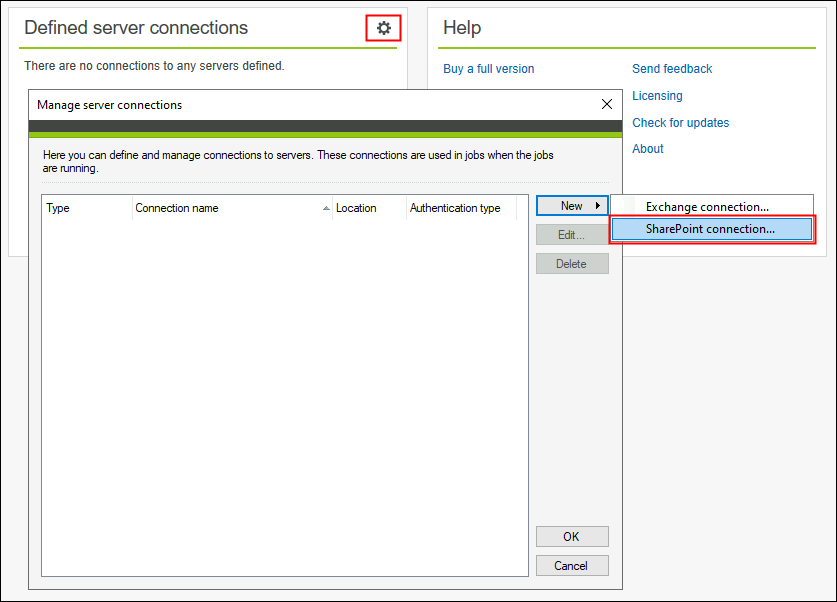
Fig. 1. Creating a new SharePoint connection.
The SharePoint connection wizard will open (Fig. 2.). In the Server location step of the wizard, you can choose between connecting to:
Important
Data backups from on-premises SharePoint Server are no longer supported.
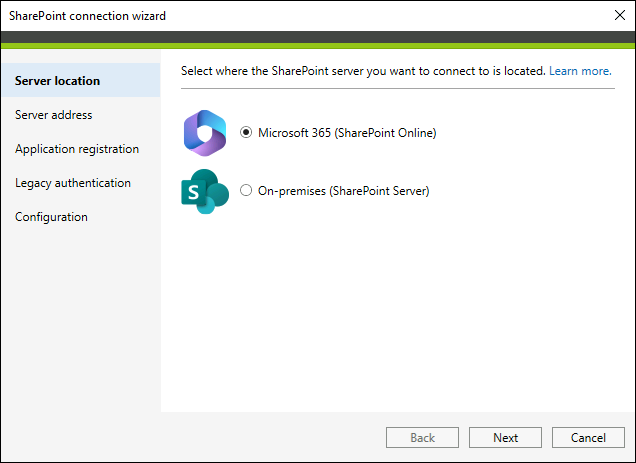
Fig. 2. The SharePoint connection wizard.
Once you make your selection, click Next to proceed.
Connecting to SharePoint Online (Microsoft 365)
In the Server address step, you need to provide the URL to your SharePoint Online organization. You can simply replace <mycompany> in the SharePoint server URL field with the actual name of your domain (also known as the organization's name). For example, if your domain name is company.com, SharePoint server URL is https://company.sharepoint.com (Fig. 3.). The Admin center URL field will be populated automatically, based on your SharePoint server URL.
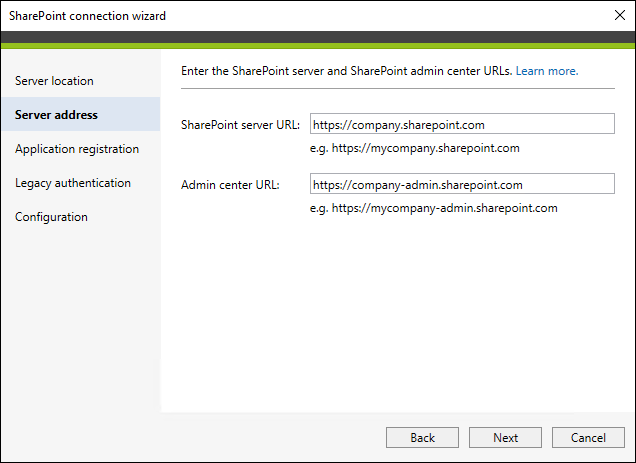
Fig. 3. Providing URLs of your SharePoint Online site.
CodeTwo Backup uses Modern Authentication (OAuth 2.0) to connect to SharePoint Online. Because of that, you need to register the program in Microsoft Entra ID (Azure Active Directory) of the Microsoft 365 tenant whose SharePoint and OneDrive for Business data you want to back up. The registration can be performed:
- Automatically by CodeTwo Backup,
- Manually in the Microsoft Entra admin center.
Automatic registration
In the Application registration step of the connection wizard, select Automatic registration and click Sign in as Microsoft 365 admin (Fig. 4.).
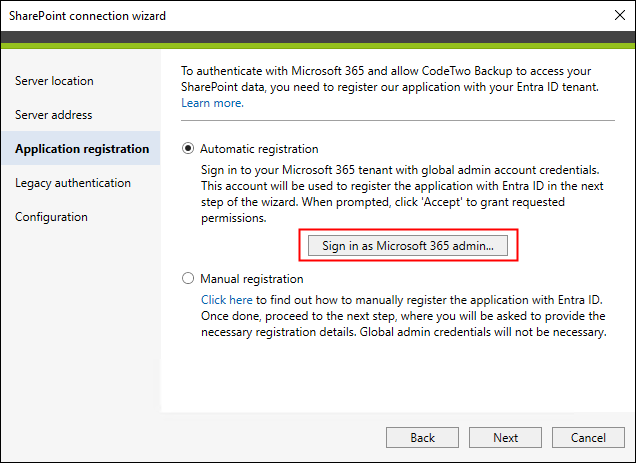
Fig. 4. Automatic registration of CodeTwo Backup in Entra ID.
On the Microsoft sign-in page, enter the credentials of your Microsoft 365 admin account. Remember that your account must be assigned the Global Administrator or Privileged Role Administrator role. When prompted, grant the required permissions to CodeTwo Backup. These are necessary for the program to be able to back up and restore data from and to your SharePoint Online and OneDrive for Business environment (Fig. 5.).
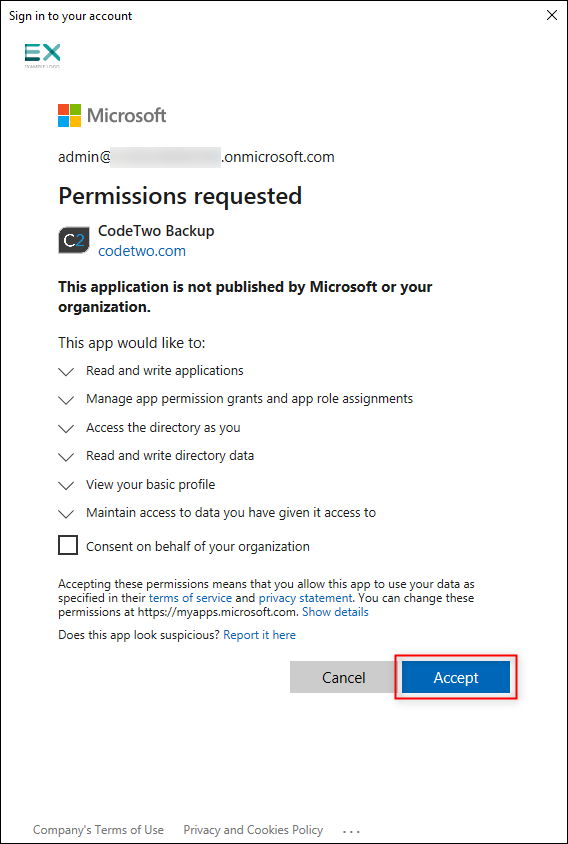
Fig. 5. Granting the necessary permissions to CodeTwo Backup.
CodeTwo Backup will be registered as CodeTwo Backup SharePoint in your Entra ID and signed with a unique certificate.
Important
A new CodeTwo Backup SharePoint entry will be registered in your Entra ID each time you configure a new connection to Microsoft 365 by using the Automatic registration option. To avoid having multiple registration entries in your tenant, edit the existing connection. If you now select the Manual registration option, all the necessary registration details will be filled out in the Application details step.
The CodeTwo Backup SharePoint registration entry will remain in your Entra ID even if you delete the server connection that has created this entry, or if you uninstall the program from your machine. If you want to delete the CodeTwo Backup SharePoint entry, you need to do so manually by following these steps.
Manual registration
You can register CodeTwo Backup manually in your Microsoft Entra ID by following the steps provided in this Knowledge Base article. Once done, select Manual registration in the Application registration step of the server connection wizard (Fig. 6.) and click Next.
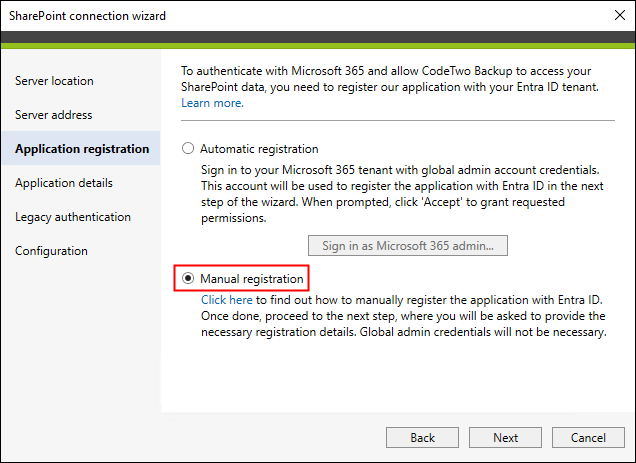
Fig. 6. Select this option if you want to register CodeTwo Backup in your Entra ID by yourself.
In the Application details step, provide the following information:
- Dedicated application account – the email address of any user from your Microsoft 365 tenant. This account is used to get the necessary information about the tenant (name, domain, etc.).
- Client ID – a unique identifier (GUID) assigned to CodeTwo Backup after the program has been registered in your Entra ID. To get this ID, sign in to the Microsoft Entra admin center, go to Identity > Applications > App registrations, click the All applications tab, and select the entry under which you have registered CodeTwo Backup. The ID is found on the Overview page, under Application (client) ID (Fig. 7.).
- Tenant ID – a unique identifier (GUID) assigned to your Microsoft 365 tenant. You can find it on the same Overview page as shown in Fig. 7., under Directory (tenant) ID.
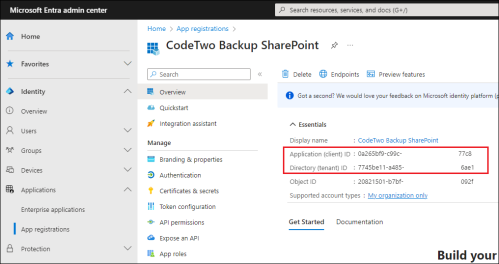
Fig. 7. The client and tenant ID assigned to CodeTwo Backup in Entra ID. - Certificate thumbprint to authenticate CodeTwo Backup. You can add or view certificates in the Microsoft Entra admin center, on the Certificates tab of the Certificates & secrets page of the registered application (Fig. 8.).
A certificate needs to be signed with a 2048 bits key and placed in the CurrentUser\My store of the account under which the CodeTwo Backup Service runs. You can use the Import button to install the certificate in the correct store (use the Import certificate window for that purpose, as shown in Fig. 9.). If the certificate is already installed in that store, you can simply provide its thumbprint in the Certificate thumbprint field.
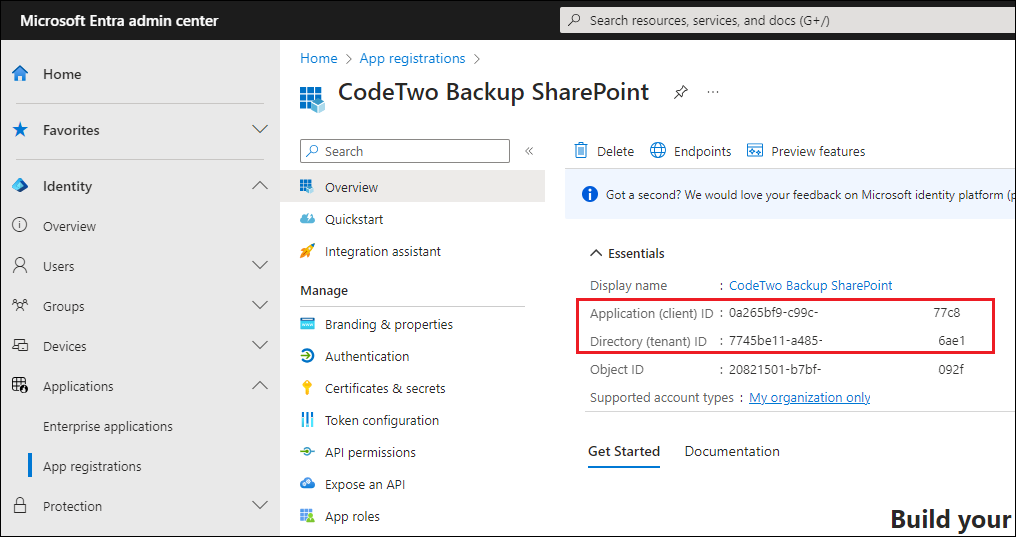
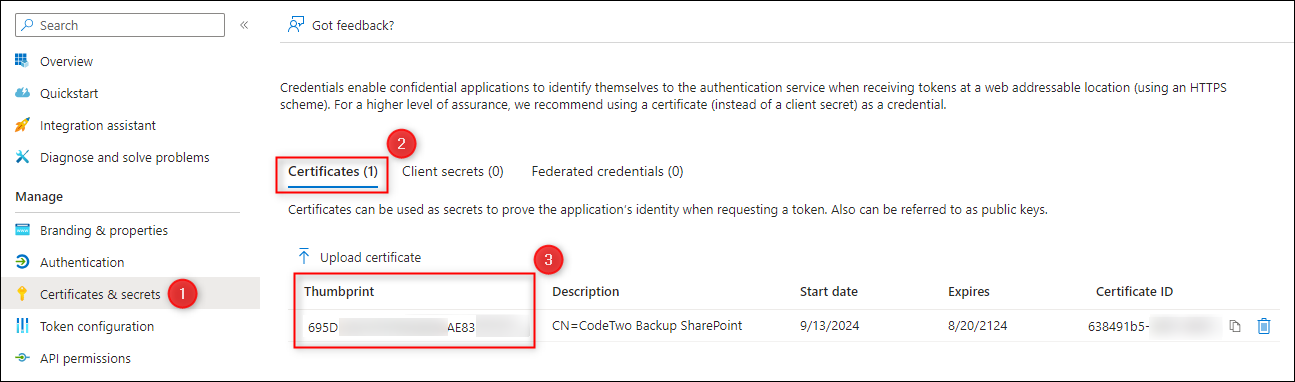
Fig. 8. The location of a certificate thumbprint in Entra ID.
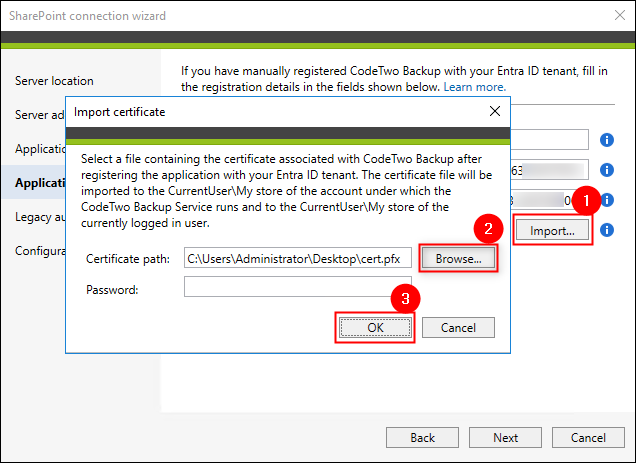
Fig. 9. Importing the certificate associated with CodeTwo Backup.
For a sample configuration of the Application details step, take a look at Fig. 10. below.
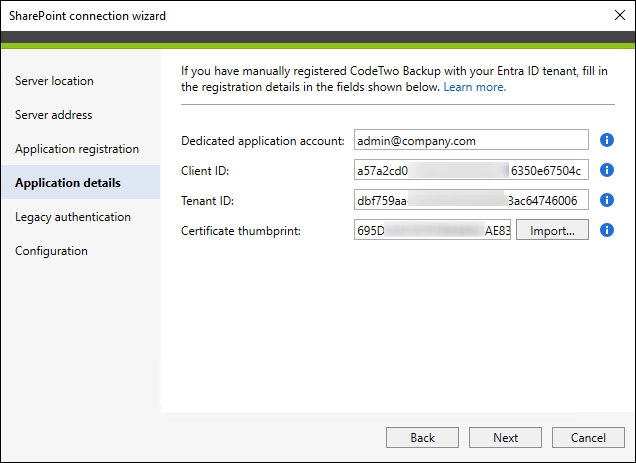
Fig. 10. Application registration details filled out in the SharePoint connection wizard.
The next step, Legacy authentication, is now deprecated. Legacy authentication was permanently retired in SharePoint Online on May 1, 2026.
In the last step, Configuration, the program will attempt to connect to your SharePoint Online environment based on the data provided in the previous steps of the wizard. Click Configure and wait for the results (Fig. 12.). During this process, the program is registered in your Entra ID (if you have chosen the Automatic registration option) and tries to enumerate SharePoint site collections and connect to one of them.
If you get any errors instead, consult the Troubleshooting section.
Important
After closing the connection wizard, you also need to click OK in the Manage server connections window (Fig. 11.) to save your connection. This will automatically close the window and store your settings. Otherwise, the connection will not be saved, and you will have to start from the beginning.
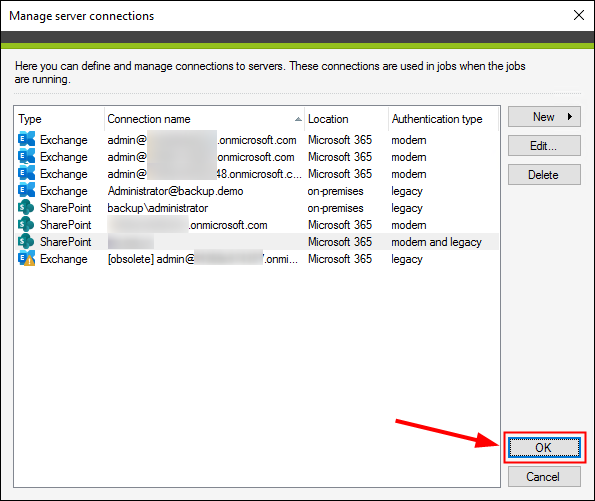
Fig. 11. Confirming the connection settings.
Click Finish to close the wizard. Your connection will be listed on the Defined server connections card.
Connecting to on-premises SharePoint server
In the Server address step, you need to specify your SharePoint server URL (Fig. 12.). The URL must include the (http or https) and FQDN (fully qualified domain name) of your server, e.g. https://sharepoint_server.com. The Central Administration URL field will be populated with data from the SharePoint Server URL field. You just need to provide the port number of the SharePoint Central Administration web application.
Info
This port number is configured when deploying SharePoint on your server.
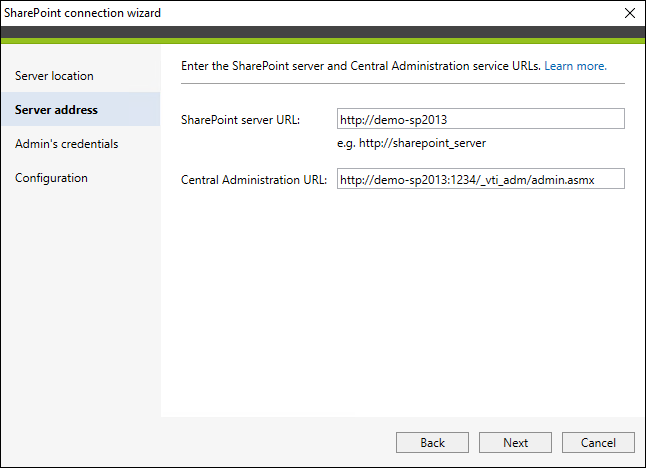
Fig. 12. Providing SharePoint server URL.
In the next step, provide the server's administrator User Principal Name (UPN) and password (Fig. 13.). Enter the UPN manually or select it from your Active Directory by clicking the Browse button.
Important
The Browse button can only be used to list the UPNs of administrators from the same domain or from different trusted domains. If you want to use a UPN from an untrusted domain, you will have to type it manually.
Keep in mind that this admin must fulfill specific requirements and have certain access rights. Learn more.
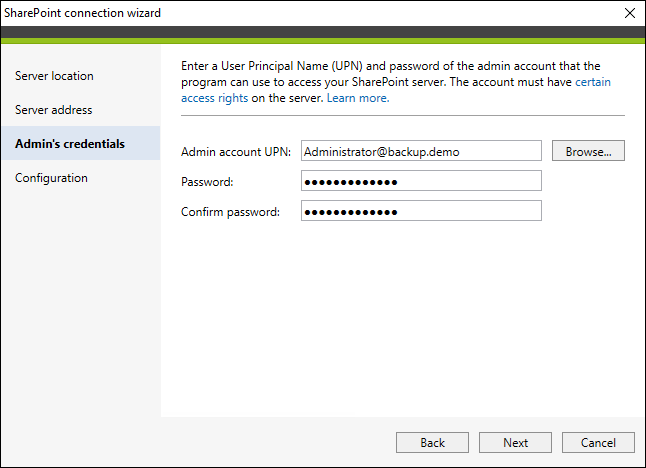
Fig. 13. Providing admin's credentials.
In the last step, Configuration, the program will attempt to connect to your SharePoint based on the data provided in previous steps of the wizard. To start the verification process, click Configure. During this process, the program tries to enumerate site collections with PowerShell and connect to any SharePoint site collections and Central Administration service. If the configuration is successful, you will see the following information (Fig. 14.):
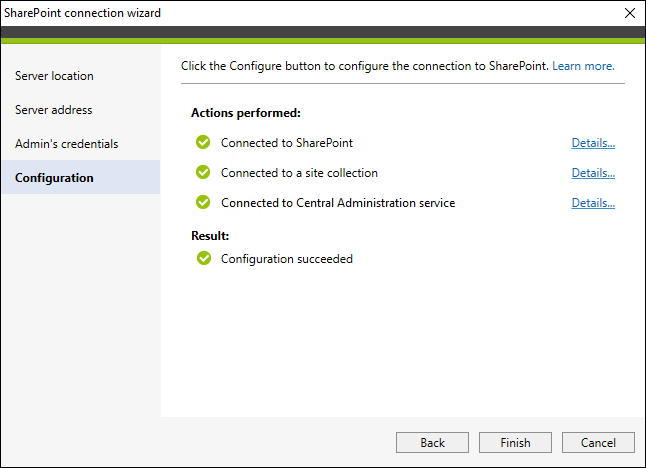
Fig. 14. The window informing about a successful connection to on-premises SharePoint server.
If you get any errors instead, consult the Troubleshooting section.
Important
After closing the connection wizard, you also need to click OK in the Manage server connections window (Fig. 15.) to save your connection. This will automatically close the window and store your settings. Otherwise, the connection will not be saved, and you will have to start from the beginning.
Fig. 15. Confirming the connection settings.
Click Finish to close the wizard. Your connection will be listed on the Defined server connections card.