Quick guide to creating and restoring backups
This section describes step by step how to create a continuous backup job for multiple source mailboxes located in Microsoft 365 (Office 365). This job will be triggered during the week, outside the working hours. You will also learn how to restore several backed up items from a specific point in time to another folder on the same server. Use the links below to learn more.
Watch the video below to see how to create and restore backups of multiple mailboxes in Microsoft 365.
If you're looking for a way to back up SharePoint data, go to this article.
Creating a backup
After the program is installed, you can start creating a backup job. Go to the Jobs tab, click New > Backup and Exchange. This opens a new Exchange backup job wizard. In the first step of the wizard, Job name, you need to type your backup job's display name.
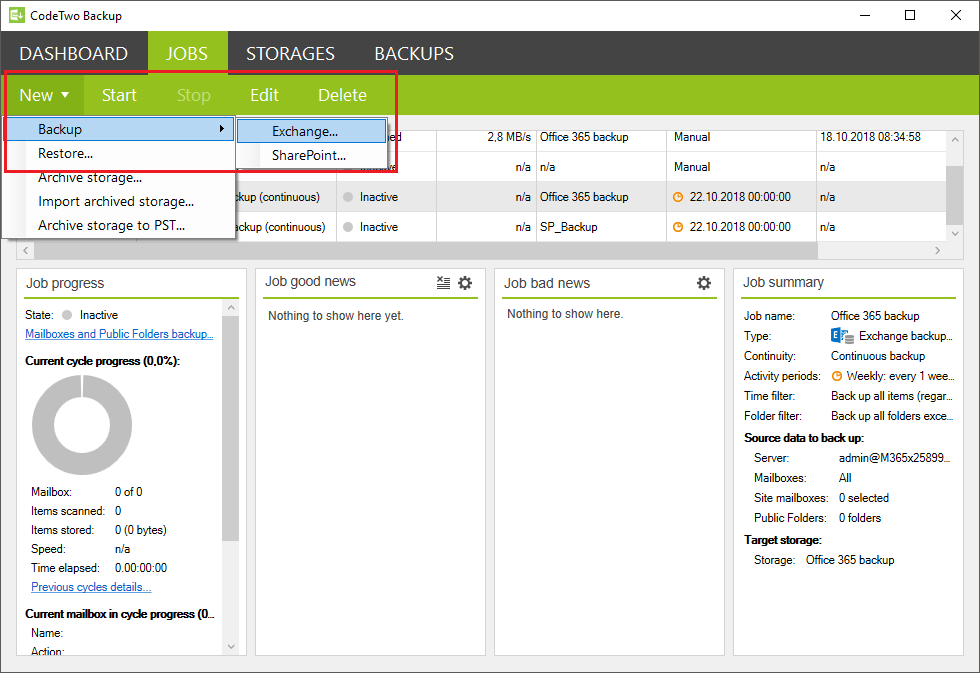
Fig. 1. Creating a new Exchange backup job.
The next step is to select the Job continuity. In this example, we decided to choose a continuous backup (Fig. 2.).
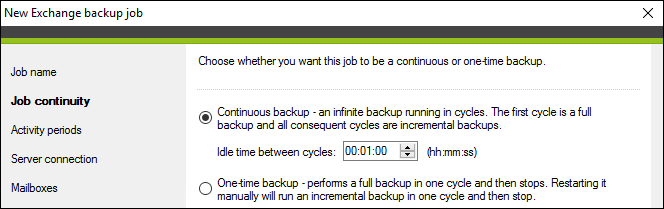
Fig. 2. Selecting the default Continuous backup model.
After choosing a continuous backup job, you can define the idle time between consecutive job cycles. In our case, we set the idle time of 1 minute.
In the step that follows (Activity periods), you can enable and define an activity period for your job. In this example, we scheduled the job to run during weekends (whole Saturdays and Sundays) and start on a specific date (Fig. 3.).
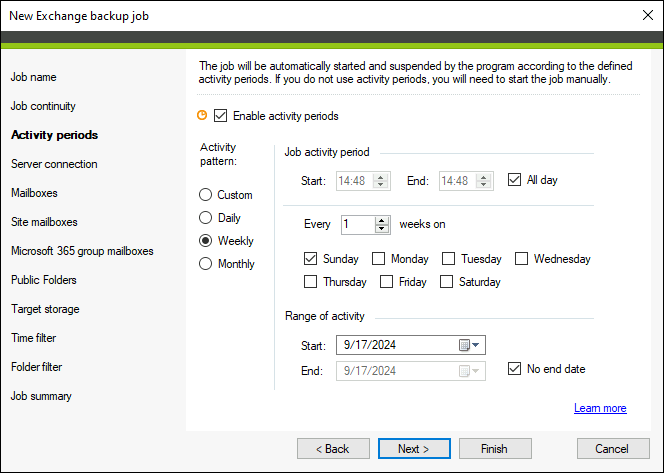
Fig. 3. Choosing the job's activity periods.
Now it is time to configure the connection to Microsoft 365. In the Server connection step, click Manage. It will open the server connection management window (Fig. 4.).
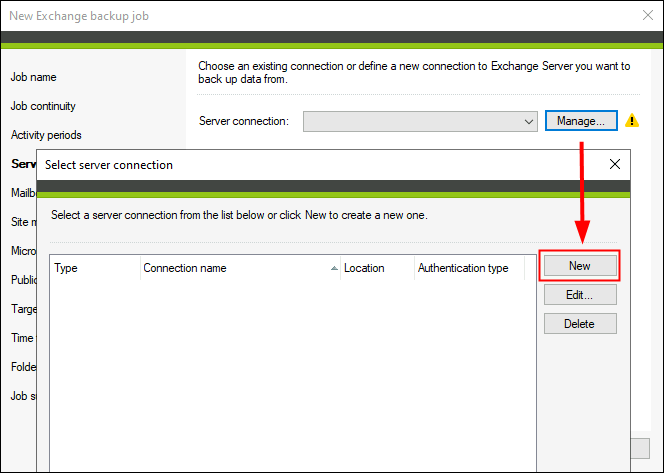
Fig. 4. Opening the server connection management window.
Click New to open the Exchange connection wizard. In the first step, choose the location of your Exchange server (Fig. 5.). In our case, it is Microsoft 365 (Exchange Online).
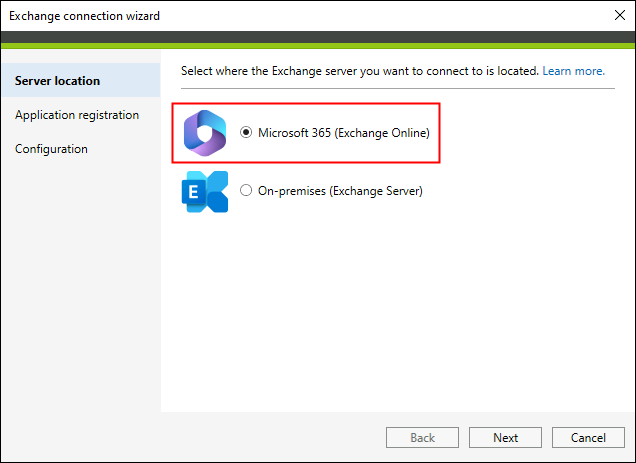
Fig. 5. Configuring a connection to an Exchange server.
Complete the remaining steps of the connection wizard (for more information on how to configure a connection to Microsoft 365, refer to this article). After the connection is verified, close the connection wizard, select your new connection, and click OK.
In the next step (Mailboxes), you can either make a list of mailboxes which should be backed up or decide to back up all your mailboxes (you can optionally exclude some of them). Click Add and, using the mailbox picker, select source mailboxes that will be included or excluded from the backup (Fig. 6.). Use the Include archive mailboxes in the backup checkbox if you want to the program to back up users' archived mailboxes.
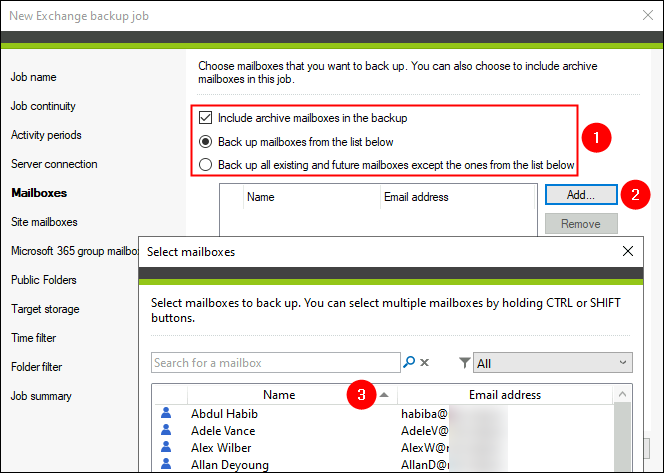
Fig. 6. Selecting mailboxes for a backup process.
The Public Folders step allows you to choose if you want to back up public folders, and to select which ones (Fig. 7.).
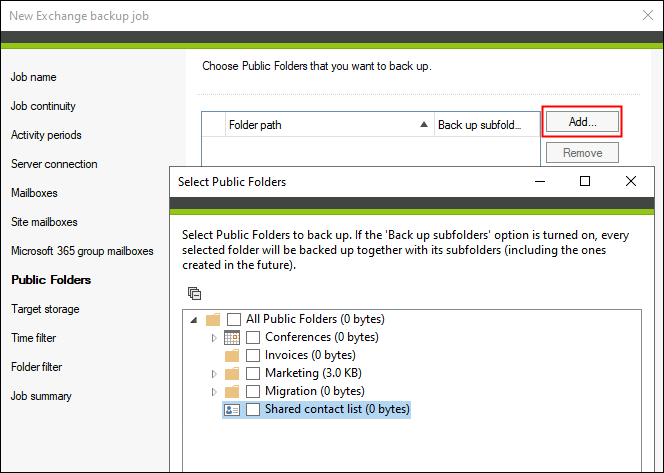
Fig. 7. Selecting public folders to be included in the backup process.
Once the server connection is configured, and you chose Exchange data to be backed up, proceed to the Target storage step and define a storage location where your backup will be saved. To create a storage, click New. A storage creation wizard will open (Fig. 8.). First, click Browse and select an appropriate directory where the backed up items should be located. You may also define the Display name of the storage.
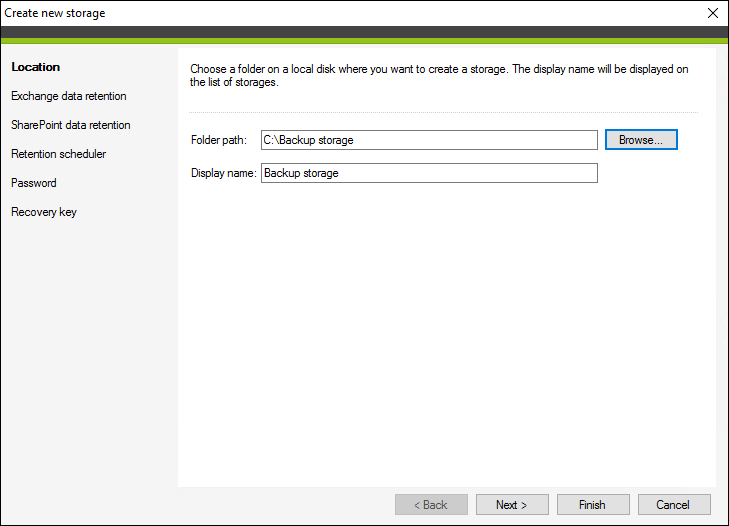
Fig. 8. Creating a new backup storage.
The next step of the wizard allows you to apply a retention policy to the Exchange data that will be backed up to the newly created storage (Fig. 9.).This feature enables you to remove all versions of items which are older than a specified number of days. The items are permanently deleted only from the storage, leaving your Microsoft 365 environment intact.
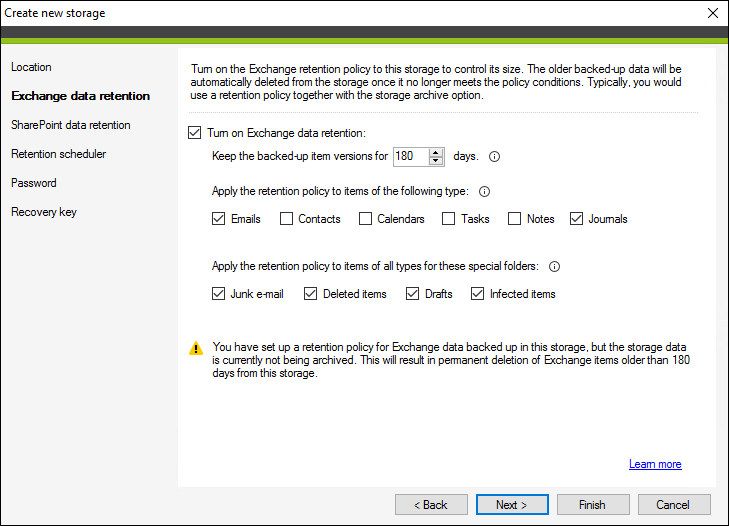
Fig. 9. Configuring a storage retention policy for Exchange data.
Warning
The retention policy will remove items older than a desired number of days. After you finish creating the storage, you will be asked to create an archive job. This job will move your older storage data to a different location before it is deleted.
You can also protect the content of a storage using a password (Fig. 10.). For more information, read this article. In the last step of the storage wizard (Fig. 11.) you will be able to save a Recovery key, which can be used to recover data from a storage if the configuration files of this storage get corrupted or if you forget the storage password.
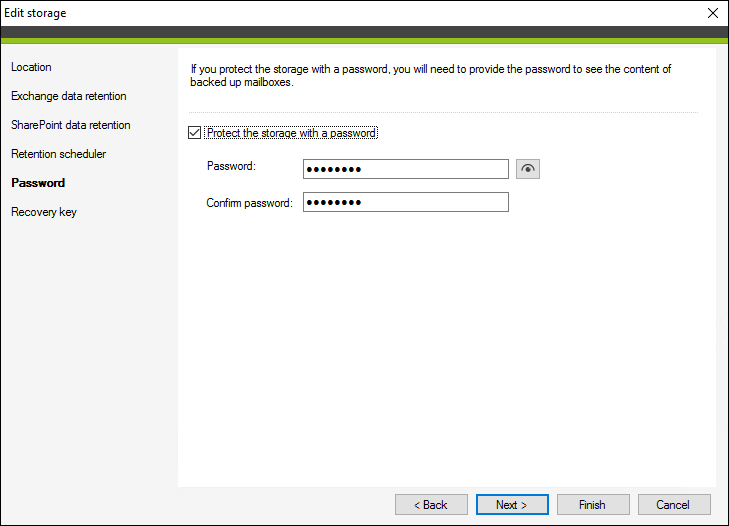
Fig. 10. The password protection feature.
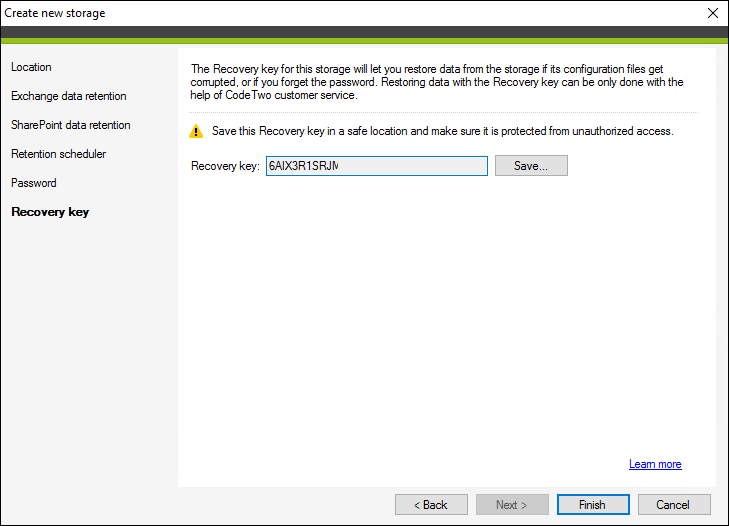
Fig. 11. A storage Recovery key.
After you complete the storage configuration wizard, proceed to the Time filter step of your backup job wizard. Here, you can decide which source items will be backed up, according to their last modification date. In this example, we chose to back up only those items that were modified no later than seven days from the time the backup job was started (Fig. 12.). You may provide the desired amount of time in days, weeks, months or years.
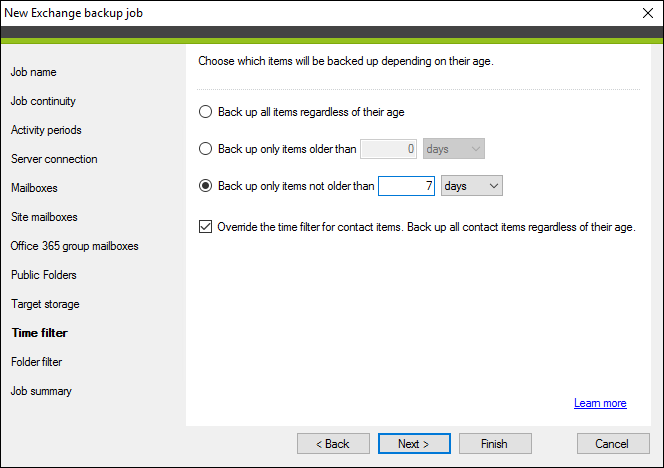
Fig. 12. Setting up a time filter.
Info
Calculation of the age of appointments or similar items (including a start/end date or another time property) is based on the time when these items occur.
For example: today is September 1, 2015, and you decided to back up only items from the last 6 months. In March of 2014, someone created an appointment which starts on April 1, 2015, and sent an email. In such a case, the appointment will be included in your backup, as it occurs within the defined period of time. However, the email sent in March 2014 does not contain any start or end date so it will be excluded.
The Folder filter step allows you to define which special folders will be excluded from the backup process, if necessary (Fig. 13.). Make your choice and click Next to proceed.
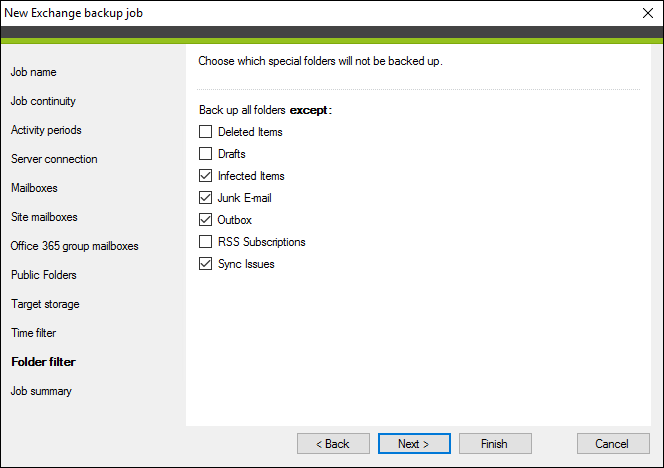
Fig. 13. Choosing special folders to be excluded from a backup.
Finally, verify all your settings in the Job summary step. This step lists the whole configuration of the backup job. If everything is correct, click Finish to activate your first backup.
Restoring a backup
To create a new Exchange restore job, you first need to decide what data to restore: a full mailbox with folders and all items included, a folder with all items included or individual versions of items from a specific point in time. To choose a content to be restored, go to the Backups tab in the Administration Panel and browse through your storages to find items you want to restore (Fig. 14.).
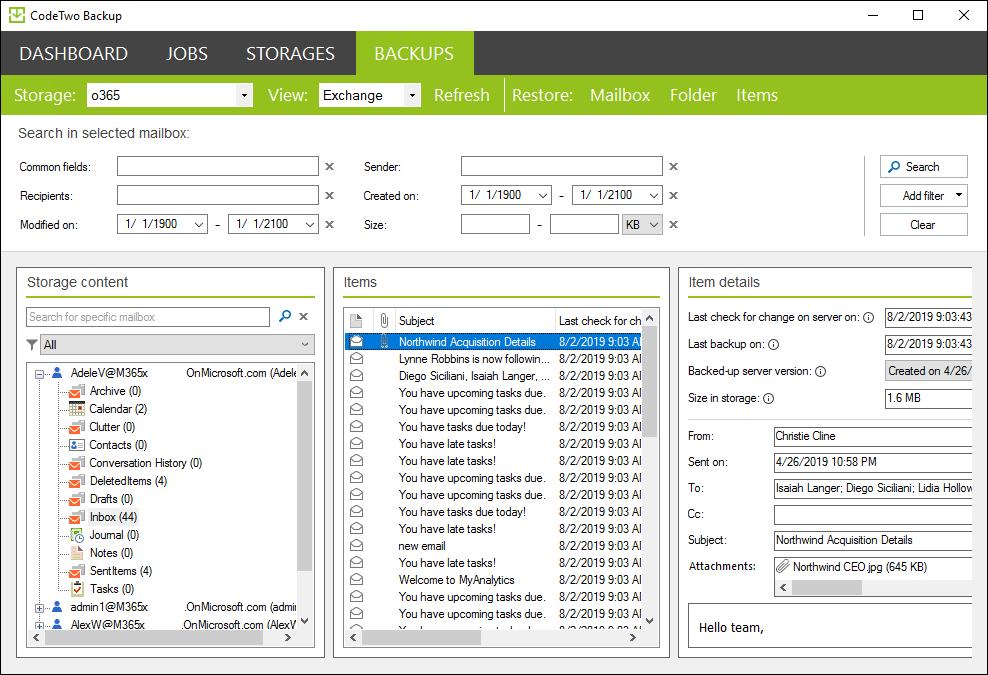
Fig. 14. Browsing through backed up data in search of items.
You can use two modules to perform your search. In the search box on the left pane, you may type a phrase to obtain a list of matching mailboxes. Once you find the desired mailbox, you can use the search form in the upper part of the Backups tab (Fig. 15.) to find particular items in this mailbox. In our example, we searched for items created on the 6th of June, which contain the phrase myanalitics in the subject (Fig. 15.).
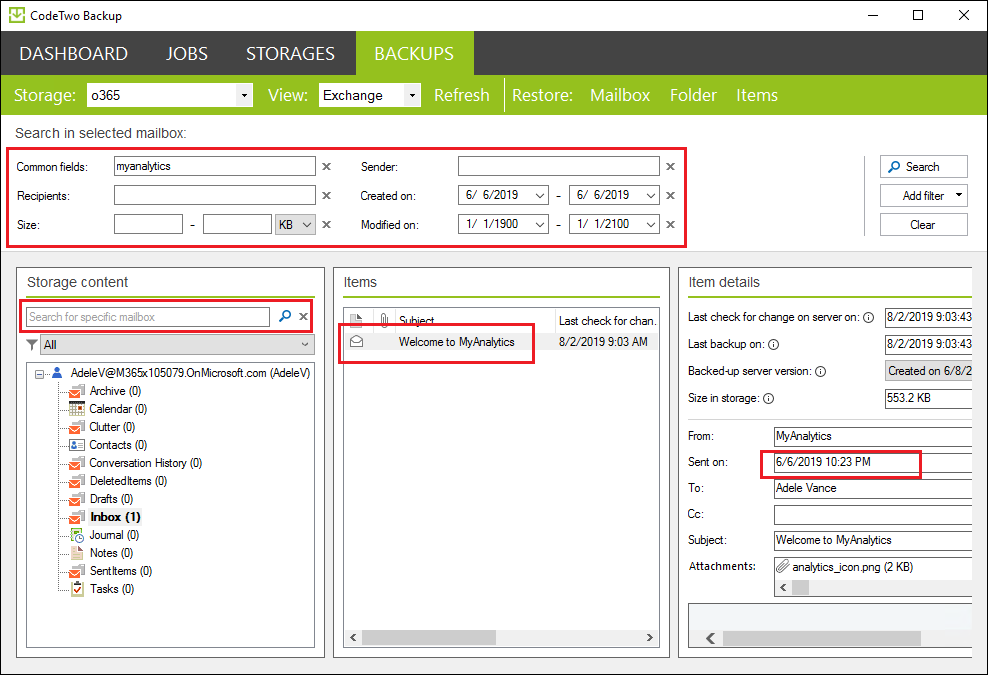
Fig. 15. Item search result.
Important
Please keep in mind that the search box on the left side (see Fig. 15.) works independently of the search filters in the upper part of the Backups tab. The search box is designed to help you find a particular mailbox. The upper search fields - item filters - can be used to search for specific items within a selected mailbox. Searching via the search box on the left automatically resets the state of item filters and vice versa.
Once you find the items to restore, highlight them and either right-click the items and select Restore selected items from the shortcut menu, or click the Restore items button on the menu bar of the Backups tab (Fig. 16.). This will open the Exchange restore job wizard (Fig. 17.).
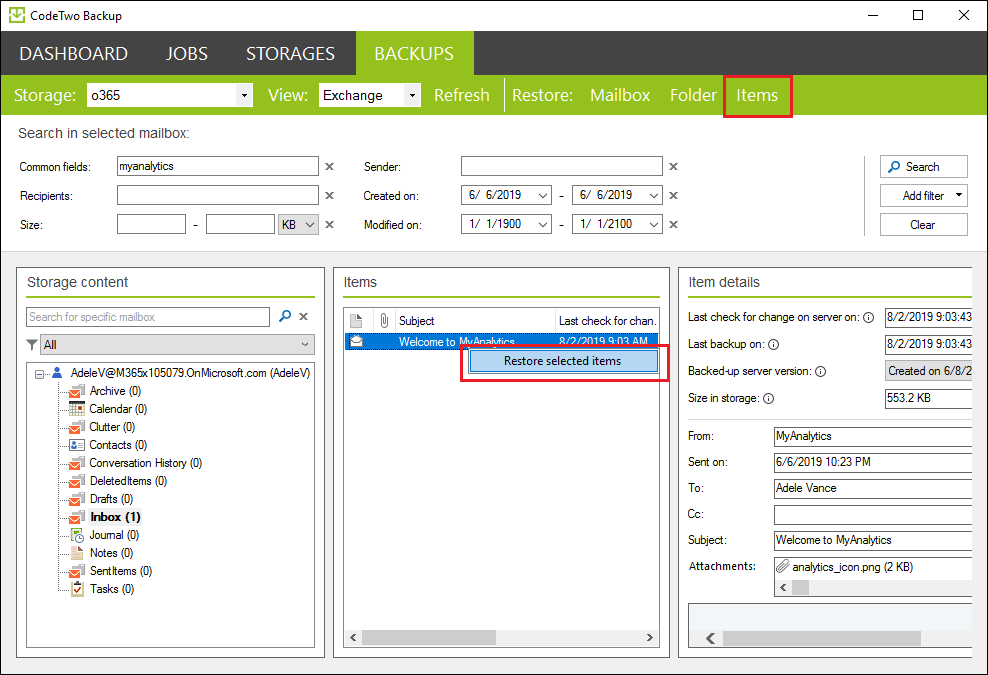
Fig. 16. Opening the Exchange restore job wizard.
In the first step of the wizard (Job name), enter the name of your restore job (Fig. 17.).
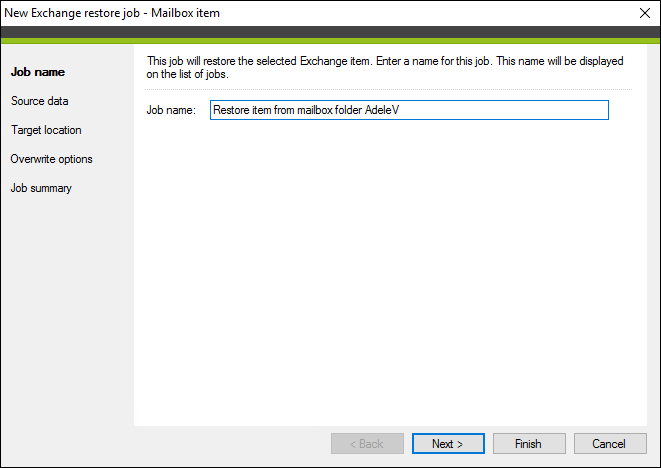
Fig. 17. The Exchange restore job wizard.
Next, go to the Source data step, where you can select a specific version of the Exchange data you want to restore (Fig. 18.).
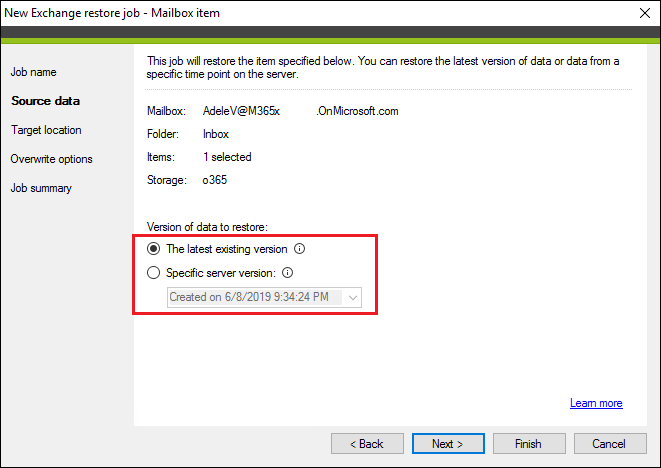
Fig. 18. Selecting a specific version of Exchange data to be restored.
In the next step (Target location), you can select an existing server connection via the drop-down menu or create a new one. Next, define the target location where your items will be restored. In this example, we chose to restore items to a different folder on the same (original) mailbox (Fig. 19.).
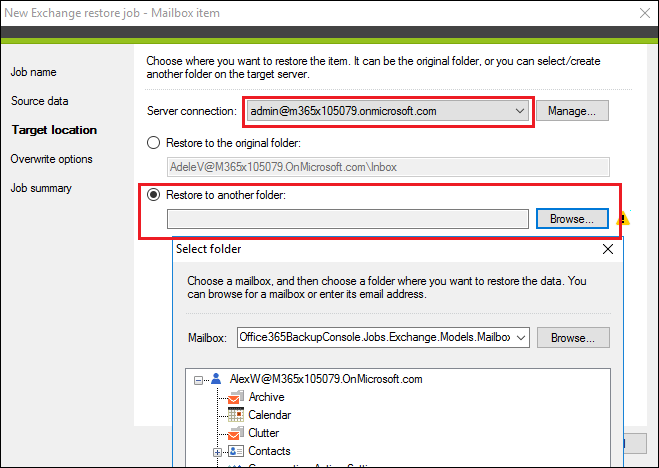
Fig. 19. Choosing another folder location to restore items.
In the Overwrite options step, define what to do with items that already exist in the target location. In this example, we chose not to restore items if they already exist on the target server (Fig. 20.).
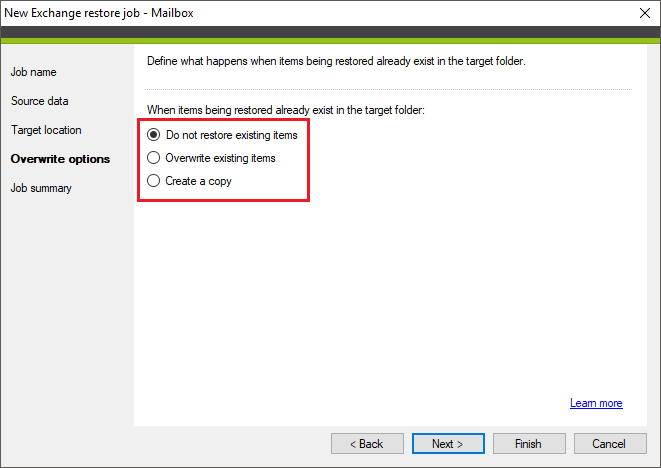
Fig. 20. Defining the items' restore options.
Important
The restore options may differ depending on your selection. Let us assume you selected a folder (such as Calendar) and chose the Restore the latest version option. If the very latest version of this folder is present as deleted, the program will not restore it at all. However, if you need to restore the last existing version, then simply select particular items from the desired folder and hit the Restore items button. On the Restore options page, you will be able to set the program to restore the latest existing version, despite the latest version of an item is present as deleted.
Finally, verify your settings in the Job summary step. If everything is correct, click Finish to save your restore job. A notification window will appear (Fig. 21.), which will allow you to start the job manually. You can also launch the restore job from the Jobs tab, as shown in Fig. 22.
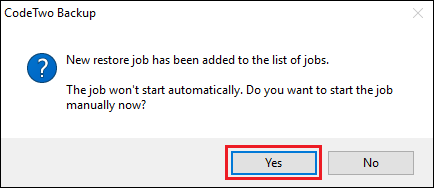
Fig. 21. Starting a new restore job from the notification window.
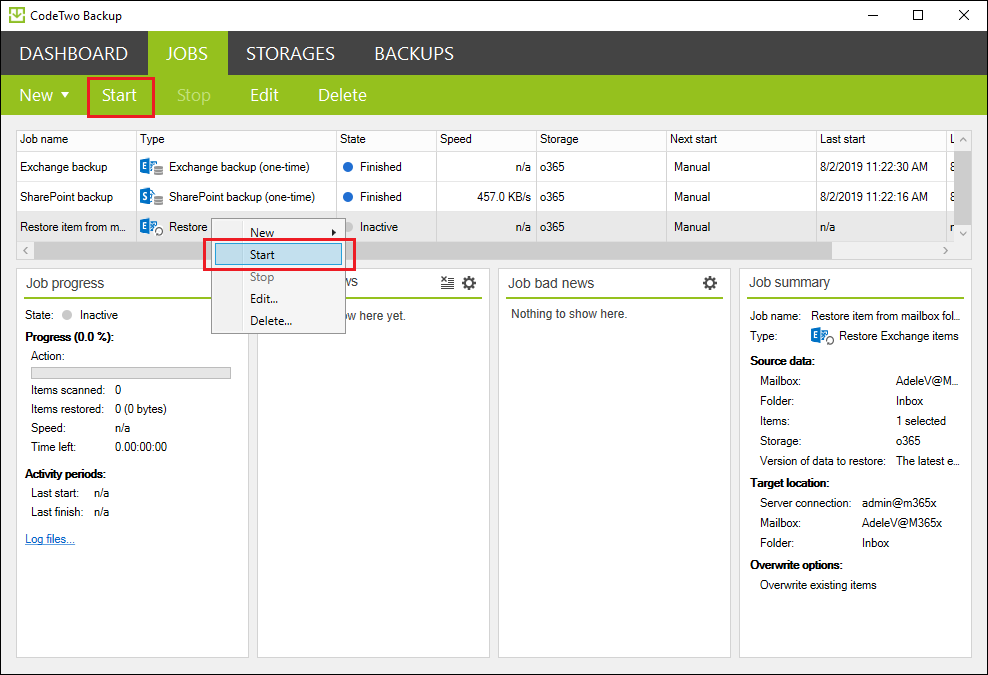
Fig. 22. Starting a restore job on the Jobs tab.
See also
Follow the links below to learn about the configuration of all features available in the program: