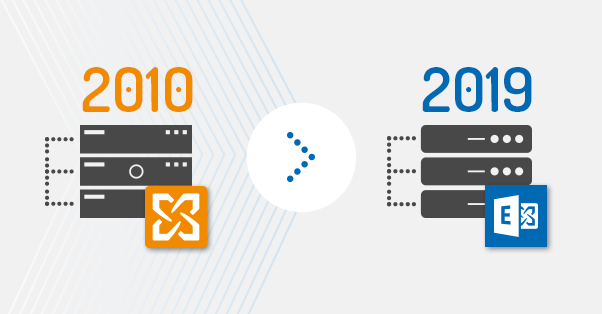
Why is it time to leave Exchange 2010?
The main reason is that you will not be able to maintain the server up to date. Once Exchange 2010 reaches the end of its lifecycle, it will no longer get security updates, bug fixes and technical support from Microsoft team. This should sound to you like a good reason to start planning your migration to a newer version of Exchange, preferably to Exchange 2019, which is currently the youngest Exchange edition available.
Why Exchange 2019?
Although Microsoft continues its cloud-only strategy, there are still companies which prefer or need to stay on-premises. The reasons for that are mainly security regulations obligating companies to store business data locally. So if you plan to migrate to a newer version of Exchange, it is worth considering moving to the newest (the youngest) available. Exchange 2019 is at the very beginning of its lifecycle, which is vital from the support and maintenance perspective. And as announced on Microsoft Ignite 2018, this is claimed to be the most reliable Exchange version ever.
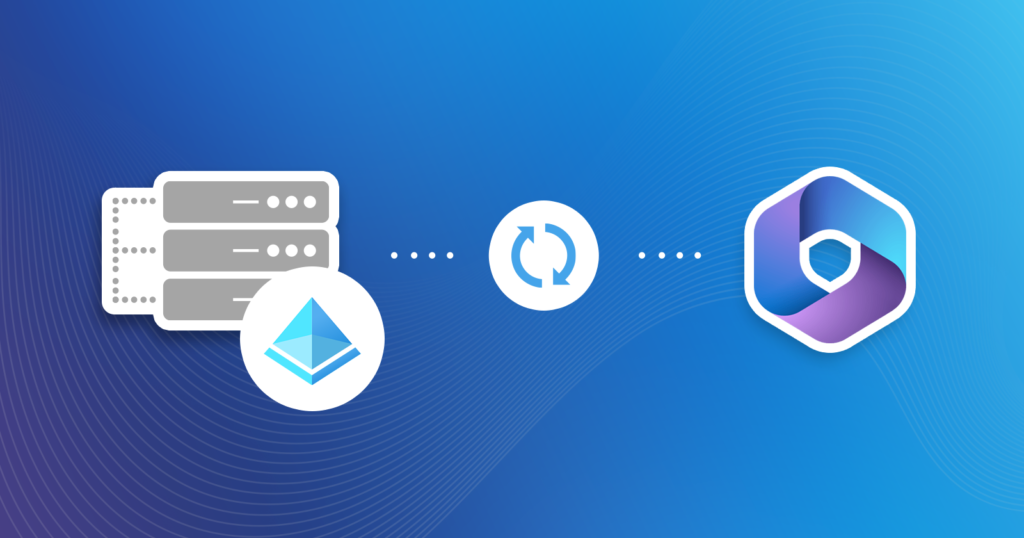
Having this in mind, I will show you how to perform the migration to Exchange 2019 using CodeTwo Exchange Migration.
Note: If you look for a way to migrate mailboxes to Microsoft 365 (Office 365), see my other article on migration from Exchange 2010 to Office 365.
Why choose CodeTwo Exchange Migration over native migration path?
Well, you can go with native options when migrating from Exchange 2010 to Exchange 2019. This will require a double-hop migration (Exchange 2010 and Exchange 2019 can’t coexist in the same forest so you need to move to Exchange 2016 first), some time and scripting knowledge. Though it consumes resources like e.g. above-mentioned time, it costs no money. However, as I want to show you the way for fast and painless migration, I will focus on using a third party tool here. Except for simplicity and speed factors, you may want to go with CodeTwo Exchange Migration also for other reasons like:
- Direct migration to Exchange 2019 (no double-hop);
- Option for planning migration ahead, and be sure that your migration tasks will automatically start and stop once proper time comes;
- Zero downtime during mailbox migration;
- Automatic creation of users’ accounts and mailboxes on the target server;
- Auto matching source and target mailboxes.
And the list does not end here. If you want to see more benefits, follow this link.
How to migrate to Exchange 2019 using CodeTwo migration tool?
It may sound a bit “salesy”, but the fact is that the migration with CodeTwo Exchange Migration will save you a lot of time and effort. Below you can find a brief overview of how to set up the software and a migration job.
Note: You can trial the software at no cost for 30 days and migrate up to 10 items per folder. Click here to download the trial version of CodeTwo Exchange Migration. There is also an option to get a temporary license key allowing you to migrate all items from a limited number of mailboxes. To obtain the special key, contact CodeTwo Customer Service.
As I mentioned before, Exchange 2010 and 2019 cannot coexist in one forest. There is no workaround for this infrastructural limitation. Therefore, the guide below shows how to perform a cross-forest migration.
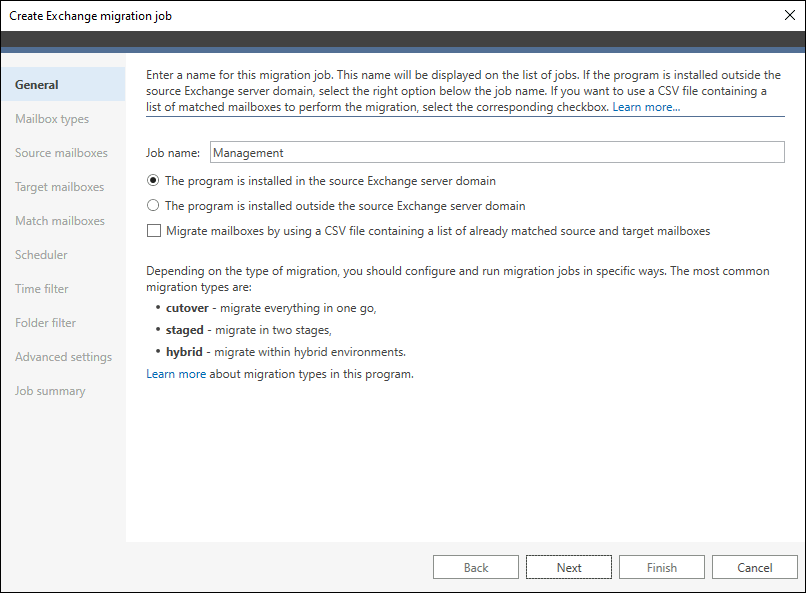
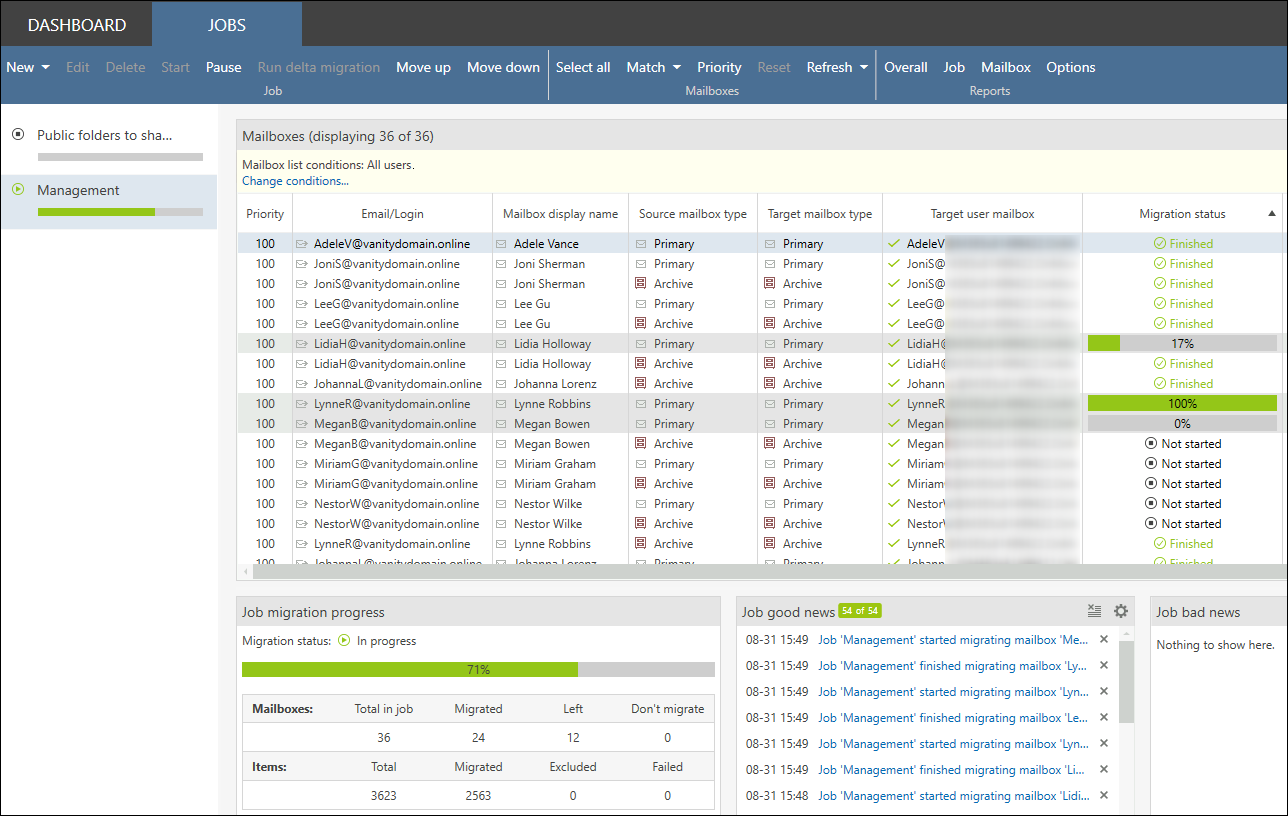
- In the Administration Panel of the program in the Jobs tab, click the New button and then Migrate from Exchange Server.

- Name your migration job.

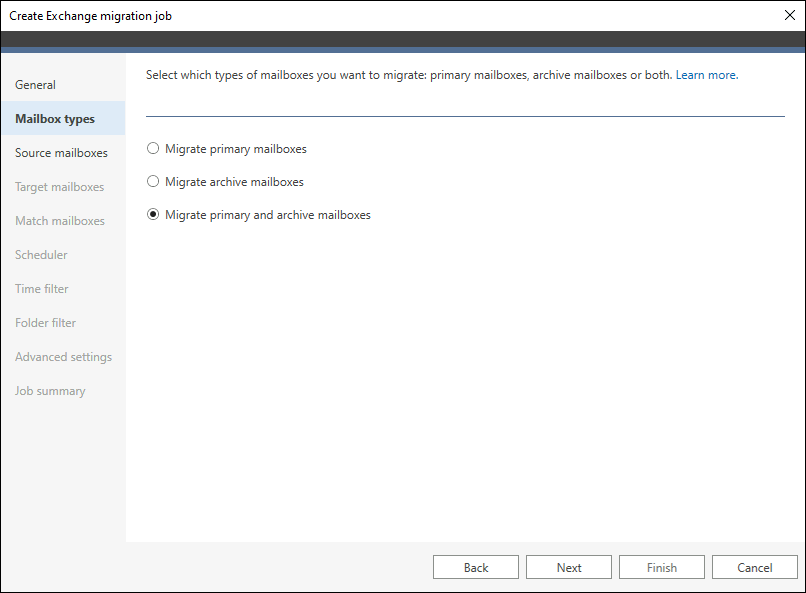
- Specify type(s) of mailboxes to migrate. Note that to be able to migrate archive mailboxes, you need to first enable them in your target server. Learn more
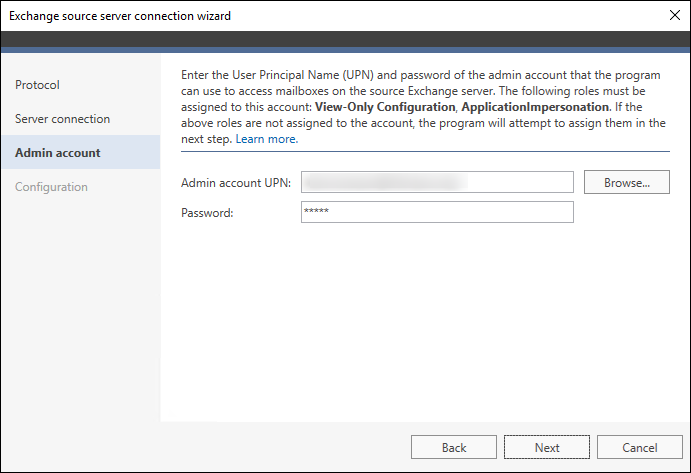
- Connect the program to the source server via the easy-to-follow connection wizard.

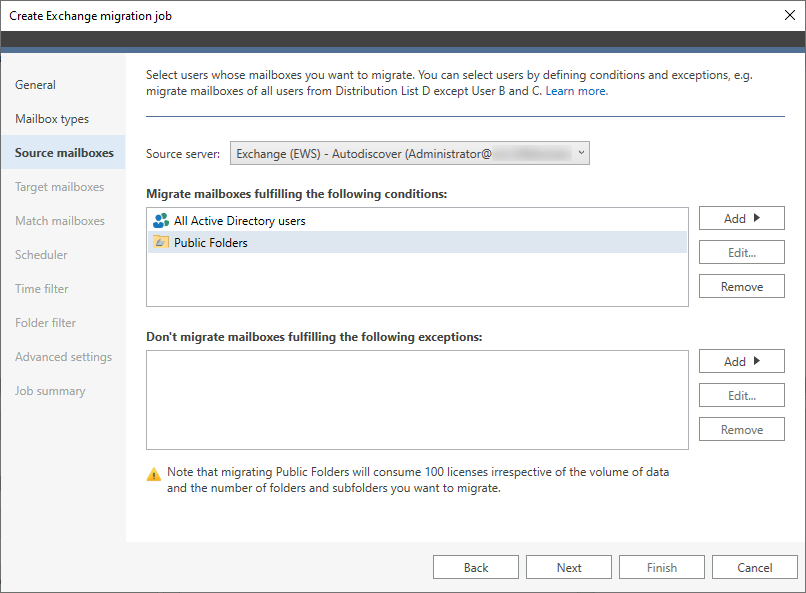
- Once the program connects to the source server, select mailboxes for migration.
- Then, set up the target server connection by following the wizard.

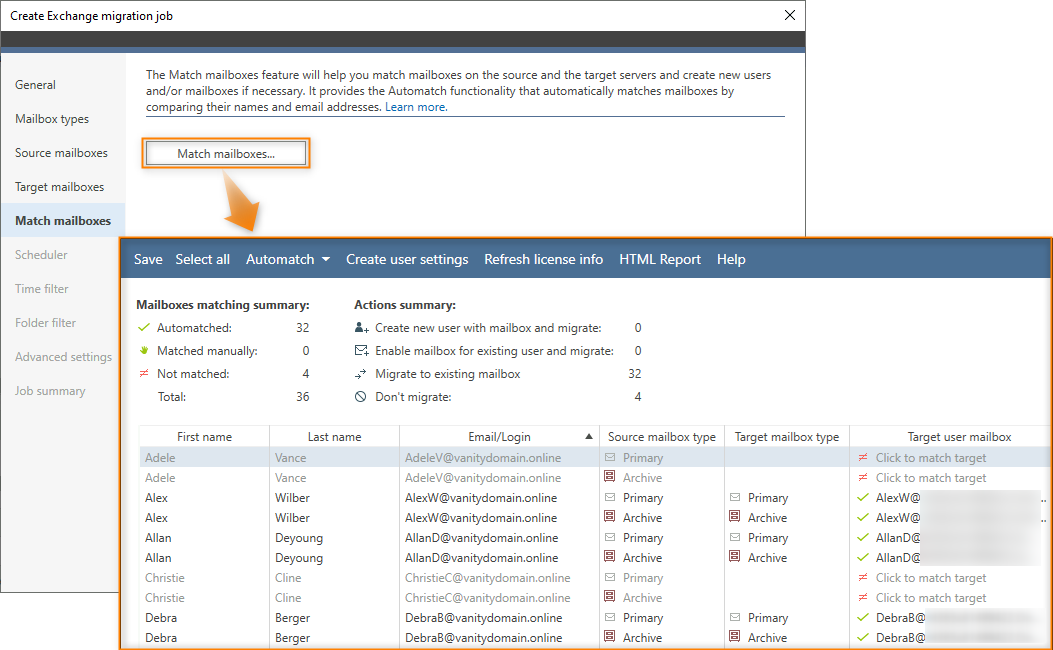
- Match source and target mailboxes. You can do it manually or let the program match mailboxes automatically.

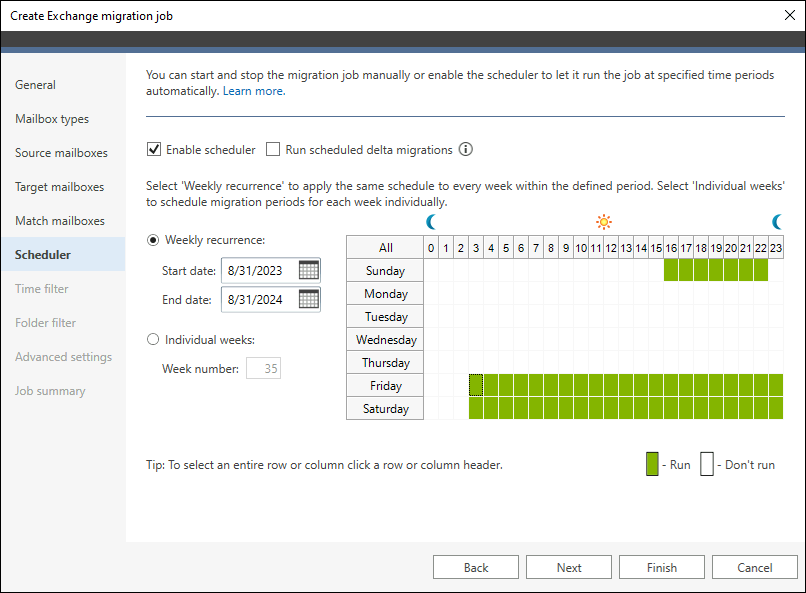
- If you want to run the migration job at a different time e.g. on weekend, you can enable scheduler to activate or stop the job automatically.
- Choose which folders should be migrated.
- Run the migration job and watch how the magic happens.


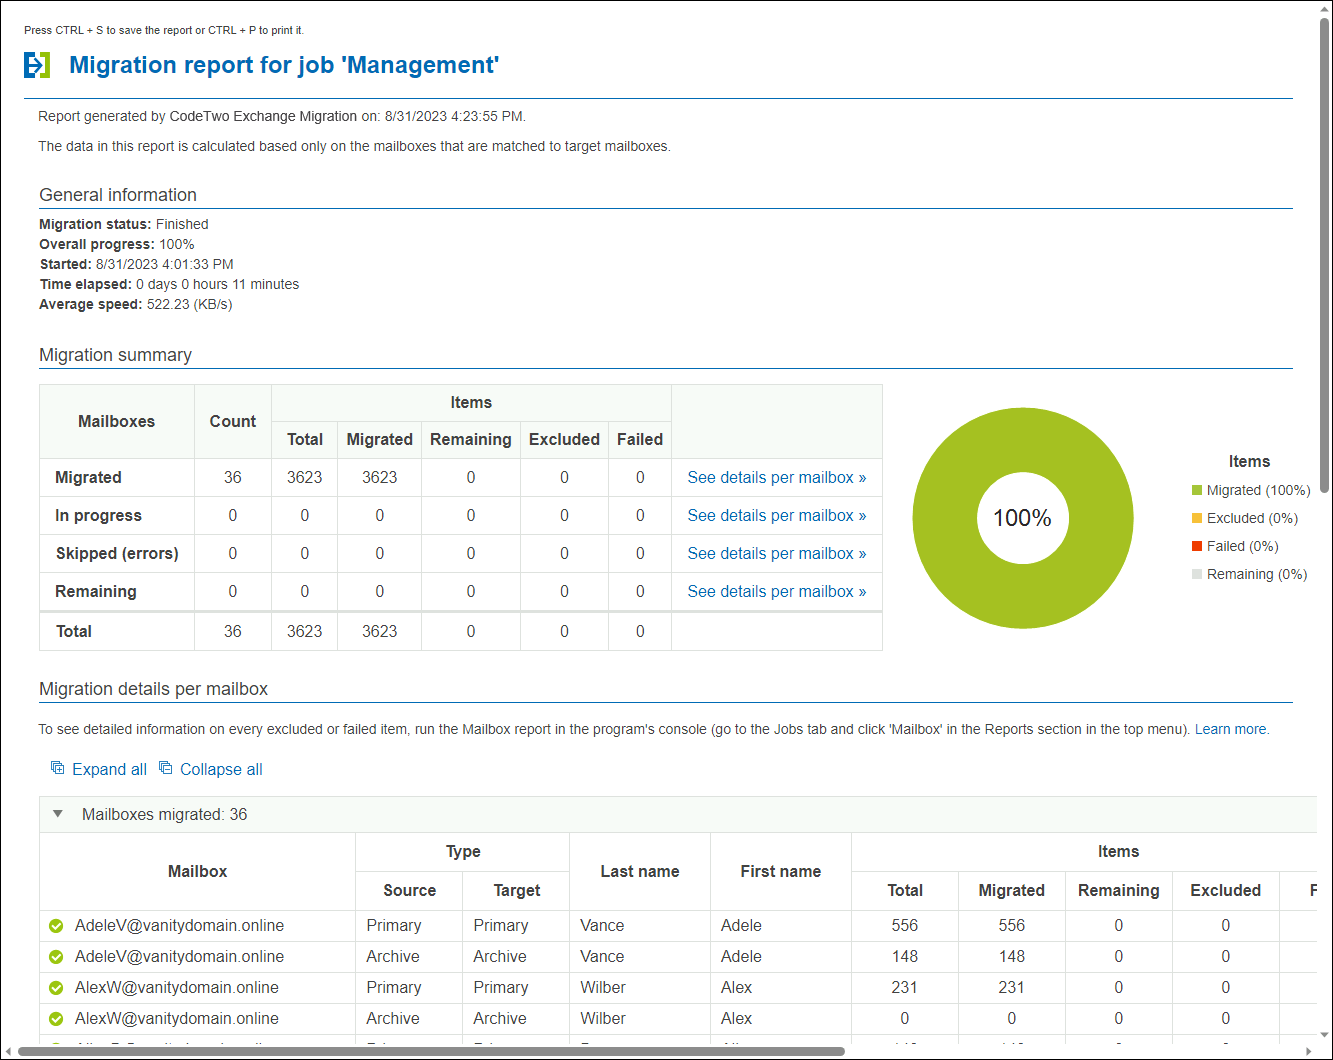
Once the migration process is finished, you can generate a report which summarizes the migration process. There are available overall, job and mailbox reports. Here is an example of the job report:
For a full Exchange 2010 to 2019 migration step-by-step guide, visit this user’s manual.
See also:

Recommended articles
Two questions.
If we don’t do cross-Forest, that means two migrations. Does that mean double licensing for your tool as well?
Furthermore, does your tool migrate send/receive connectirs, certificates etc? or do we do that manually?
CodeTwo Exchange Migration is dedicated mainly for cross-tenant and cross-domain migrations. In the scenario you described, the software will also work, but it will require you to perform some extra steps: Understanding the program – Migration.
And this article sums up what can be migrated using the tool: What type of data can be migrated.
It possible to use this tool and migrate from 2007 to exchange 2016/2019?
Sure! It’s not a problem with CodeTwo Exchange Migration.
Checking
https://support.microsoft.com/en-gb/lifecycle/search?alpha=Exchange%20Server
Both Exchange 2016 and 2019 reach EOL on 14/10/2025
Given you can migrate 2010=>2016 without additional tool or creation of another forest, and both versions of Exchange reach EOL on the same day. I cant see the point of going to 2019
While the end of extended support is the same, the end of mainstream support reaches its end in 2020 for Exchange 2016 and in 2024 for Exchange 2019. Apart from this, there
are some additional features in Exchange 2019. (What’s new in Exchange 2019?)
Despite all of this, it is understandable that some people prefer to go to Exchange 2016, instead, that’s why I’ve published a guide for this move as well:
How to migrate Exchange 2010 to 2016? A step-by-step guide
I HATE, I say again, HATE that you didn’t mention anything about the necessary cross-domain migration to do this. This article is extremely deceiving. This is a very complicated process no matter how you look at it.
Hello Bob,
Thank you for your input, I didn’t realize the information is not clear. I have updated the article to highlight the need for cross-forest migration, since Exchange 2010 and Exchange 2019 cannot coexistin one forest. I don’t think that any third-party tool will allow to bypass this limitation.