How to enable archive mailboxes in Exchange
Depending on your environment, click an appropriate link below:
Exchange Online
Important
Before you proceed, make sure that the user or users for whom you want to enable the archive mailbox (In-Place Archive) is assigned an appropriate license that allows you to use this feature. Learn more
Choose which method you want to use to enable archive mailboxes in Exchange Online:
- Exchange admin center (for a single mailbox only)
- Windows PowerShell
Enable archive mailboxes in Exchange Online by using the Exchange admin center
The Exchange admin center (EAC) lets you enable the archive mailbox only individually - for one user at a time. For bulk actions, refer to the section on using Windows PowerShell.
- Sign in to the Exchange admin center.
- Go to Recipients > Mailboxes to display the list of mailboxes.
- Click a user for whom you want to enable the archive mailbox. In the pane that opens, select the Others tab and click Manage mailbox archive (Fig. 1.).
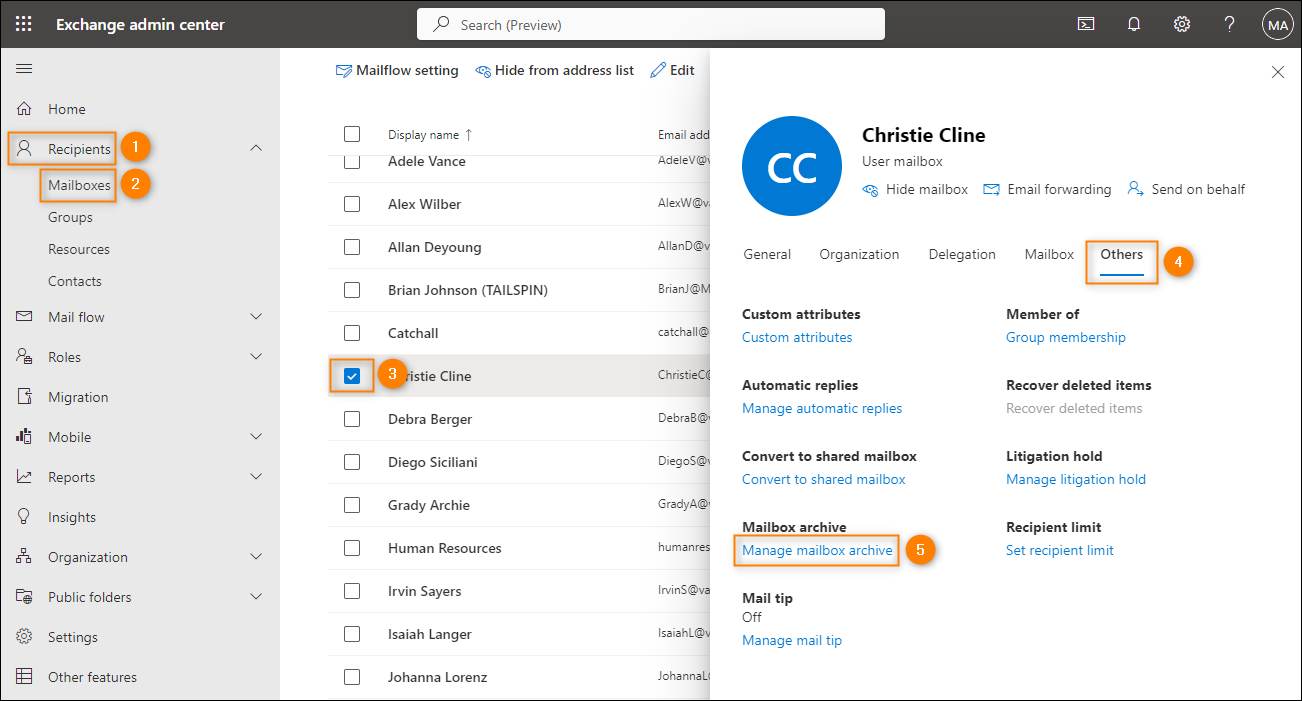
Fig. 1. Accessing archive mailbox settings in the Exchange admin center.
- Next, set the toggle switch to Enabled and click Save (Fig. 2.).
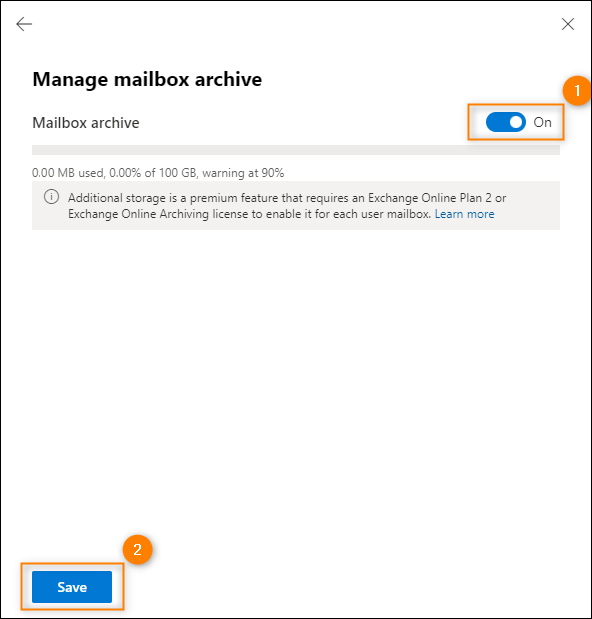
Fig. 2. Enabling the archive mailbox for a user in the EAC.
It usually takes a few moments to create the archive mailbox in the EAC.
Enable archive mailboxes in Exchange Online by using Windows PowerShell
- Connect to Exchange Online, as explained here.
- Depending on how many users you want to enable the archive mailbox for, run one of the following scripts:
- For a single user:
Enable-Mailbox -Identity <user mailbox> -ArchiveRemember to replace <user mailbox> with the user's UPN.
- For all users who don't have the archive mailbox enabled:
Get-Mailbox -Filter {ArchiveStatus -Eq "None" -AND RecipientTypeDetails -Eq "UserMailbox"} | Enable-Mailbox -ArchiveInfo
With this script, you will enable the archive mailbox for all user mailboxes. To enable the archive mailbox for all shared mailboxes, you need to first assign a license to them and next re-run the command, replacing UserMailbox with SharedMailbox.
- For selected users:
$users=Import-CSV <filepath>
foreach($user in $users){Enable-Mailbox –Identity $user.UPN -Archive}
Remember to run the lines of the code one by one. Replace <filepath> with a path to a CSV file that contains exported UPNs of the users for whom you want to enable the archive mailbox. In our example, the header of the column (in the CSV file) that lists UPNs is UPN. If your column's header is different, update the PowerShell command above accordingly.
- For a single user:
- Disconnect from Exchange Online by running the following cmdlet:
Disconnect-ExchangeOnline
Exchange Server
Important
Before you proceed, make sure that each user for whom you want to enable the archive mailbox (In-Place Archive) is assigned the Enterprise client access (CAL) license that allows you to use this feature. Learn more
Choose which method you want to use to enable archive mailboxes in on-premises Exchange:
Enable archive mailboxes in Exchange Server by using the Exchange admin center
- Sign in to your server.
- Open a web browser and sign in at https://localhost/ecp.
- Go to recipients > mailboxes.
- Depending on how many users you want to enable the archive mailbox for, complete one of the procedures below:
- For a single user:
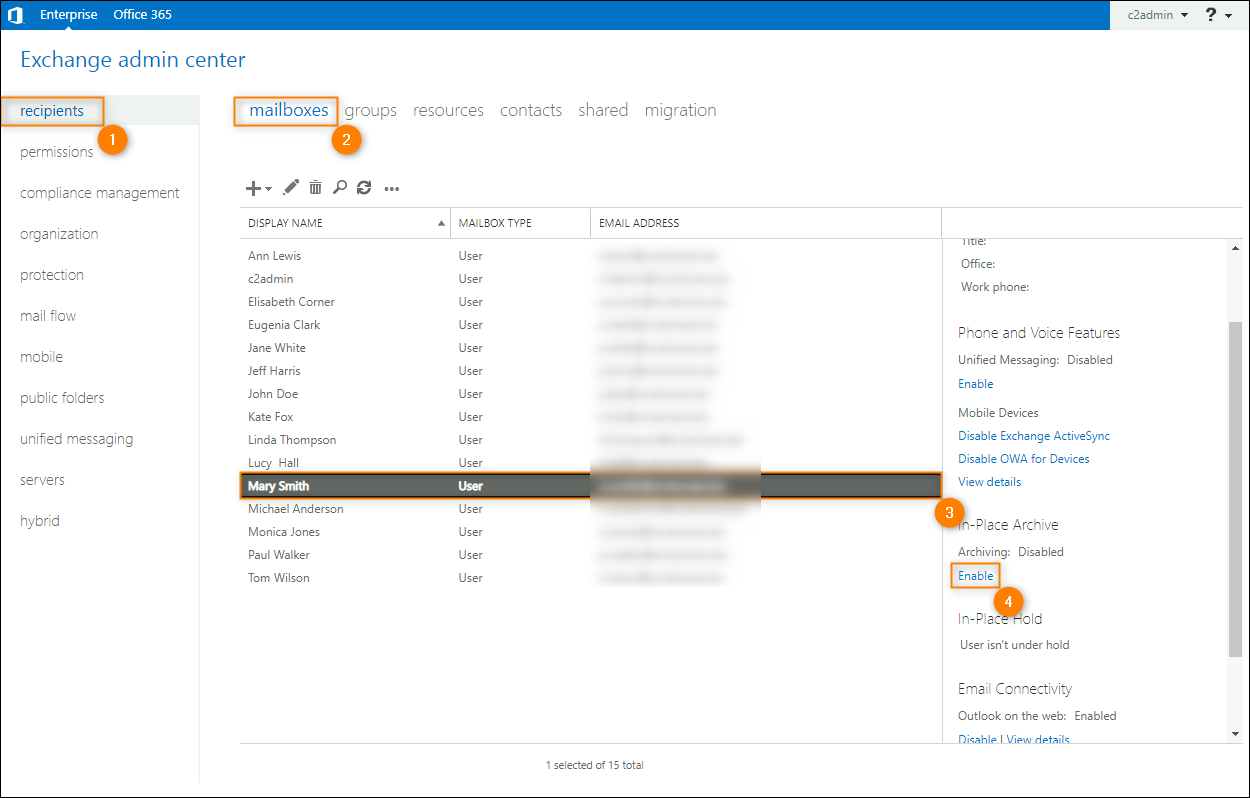
- Select the user (mailbox) on the list.
- In the pane on the right, click Enable under In-Place Archive (Fig. 3.).
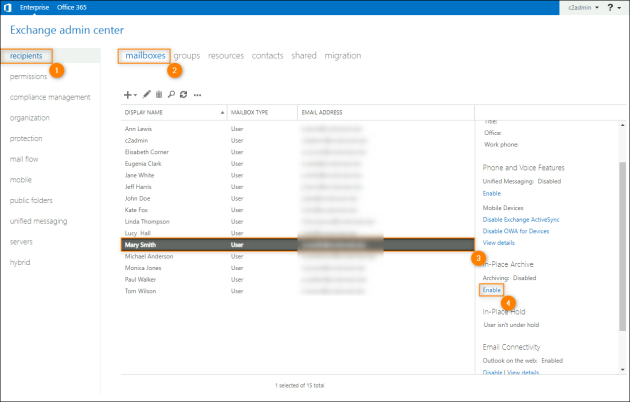
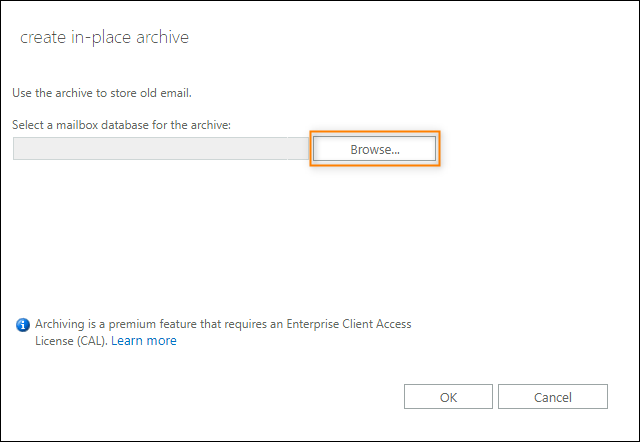
Fig. 3. Accessing the archive mailbox settings for a single user in the Exchange admin center. - (Optional) If you don't want Exchange to automatically choose a database for the archive mailbox, click Browse (Fig. 4.) and choose one of the available server databases on the list.
Important
The archive mailbox's server (database) version cannot be newer than the primary mailbox's server version. Learn more

Fig. 4. Enabling the archive mailbox for a single user in the EAC. - Click OK to enable the archive mailbox.
- For multiple/all users:
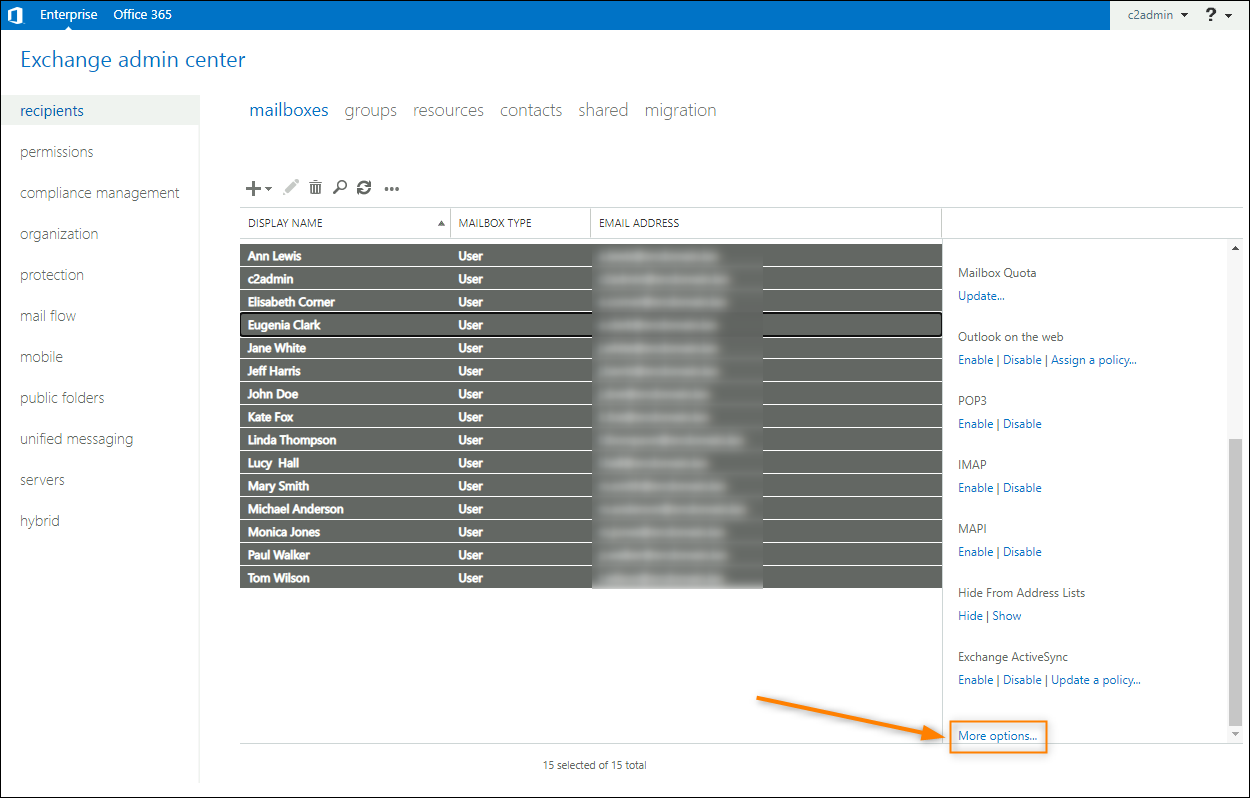
- Select multiple users (mailboxes) by clicking them and using the Ctrl/Shift key or select all users with the Ctrl+A key combination.
- Click More options in the pane on the right (Fig. 5.).

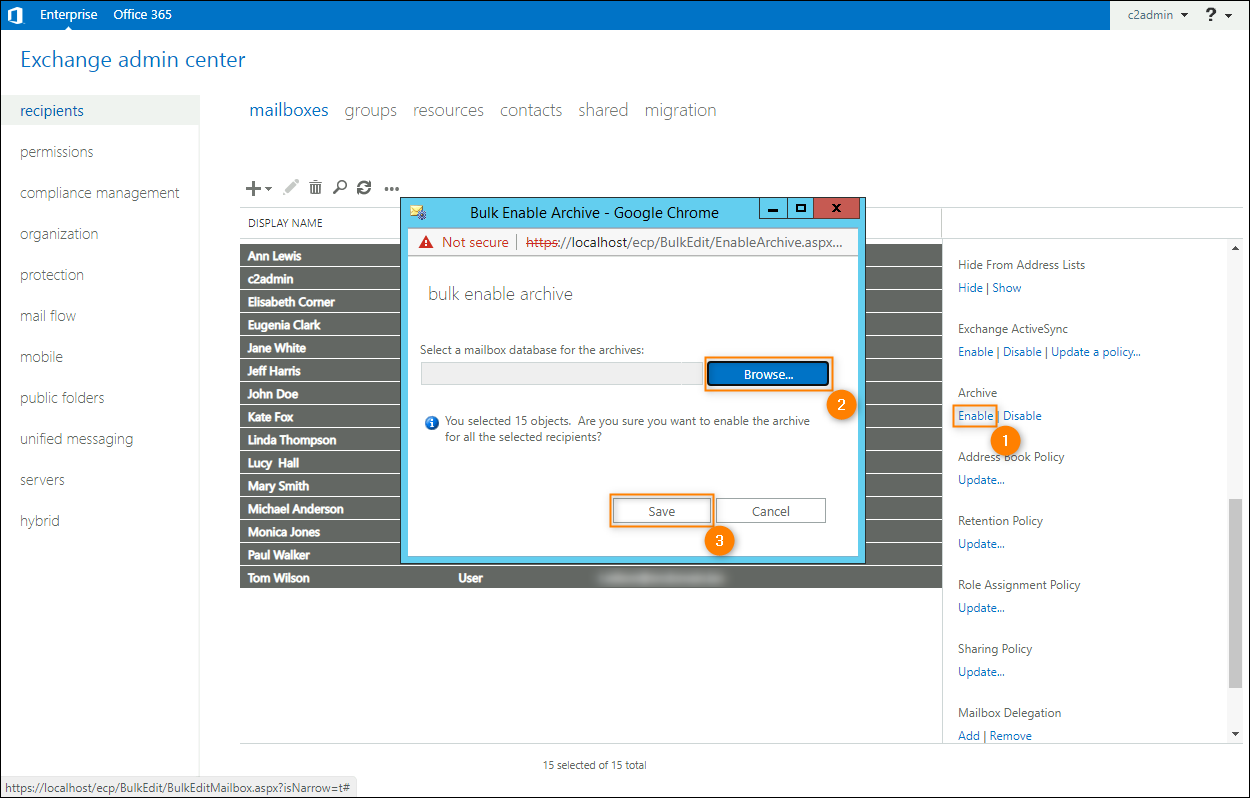
Fig. 5. Accessing additional options for selected mailboxes. - In the pane on the right, click Enable under Archive and repeat steps iii and iv from the section above (Fig. 6.).

Fig. 6. Enabling the archive mailbox for multiple users.
- For a single user:
Enable archive mailboxes in Exchange Server by using the Exchange Management Shell
- Sign in to your server.
- Click the Start menu and open Exchange Management Shell.
- Since you can use the same scripts as for Exchange Online, run one of the scripts from the section above, depending on how many users you want to enable the archive mailbox for.
See also:
How to set up Microsoft 365 archive policy
| Related products: | CodeTwo Exchange Migration, CodeTwo Office 365 Migration |
| Categories: | FAQ, How-To |
| Last modified: | March 7, 2024 |
| Created: | February 27, 2023 |
| ID: | 1027 |


