In this step-by-step guide, you’ll learn how to easily migrate Exchange public folders to a Microsoft 365 (Office 365) shared mailbox using CodeTwo migration software, why this approach is often more practical, and what limitations and upcoming changes (like EWS retirement) you need to be aware of. It also shows how to create a shared mailbox in Microsoft 365 and access it on desktop and mobile devices.
Why migrate public folders to a shared mailbox?
You might wonder why you should even bother. How is this approach better than migrating to public folders in the target environment? Let’s take a closer look at both solutions:
| Feature/Aspect | Public folders | Shared mailboxes |
|---|---|---|
| Primary purpose | Shared data repository with folder hierarchy | Shared email communication and collaboration |
| Structure | Hierarchical (folders and subfolders) | Flat mailbox with folders (no true hierarchy across mailboxes) |
| Access | Outlook desktop – yes Outlook on the web – yes Outlook mobile – limited / not natively supported | Outlook desktop – yes Outlook on the web – yes Outlook mobile – yes |
| Permissions | Folder-level | Mailbox-level + folder-level |
| Licensing | Included in Exchange Online plans | No license required |
| Storage | 100 GB per public folder mailbox, up to 1000 mailboxes | 50 GB without license, up to 100 GB with Exchange Online Plan 2 |
Public folders have long been used to store important data in one place. All or selected employees can access this data from their computers. The problem is that accessing this data on mobile devices typically requires a third-party tool.
Shared mailboxes are one of the most common Exchange public folders alternatives in Microsoft 365. There are two main reasons why many organizations choose to move public folders to a shared mailbox:
- To simplify access – shared mailboxes can be easily accessed on desktop, web, and mobile devices.
- To save money – shared mailboxes do not require separate licenses in Microsoft 365.
Another important factor is future compatibility. Public folder migrations rely on Exchange Web Services (EWS), which Microsoft plans to retire in Exchange Online starting October 2026. As a result, migration scenarios may become limited or no longer possible (as of writing this article, Microsoft has not committed to support Public Folder migrations via Graph API), which makes migrating public folders to shared mailboxes a practical way to future-proof your data. At the same time, Microsoft has not announced plans to retire public folders entirely. Learn more about EWS retirement and its impact on public folder migrations
When NOT to migrate public folders to a shared mailbox?
While shared mailboxes work well in many scenarios, they’re not always the best fit. Consider keeping public folders (or migrating them to public folders in a new target environment) if:
- your public folders exceed shared mailbox limits (50 GB without license),
- you rely heavily on public folder hierarchy,
- you need full public folder functionality in Exchange Online.
Now, let’s move on to the practical steps.
How to create a shared mailbox in Microsoft 365
You can create a shared mailbox in Microsoft 365 in the following ways:
How to create a shared mailbox using the Microsoft 365 admin center
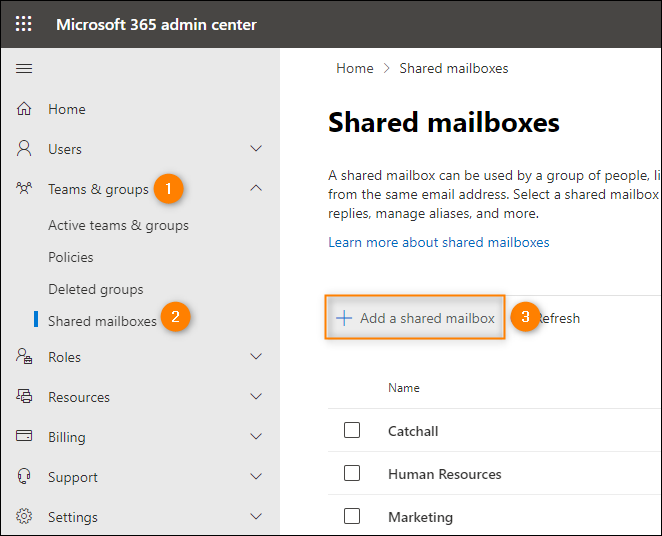
- Sign in to the Microsoft 365 admin center, go to Teams & groups > Shared mailboxes, and click Add a shared mailbox.
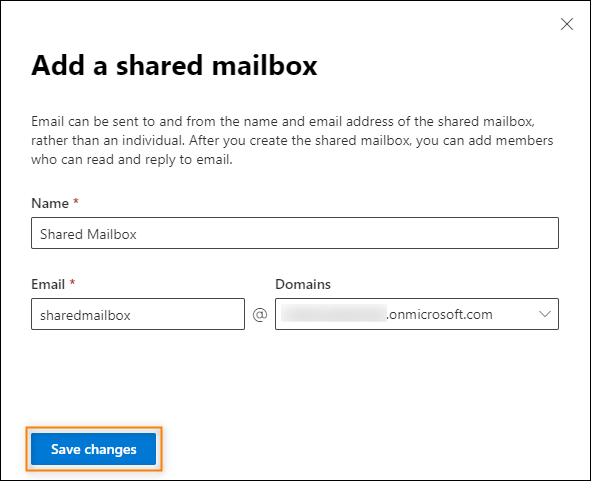
- In the pane that opens, specify the display name and email address of the new shared mailbox. Confirm by clicking Save changes.
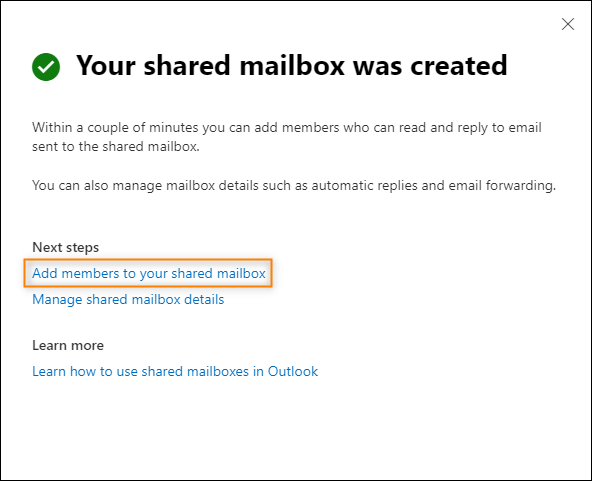
- On the screen confirming shared mailbox creation, click Add members to your shared mailbox to assign users who will have access to the shared mailbox.
- Click Add members and use a standard user picker to select Microsoft 365 users who will have access to the mailbox and the public folder data you are about to migrate.

The shared mailbox is now ready in your Microsoft 365 tenant.
How to create a shared mailbox using the Exchange admin center
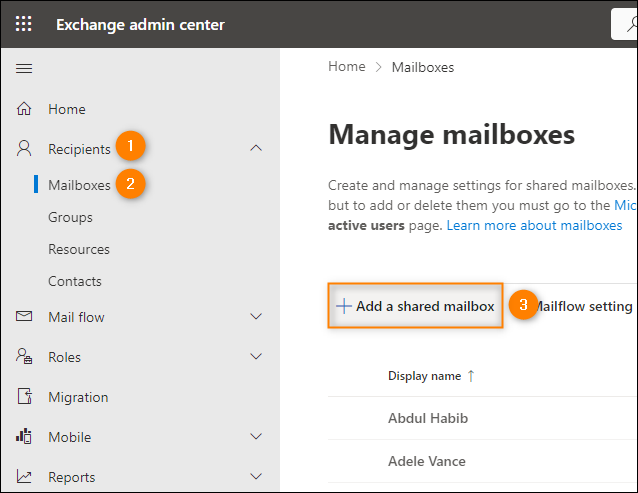
- Sign in to the Exchange admin center, go to Recipients > Mailboxes and click Add a shared mailbox.
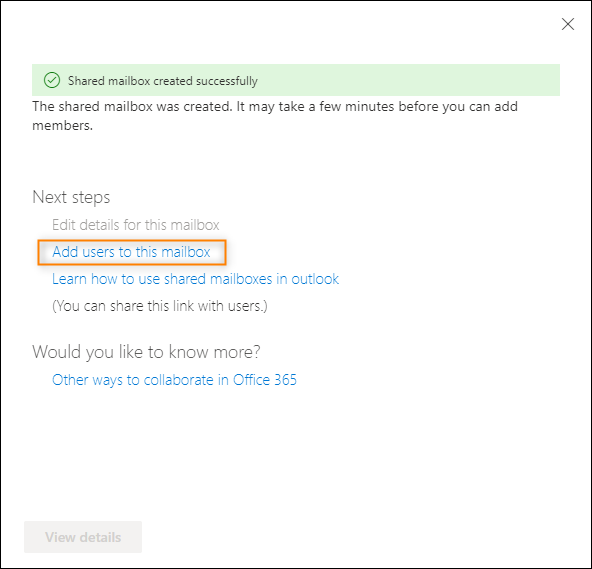
- In the pane that opens, specify basic mailbox settings such as display name and email address, then click Create.

- Just like in case of the Microsoft 365 admin center, the confirmation screen lets you add users who will have access to the mailbox – simply click Add users to this mailbox.
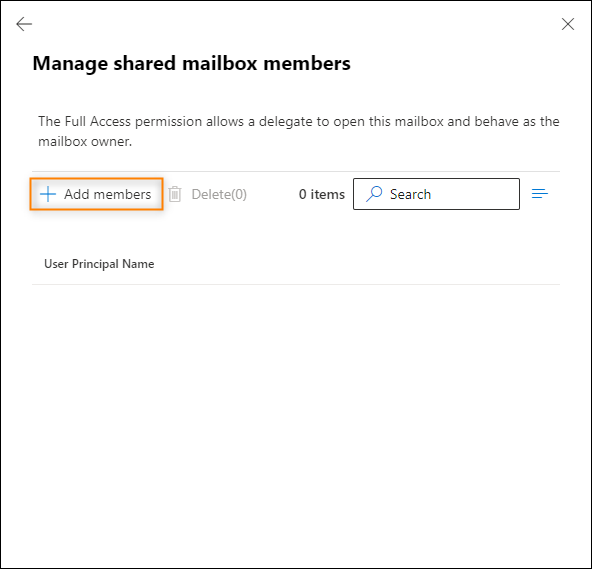
- Click Add member – the Microsoft 365 user picker will open.
- Select users who should have Full Access permission to the shared mailbox and access to the public folder data you are about to migrate.
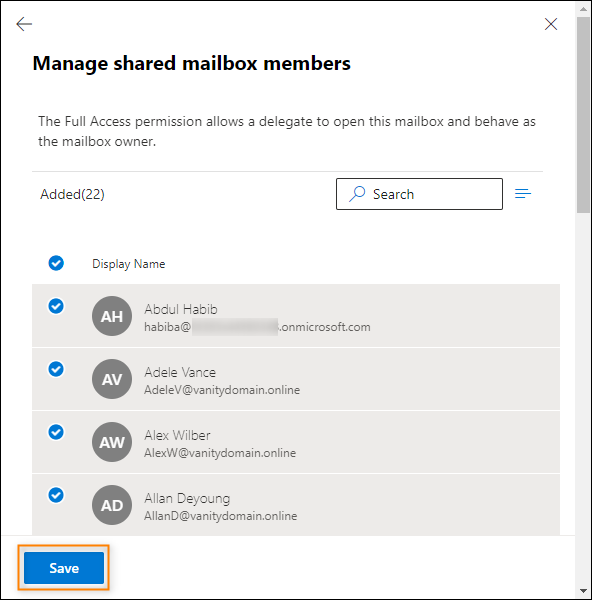
- Finally, click Save to apply the changes.
How to create a shared mailbox using PowerShell
Even though I prefer to use the UI for this task (it just seems to be quicker), you can use PowerShell to create the shared mailbox and assign delegate permission at the same time:
New-Mailbox -Shared -Name "Info" -DisplayName "Info" -Alias Info | Add-MailboxPermission -User [email protected] -AccessRights FullAccess -InheritanceType All | Set-Mailbox -GrantSendOnBehalfTo [email protected]
The cmdlet creates a shared mailbox [email protected] with the display name “Info” and assigns full access rights to [email protected]. The last part is optional and grants the Send on Behalf permission to [email protected].
How to migrate Exchange public folders to a shared mailbox using CodeTwo
CodeTwo Office 365 Migration is an award-winning software that makes migrating from Exchange Server to Microsoft 365, or between two Microsoft 365 tenants, much easier than using native methods. The program lets you perform secure migrations using features such as automatic mailbox matching, time and folder filters, scheduler, and detailed reports, which let you plan the entire process and run it automatically. Migrating public folders to a shared mailbox with CodeTwo Office 365 Migration is very straightforward:
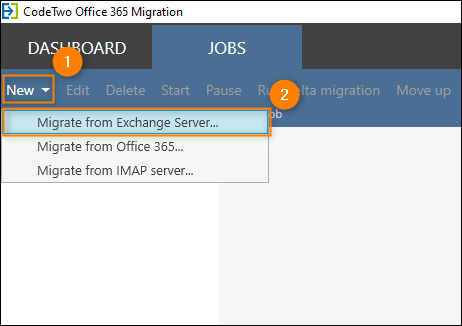
- Start by creating a new migration job from Exchange Server (or Microsoft 365 / Office 365).
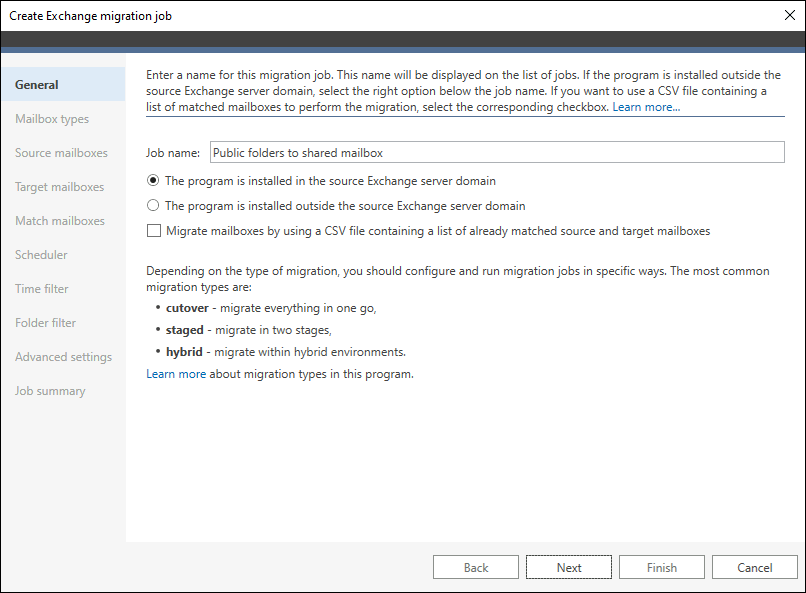
- Enter a descriptive job name.
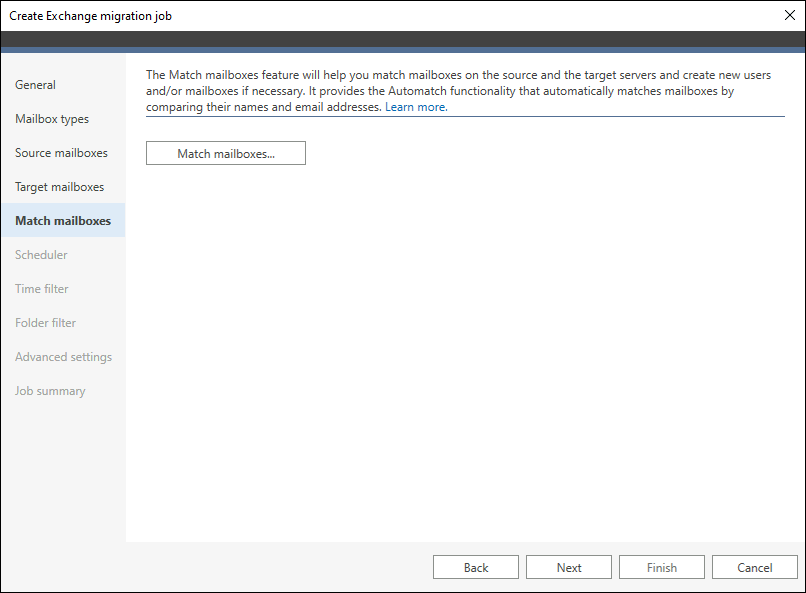
- In the Mailbox types step, leave the default option (Migrate primary mailboxes) selected and click Next.
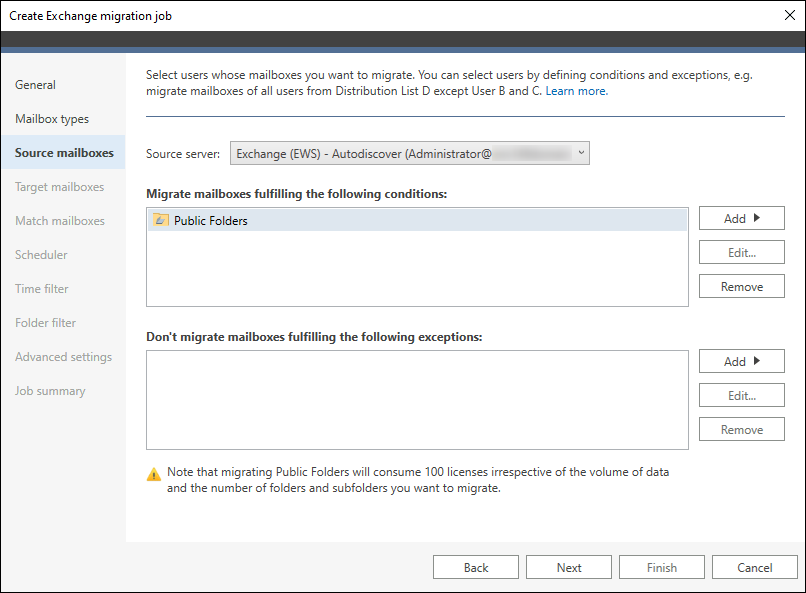
- Connect to the source server (if you have not done this yet) and choose your public folders to migrate. Keep in mind that license-free shared mailboxes are limited to 50 GB, so you may need to split your public folders into batches to migrate all content. You cannot select specific public folders to migrate, but you can use this workaround to exclude a specific public folder from migration.
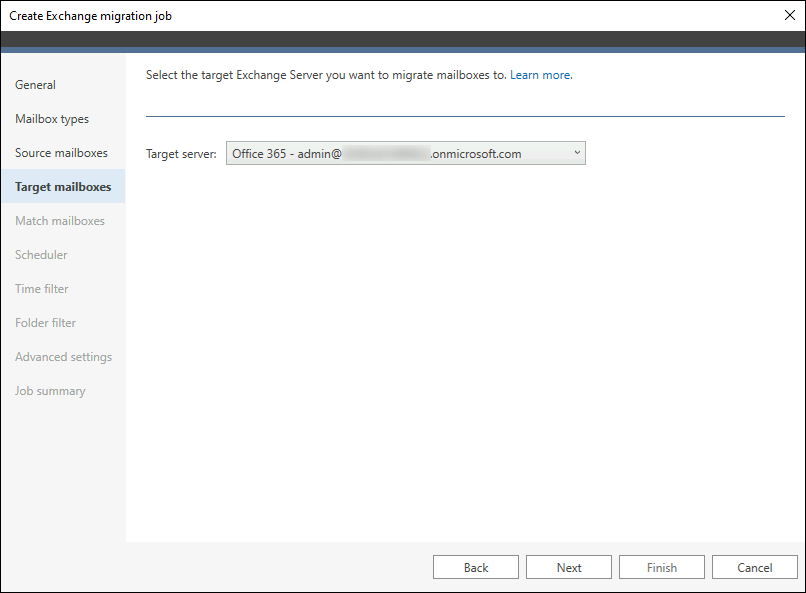
- Next, connect to the target server.
- After establishing the connection, click Match mailboxes to open the matching tool.
- In the tool, manually match your public folders with the target shared mailbox.
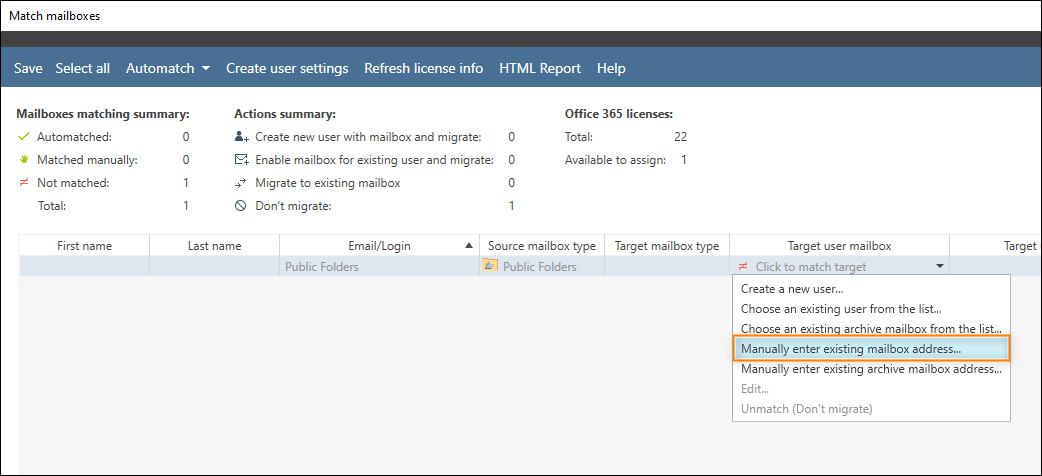
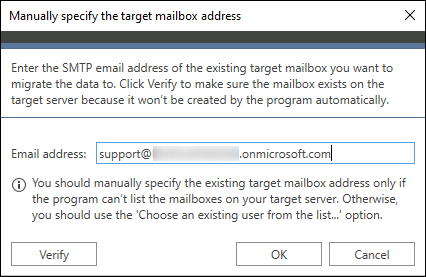
- Enter the target shared mailbox address, click OK, save the changes in the matching tool, and continue configuring the job.
- In the next steps, you can choose when to run the migration (e.g. outside working hours) and which item types to include. These settings depend on your environment and can be adjusted as needed.
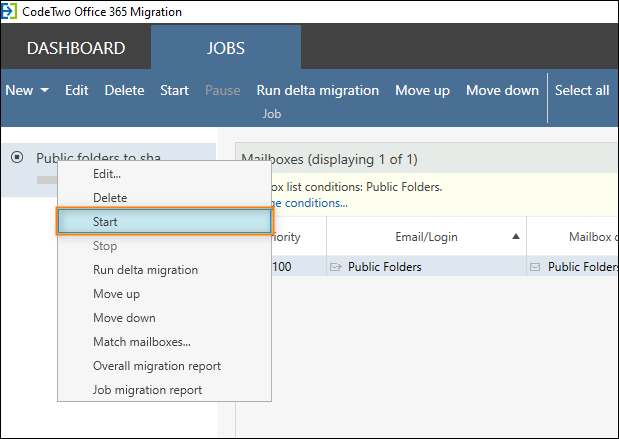
- After completing the configuration, you can start the migration job manually from the Jobs tab. If you configured the scheduler, the migration will start automatically according to the defined schedule.
Once the migration is complete, the shared mailbox will contain emails, calendars, tasks, and any other items you chose to migrate. They will be organized in folders corresponding to your original public folders.
How to access a shared mailbox in Outlook
Your users can now access the shared mailbox that contains migrated public folder data in Outlook. Follow these links below to learn how to do this in different versions of Outlook:
How to access shared mailbox in classic Outlook for Windows
Once you add a user as a member of a shared mailbox, they simply need to restart Outlook. The shared mailbox should then appear automatically in the folder pane in Outlook.
How to access shared mailbox in new Outlook for Windows and OWA
If you have the required permissions, you can manually add a shared mailbox to your account in the new Outlook for Windows and Outlook on the web (OWA):
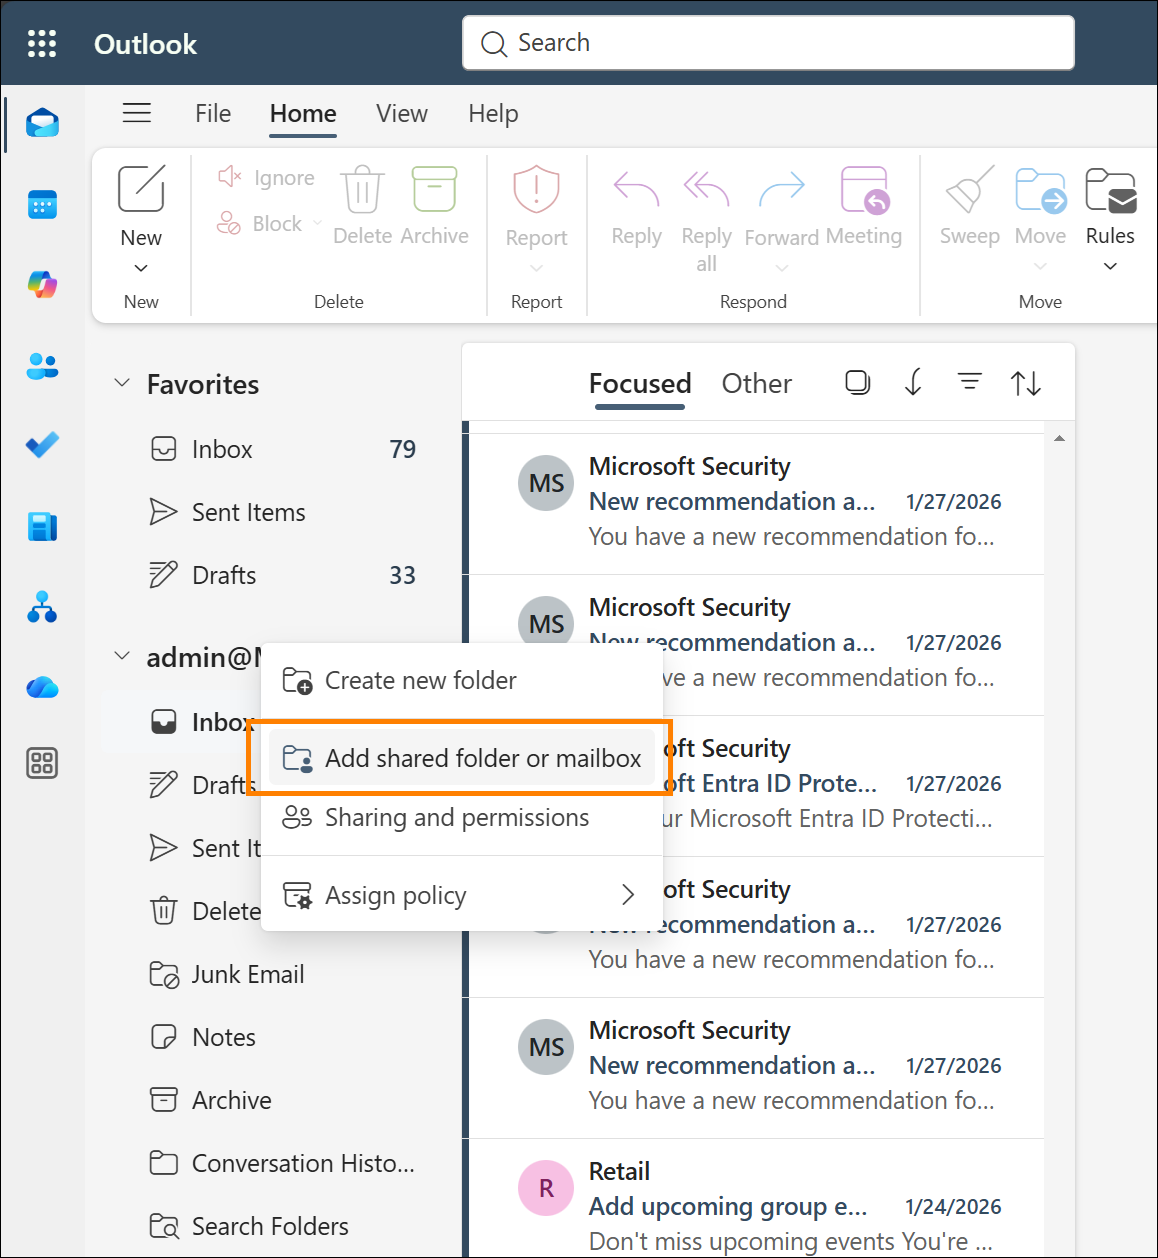
- On the Mail tab, right-click your account name and select Add shared folder or mailbox from the context menu.
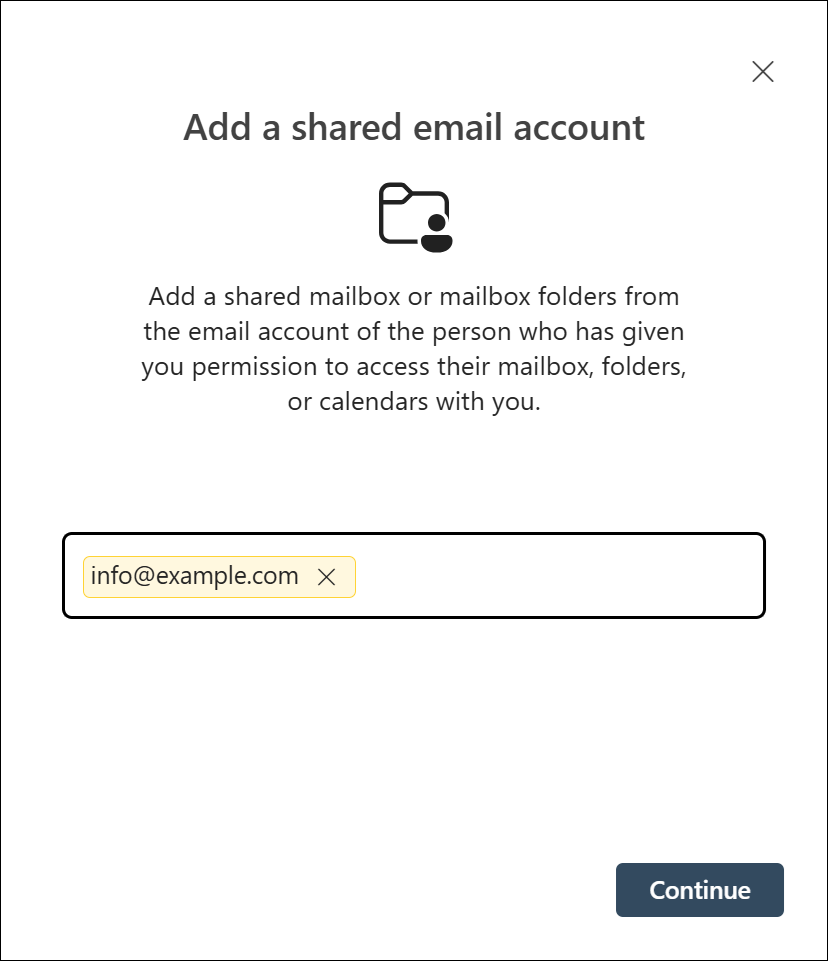
- In the window that opens, enter the name or email address of the shared mailbox. Once it shows up on the list, select it and click Continue.
In OWA, you can also open the shared mailbox by clicking your profile photo in the top-right corner and selecting Open another mailbox. A window similar to the one in step 2 will appear, allowing you to select the mailbox you have access to. This method is less convenient, but it works.
How to access a shared mailbox on mobile devices
These steps are similar to Outlook for iOS and Android:
- Tap your profile picture.
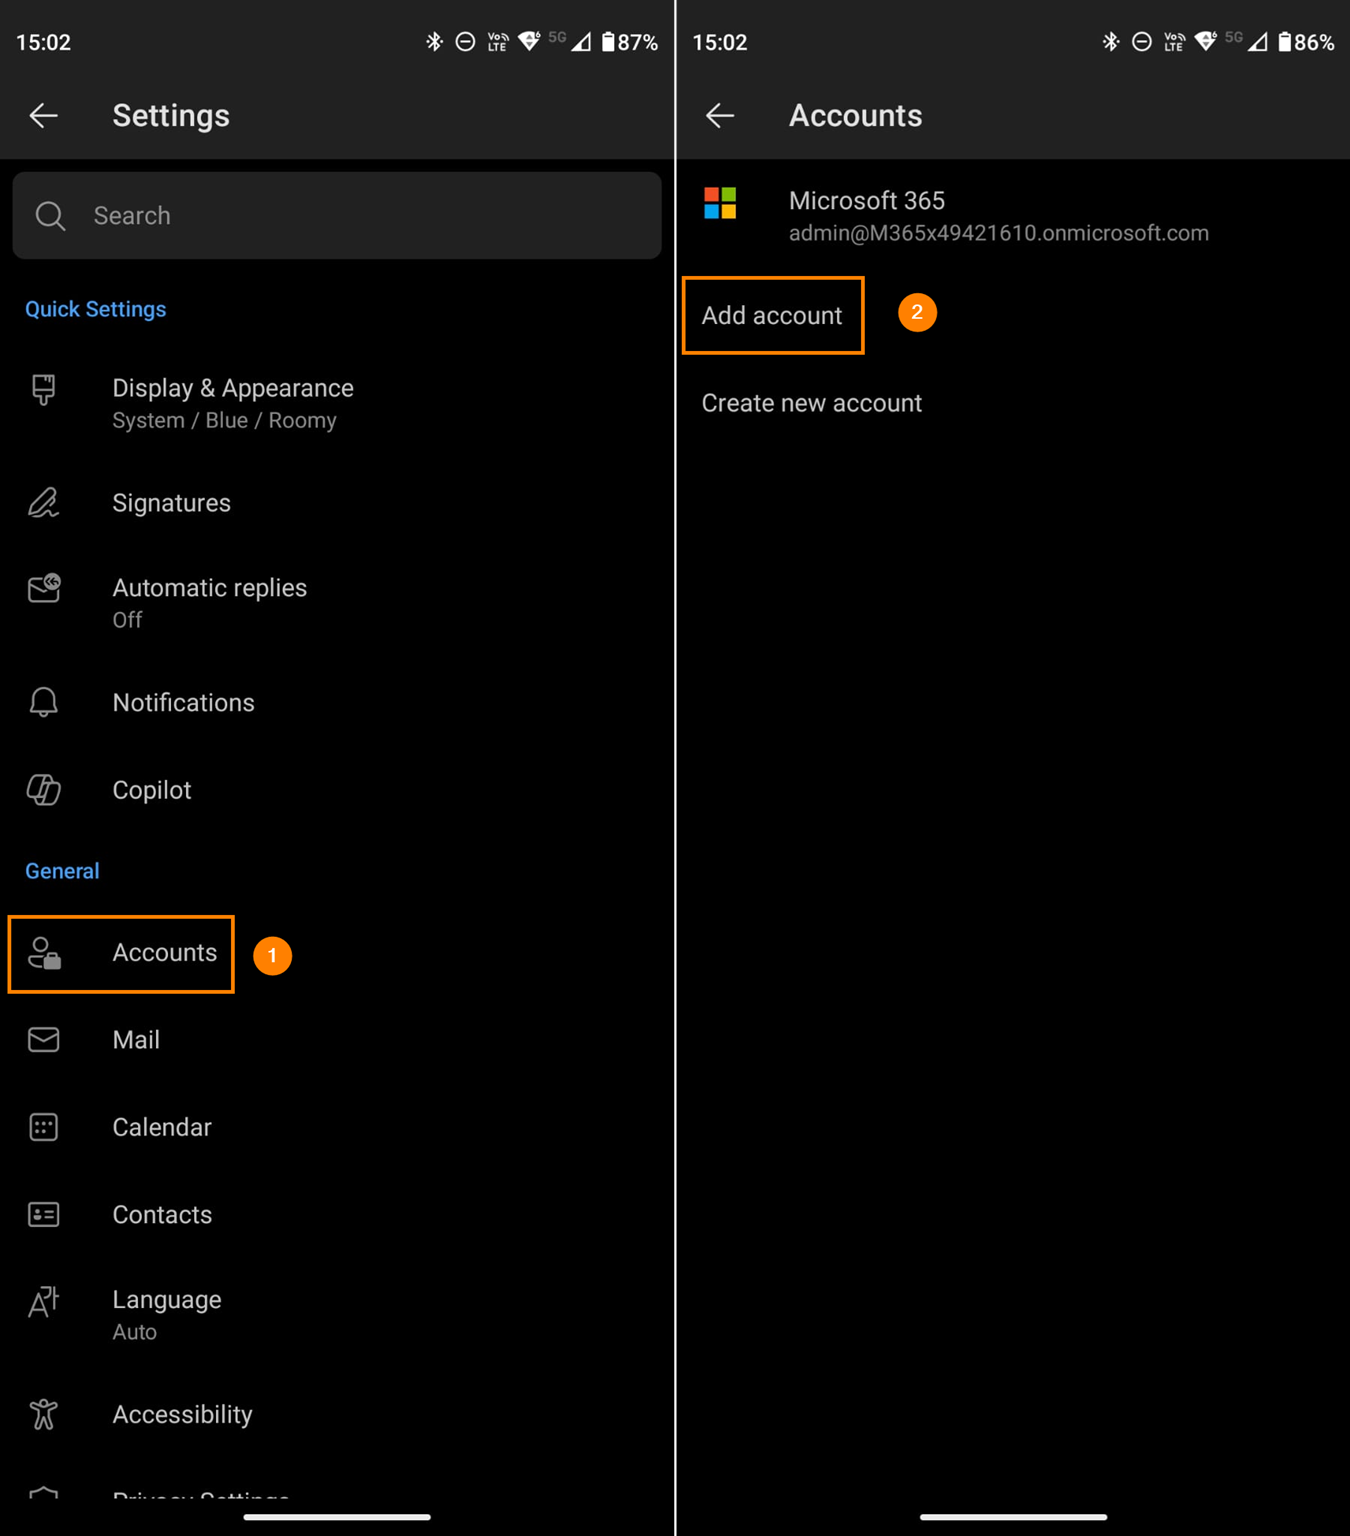
- In the side menu, tap the Settings (gear) icon.
- Tap Accounts and tap Add account.
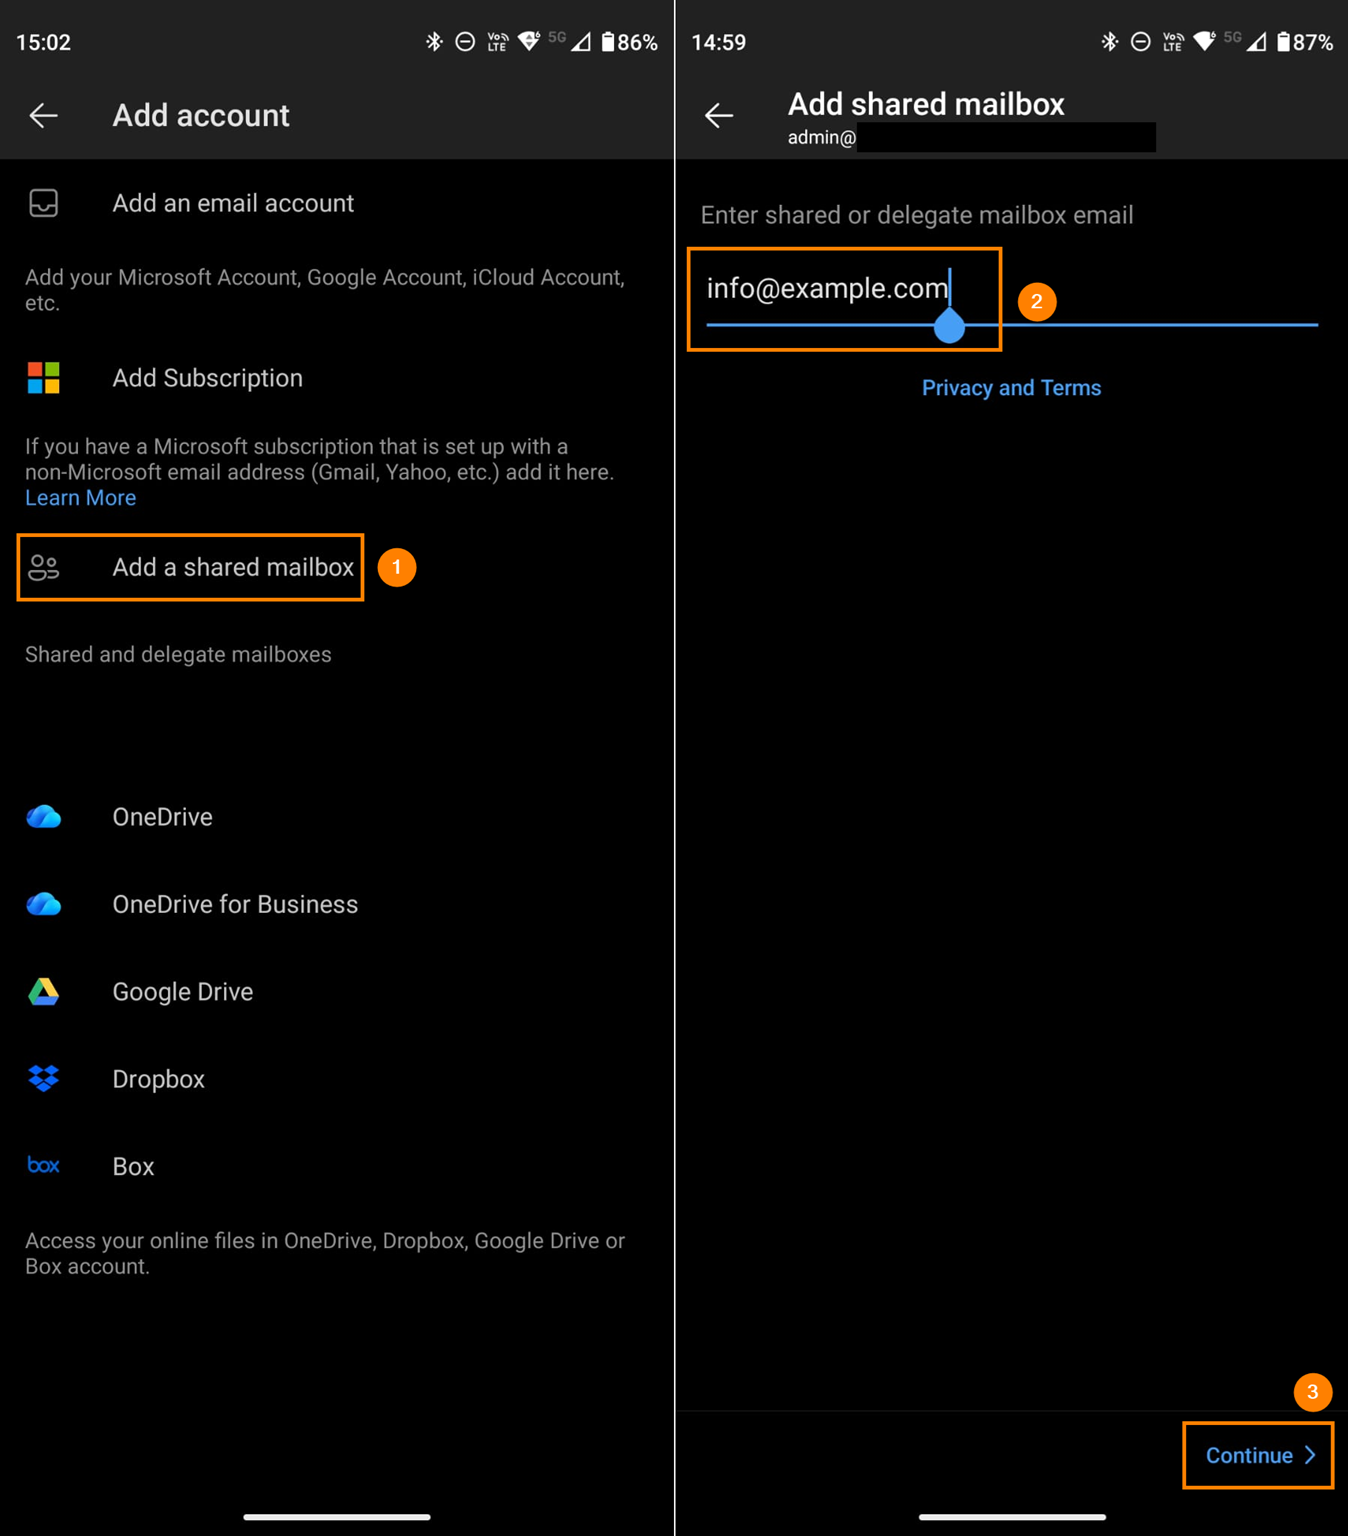
- Tap Add a shared mailbox.
- If you have multiple accounts added to your Outlook mobile app, select the one that has access to the shared mailbox. Next, enter the email address of the mailbox and tap Continue.
And that’s it. You now have access to the shared mailbox containing the migrated public folder data on your mobile phone.
Further reading
Recommended articles
Hi,
I might have a question or two about public folder migration. It is said we need 100 licences for migrating publics folder to M365.
My goal is to migrate about 250GB of PF to shared mailboxes, so it will fit in 5/6 shared mailboxes. Is the required licences number still 100 or do i need to plan 100 licences for each shared mailboxes ? It might seems like a stupid question, but i’d like to make sure.
Also second question, for the migration do i have to just follow this guide then repeat it as much time as i need with different sources folders and destination mailbox ?
And the last one, i assume that you can just select which public folder you want migrate and not necessary all at once, can you confirm me that ?
Hi Florian,
The migration of public folders always requires 100 licenses – this number is fixed and doesn’t depend on the actual size or number of migrated public folders.
Regarding your second question: With CodeTwo Office 365 Migration, you can set up the migration process according to your needs. You can configure a single migration job to migrate all items (in one go or in specific time frames thanks to the built in Scheduler), or you can set up multiple migration jobs to move specific items when necessary. For a step-by-step guide, refer to the user’s manual.
Regarding your last question: Unfortunately, it is not possible to select which public folders should or should not be migrated, but you can exclude specific public folders from migration using this method.
hi there, sorry if this isnt the right place to ask this, but this is the closest Ive found… is it possible to migrate an existing source server user mailbox over to a destination shared user mailbox ?
thanks in advance for any guidance
Hi Michael,
I don’t see any technical obstacles in such a migration scenario. Reach out to our Customer Success Team for more details.
Is it possible to use the mailbox’ online archive as a target ?
Unfortunately, there is no such option at the moment.
You could, however, use a retention policy to move the migrated content automatically to the archive mailbox. See this Microsoft’s article for details.
I need to automate the migration, am I able to set the source/target settings through script or a CSV import
In CodeTwo Office 365 Migration, you can use a CSV file to provide matching information, as described here. If you have any additional questions, our Customer Success team is available 24/5 and will be happy to assist.
Does this actually work for Public Folders that have subfolders with separate permissions? We would need each subfolder within the one Public Folder Mailbox to go to its own shared mailbox. Can this do that?
By default, you cannot migrate specific subfolders to separate shared mailboxes. You can use this workaround to achieve that and follow those steps to retain permisssions after migration.
I followed the guide and migrated our public folders to the shared inbox but our shared inbox is not accessible. We’ve shared permissions on the shared mailbox to IT staff, but when we look for it when trying to “add a shared mailbox” or “Open another mailbox” the name of our shared folder isn’t there. We tried converting it to a regular mailbox just to see if that would work, but it didn’t show up then either.
Have you started with creating a shared mailbox on the target Microsoft 365 tenant? As soon as you create such a group and add members to it, those members should be able to access the mailbox without any problems.