
Essentially, Microsoft Intune is a one-stop cloud solution that allows you to manage all devices (PCs, laptops, tablets, and mobile phones), regardless of whether they belong to the organization or to users (BYOD). Device management with Intune can be handled in an automated and centralized way thanks to integration with Microsoft Entra ID (Azure Active Directory). The solution also offers great compatibility and can be used to improve security, ensure unified experience across all the devices, and ultimately make your IT Department’s life easier.
Microsoft Intune is available with licenses listed here (it’s also possible to purchase standalone user licenses for it). To configure all the Intune management features, you need to sign in to the Microsoft Intune admin center as an admin.
In this guide, I’m going to show you one of the basic app management features of Microsoft Intune, namely, centralized app deployment for all users in an organization. Before that, however, let’s just have an aerial view of what else you can do with Intune and discuss major differences between Intune and Group Policy Objects.
What you can do with Microsoft Intune
Microsoft Intune offers a wide array of features. Apart from app deployment, you can use it to:
- Configure devices via profiles and configuration policies (enroll devices in the organization, limit their settings to end users, enable security features, wipe data from stolen or lost devices, etc.)
- Manage apps with app configuration policies (install/remove apps for specific groups of users, centrally configure apps’ settings, selectively remove organization data from apps, etc.)
- Protect data using app protection policies and device compliance policies (set rules for accessing data and networks, control data access and sharing, ensure compliance with security requirements, etc.)
Intune vs. GPOs
To get the complete image of centralized app deployment before I dig deep into the actual process, let’s quickly deal with differences in this respect between Global Policy Objects and Microsoft Intune.
Firstly, GPOs let you install apps on Windows 11 as well as legacy versions of Microsoft’s OSes (back to Windows 2000). On the other hand, Intune requires at least Windows 8.1, offering full app deployment functionality starting with specific Windows 10 versions. But the big advantage of Microsoft Intune is that it can install apps on machines running non-Microsoft operating systems, including mobile devices.
Also, while GPOs still have a greater coverage for Windows-related configurations (e.g., folder options, printers, and so on), Intune offers more app deployment options – simply because it also supports non-Windows OSes (just like I wrote before) and modern Windows applications.
Finally, GPOs are based on on-premises Active Directory (AD) data, which means the devices on which you want to install apps must be joined to a specific domain within AD Domain Services. Such a restriction does not apply to Intune which allows you to centrally install apps on non-domain-joined and hybrid domain-joined devices as well.
Intune app deployment
Let’s get to the point – here’s how you can centrally deploy an app for all users via Microsoft Intune:
- Log in to the Microsoft Intune admin center.
- Go to Apps > All Apps and click Create.

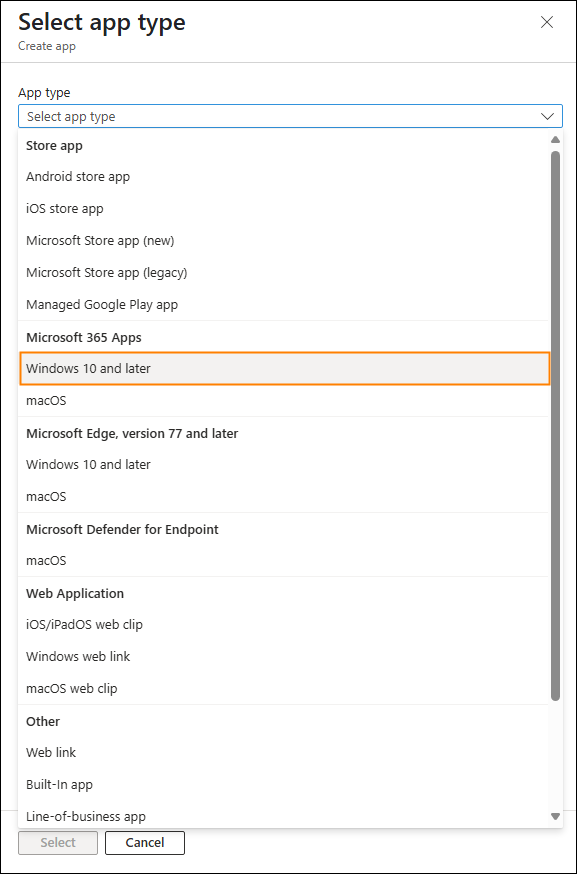
- Now, it’s time to select the app type you want to deploy. Your choice will affect the next steps, since each app type has a different set of requirements and options. In general, these may involve:
- Providing a link to an app (e.g., Android store app, Microsoft store app, Web link)
- Searching or selecting an app from a list (e.g., iOS store app, Bult-in app)
- Selecting an app’s installation file (e.g., Line-of-business app, Windows app)
In our example, I will deploy Microsoft 365 Apps on devices running under Windows 10 or later because it’s a common scenario for many organizations. This path also offers the greatest number of options, which is not surprising since both the solutions are a part of the Microsoft ecosystem.
To make the choice, click the App type dropdown and select Windows 10 and later under Microsoft 365 Apps. Finally, click the Select button.
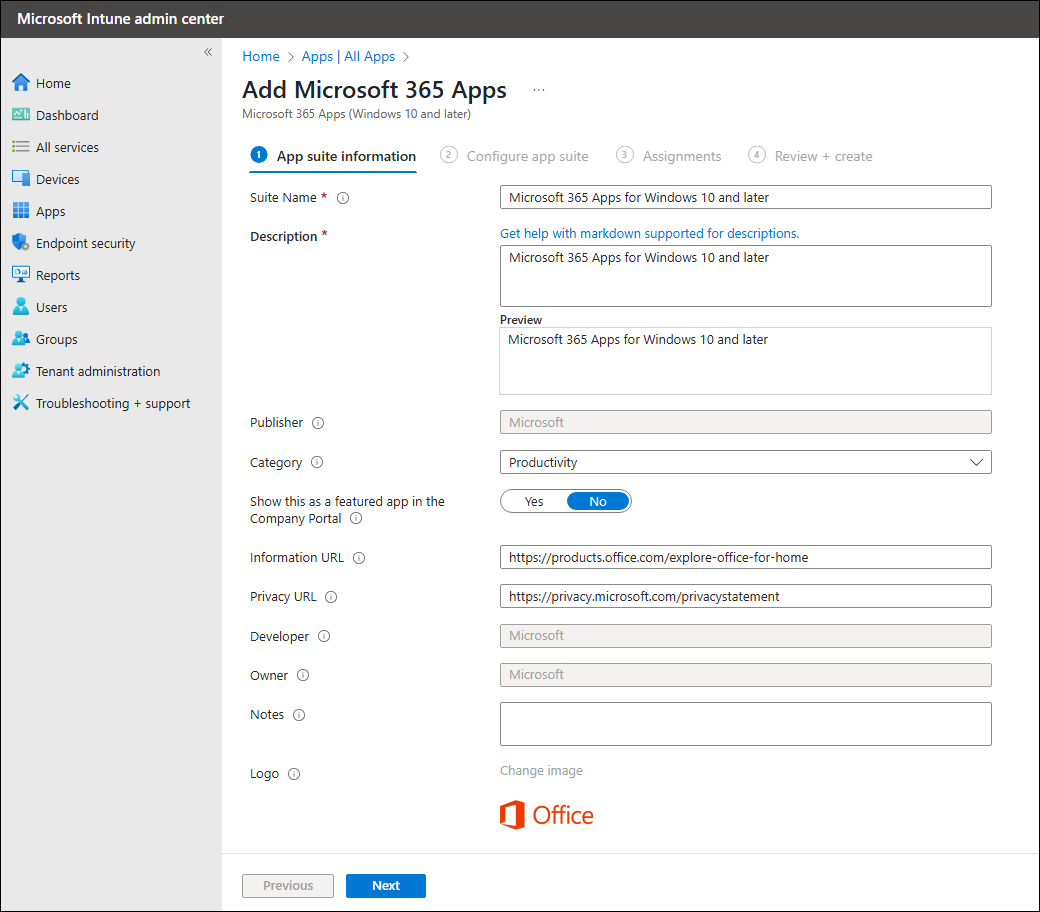
- In the first step of the wizard, you can configure information that will be shared with your users about Microsoft 365 Apps, including the description to help users better understand the apps’ purpose, a URL to help resources, and so on.
The default settings should be okay for most cases, but you can of course edit them in a way that suits your needs. Once you’re ready, click Next at the bottom.
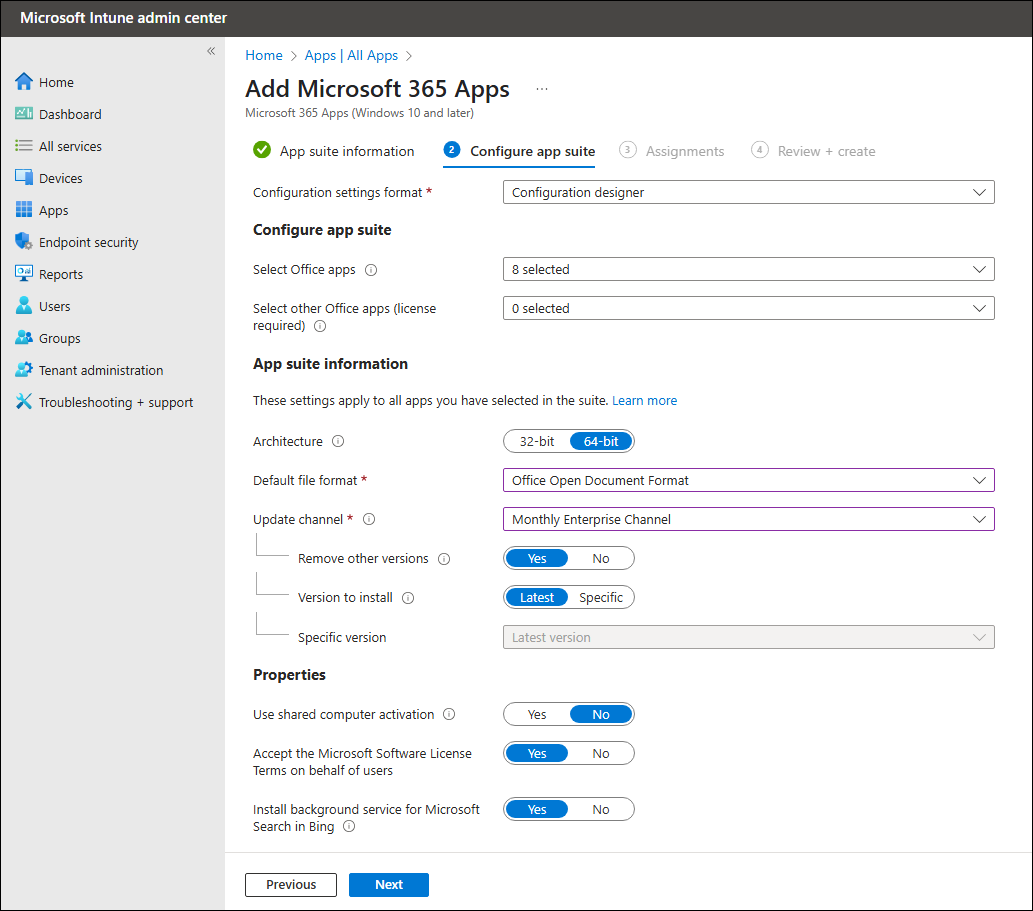
- The second step, Configure app suite, is the place where the actual configuration takes place. Most of the settings are pretty self-explanatory, possibly except for the ones I list below, so let’s quickly discuss them:
- Configuration settings format – leave the default setting (Configuration designer) to use a user-friendly GUI in Intune to configure Microsoft 365 Apps. The other option requires you to prepare a special XML file. Learn more
- Use shared computer activation – allows you to deploy Microsoft 365 Apps on computers accessed by many users and override the Microsoft 365 device limit. Learn more
- Install background service for Microsoft Search in Bing – allows you to deploy a Chrome extension to facilitate searching e.g., people, files or internal sites in your organization. Learn more
Tip: You can get information on each item by simply clicking the  icon next to it.
Once you finish setting everything up, click Next.
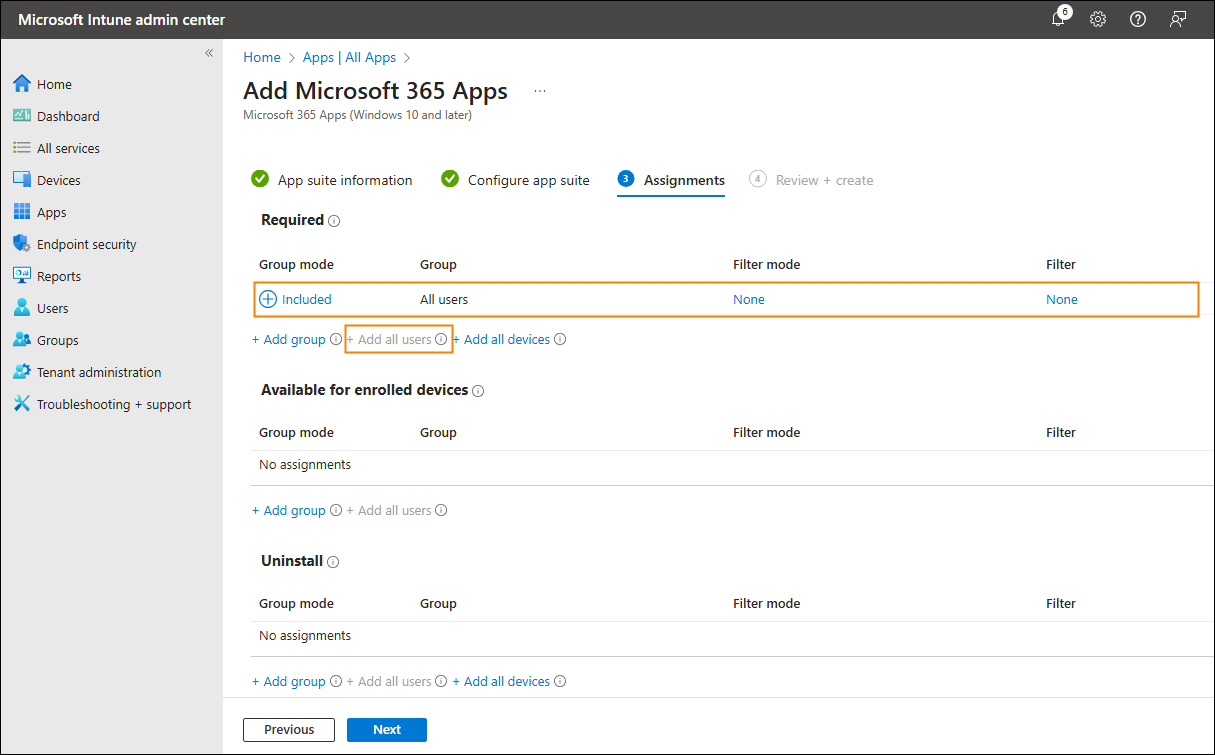
- Assignments is an important step. Here, you can decide for which users or on which devices Microsoft 365 Apps will be installed (the Required section), available to install (the Available for enrolled devices section), or removed (the Uninstall section). If you would like to make assignments according to Entra ID groups (the Add group option), remember to create appropriate public Entra ID group(s) beforehand.
Since you want to deploy Microsoft 365 Apps to all users, you should use the Add all users option under Required and click Next.
- The last step, Review + create, allows you to review the whole configuration for Microsoft 365 Apps. If you’re fine with all the settings, click Create to start the deployment.
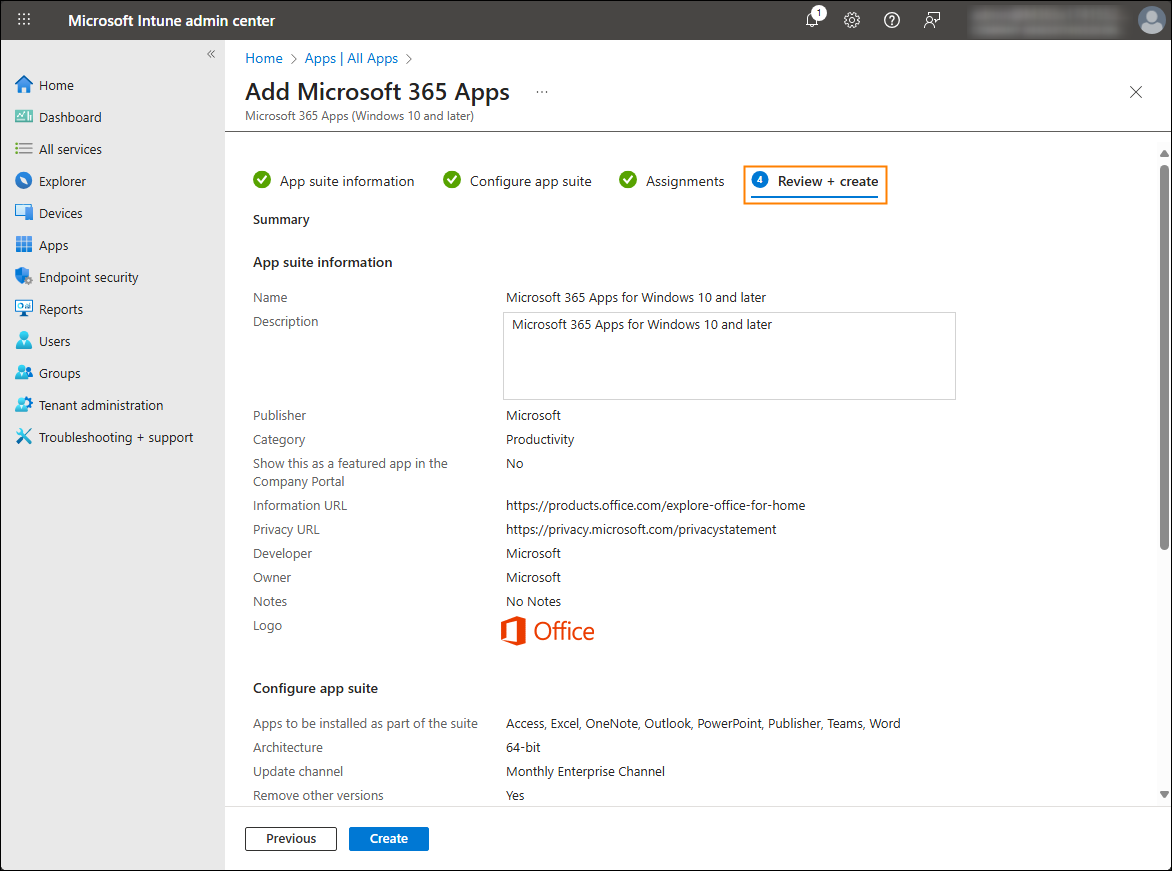
That’s it. From now on, Microsoft 365 Apps will start to install on devices of all users in the organization.
Tracking deployment in Intune
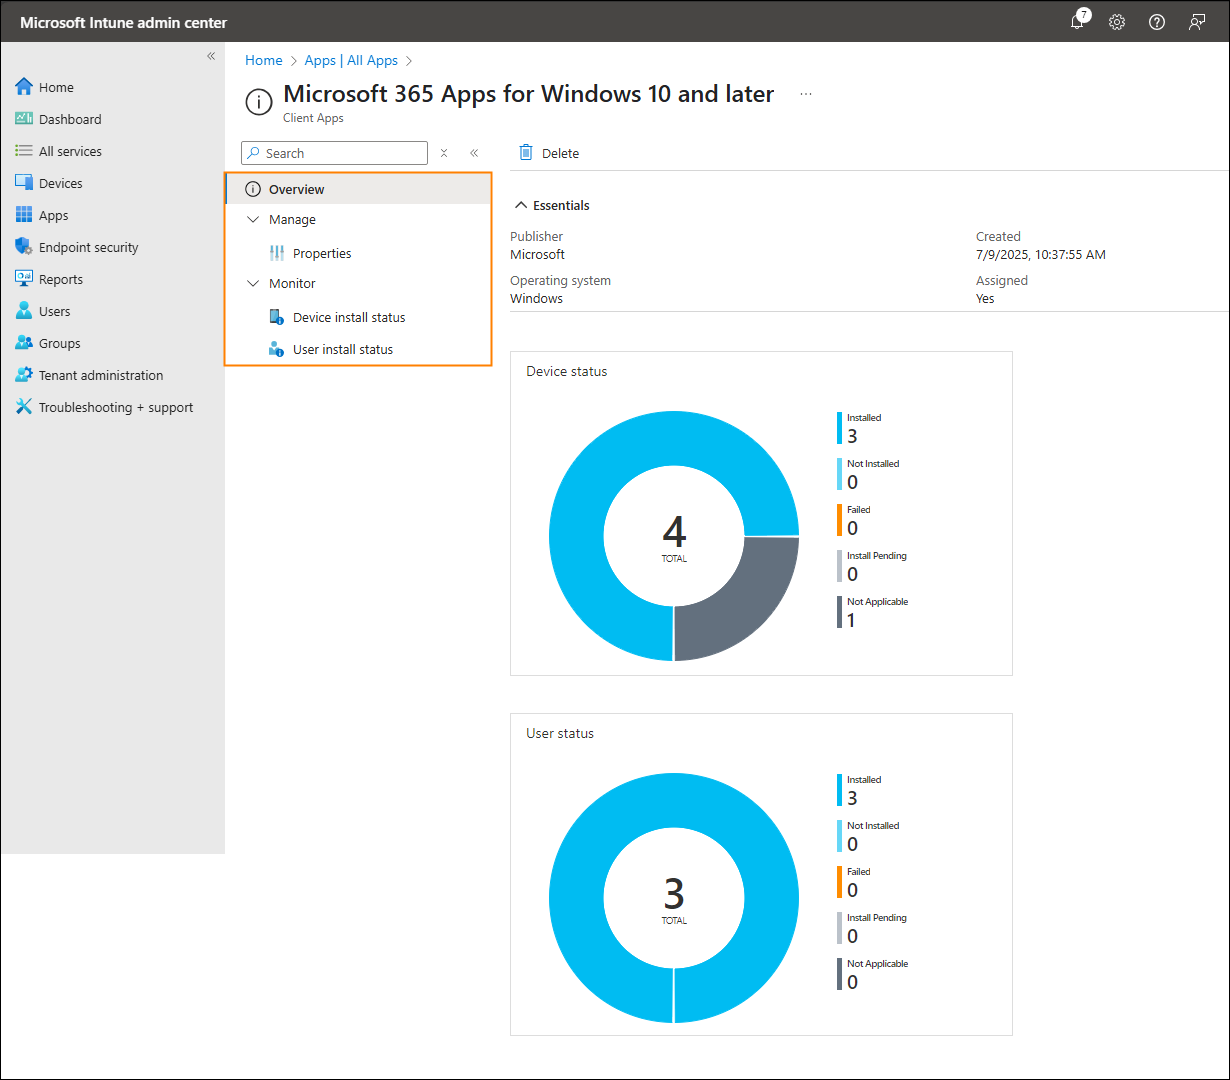
With Intune, you can also track the progress of any deployment. To do it, go to Apps > All Apps and click your deployment configuration. The items from the left-hand menu allow you to access various deployment progress information:
- Overview – here you can get general information on installation status for devices and users in the form of charts.
- Properties – allows you to edit your app deployment policy.
- Device install status & User install status –allow you to view the install status lists showing specific devices and users.
This concludes the presentation of the Microsoft 365 Apps deployment via Microsoft Intune. If you would like to further develop your Intune expertise, I encourage you to have a look at this article. It is a quick yet informative guide on how to deploy and uninstall a line-of-business app, using our CodeTwo Signatures Add-in for Outlook add-in (MSI package) as an example.
Read more

Recommended articles
CodeTwo sp. z o.o. sp. k. is a controller of your personal data.
See our Privacy Policy to learn more.