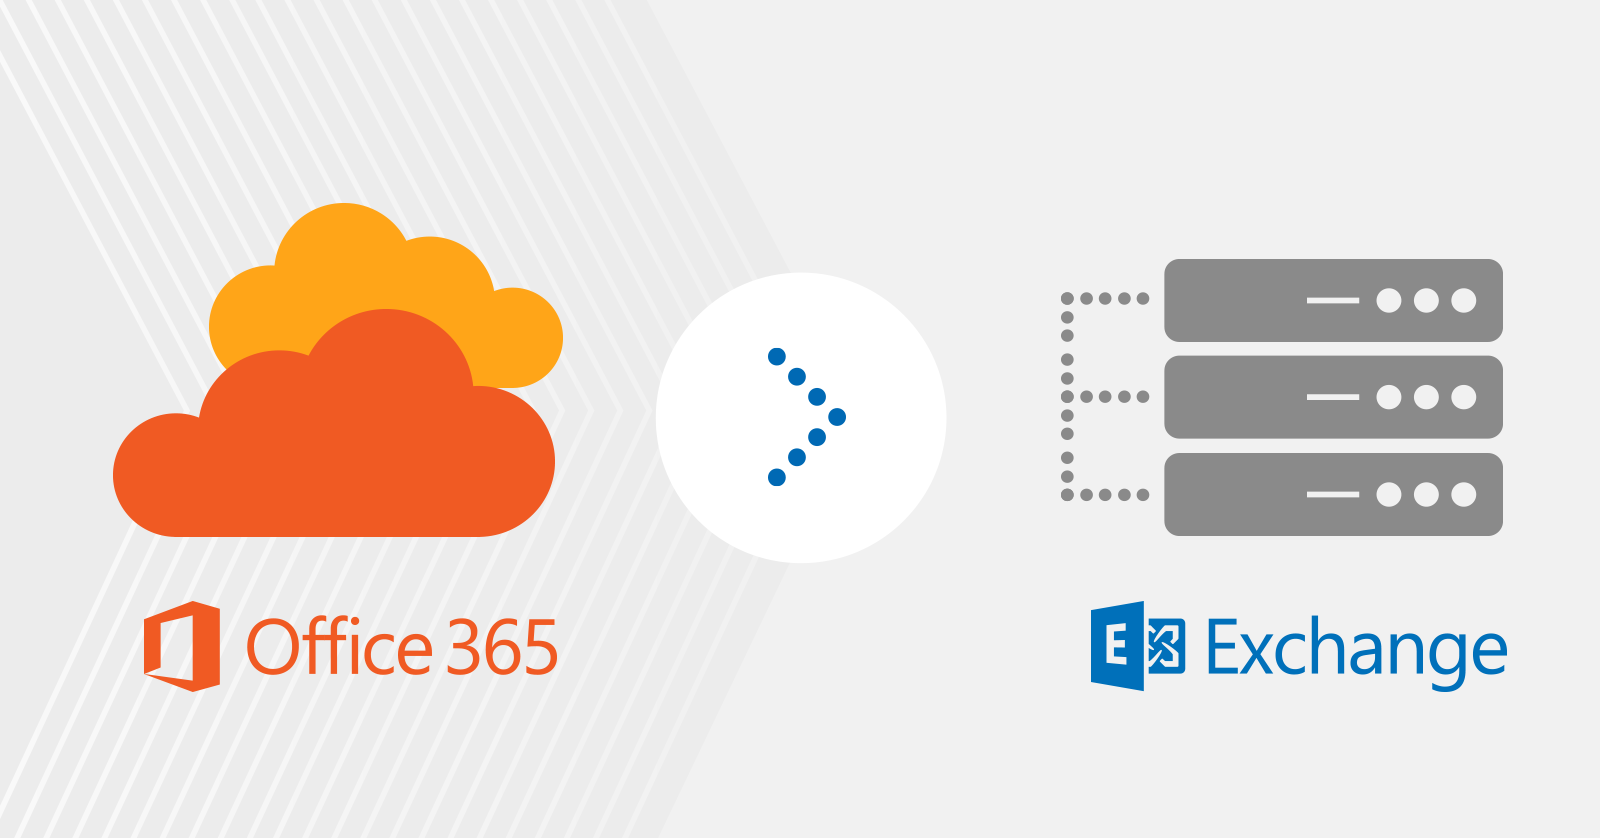
Actually, this is not a very popular migration scenario. The migration pattern that the majority of companies choose (and the one Microsoft propagates so widely) is to move organizations to Office 365, not the other way round. This may be the reason for the shortage of resources that would guide admins through this migration process. However, there are three options for you to consider when planning migration back to Exchange on-premises – a third party tool, hybrid migration or PST export/import.
Get help from a migration tool
This option requires you to invest some money in the migration solution but it is the simplest and the quickest way to move user mailboxes away from Office 365. Using a third party tool like CodeTwo Exchange Migration saves you a lot of work and time. With the application, you can easily control the migration process from a single machine (or from multiple machines if you want to speed up the process) via a user-friendly interface. You can set up server connections within seconds with no need to play with PowerShell commands.
CodeTwo Exchange Migration is a tool which connects with Office 365 source environment via EWS and copies the user mailbox data directly to on-premises Exchange Server (also via EWS). The migration is based on jobs. You can create as many migration jobs as you need to better organize and plan your migration task. For each job individually, you can decide which mailboxes to move, what mailbox folders to include and exclude from migration or you can filter items for migration according to their age.
The point of using a third party tool is to maximally ease and speed up the migration project. Especially, this may be a way to go if you need to move mailboxes just over the weekend.
Move within a hybrid environment
This may be a good option if you already have a hybrid environment up and running. In this case, the move is rather simple. You just need to create a migration batch via EAC in Office 365, select users one by one or upload the CSV file with users you want to migrate, run the migration and once the migration is finished remove the batch.
If you have no hybrid deployment in place, you will need to do a lot of planning and preparation first. As this is not the simplest of all admin tasks, it is a good practice to analyze and understand all the steps beforehand. You may want to get some help from this step-by-step guide on how to use Hybrid Configuration Wizard. HCW will walk you through the hybrid deployment configuration. However, before running the wizard you need to put a tick against prerequisites listed here.
Migrate via PST import/export
This migration option is the last on the list as it involves a lot of manual work and is far from perfect. You may go for it if you have relatively a small number of mailboxes to move and some extra time to spend on doing the migration. The whole operation is about downloading the mailbox data to PST files somewhere on local storage, and then uploading the PST files to the target server mailboxes. Exchange on-premises gives you New-MailboxExportRequest cmdlet to make the export kind-of-automatic and less painful. Office 365, on the other hand, lacks this functionality requiring more creativity and attention.
There are two paths you can follow to extract mailbox data to PST files in Office 365. The first one is to export the mailbox content using eDiscovery. The good news is that eDiscovery option is supported by most popular Exchange Online and Office 365 plans. Here you can check the plans that have this feature available. Your second option is a traditional export via Import/Export option in Outlook clients. In other words, you need to physically go to each workstation, open (or add) Office 365 mailbox in Outlook and then navigate to Import/Export functionality to extract the mailbox content. Once you have PST files ready, it is time to import them to on-premises Exchange mailboxes.
Although still relatively popular, more and more IT pros treat this method as the last resort. The dark side of PST export shows that too often the files become corrupted, data lost, or it is difficult to avoid differences between mailbox content copied to PST files and the server copy of mailbox data (if the mailbox still receives emails while doing the PST migration).
How to migrate from Office 365 back to Exchange on-premises using CodeTwo Exchange Migration?
CodeTwo Exchange Migration is a paid solution so you will need a license to activate the program and run the full migration. Before purchasing, you can download a free trial and do some tests in real settings. The trial version can migrate up to 10 items per folder but there is also an option to get a free temporary license key and migrate all items from a limited number of mailboxes. To get that key contact CodeTwo Customer Service.
The migration process itself is very simple. In short, you just need to:
- Download and install CodeTwo Exchange Migration and activate it with the license key.
- Create a new migration job and within that job:
- Configure source and target server connections. This is as simple as following the wizard.
- Select source mailboxes for migration and automatically match them with target ones. For this process to work correctly the user mailboxes must exist on the target server. You can create them directly on Exchange or let the program do it for you.
- Enable scheduler feature if you want the migration job to start and stop automatically at a scheduled time.
- Filter items by age to include/exclude in migration.
- Decide with mailbox folders migrate and which not.
- Start the migration job (if you didn’t enable the Scheduler feature) to let the program move Office 365 mailboxes to your local Exchange Server.
For a more detailed step-by-step migration guide from Office 365, follow this link.
A bunch of useful functionalities
In fact, CodeTwo Exchange Migration is more than just a tool for simple migration. It gives you a bunch of useful functionalities to better manage the move from Office 365. For example, the tool will let you:
- Keep an eye on the migration performance directly in the program or via automatic reports that program can send to your inbox.
- Migrate absolutely everything that you want in one go: primary mailboxes, archive mailboxes and/or public folders.
- Minimize downtime to zero. The migration is invisible to end users so they can use their mailboxes as usual.
- Refresh email addresses listed in the program if you switch the domain during the move.
- Ensure 100% security of migrated data. The program does not read or store it – just replicates mailbox data directly between servers.
But the list of benefits does not end here. For more, visit CodeTwo Exchange Migration website.
You can also take CodeTwo Exchange Migration for a test drive – here you can download the trial.
Useful links:
Recommended articles


CodeTwo sp. z o.o. sp. k. is a controller of your personal data.
See our Privacy Policy to learn more.