Connecting to source Office 365
Once the installation of CodeTwo Exchange Migration is finished, you need to choose a source environment from which the data will be pulled and migrated to selected mailboxes in target Exchange Server. This article describes how to connect to source Office 365 tenant.
Select Add new source connection from the Source server drop-down list to open the Office 365 source server connection wizard. To create a new source Office 365 connection, click the Settings ( ) button on the Defined source server connections card and choose New > Office 365 connection (Fig. 1.). You can also define a new source connection when configuring a migration job. To do so, click Create a new migration job on the How to start card and select Office 365. Type the name of your job and proceed to the Source mailboxes step. Select Add new source connection from the Source server drop-down list to open the source server connection wizard.
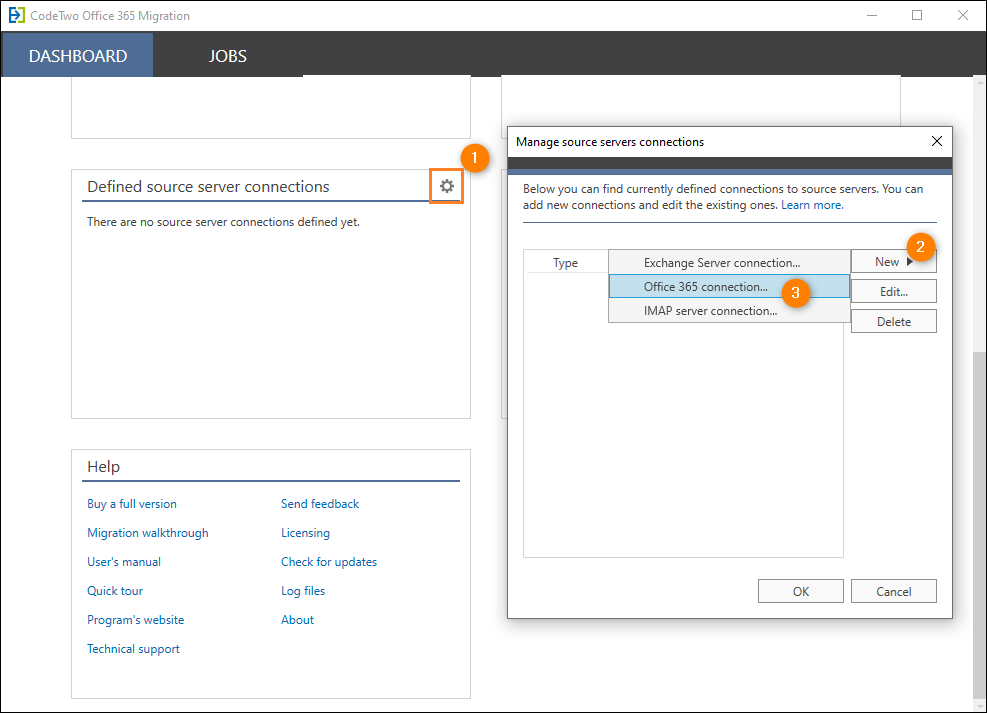
Fig. 1. Opening the Office 365 source server connection wizard.
The Office 365 source server connection wizard opens. It consists of the following steps:
- Application registration
- Application details (manual registration only)
- Configuration
Application registration
To connect to your Office 365 tenant, you need to register CodeTwo Exchange Migration in that tenant's Microsoft Entra ID (Azure Active Directory). By doing so, the program will be able to authenticate with Office 365 via OAuth 2.0, access source mailboxes and perform the migration tasks on your behalf.
There are two options available:
Automatic registration
Select this option if you want the CodeTwo migration application to register itself in your Entra ID (Azure AD). Click Log in as Office 365 admin (Fig. 2.) to load the Entra ID sign-in page.

Fig. 2. Registering the program automatically in Entra ID.
Next, provide the credentials of a user with the Global Administrator or Privileged Role Administrator role in your Office 365 tenant and accept all permissions the application has requested to be able to perform the migration (Fig. 3.).
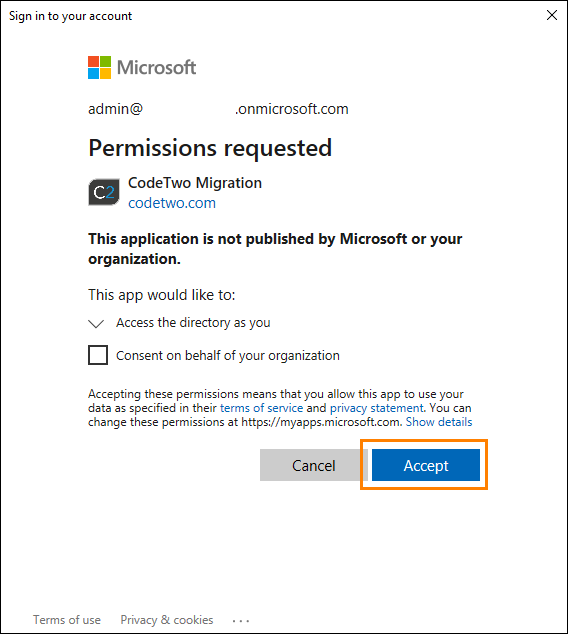
Fig. 3. Granting the necessary permissions to CodeTwo Exchange Migration.
The application will be registered as CodeTwo Exchange Migration Source in your Entra ID and will be signed with a unique certificate, valid for 5 years.
Important
Each time you configure a new Office 365 server connection in the program by using the Automatic registration option, a new CodeTwo migration application entry will be registered in your Entra ID (this does not apply to situations where you edit an existing connection). If you don't want to duplicate these entries in your tenant, select the Manual registration option and provide the registration details of the previously registered CodeTwo migration application in the Application details step. You can view the application registration details by signing in to your Microsoft Entra admin center and navigating to Identity > Applications > App registrations.
Keep in mind even if you delete this connection from the program, or once the migration is finished, the application will not be deleted from your Entra ID. To delete it manually, follow these steps.
Manual registration
Select the Manual registration option (Fig. 4.) if you prefer to register the CodeTwo migration application in Entra ID (Azure AD) by yourself. A step by step guide on how to do so is available in this Knowledge Base article. Click Next to proceed to the next step, where you need to provide the application registration details.
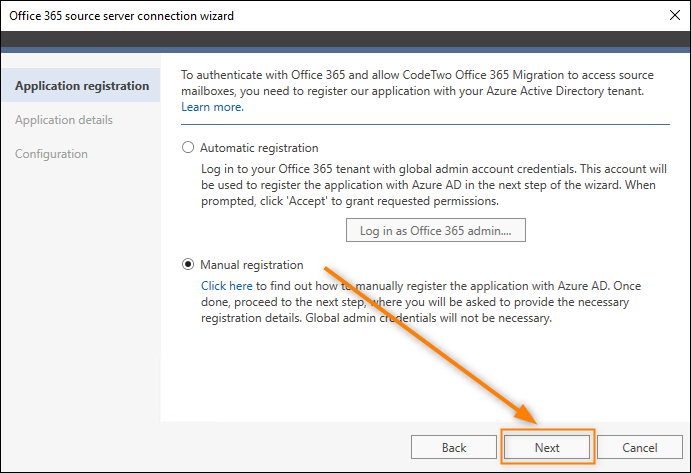
Fig. 4. Selecting the Manual registration option.
Application details
The Application details step is required only if you have selected the Manual registration option. You are asked to provide the following information:
- Dedicated application mailbox – the email address of any user from your source Office 365 tenant. This account is used to gain access to the tenant's information, such as name, domain, etc.
- Client ID – this is the ID assigned to CodeTwo Exchange Migration after the application has been registered in your Entra ID. The ID can be found on the application's Overview page in the Microsoft Entra admin center, under Application (client) ID (Fig. 5.).
- Tenant ID – this the ID of your Office 365 tenant. It also can be found on the application's Overview page, under Directory (tenant) ID (Fig. 5.).
- Certificate thumbprint or Client secret – only one of these credentials needs to be provided in the wizard. You can add or view certificates and client secrets (app passwords) on the application's Certificates & secrets page in the Microsoft Entra admin center (Fig. 6.).
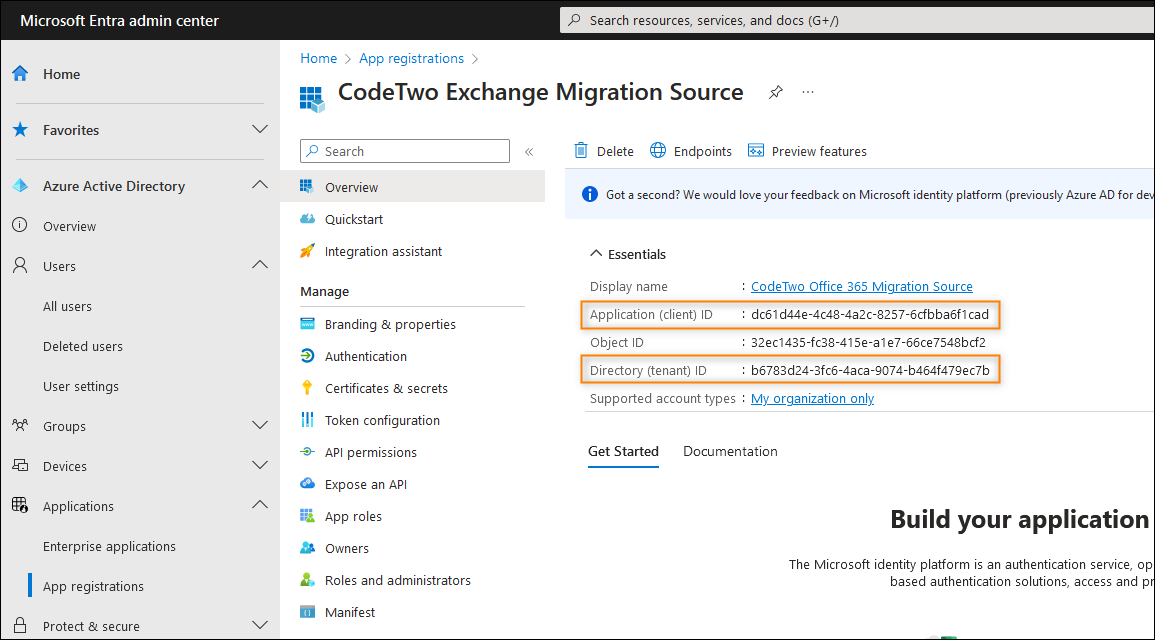
Fig. 5. Client and tenant IDs shown on the application's Overview page in Entra ID.

Fig. 6. The location of a certificate thumbprint (A) and client secret (B) in Entra ID.
To use the Certificate thumbprint credential, your certificate needs to be signed with a 2048 bits key. The certificate also needs to be installed in the CurrentUser\Personal store. Use the Import button to open the Import certificate window (Fig. 7.), where you can select your certificate. If your certificate is already installed in the CurrentUser\Personal store, simply enter the certificate thumbprint in the appropriate field in the server connection wizard.
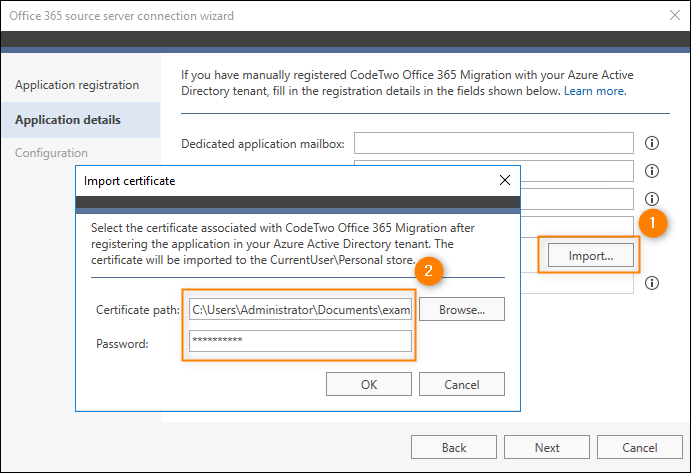
Fig. 7. Importing the certificate associated with the CodeTwo migration application.
Client secret can be generated in Entra ID on the Certificates & secrets page (see Fig. 6. above). Once generated, it will be visible for as long as you remain on that page, so make sure to copy its value to the clipboard and paste it in the server connection wizard (Fig. 8.).
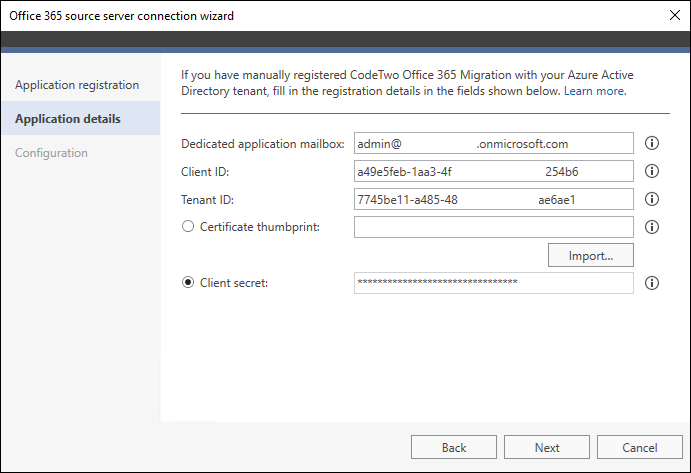
Fig. 8. Application registration details filled out in the source Office 365 server connection wizard.
Configuration
In the last step, the wizard will set up a connection between the program and your source Office 365 tenant (and register the CodeTwo migration application in your Entra ID (Azure AD), if you have selected the Automatic registration option in the previous step). Click Configure and verify the results (Fig. 9.).
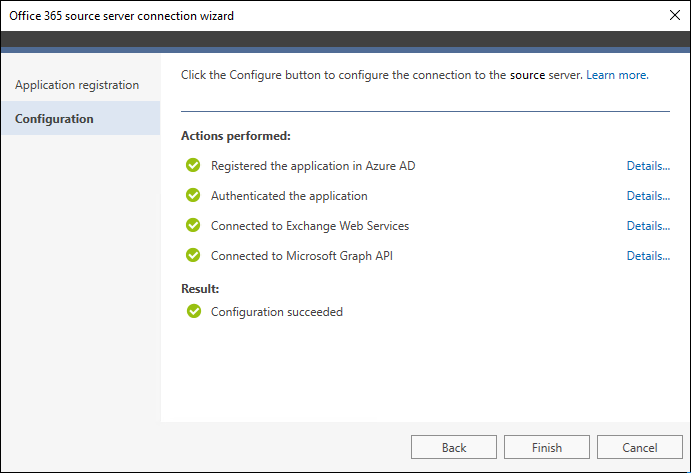
Fig. 9. The program has successfully connected to the source Office 365 tenant.
Once the setup is complete, click Finish to close the wizard, and then click OK in the Manage source server connections window to save your connection. The new connection will be displayed on the Defined source server connections card (Fig. 10.).
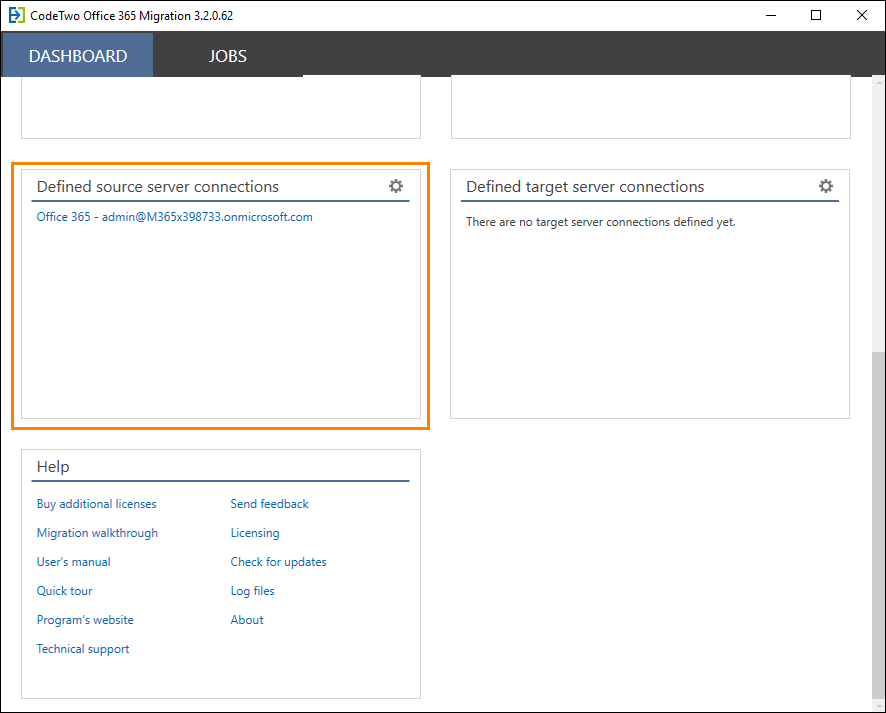
Fig. 10. The Defined source server connections card.
If you encounter any problems during the server configuration process, see Troubleshooting.
See next
In this article