



Required permissions
The permissions needed to create mailboxes are Mail Recipients and Mail Recipient Creation. The two default groups with the required permissions are Organization Management and Recipient Management.
Migrating to Microsoft 365?
The most common scenario when you need to create mailboxes in Microsoft 365 is when you recreate your on-premises Exchange environment. In this article, I only show how to create mailboxes. Keep in mind, however, that migration requires you also to move their contents. Click the links below to learn how to perform the migration process for different scenarios:
- Learn how to migrate from on-prem Exchange to Microsoft 365
- Migrate between Microsoft 365 tenants
- Migrate to Microsoft 365 from an IMAP server
And if you want to make the process much easier, there is a migration tool which gets the job done. It allows you to:
- create and assign licenses automatically,
- schedule your migration and get automatic reports and notifications,
- easily migrate user mailboxes and public folders from Exchange Server (2010+) and SBS 2011,
- make sure nothing gets lost in the process with the post migration rescan feature
- and more…
Create a user mailbox in the Microsoft 365 admin center
Currently, the only place in the admin portal that lets you create user mailboxes is the Active users tab in the Microsoft 365 admin center. Shared mailboxes can be created from Teams & groups > Shared mailboxes or, in the Exchange admin center, from Recipients > Mailboxes.
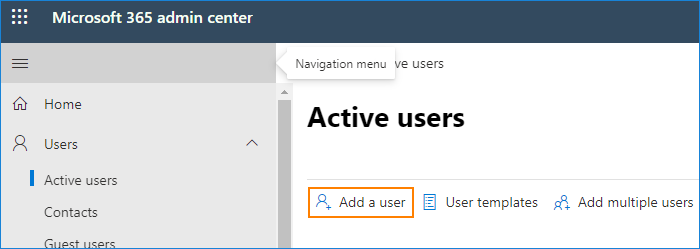
To create a new user with a mailbox, click Add a user in the Active users settings page:
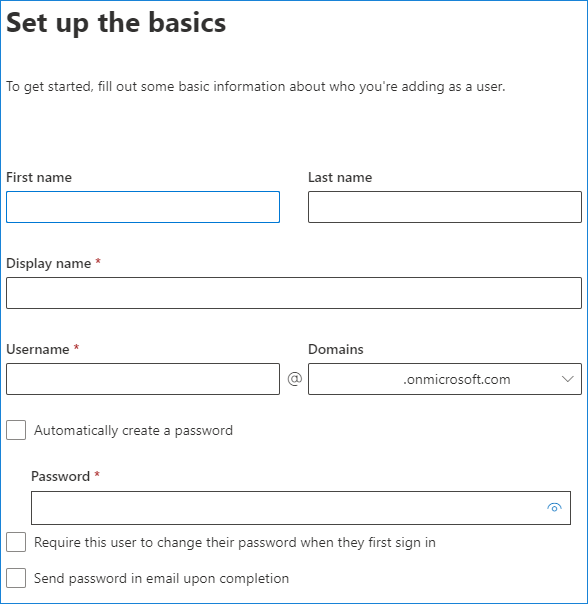
Next, fill out basic information about the user. The only required fields are Display name, Username (UPN) and password. While you can skip all other fields whatsoever, it’s usually best to fill out all you can now. It lessens the risk of having incomplete Entra ID (Azure AD) later on.
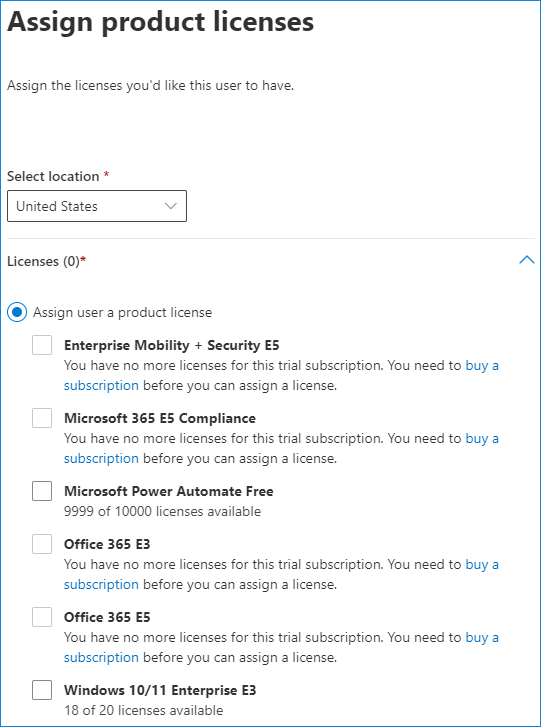
In the next step, select the user’s location and assign product licenses from the available pool. If you want the user to have an active mailbox, you need to assign a plan which includes the Exchange Online service. Otherwise, you will create the user without a mailbox.
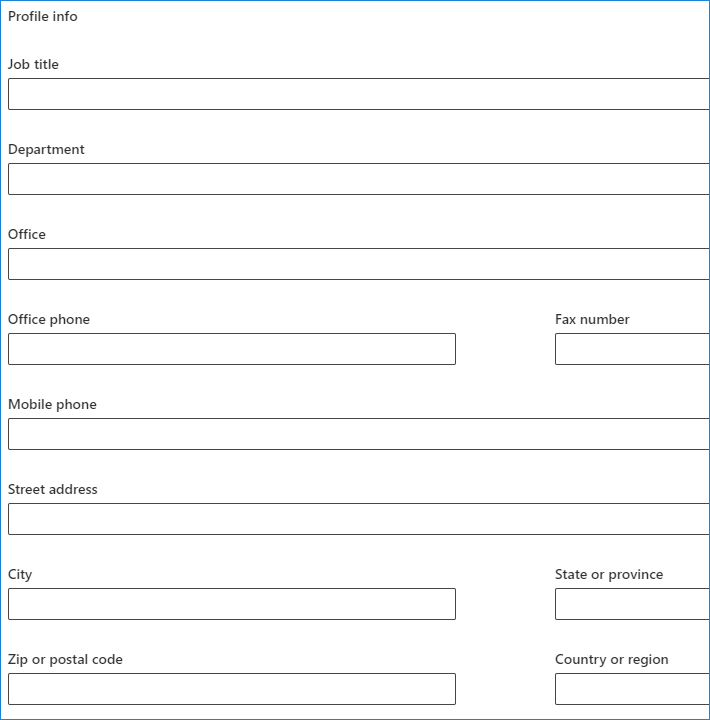
The last step is about filling out more detailed profile description. Once again, you can leave it for later, but it’s not recommended.
After that, the mailbox is created.
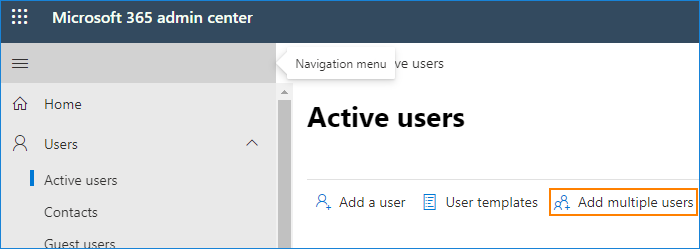
To create multiple users, you can use the Add multiple users button on the Active users settings page.
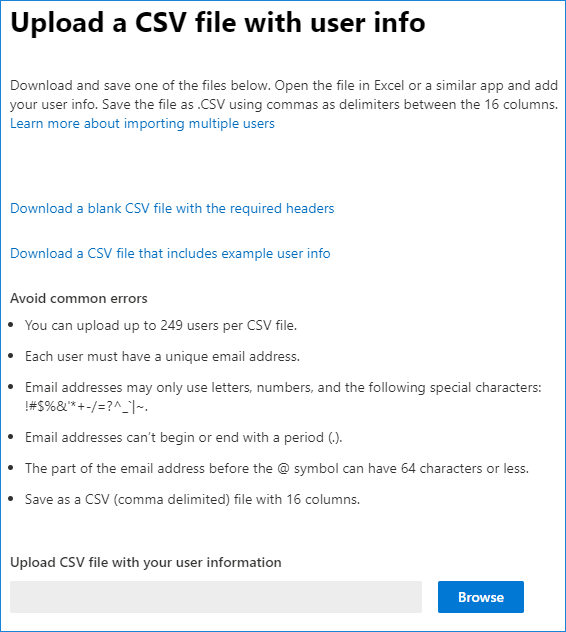
Here, you can download sample CSV files with the required headers. In most cases, however, you’d already have your user information stored somewhere, so you could either copy users’ info to the file with the right headers or use PowerShell to create a CSV file with the right headers and your users’ data already filled out. Learn how to export users from Active Directory
Once you have the CSV file, use the Browse button to locate it and start the mailbox creation process.
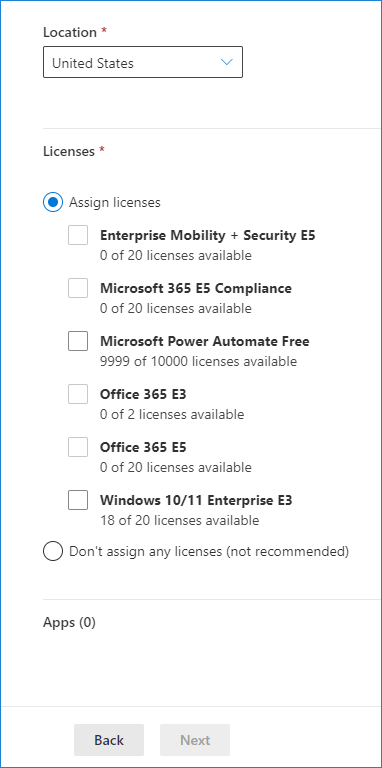
Next, you can assign licenses just like you would while creating a single mailbox:
Create a shared mailbox from the Microsoft 365 admin center
To create a shared mailbox, go to Microsoft 365 admin center > Teams & groups > Shared mailboxes, or use this link. Then, click Add a shared mailbox.
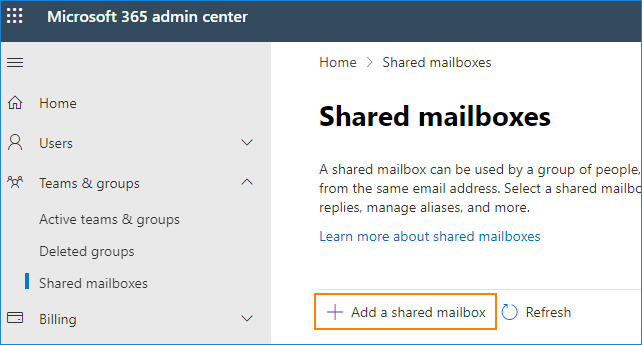
On the right, you should see a new pane with 3 fields to be filled out with relevant information.
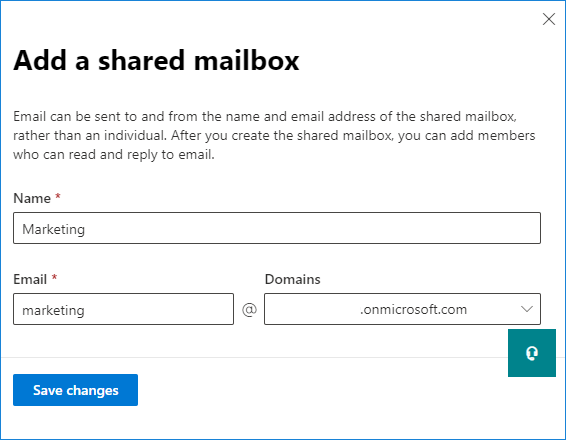
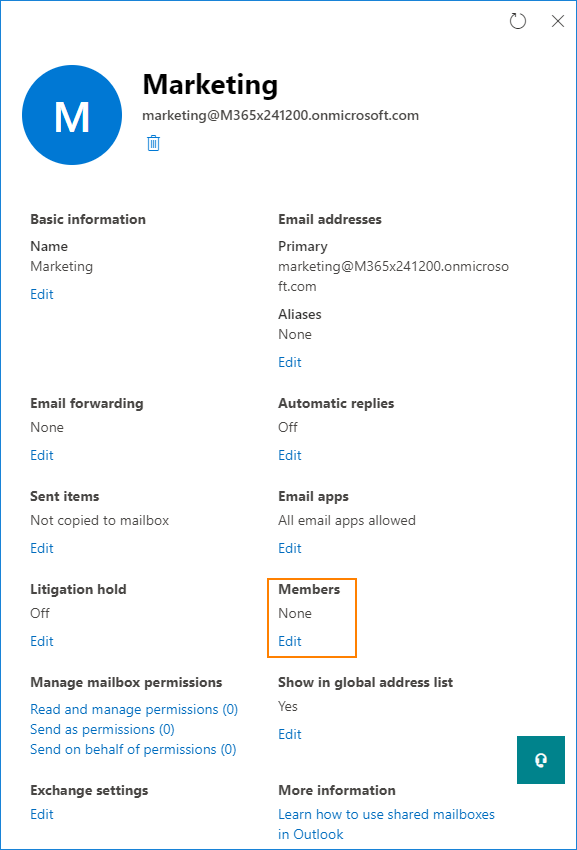
After the mailbox is created, you can select it from the list, click Edit, and add members:
Create user mailboxes with PowerShell
Before you do anything with PowerShell in your Microsoft 365 tenant, you need to connect to Exchange Online. Learn how to connect to Exchange Online with PowerShell
Using the New-Mailbox cmdlet from the Exchange Online module lets you create users and mailboxes in Microsoft 365 at the same time.
While you could use only -MicrosoftOnlineServicesID and -Password parameters to successfully create a new user mailbox, it’s better to add parameters like -MailboxPlan (so you don’t have to use Set-MailboxPlan afterwards):
New-Mailbox -Name MeganB -FirstName Megan -LastName Bowen -DisplayName "Megan Bowen" -MicrosoftOnlineServicesID MeganB -Password (ConvertTo-SecureString -String 'YourPassword' -AsPlainText -Force) -ResetPasswordOnNextLogon $true -MailboxPlan 'MailboxPlan'
Remember that the password needs to meet the password complexity requirements, or the mailbox creation will fail. Learn how to check and configure password complexity (Microsoft’s page)
To create mailboxes in bulk, you need a CSV file with the mailboxes list first. Then, you can import its contents to an array and use the foreach loop to create multiple mailboxes. You can of course use a different file location, and the specific variables’ values will depend on your CSV headers. The script will look like the following:
$mbxs = Import-Csv 'C:\users.csv'
Foreach ($mbx in $mbxs) {
New-Mailbox -Name $mbx.DisplayName -DisplayName $mbx.DisplayName -MicrosoftOnlineServicesID $mbx.UserPrincipalName} -Password (ConvertTo-SecureString -String 'YourPassword' -AsPlainText -Force) -ResetPasswordOnNextLogon $true -MailboxPlan 'MailboxPlan'}
Finally, you can use Set-MsolUser to fill out the rest of your users’ profile details.
Create a shared mailbox with PowerShell
Creating a shared mailbox with PowerShell requires less parameters as it works in a different way. In most cases, shared mailboxes don’t require any licenses and don’t have passwords. On the other hand, you need to take care of setting permissions to those mailboxes, so that licensed users of your choice can access them.
New-Mailbox -Shared -Name 'Marketing' -DisplayName 'Marketing' -Alias 'Marketing'
Set-Mailbox Marketing -GrantSendOnBehalfTo 'Sales and Marketing'
Add-MailboxPermission -Identity Sales -User 'Sales and Marketing' -AccessRights FullAccess -InheritanceType All This sample code creates a new Shared Mailbox named Marketing and grants Full Access and Send on Behalf permissions for the Sales and Marketing security group members.
Read more:
Recommended articles
CodeTwo sp. z o.o. sp. k. is a controller of your personal data.
See our Privacy Policy to learn more.