Deprecation of Client Access Rules in Exchange Online
Although they are incredibly useful, the days of Client Access Rules are soon to be over.
As announced in this Exchange Team Blog, CARs were disabled in October 2022 for those tenants that hadn’t used them. Complete retirement was planned for September 2023.
But as with many other deadlines, the date needed to be pushed forward. According to this announcement, it turned out that the substitutes for CARs (Conditional Access Policies and Continuous Access Evaluation) don’t support all scenarios. While Microsoft boasts superior security, some rules simply cannot be migrated yet. That’s why the Redmond-based company decided to push the Client Access Rules’ retirement to September 2024. That’s when all scenarios should be supported.
In the meantime, after September 2023, rules without technical limitations have been retired. What are those technical limitations? For example, defining auth policies for different connection methods.
Since the Client Access Rules’ days are over, you might want to learn how to use Entra ID (Azure AD) Conditional Access Policies instead.
The rest of the article is now more like “what you could have done in Exchange Online”. However, those methods should still work for on-premises environments, like Exchange 2019, Exchange 2016 and Exchange 2013.
The elements of Client Access Rules
Client Access Rules are defined with the following attributes:
- Conditions – here you define the client connections you want to block or allow access for. Once the conditions are met (the client trying to connect to your EO matches the characteristics in the conditions), then the action is applied.
- Exceptions – this attribute lets you narrow down the scope of the rule, which means that if the client connection matches your exceptions, the rule will not apply to that client connection. It’s optional.
- Actions – here you decide whether you want to allow or block the access to your Exchange Online organization.
- Priority – each rule has its priority number assigned. The lower the number, the higher the priority. By default, the oldest rules have the highest priority, so they are processed first.
Note: Once a rule is applied, no more rules are processed.
The cmdlets for Client Access Rules
When managing Client Access Rules, you can use the following cmdlets:
- Get-ClientAccessRule – shows a list of currently configured rules.
- Set-ClientAccessRule – modifies existing rules.
- New-ClientAccessRule – creates new rules.
- Test-ClientAccessRule – lets you test rule’s configuration.
- Remove-ClientAccessRule – removes the rules.
For more details on using Client Access Rules cmdlets, check out this Microsoft article.
Note: To manage Client Access Rules, it is recommended to use Exchange Online PowerShell V3 module, which supports modern authentication. This article shows how to start a remote session to Exchange Online using this module.
With Client Access Rules, you can cover so many different scenarios that it is impossible to discuss them all. That is why I will focus on just a few examples that may be a good start for your Client Access Rules exploration.
Block access to the Exchange admin center in Microsoft 365 (Office 365)
Client Access Rules can be your way to prevent external or internal client connections to your Exchange admin center. This will help you protect your organization against any unauthorized access attempt.
Important: Before you start, it is a good practice to run the below cmdlet which prevents remote PowerShell from being accidentally blocked for the administrator. You definitely don’t want to lose access yourself. The rule should have the highest priority.
New-ClientAccessRule -Name "Always Allow Remote PowerShell" -Action Allow -AnyOfProtocols RemotePowerShell -Priority 1

Block access for all users except for a specific IP address
To block access to the Exchange admin center for all users except for one IP address (e.g. Management), run the following cmdlet:
New-ClientAccessRule -Name "Allow EAC access only for MGMT" -Action DenyAccess -AnyOfProtocols ExchangeAdminCenter -ExceptAnyOfClientIPAddressesOrRanges 192.168.171.0 -Priority 2
Note: You can also provide an IP address range, for example, 192.168.171.0-192.168.171.254 or 192.168.171.0/24.
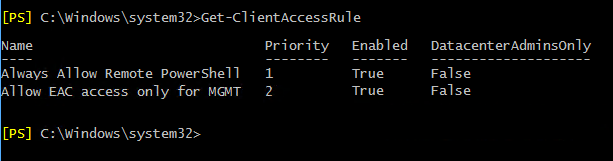
Get a list of Client Access Rules
To see what rules you already have configured, run the following cmdlet:
Get-ClientAccessRule
Verify if the rule works as expected
To test your client access rule, you can use the following cmdlet:
Test-ClientAccessRule
For example:
Test-ClientAccessRule -AuthenticationType BasicAuthentication -Protocol ExchangeAdminCenter -RemoteAddress 192.168.171.0 -RemotePort 443 -User [email protected]
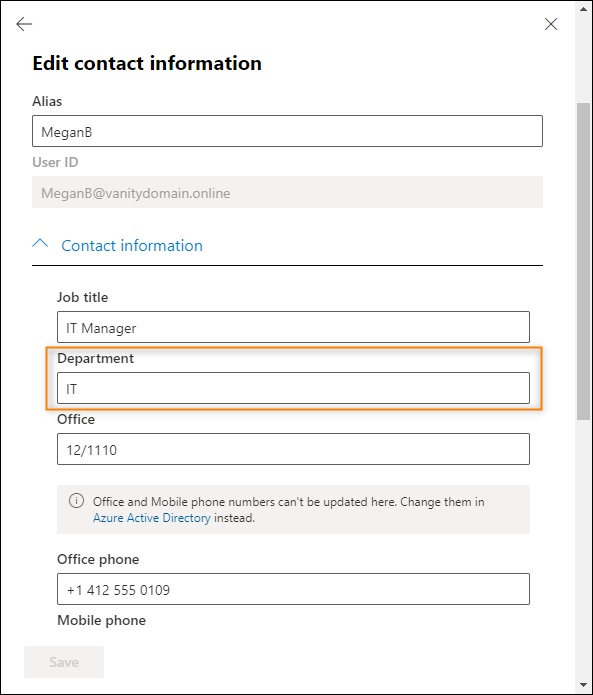
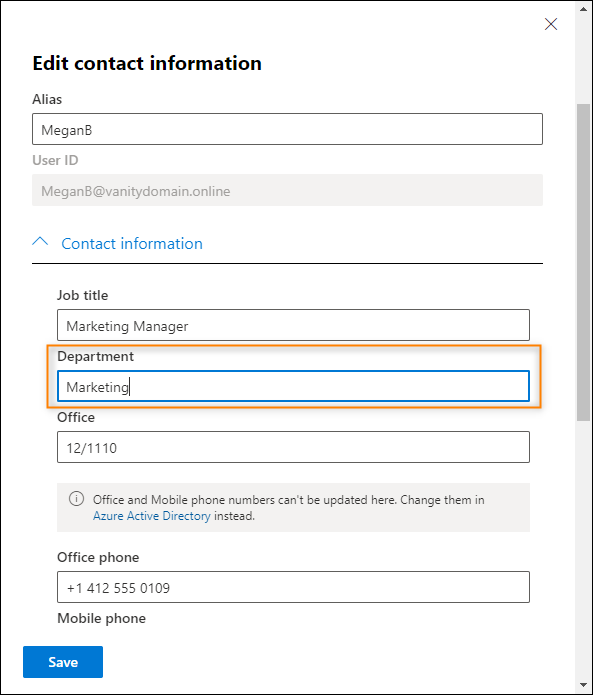
Prevent access to EAC based on user Active Directory attributes
Depending on Active Directory attributes of a user, you can define who can or can’t access the Exchange admin center. This is helpful, for example, when you can’t rely on IP addresses (different location and networks of users). Then, to create a Client Access Rule for a specific group of people, you can use one of the AD attributes, for example, the Department attribute.
Removing old rules
So, to start creating this new rule, I first remove the rule for the IP address I added in the previous steps. The cmdlet for removing is as follows:
Remove-ClientAccessRule –Identity "Allow EAC access only for MGMT"
Creating a new rule
Now, to allow access to EAC only for members of the IT Department, you can use the following cmdlet:
New-ClientAccessRule -Name "Allow access to EAC only for IT" -Action DenyAccess -AnyOfProtocols ExchangeAdminCenter -UserRecipientFilter {Department -ne 'IT'} -Priority 2
This will check if the Department attribute value matches “IT”. All access attempts that have different Department value will be blocked. For example, all members of the Marketing or Sales Departments will not have access to the Exchange admin center.
Checking if the rule works correctly
Once you have created the rule, it is a good practice to check if it works as expected. To verify that, try connecting to the Exchange admin center from a user account where the Department value equals “IT”. Then, repeat the testing but this time change the Department value for the user to, for example, “HR” or “Marketing” and see if the access is blocked for that user.
To test this, you can also run the Test-ClientAccessRule cmdlet. For example:
Test-ClientAccessRule -AuthenticationType BasicAuthentication -Protocol ExchangeAdminCenter -RemoteAddress 192.168.171.0 -RemotePort 443 -User [email protected]
Bottom line
As I mentioned, these are just examples of what you can do with Client Access Rules to manage client connections to your Microsoft 365 organization. Feel free to explore the topic and strengthen your business security.
See also:
- How to block external access to the Exchange admin center in Exchange 2019 via Client Access Rules?
- How to prevent Office 365 users from sending emails outside the organization?
- New-ComplianceSearch: how to use the newer version of Search-Mailbox
- Update your Exchange Online PowerShell module to V3 before it’s too late
Recommended articles


Hello and thanks for the post.
I’m looking to leverage the department attribute for multiple admin whose department attribute are different. Example: IT admin, IT operation, IT security.
How can have one rule to contain these three different department attributes using below commands?
EAC only for IT” -Action DenyAccess -AnyOfProtocols ExchangeAdminCenter -UserRecipientFilter {Department -ne ‘IT’} -Priority 2
You can use the -or operator in the -UserRecipientFilter parameter, so you could use something along those lines:
"Department -ne 'IT admin' -or Department -ne 'IT operation'"It is worth mentioning, that:
a) UserRecipientFilter can only use a very limited subset of filterable attributes — see the full list in New-ClientAccessRule documentation.
b) the rules are actually applied to mailboxes and not to user accounts, despite Microsoft documentation stating otherwise. Big deal if you’re using delegation or impersonation.