How to solve font-related problems in email signatures
Problem:
Fonts in email signatures are not correctly displayed.
Solution:
The appearance and availability of a font in an email message depends on the client and device used to read this email. If fonts used in your email signature are not supported by the recipient's environment, these fonts are not displayed or they get replaced with other available fonts. This might be solved by installing your fonts in the recipient's environment, but not all fonts are supported on every platform. That is why it's better to avoid these problems by preparing your email signatures properly. You can:
Use web safe fonts only
If you want to make sure your email signatures are correctly displayed on as many devices (email apps) as possible, use only the most common fonts (known as web safe fonts). The following table lists fonts that are known as safe to use in Windows along with their safe counterparts from MacOS:
| Windows fonts | MacOS fonts |
|---|---|
| Arial | Arial, Helvetica |
| Arial Black | Arial Black, Gadget |
| Comic Sans MS | Comic Sans MS* |
| Courier New | Courier New |
| Impact | Impact*, Charcoal* |
| Lucida Console | Monaco* |
| Lucida Sans Unicode | Lucida Grande |
| Tahoma | Geneva |
| Times New Roman | Times New Roman, Times |
| Trebuchet MS | Trebuchet MS |
| Verdana | Verdana, Geneva |
* These fonts may not work properly when used in certain types such as italic or bold.
Even though these fonts are supported in the majority of environments, they do not guarantee 100% success. For example, the Gmail web app and/or mobile devices in general are known to be particularly troublesome in terms of displaying fonts. That’s why, to ensure the best compatibility, we recommend defining the fallback fonts, as described below.
Define fallback fonts
To protect your signature against situations where a font is missing on the recipient's platform, you can define one or more fallback fonts - they will be used if the primary font is missing. You can add fallback fonts in the HTML source of your signature. See this article if you are using CodeTwo Email Signatures 365 or this article if you are using CodeTwo Exchange Rules to learn how to access the HTML source view in the template editor.
In the HTML source code, find an element (e.g. a paragraph) that you would like to modify, and add the following style attribute in the opening tag:
style="font-family: font-name1, font-name2, font-name3;"
where font-name1 is the name of your primary (default) font, font-name2 is the secondary font (it will be used if font 1 is missing), and so on. You can add as many fonts as you like and set their priority by putting them in order. Make sure that you provide the exact font name as displayed in the font file (see Fig. 1.). Do not omit any spaces, hyphens, etc.
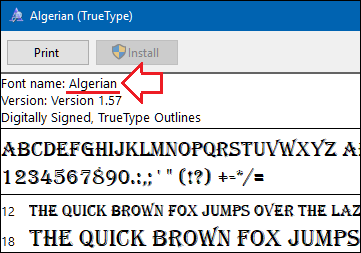
Fig. 1. A True Type font file (TTF) contains information about the font name.
Example
This is how the HTML code of a paragraph looks like if three fallback fonts are used and the font size is 10 points:
<p style="font-family: Myriad Pro, Open Sans, Arial;font-size:10pt;">This is a paragraph.</p>
And this is the end result:
This is a paragraph.
See also:
| Related products: | CodeTwo Email Signatures for Office 365, CodeTwo Email Signatures for Email Clients, CodeTwo Exchange Rules 2007 4.x, CodeTwo Exchange Rules 2010 3.x, CodeTwo Exchange Rules 2013 2.x, CodeTwo Exchange Rules 2016 1.x, CodeTwo Exchange Rules 2019 1.x, CodeTwo Exchange Rules Pro 1.x, 2.x |
| Categories: | How-To |
| Last modified: | March 8, 2024 |
| Created: | March 19, 2018 |
| ID: | 708 |


