Manual configuration of Exchange Online connectors with PowerShell
Problem:
You would like to know how to use PowerShell to manually create Exchange Online outbound and inbound connectors and the CodeTwo Exchange transport rule for CodeTwo Email Signatures 365.
Solution:
This is an alternative method to create the connectors and the mail flow rule that can be helpful if:
- the automatic (recommended) or the manual UI-based methods do not work for you, e.g. because certain Microsoft services are down,
- you prefer to create connectors yourself and you’re familiar with PowerShell, so it’s a quicker method for you.
To succeed, it’s important that you follow the order of the configuration outlined below. In short, you need to configure:
- Exchange Online outbound connector that will route your emails through CodeTwo to get signatures,
- Exchange Online inbound connector that will accept emails with CodeTwo signatures back to your tenant for final delivery,
- Exchange Online transport rule that will filter emails that should be processed by CodeTwo service. The rule also helps avoid loops and duplicate signatures.
Steps to complete
Before you start creating anything, you need to complete these preliminary steps:
- While registering your tenant in CodeTwo Admin Panel, select I want to manage my connectors manually in the Connectors step of the tenant registration wizard. Next, click Authorize (as shown in Fig. 1.) and sign-in to Microsoft 365 with a global admin accont. We need your authorization to issue a certificate and create a unique CodeTwo subdomain that is required for the connectors to work. Once done, click Next to proceed to the next step.
Info
If you have already registered your tenant with CodeTwo, have a look at this Knowledge Base article to locate and copy the address of your unique CodeTwo subdomain assigned during provisioning (you'll need it later on) and skip to step 3.
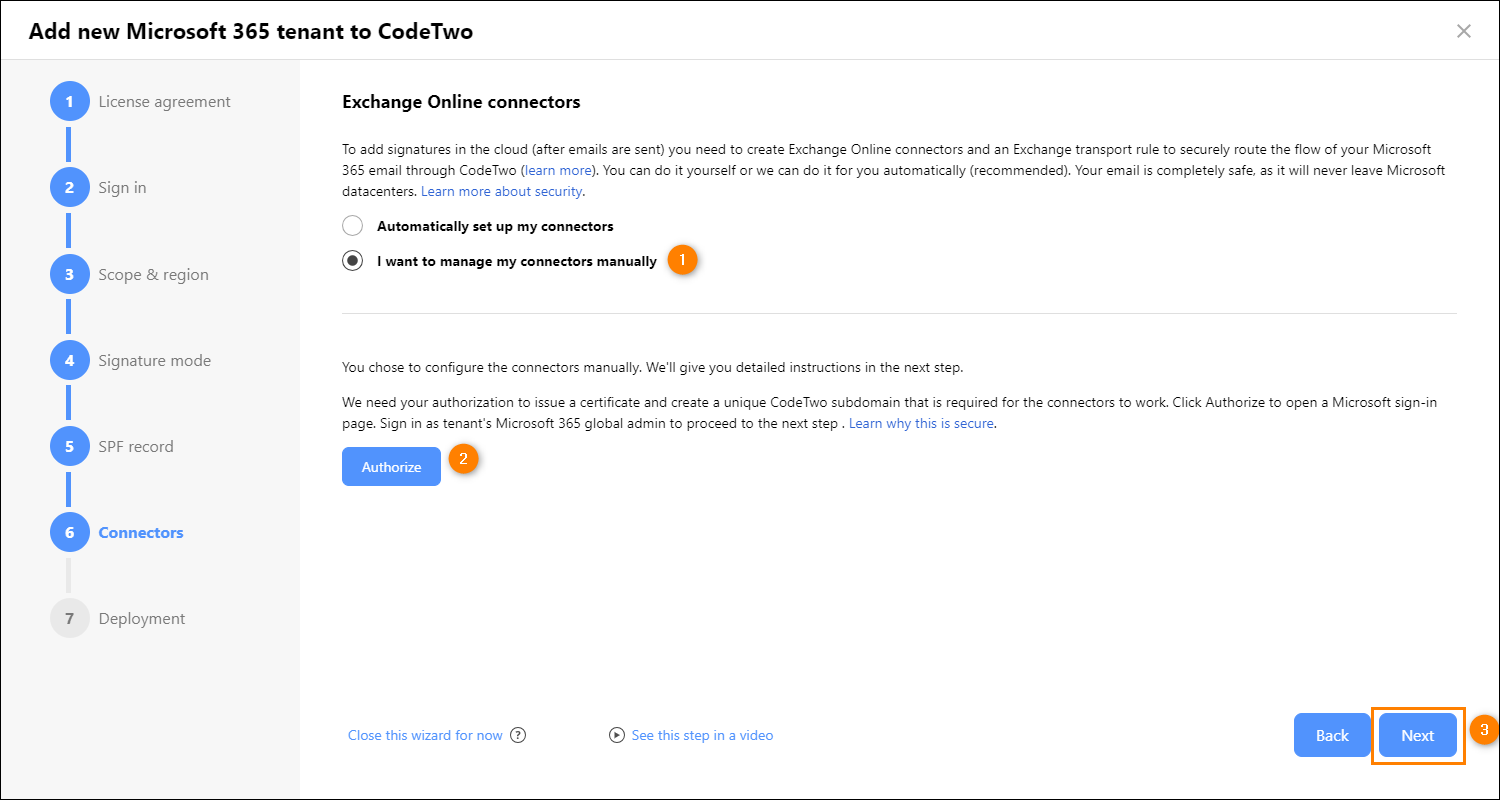
Fig. 1. Choosing to configure connectors manually.
- Copy you unique CodeTwo subdomain address that you can find in the Deployment step (Fig. 2.) - you'll need it later on. Leave the browser's tab with the wizard open for now.
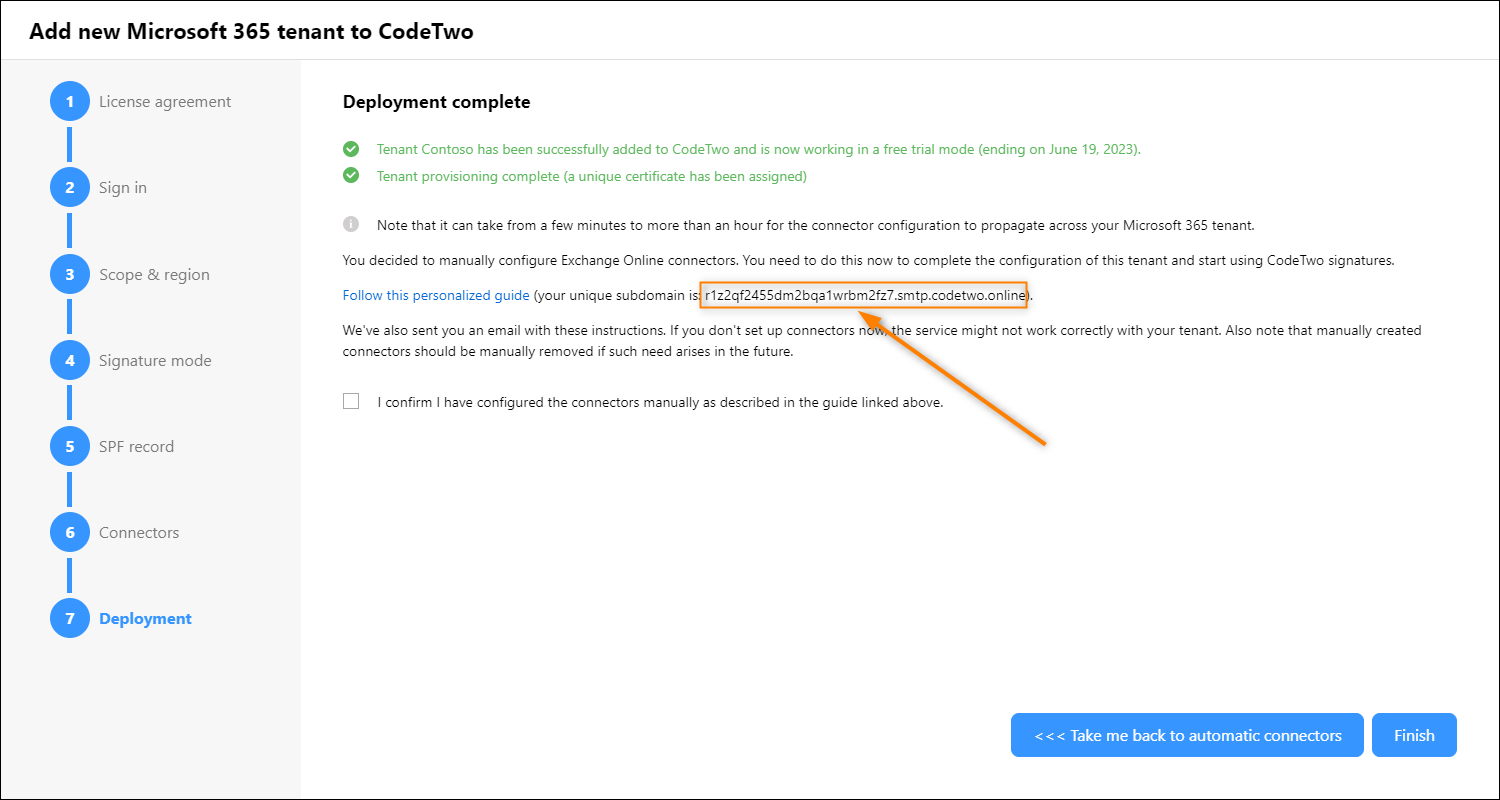
Fig. 2. Copying your unique CodeTwo subdomain address.
- Run Windows PowerShell console as an admin and connect to your tenant’s Exchange Online. To learn how to do it, refer to this article.
Important
To successfully connect to Exchange Online after July 1st, 2023, you need to update to Exchange Online Management PowerShell V3 module. Learn more
Once you’ve successfully connected to Exchange Online, you can proceed with the steps below.
Create Exchange Online outbound connector
- Copy the following cmdlet and paste it into the Windows PowerShell console:
New-OutboundConnector -Name "CodeTwo Outbound Connector" -ConnectorType OnPremises -CloudServicesMailEnabled $True -Enabled $True -SmartHosts <your unique subdomain name>.smtp.codetwo.online -IsTransportRuleScoped $True -TlsSettings DomainValidation -TlsDomain *.codetwo.com -UseMXRecord $False -RouteAllMessagesViaOnPremises $FalseReplace <your unique subdomain name> with the unique subdomain address you copied from the tenant registration wizard or from a different place, as discussed in this article.
Important
To avoid any configuration issues in the future, for example if you decide to reconfigure connectors automatically using the wizard, make sure not to change the default name of the connector (CodeTwo Outbound Connector), provided in the cmdlet after the −Name parameter.
- Execute the cmdlet by pressing Enter – a new outbound connector will be created.
Create the inbound connector
- Copy the following cmdlet and paste it into the console:
New-InboundConnector -Name "CodeTwo Inbound Connector 2.0" -SenderDomains * -ConnectorType OnPremises -CloudServicesMailEnabled $True -RestrictDomainsToCertificate $False -RequireTls $True -TlsSenderCertificateName <your unique subdomain name>.smtp.codetwo.online -Enabled $TrueAgain, replace <your unique subdomain name> with your actual unique subdomain name, as described here.
Important
To avoid any configuration issues in the future, for example if you decide to reconfigure connectors automatically using the wizard, make sure not to change the default name of the connector (CodeTwo Inbound Connector 2.0), provided in the cmdlet after the −Name parameter.
- Execute the cmdlet by pressing Enter – a new inbound connector will be created.
Create the transport rule
- Copy the following cmdlet and paste it into the console:
New-TransportRule -Name "CodeTwo Exchange transport rule" -Mode Enforce -RuleErrorAction Defer -SenderAddressLocation HeaderOrEnvelope -Priority 0 -FromScope InOrganization -ExceptIfHeaderMatchesMessageHeader X-CodeTwoProcessed -ExceptIfHeaderMatchesPatterns $true -ExceptIfFromAddressMatchesPatterns "<>" -ExceptIfMessageTypeMatches Calendaring -ExceptIfHeaderContainsMessageHeader Return-Path -ExceptIfHeaderContainsWords "<>" -RouteMessageOutboundConnector "CodeTwo Outbound Connector" -FromMemberOf <group name in Microsoft 365>
where <group name in Microsoft 365> should be replaced with the actual name of a group of users who will get CodeTwo signatures, with no spaces included, e.g. SalesandMarketing. Make also sure that the outbound connector name (highlighted in red) is exactly the same as the one used in the cmdlet to create the outbound connector.
Important - limiting the scope of users
When registering your Microsoft 365 tenant with CodeTwo, you defined the scope of licensed users who can benefit from the service (e.g. consume licenses and get signatures). See this article to learn how the CodeTwo service behaves if the scope of senders (handled by connectors) is different from the scope of licensed users.
If you want our software to add signatures to emails send by all users in your tenant, remove the following code from the above cmdlet:
-FromMemberOf <group name in Microsoft 365> - Execute the cmdlet by pressing Enter – a new transport rule will be created.
Check the configuration
Now, you can run the following 3 cmdlets to make sure that Exchange Online connectors and the transport rule have been created successfully in your tenant:
Get-OutboundConnector
Get-InboundConnector
Get-TransportRule
If the newly created items are listed in the Windows PowerShell console after running the cmdlets (as shown in Fig. 3.), your configuration is OK.
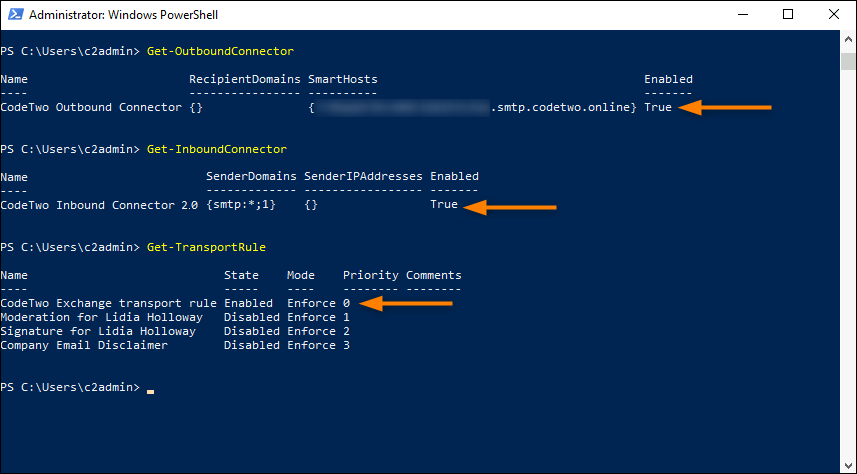
Fig. 3. Checking if the connectors and the rule have been created successfully.
In such a case, disconnect from Exchange Online by using the following cmdlet:
Disconnect-ExchangeOnline
If you've left the tenant registration wizard open, you can now get back to it to confirm your manual configuration and click Finish (Fig. 4.).
Tip
If, in the meantime, you've closed or reloaded the browser's tab with the tenant registration wizard by mistake, etc., you can return to the wizard by clicking Continue setup in the Status column (on the Tenants page).
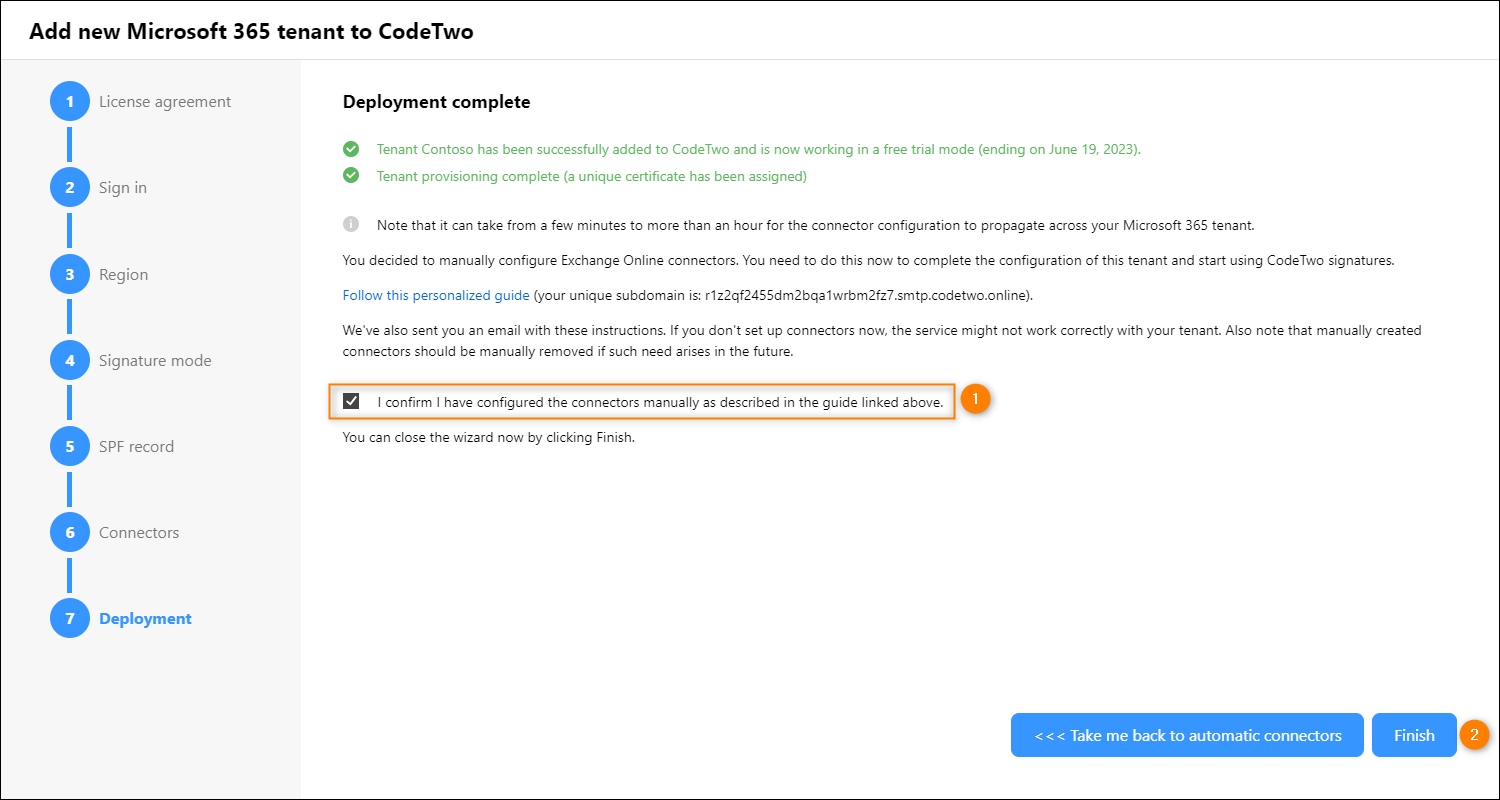
Fig. 4. Confirming your manual configuration and completing the tenant registration wizard.
Now, you can access the signature management app to start managing your email signatures. Learn more
| Related products: | CodeTwo Email Signatures for Office 365 |
| Categories: | FAQ, How-To |
| Last modified: | July 22, 2024 |
| Created: | February 17, 2023 |
| ID: | 1023 |


