How to transfer signatures between different CodeTwo products
Problem:
You would like to copy a signature (or a signature template) from one CodeTwo product to another.
Solution:
If you want to transfer all your existing signature templates (as well as auto-reply message templates) from CodeTwo Exchange Rules or CodeTwo Exchange Rules Pro to CodeTwo Email Signatures 365, you can simply use the CodeTwo Exchange Rules Converter. Learn more about the tool
If you want to transfer a signature template in the opposite direction (from the cloud to your on-premises environment) or between a different pair of CodeTwo email signature management products, you have the following two options:
- Save a signature template to a file and load it in another program’s editor
- Copy the source HTML code of a signature template and paste it in another program’s editor
Warning
Some AD attribute placeholders in your transferred signature might not work, especially if you move from Active Directory (CodeTwo Exchange Rules) to Entra ID / Azure AD (CodeTwo Email Signatures 365). This is because different attributes are available in on-premises and cloud Active Directory environments. Also, when transferring your signature template to CodeTwo Email Signatures 365, keep in mind that there are certain placeholders that are not supported in Outlook (client-side) mode. Learn more about placeholder availability
Transferring a signature template using a C2CF file
In the following example, we are going to transfer a signature template from CodeTwo Email Signatures 365 to CodeTwo Exchange Rules (Pro).
Important
Transferring a template as a file from or to CodeTwo Exchange Rules (Pro) is only possible for cloud (server-side) signature rule templates.
Additionally, it is not possible to transfer template as a file between cloud (server-side) and Outlook (client-side) rules in general because each rule type uses a different proprietary file format – C2CF (cloud rules) and C2TF (Outlook rules). That’s why, you should go for different methods in the following scenarios:
If you want to use a template from a CodeTwo Email Signatures 365 Outlook (client-side) rule in CodeTwo Exchange Rules (Pro) either:
- use the second method below to copy template’s source code, or;
- use the method from this article (but in the opposite direction) to copy a template from an Outlook rule to a cloud one, and next proceed normally with steps below to save and load the template.
If you would like to do the opposite, namely use a CodeTwo Exchange Rules (Pro) template in an Outlook (client-side) rule in CodeTwo Email Signatures 365:
- use the CodeTwo Exchange Rules Converter to move your cloud (server-side) rule to CodeTwo Email Signatures 365, and then proceed with the method from this article to copy the template from the cloud rule to an Outlook one (preferred solution);
- use the second method below to copy template’s source code.
Saving a signature template locally to a C2CF file
- Sign in to the signature management app and select the cloud (server-side) signature whose template you wish to transfer.
- Go to the Design step and click Edit signature to open the signature template editor (Fig. 1.).

Fig. 1. Opening the chosen cloud (server-side) signature template in CodeTwo Email Signatures 365.
- In the editor, click the Templates button and choose Save as file from the drop-down menu (Fig. 2.).
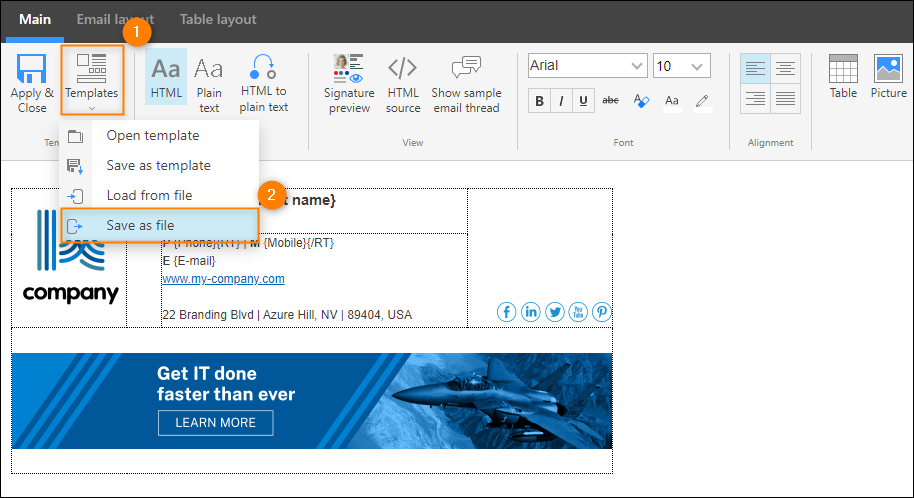
Fig. 2. This option allows you to save a signature template locally as a C2CF file.
- Name the signature template file, select its location, and save it by clicking the Save button (Fig. 3.).
Info
Ideally, save the file to the location where you’ve installed the Administration Panel of CodeTwo Exchange Rules (Pro).
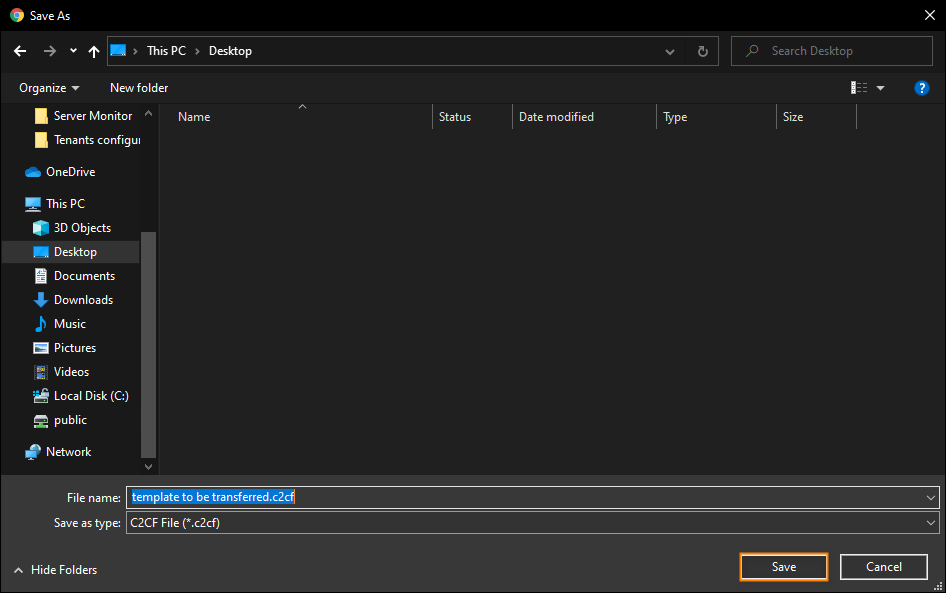
Fig. 3. Defining a name and location of the exported signature template.
Loading the saved C2CF file in the target editor
- Launch the CodeTwo Exchange Rules (Pro) Administration Panel from the Start menu.
- Create a new rule to which you wish to apply the exported template – click the +Add button, next go to the Actions tab, and click the +Add button to add an appropriate action (e.g. Insert signature). Alternatively, choose your existing rule.
- Finally, launch the editor by clicking Edit (Fig. 4.).
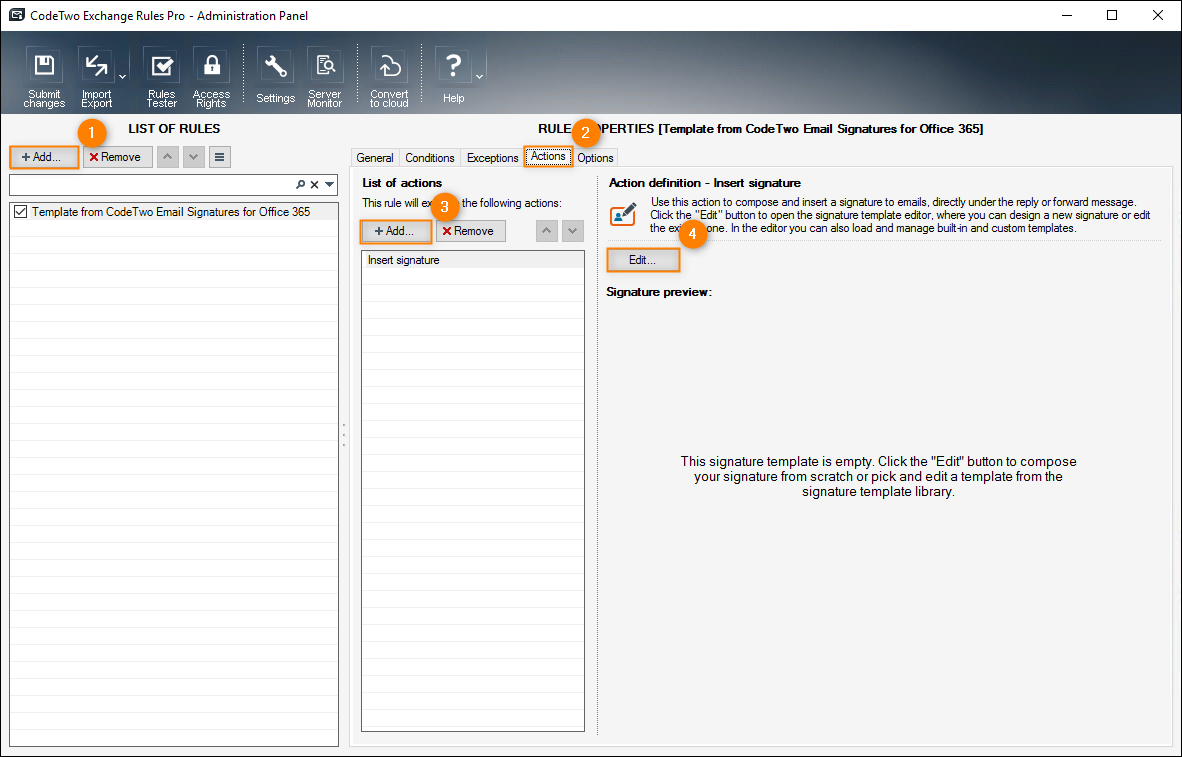
Fig. 4. Creating a new rule and launching the template editor in CodeTwo Exchange Rules Pro.
- If the template library opens on startup, simply close it or select the blank template.
- In the editor, click the Load from template button, locate your saved signature template file and open it (Fig. 5.).
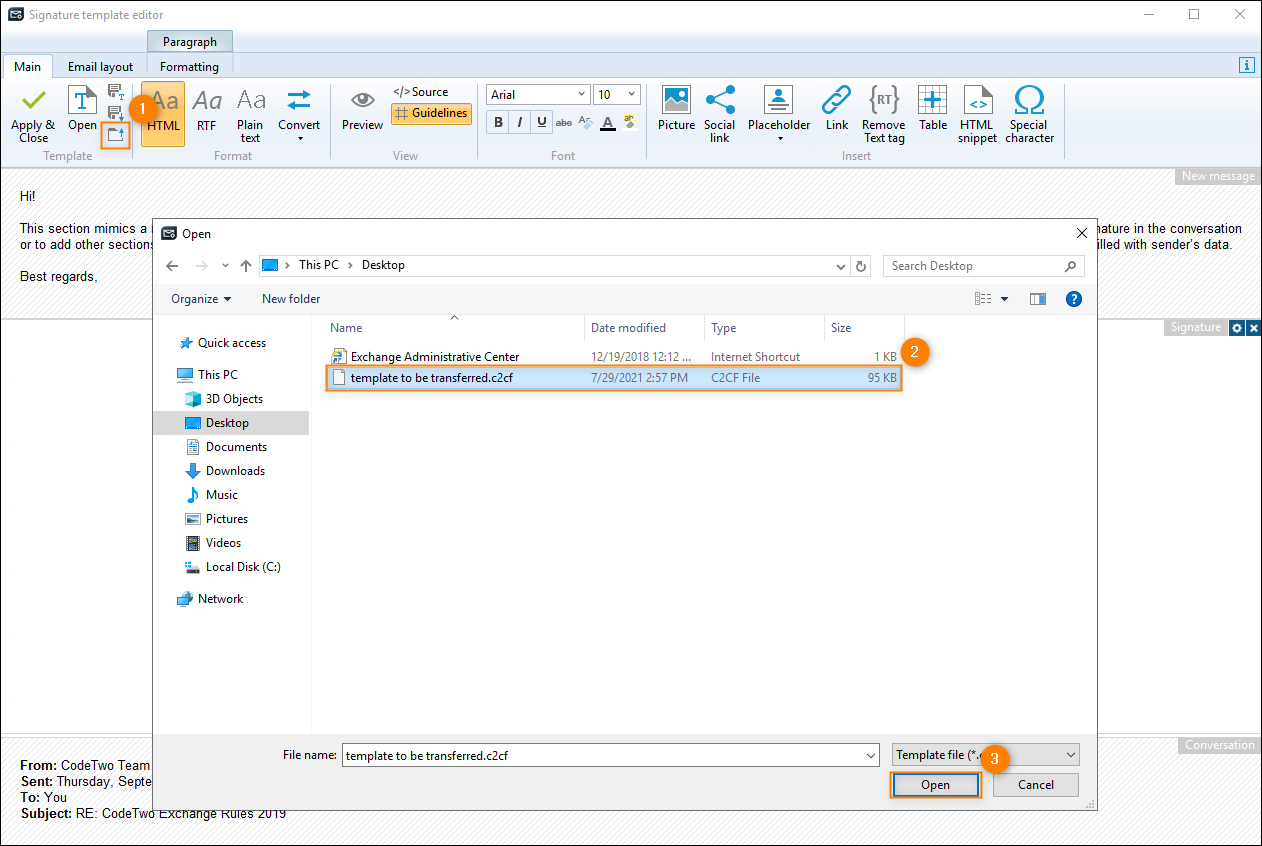
Fig. 5. Loading the signature template exported from CodeTwo Email Signatures 365.
- The template will be inserted into the editing pane (Fig. 6.). Now, you can apply your template to the signature rule you are currently editing by clicking Apply & Close.
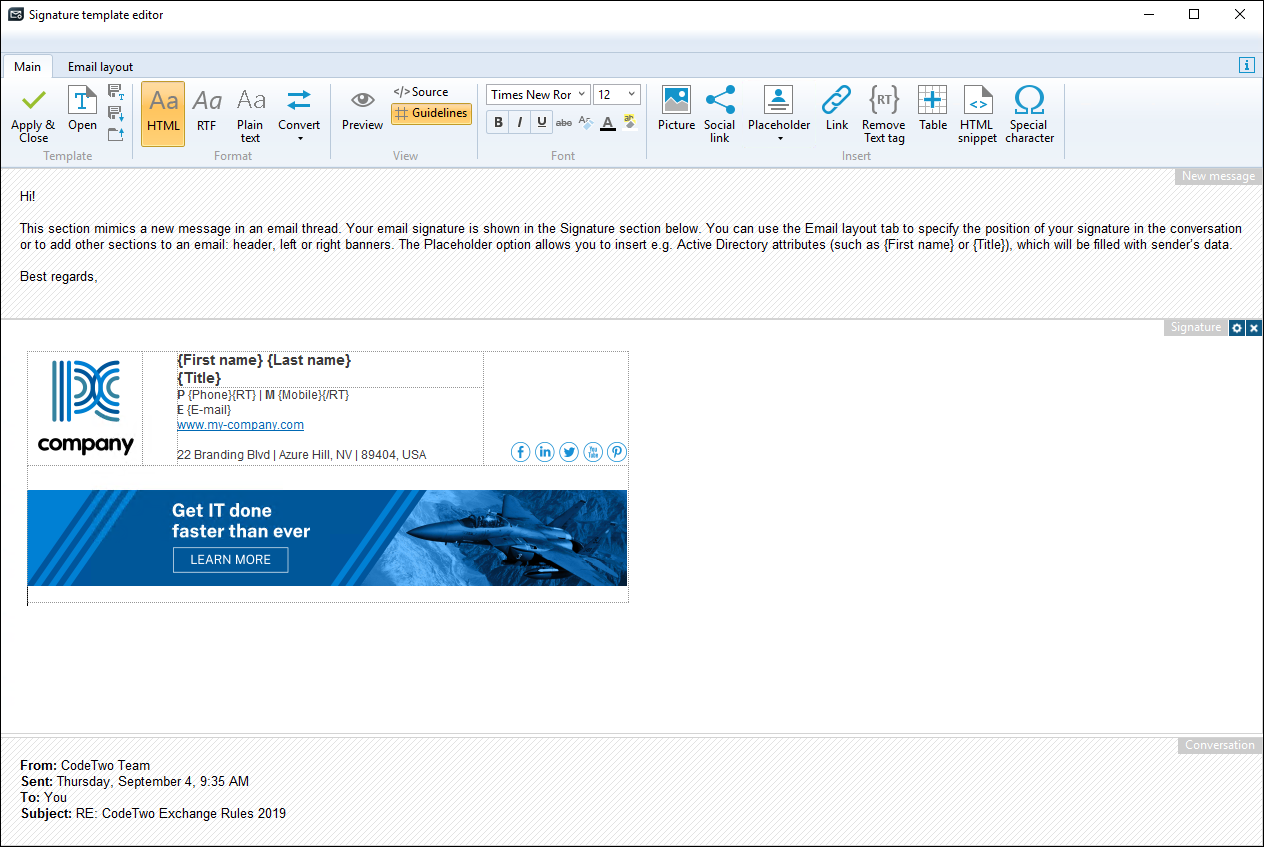
Fig. 6. A signature template transferred to CodeTwo Exchange Rules Pro from CodeTwo Email Signatures 365 (see Fig. 2.).
Transferring a signature template by copying its source HTML code
Warning
This method is most useful when you migrate between the programs that use the same signature editor. If you copy a signature between different versions of the editor (e.g. from CodeTwo Email Signatures 365 to CodeTwo Exchange Rules), the formatting (especially tables) might change, and you might need to fix it afterwards. In such a case, it may be a better idea to create a signature template from scratch or use the first method. Contact us if you have any problems - our Support team can help you recreate your templates.
If your signature contains references to local content (such as images), these references may not be correctly linked after you paste the signature. Make sure that all the references are working properly before going live with the signature. If necessary, insert all signature elements again in the editor.
Copying the HTML source code of a signature template
- Open (edit) your signature in the editor.
- If you use CodeTwo Exchange Rules (or Exchange Rules Pro), open the Administration Panel and find a rule that contains the signature that you want to copy. To open the signature in the editor, click the Edit button on the Actions tab (Fig. 7.). Note that the editor is available only in the signature, disclaimer, and full composition related actions.

Fig. 7. How to edit a signature in CodeTwo Exchange Rules & Exchange Rules Pro.
- If you use CodeTwo Email Signatures 365, you need to sign in to app.codetwo.com and select your signature rule from the list. Go to the Design step and edit the signature template via the Edit signature button, as shown in Fig. 8.
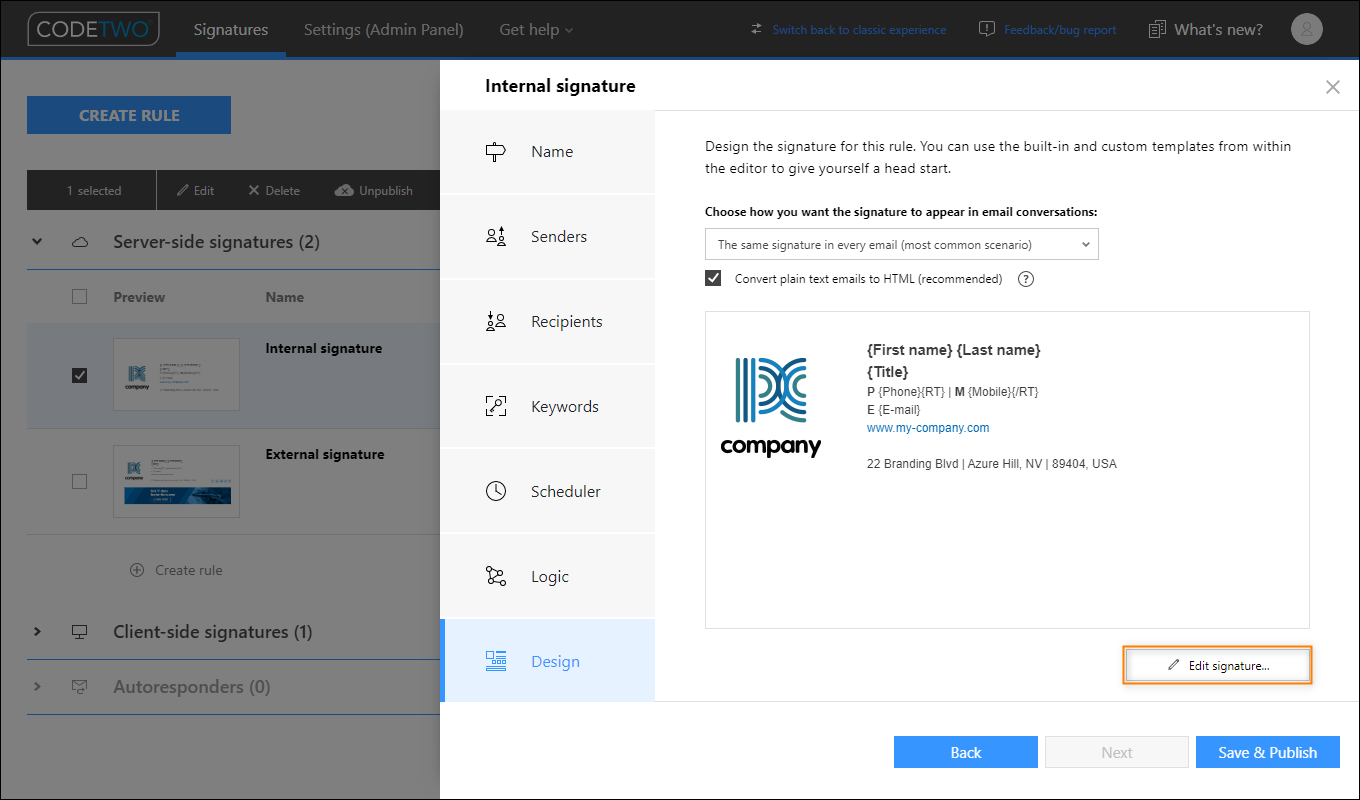
Fig. 8. How to edit a signature in CodeTwo Email Signatures 365.
- In the editor, click the HTML source or Source button to open the HTML source code view window (Fig. 9.).
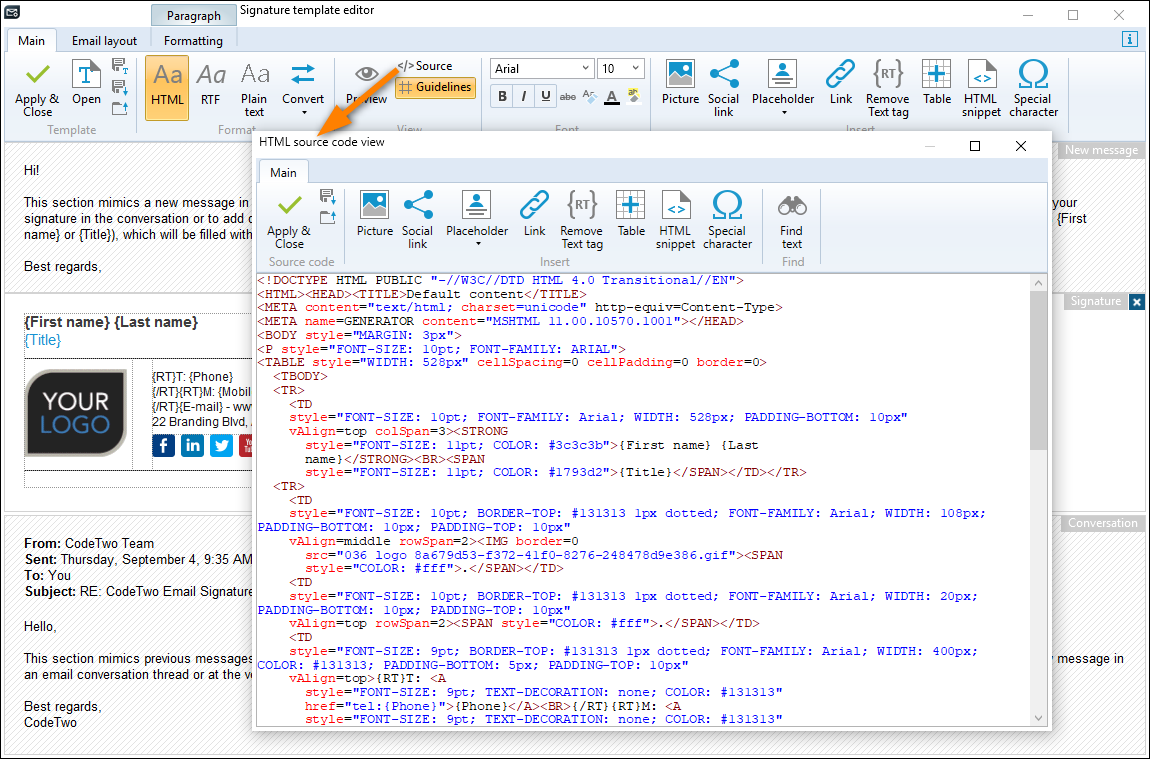
Fig. 9. How to open the source code view of a signature.
- Select the entire HTML code by pressing Ctrl+A on the keyboard and copy it to the clipboard by pressing Ctrl+C.
Pasting the HTML source code of the signature template into the editor
- Create a new signature rule in your CodeTwo program and launch the template editor. Alternatively, choose your existing rule.
- If the template library opens on startup, simply close it or select the blank template.
- Click the HTML source or Source button in the editor to open an empty HTML source code view window.
- Paste the HTML source code of your signature by pressing Ctrl+V on the keyboard. Click Apply & Close.
- Save the changes in the editor and close it by clicking the Apply & Close button.
- Save the signature rule in your CodeTwo software.
See also:
- If you would like to automatically convert cloud (server-side) email signatures to Outlook (client-side) signatures or vice versa in CodeTwo Email Signatures 365, follow the instructions from this article.
- If you would like to transfer rules and templates from CodeTwo Exchange Rules to CodeTwo Email Signatures 365, try an easy-to-use converter.
| Related products: | CodeTwo Email Signatures for Office 365, CodeTwo Exchange Rules 2007 4.x, CodeTwo Exchange Rules 2010 3.x, CodeTwo Exchange Rules 2013 2.x, CodeTwo Exchange Rules 2016 1.x, CodeTwo Exchange Rules 2019 1.x, CodeTwo Exchange Rules Pro 2.x |
| Categories: | How-To |
| Last modified: | February 16, 2024 |
| Created: | March 6, 2018 |
| ID: | 698 |


