


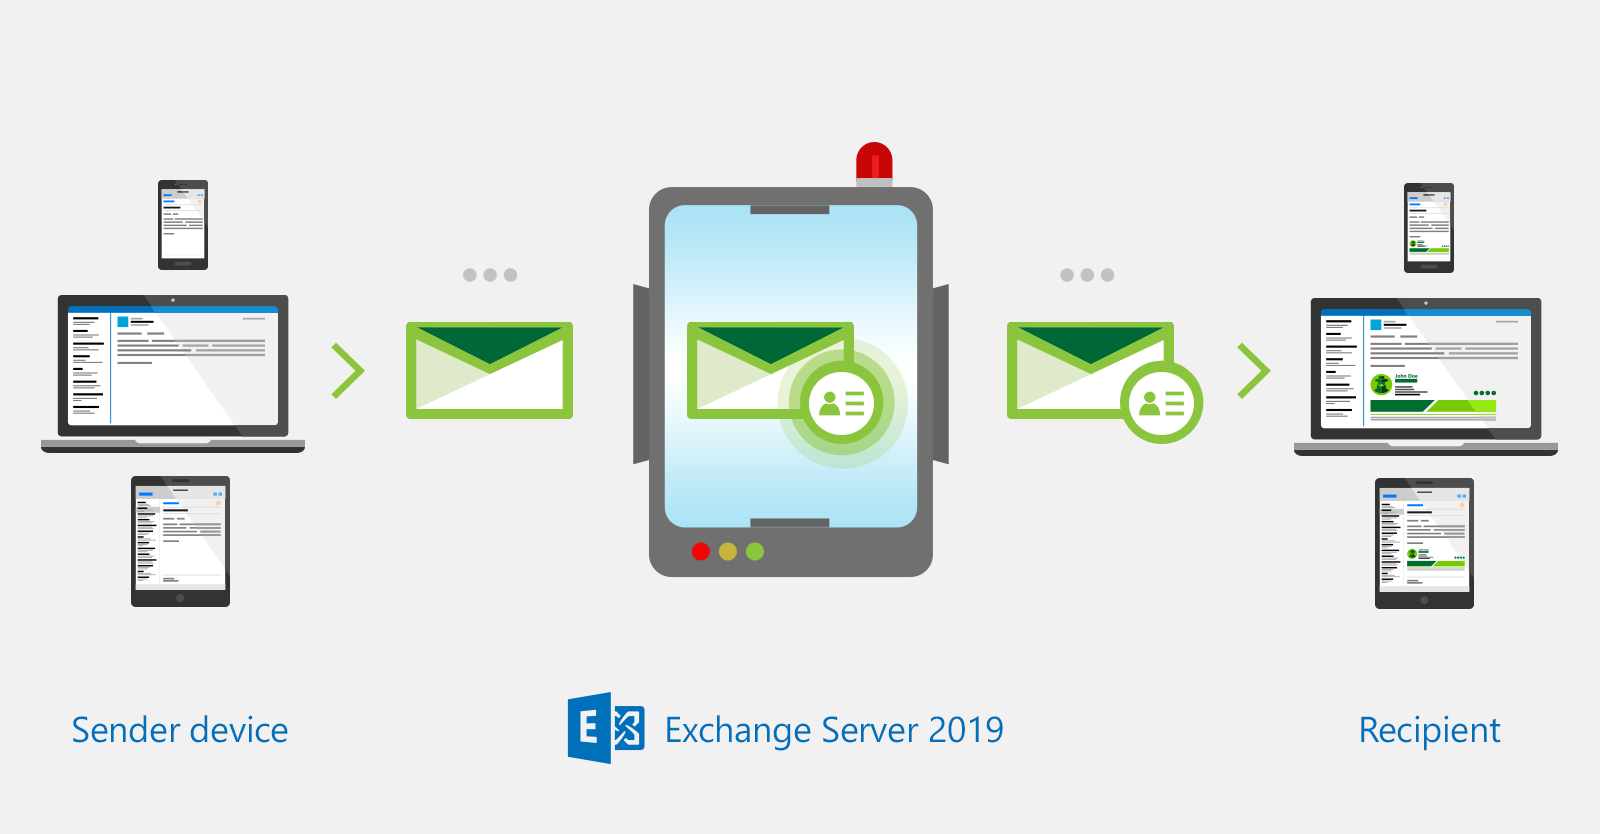
Exchange Server 2019 offers a way to configure a global or server-side email signature. Although it is usually referred to as “disclaimer” feature, it is widely used to configure automatic HTML signatures. Why is this better than email signatures set up by users? By applying organization-wide email signatures on Exchange Server 2019, you can make sure that email correspondence is unified, branding is always in place and that nobody automatically adds inspirational quotes to every email sent. This method also has some drawbacks, but I show how to fix those limitations at the end of the article.
If you have ever set up a mail flow (or transport) rule adding a disclaimer on another server version, you will not find many differences. Exchange 2013, 2016 and Exchange Online offer very similar experience in this matter.
How to add automatic email signature on Exchange 2019
To configure a global email signature in Exchange 2019, you need to create a new mail flow rule. You need an admin account with Transport Rules role. The role is included in Organization Management and Records Management role groups by default.
- First, you need to launch the Exchange Admin Center. If you are on the CAS Server, pasting
https://localhost/ecp
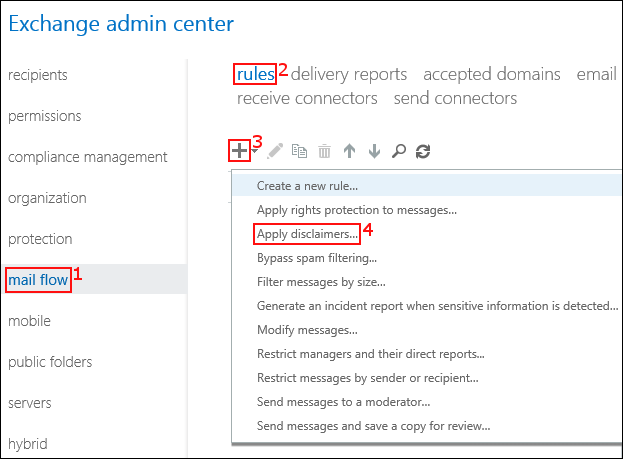
in the browser usually does the trick. - In the Admin Center, go to mail flow > rules > create new rule > apply disclaimers

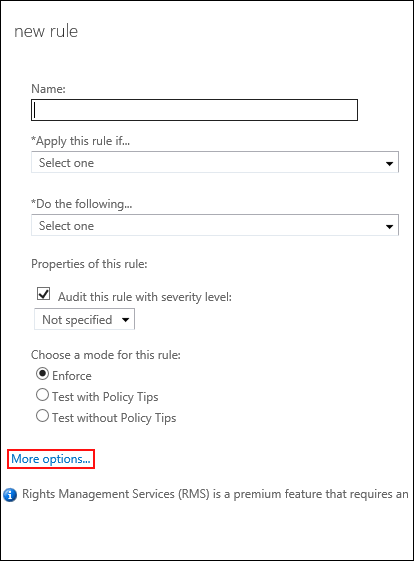
- Start creating the new rule by clicking more options – it lets you, for example, add exceptions. Exceptions come in handy while fixing some of the Exchange email signatures limitations.

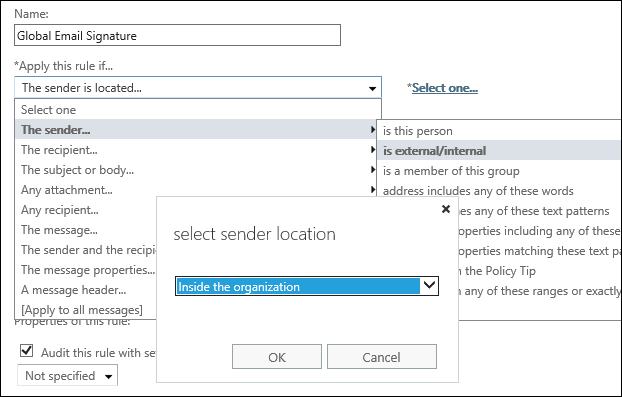
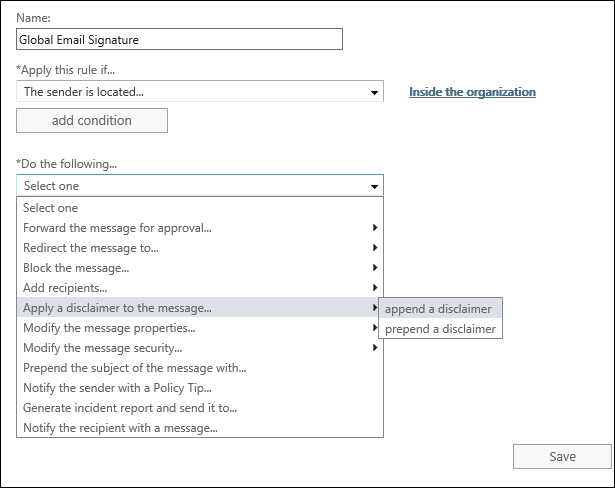
- The next step is to give the rule a friendly name, like Global Email Signature and choose when it should add the signature. The most widely-used condition is to add a signature when the sender is inside the organization. You can also only apply it to a chosen AD Group (for example marketing & sales teams)

- In Do the following section, select Apply a disclaimer to the message > append a disclaimer

- Two key options appear: Enter text & Select one.

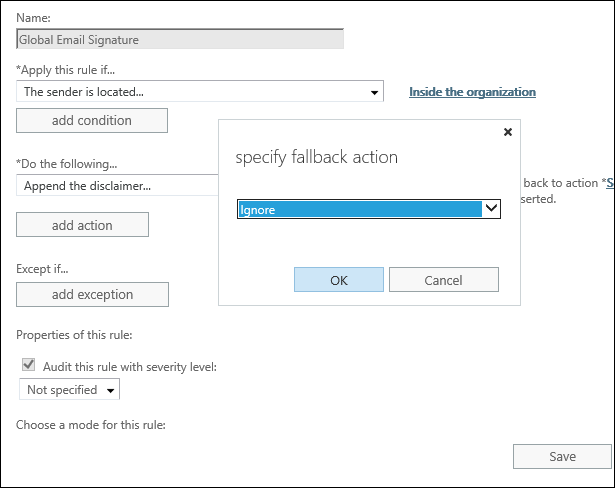
- When you click Select one, you need to specify the fallback action. In other words: what do you want your transport rule to do when it cannot append the signature to a message (for example when you send an encrypted message). You can choose Ignore to send such messages without the signature, Reject to block them from sending (which might not be the best option) or Wrap to send those messages with the signature in an “envelope” email, and with the proper message being an attachment. Ignore is the most usual approach:
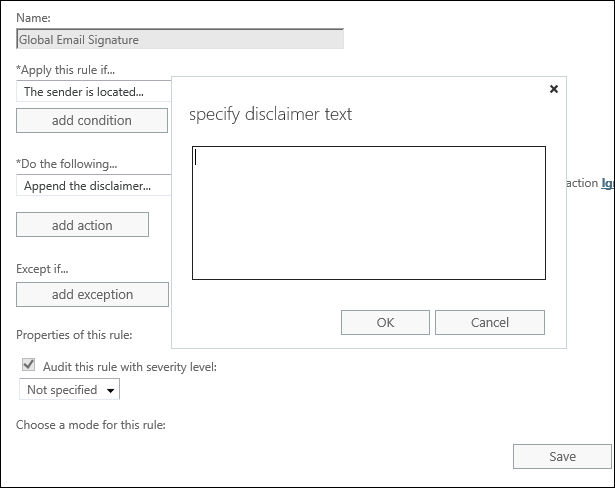
- Now you need to specify the looks of your signature. When you click Enter text, you can enter the HTML code of your signature template. The template uses placeholders to pull users’ data from the AD. To make this task super easy, you can go to our free email signature generator and copy the HTML code of any template you like. The generator can insert the correct AD placeholders for you. When you generate the HTML code, paste it into the text box and click ok.
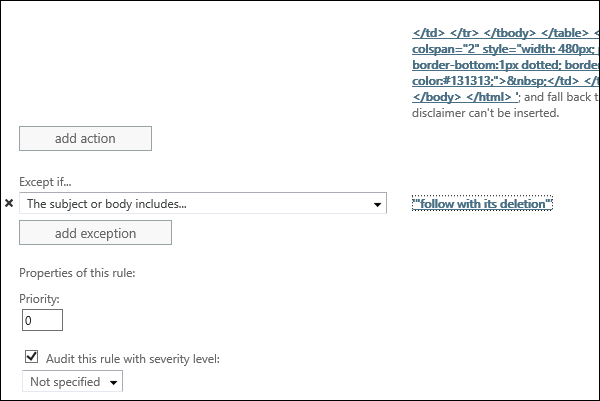
- Now is the time to (partially) prevent one of the drawbacks of the native Exchange signature adding rule. The problem is that it adds a signature to every reply and forward at the very bottom of the email chain. It is a good practice to add an exception to exclude replies and forwards. You can do it by choosing Except if the subject or body includes… and inserting a part of your disclaimer which is unlikely to appear in a normal conversation.

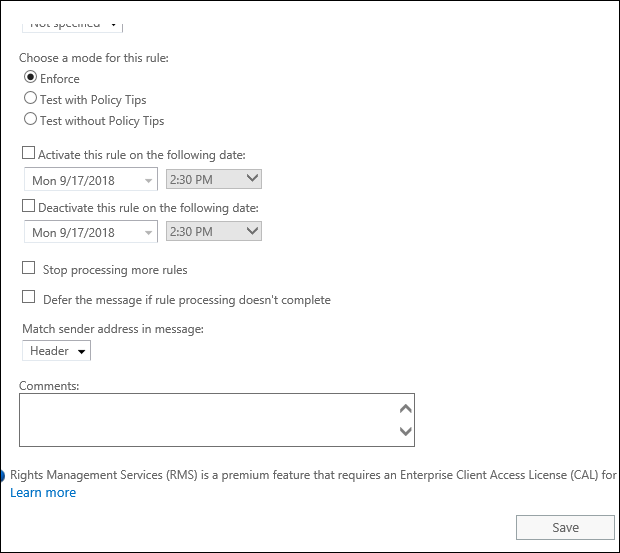
- Finally, you have an option to choose the time frame in which the signatures should be added: When you finish configuring the mail flow rule, click save and it will start working.


Limitation of the native server-side signatures
As I mentioned before, there are some limitations to this central signature management method. They have been there since the email signature/disclaimer feature exists in mail flow rules. Here is the list of the most troublesome limitations:
- Email signatures are stacking at the bottom of the conversation. By default, email signatures and disclaimers get attached to the very bottom of the conversation. The workaround to prevent it works in most cases; however, there is no way to add signatures directly under each reply and forward.
- Users cannot see signatures in their Sent Items. This issue often makes users worried. They are not sure if they should include their own email signature. As a result, you have to block users’ ability to add their own signatures.
- Empty fields. Active Directory is like a living organism – it changes, and users are different. Some of them do not have their contact details filled or prefer different means of contacting them. Unfortunately, Exchange 2019 automatic email signatures have no way of determining if a field is empty or not. As a result, you can expect some users to have signaling phrases followed by an empty field, for example, “Mobile: “.
- Only hosted images are supported. While hosted (online) images have their advantages, they have more drawbacks. You have to host them, they are often blocked by email clients and will disappear if the link to the image changes.
- No WYSIWYG editor. Although our free Email Signature generator helps you create a working HTML signature template, creating a custom signature for a company can be a challenge. The need to know how to work with HTML is often a roadblock. Especially because you have to be aware of how email clients interpret HTML code.
How to remove Exchange 2019 email signatures limitations?
Some of the above limitations have better or worse workarounds, but to counter them all, you need a third-party app: CodeTwo Exchange Rules Pro. It is fully compatible with Exchange Server 2019.
CodeTwo Exchange Rules Pro is a mail flow manager which has been created to counter each server-side email signature drawback mentioned above. This Exchange toolbox lets you create email signatures for the whole company in no time. Take a look at the video below to get a general idea of how the software works:

Recommended articles



CodeTwo sp. z o.o. sp. k. is a controller of your personal data.
See our Privacy Policy to learn more.