



Email signature management using mail flow rules has been a thing since transport rules were invented. In Exchange Server Subscription Edition, it’s very similar to how it worked in Exchange 2019 or 2016. You use a transport rule to catch specific emails after they are sent. The rule adds a company-issued email signature (disclaimer) in transit, adding the right contact information from Active Directory (AD) on the fly. So, without further ado, let’s see how to manage Exchange Server SE email signatures.
Before you start
This is a step-by-step tutorial, showing how you can take control over your email branding with transport rules. I recommend reading through the whole article before attempting to set it up in your organization, because there are some limitations to what you can and cannot do. You’ve been warned.
Before you start, remember that you need to have enough permissions to access and set up the Exchange admin center in your Exchange Server SE (the Transport Rules role is required), which means you should be a member of Organization Management, Compliance Management or Records Management role group.
How it works
The idea is ingenious – why would you make everyone set up the same thing (or rather why would IT set it up for them individually), if you can manage it from one place? You come up with a template and add the required legal disclaimer, while contact details for specific users are taken automatically from Active Directory.
With this method, signatures are added in transit, so users can send their emails with no signature at all. A mail flow rule will handle it for them.
After setting everything up, you prevent users from messing with their job titles and adding custom quotes. You set it up once, making signatures fully-automatic in your Exchange Server SE.
Sounds too good to be true, right?
How to set up a global Exchange Server email signature
Setting up your centrally-managed Exchange Server SE email signatures requires you to go through 3 main steps. I’ll break everything down below.
Step 1: Get the HTML code for the email signature
The best way to start is to get the HTML code you’ll need during the setup. You have two basic options:
Option 1 (Hard and ambitious): Create the HTML yourself
You can create HTML code for your email signature yourself. Remember that you need to:
- use inline CSS,
- preferably keep everything in tables,
- use only hosted images,
- use the right format of AD placeholders (also called macros) to have all contact details automatically filled in.
Option 2 (Quick and effective): Use the free email signature generator
The free email signature generator comes with over 100 templates that you can easily modify. Their HTML code is optimized to display signatures correctly no matter if your recipients use Outlook, Apple Mail or any other app. You don’t have to worry about the right placeholders either – the generator can add these with a click of a button. And there’s no catch – you don’t even need to create an account or subscribe to a newsletter to use the generator.
Step 2: Create a rule in the Exchange admin center
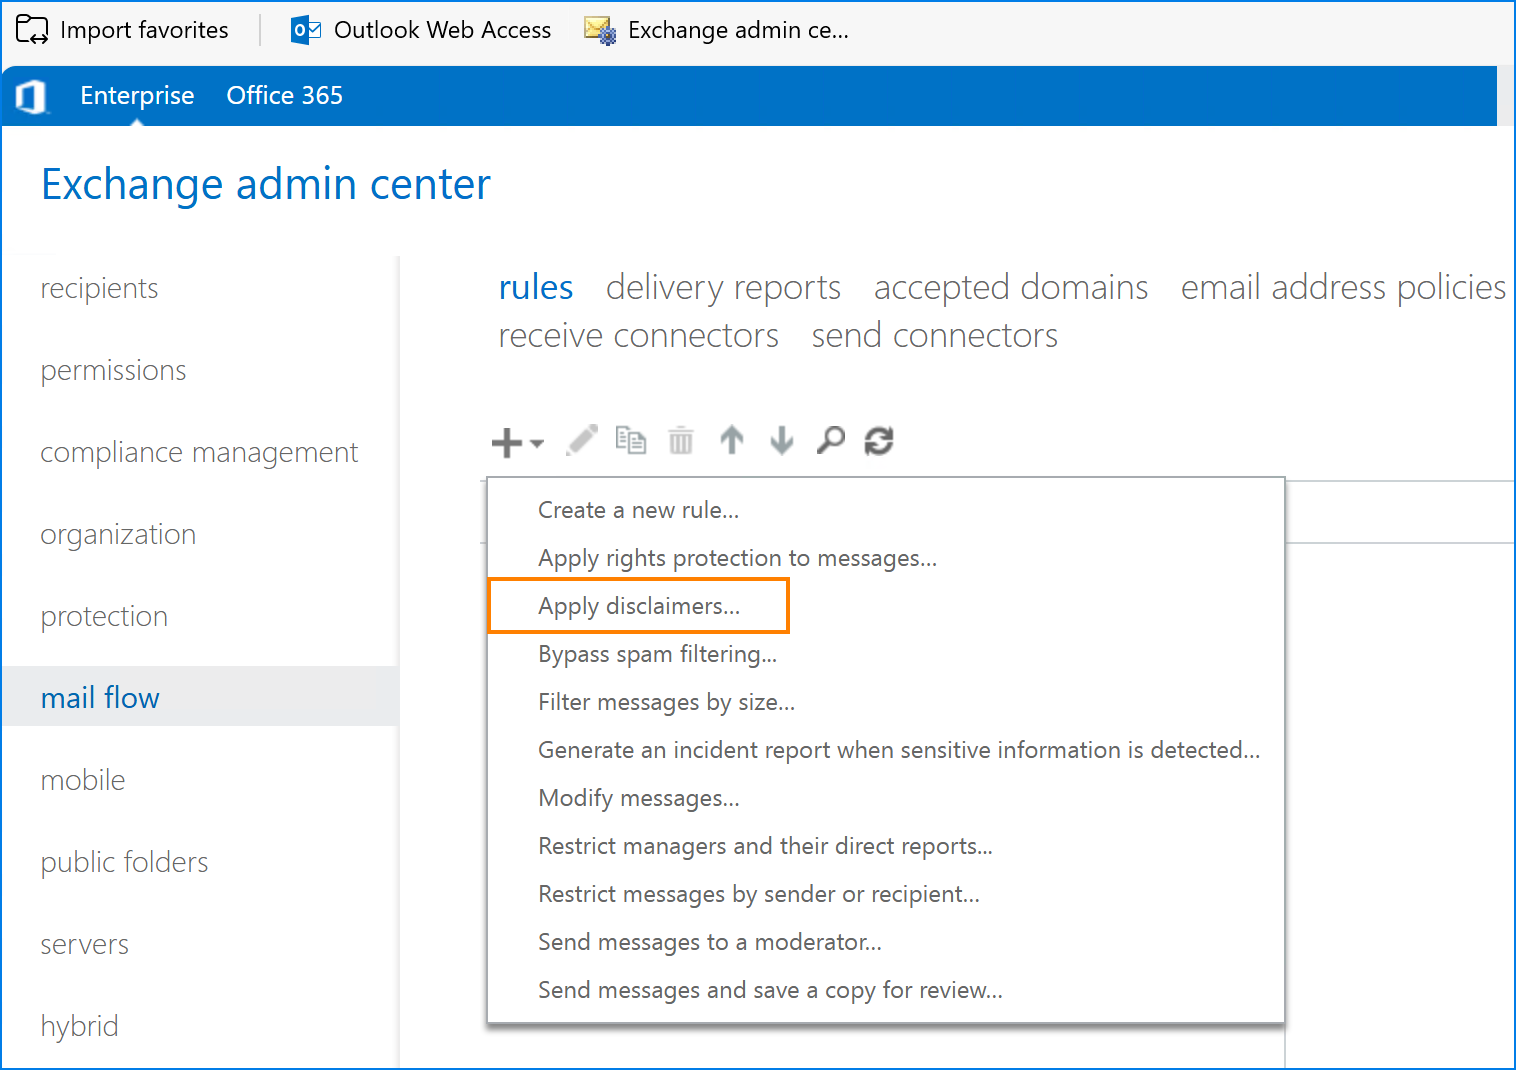
- Go to your Exchange admin center > mail flow > rules. Then, click the plus button and select Apply disclaimers.
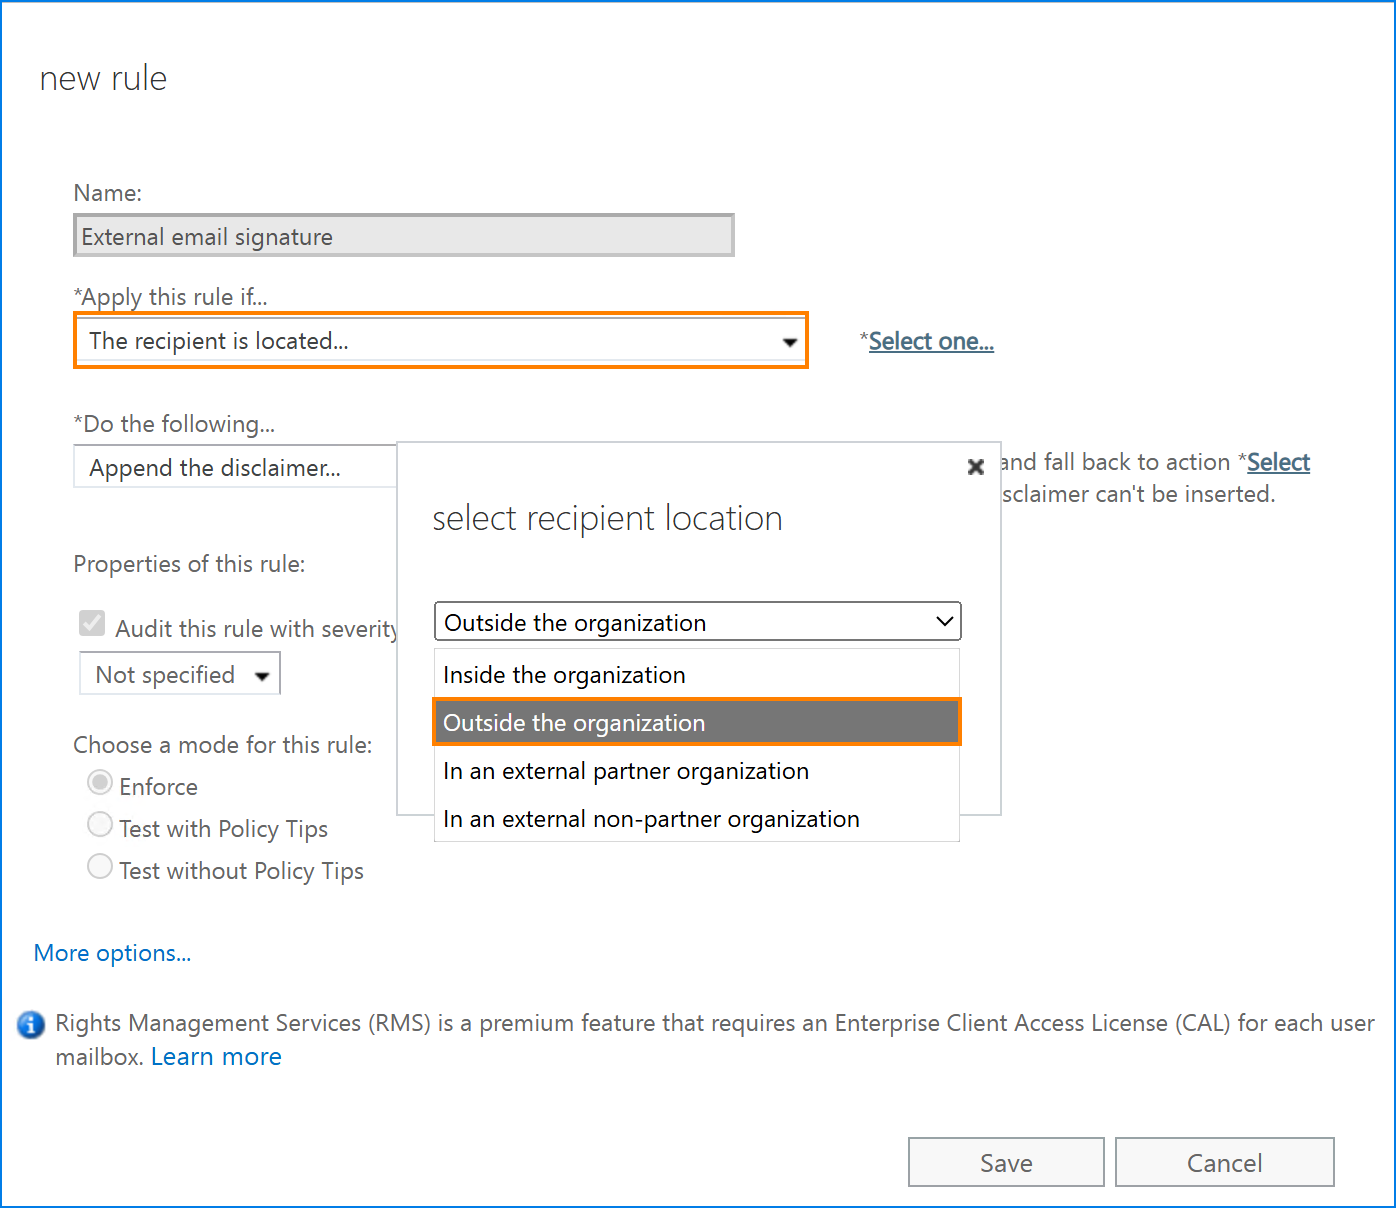
- The mail flow rule creation wizard will open. You need to select a condition that will enforce the rule. In the example below, my rule will be applied if the recipient is located outside the organization. It will not be applied when sending emails between coworkers.
Tip: It’s a good idea to first test the signature yourself. So, before using a condition from the example below, you can, for example, apply the rule only if the sender is this person and choose your own SMTP address.
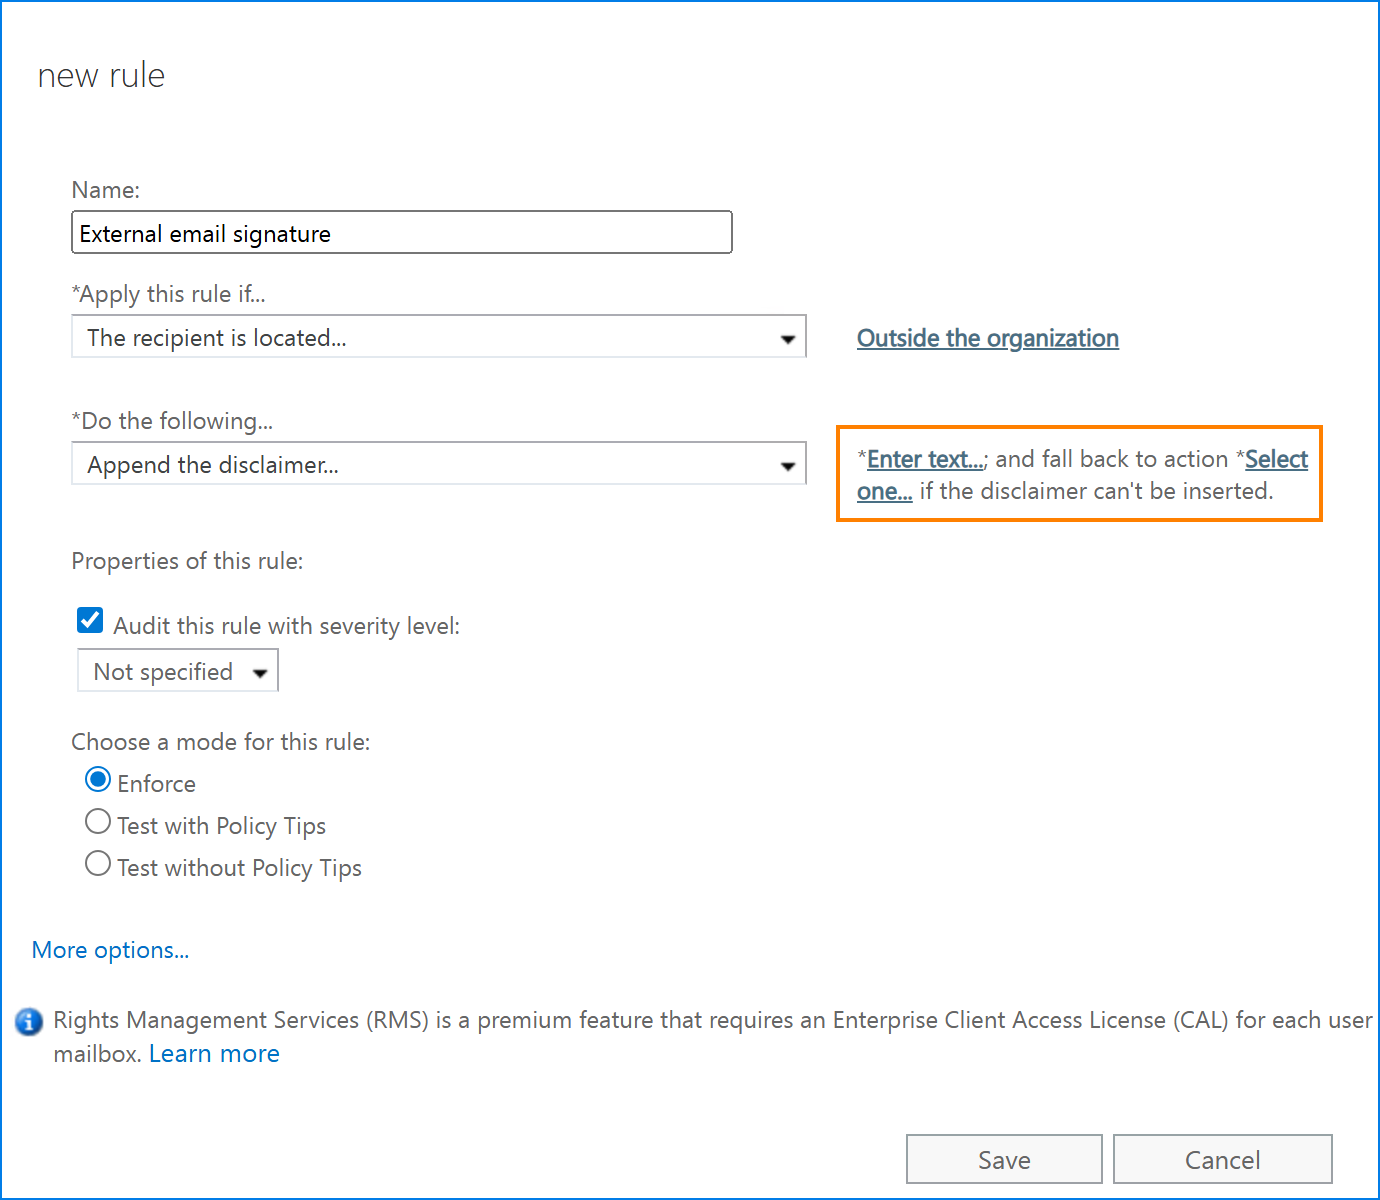
- In the Do the following field, the Append the disclaimer action is selected automatically for the rule (if not, choose it from the dropdown menu). Next to this field, there are two links you need to click before moving forward:
- Clicking Enter text opens a window where you can paste the HTML code you’ve prepared earlier. If any of your AD placeholders (e.g., %%FirstName%%) are incorrect, you will see an error message and will need to find out what’s wrong.
- After clicking Select one, you needto choose the fallback action. In short, this is where you decide what the mail flow rule should do if it cannot access email body. Wrap is the default option and it should cover most common scenarios. For a short explanation of what these actions do, refer to Email rules on Exchange Server explained.
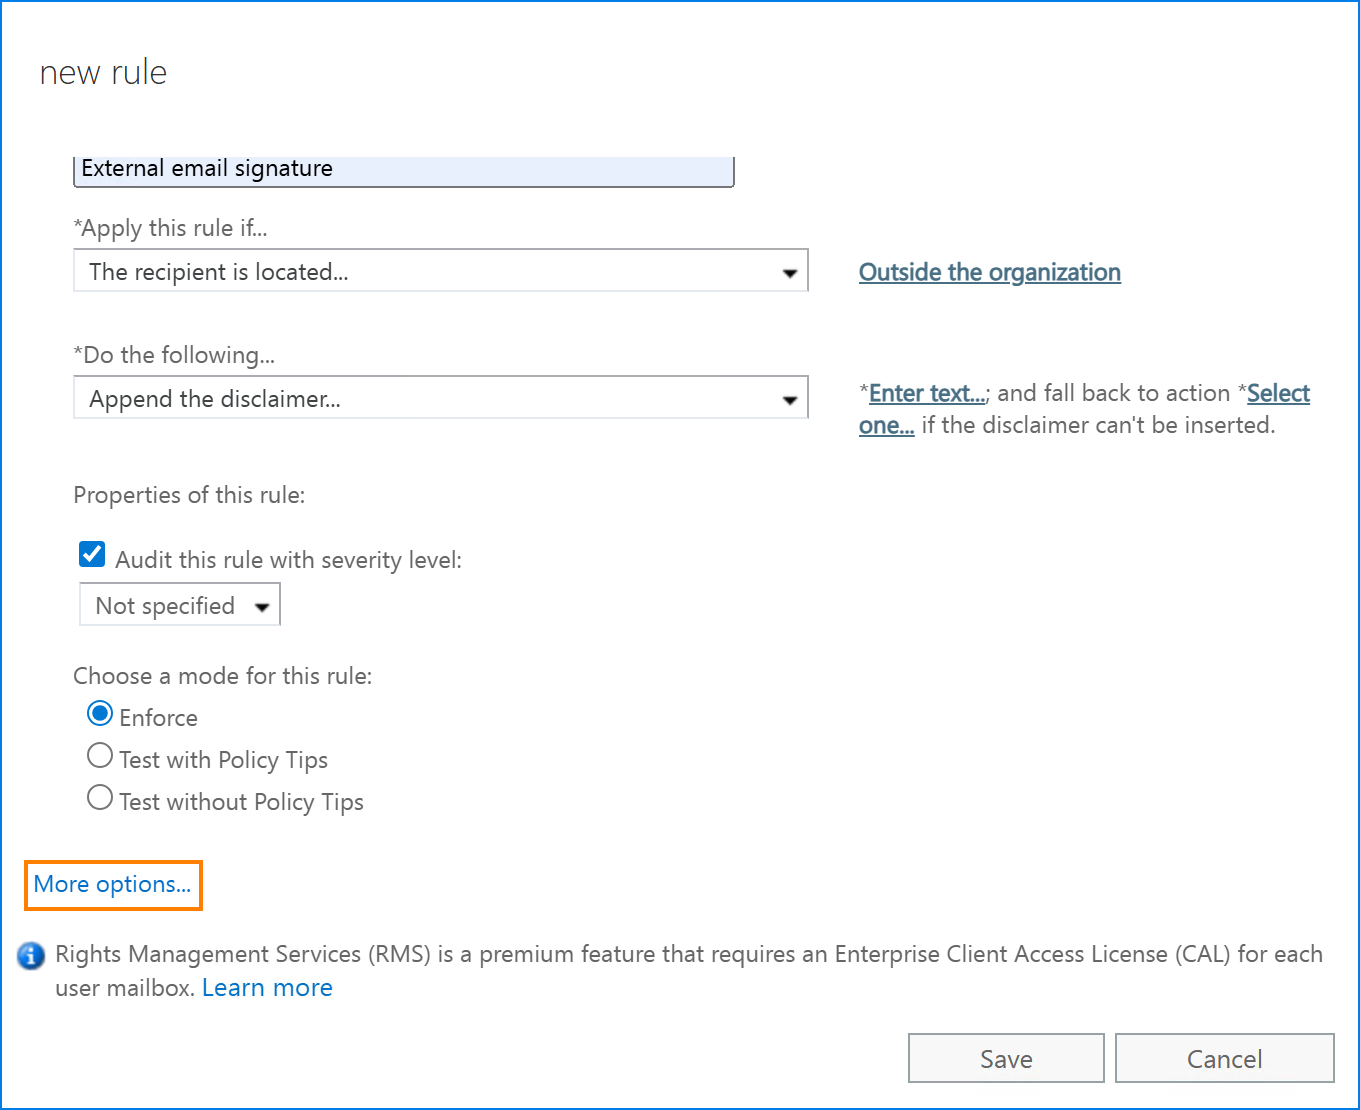
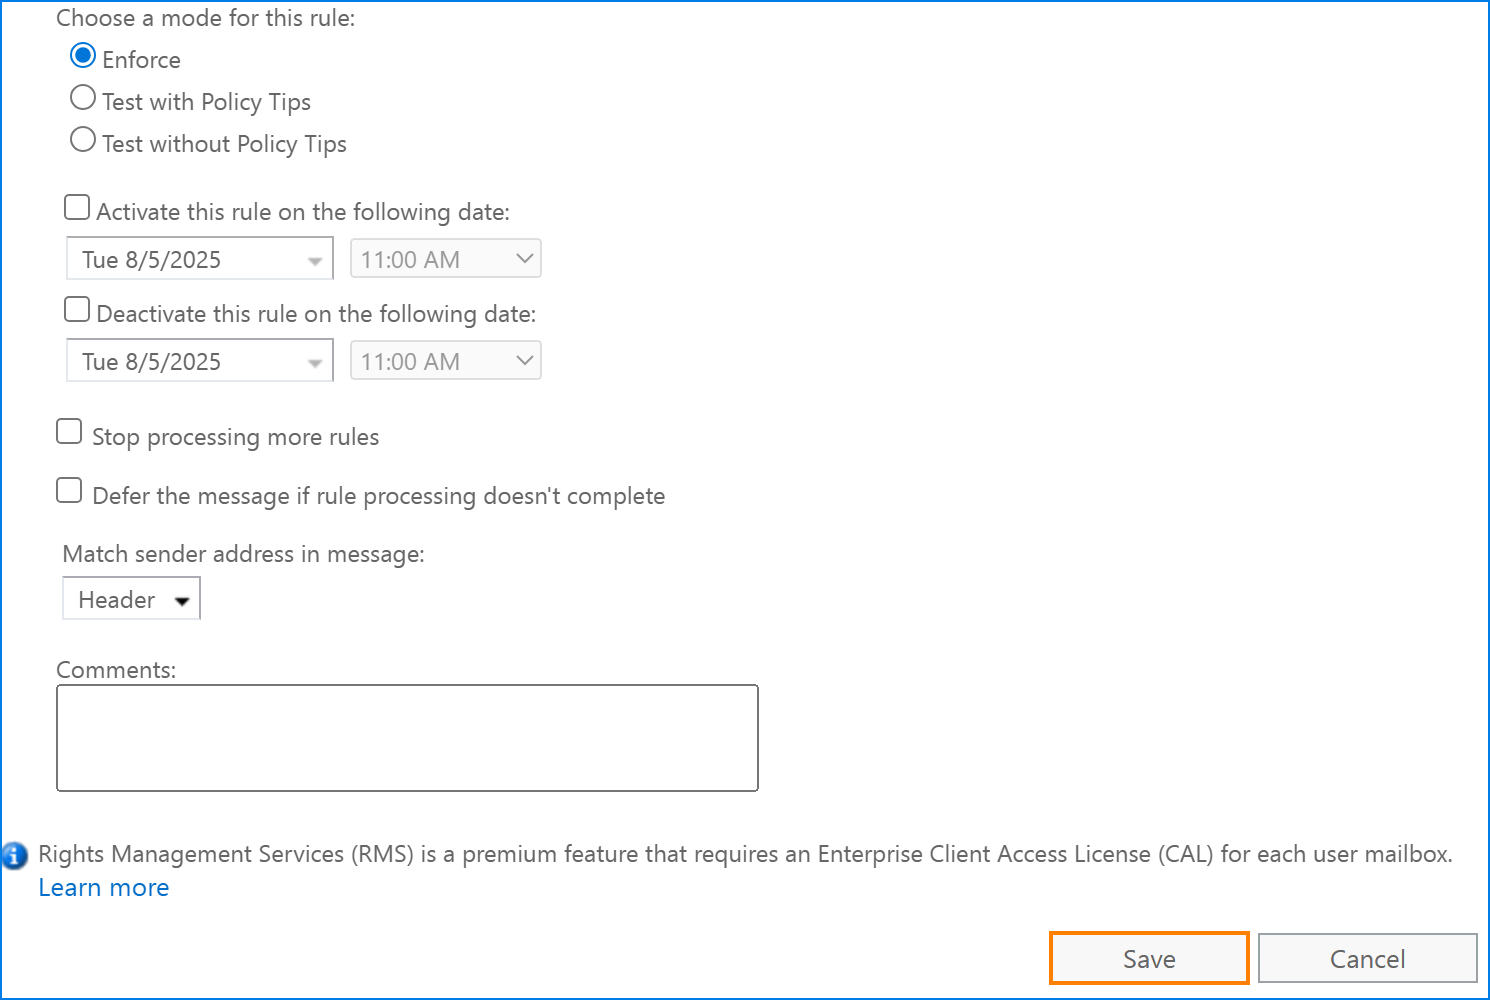
- (Optional) At any point of your setup, you can scroll down and click More options. This will let you configure more than a single condition for the rule, set up some exceptions, and use a very basic scheduler.
- When you’re done, click Save at the bottom of the wizard.
Step 3: Test how it works
Before you actually enforce the new rule, I’d recommend testing it on a small subset of users to see if it works as expected.
There are a few things you should take a look at:
- See what happens after replying and forwarding an email using various email clients. If the signature layout gets broken, you will need to work on the HTML code.
- Verify if the signature looks good both when using standard color settings and in dark mode.
- Double-check all links – see if they work as expected.
- If you can, send your message with and without an email signature to an email address located on Exchange Online and check email headers to see the SCL score. If the email with the signature has a higher SCL score, it means that you might have added too many links or images.
Exchange Server SE email signature limitations
Email disclaimers and email signatures added via mail flow (transport) rules have some drawbacks you need to know before you drop everything and set them up.
Images not displayed correctly
Mail flow rule disclaimers support only hosted images. It means that images aren’t added directly to signatures, but rather are “referenced”, so any time someone wants to take a look at images in your email signature, the image is taken directly from an online location.
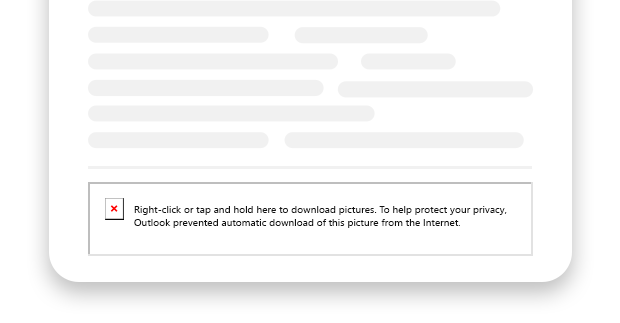
In the simplest of terms, it means that the images in your signatures will not increase the size of your email. That’s good. However, in most cases, your recipients will not see those images, at least not right away. That’s bad. You see, most email apps block hosted images until you add the sender to the safe senders list or click the dedicated option to display images. Which means you might get an error like this:
The solution? Using embedded or inline images. The only problem is that mail flow rules don’t support those images.
Learn more about linked and embedded images in email signatures
Double, triple, and more signatures stacked at the bottom
Have you ever seen multiple email signatures stacked at the bottom of an email conversation?
The problem is that mail flow rules are unable to correctly determine where one message ends and where another one begins. They treat every email thread as a whole, so the disclaimer action adds the signature directly under whole conversations. It means that you won’t get your email signature under a reply or forward. Instead, it will be thrown to the pile at the very bottom of the whole conversation. As a result, you don’t know whose email signature is where and the pile looks horrible.

The solution? You could add an exception to the mail flow rule, so that the signature is added only to new emails. But what about replies and forwards then?
Poor control and personalization
Let’s say you launch a single email signature template for the whole company. AD macros / placeholders are replaced with personal details of each mailbox (user), giving you uniform branding with just the right amount of personalization. Sounds good, right?
Well, not really.
Launching your email signature template might be the moment when all sorts of unexpected issues start to crop up. For example:
- Users A & B don’t have a mobile phone added in AD, so their email signatures contain “Mobile: blank” element.
- Users from C to R all have their phone numbers added, but each one has a different format.
- User S has their mobile phone specified but doesn’t want it appearing in their emails.
- Team X wants to have a different marketing banner.
- Members of Team Y want their photos added to the signature to make conversations more personal and less bot-like.
So, in the end, the process that was supposed to streamline communication and make it more professional ends up backfiring. IT gets signature-related tickets, some of which require separate mail flow rules or simply cannot be fixed without third-party tools. And the signature, when you look at various users, isn’t as perfect as you wanted it to be:

The solution? Highly depends on your specific setup, and might even be impossible to apply without a third-party solution.
Even more limitations
Sorry to say, that’s still not everything. I’ll list a few other limitations that Exchange Server SE email signatures have. At least when you set them up in mail flow rules.
- Character limit. The HTML code you add to a mail flow rule has a very strict limit of 5120 characters. It might sound like a lot, but it’s not, if you look closely. For the email signature to work properly, you need to use inline CSS, tables and so on. All this code counts toward the limit. It might turn out that your perfect design is not supported.
- No AD Photos support. Want to make your email conversations more human with user photos? Too bad. Exchange Server SE mail flow rules can’t look up your AD photos.
- No way to force HTML format. Wondering what happens with emails sent in plain text? They get a corrupted version of the email signature with no way for you to control its appearance.
- No message splitting. You can launch those Exchange Server signatures in a few different variants for specific teams and even try to set different rules for different recipients. But when you send an email to multiple recipients, all of them will get the same signature from a single rule.
- No signature preview. Mail flow Exchange Server signatures are added after the message is sent. There’s no way for the user to see their signature before sending their email and the signature is not going to appear in Sent Items either. This, unfortunately, means that users will not be able to spot potential errors and problems with their email signatures, and might even add their own signature, which will result in double signatures (personal + centralized) under a single email.
- No way to delegate the task to Marketing. Managing and controlling email branding is usually Marketing’s responsibility. Unfortunately, to let them manage mail flow rules, they’d need to gain access to the Exchange admin center, getting some additional privileges as a bonus. For most companies, that’s unacceptable. This means that each signature update becomes an inter-team collaboration project.
Professional Exchange Server SE signature management
Exchange Server SE email signatures managed by mail flow can help you control your branding, but, as you can see in the limitations section, they are far from perfect. No worries – there is an alternative that allows centralized control without all these limitations.
CodeTwo Email Signatures On-prem has been designed to help companies control their branding, manage legal disclaimers, and take full control of their Exchange Server SE mail flow. It comes with some additional features that take your mail flow management to the next level:
- You can forget about those pesky red Xs that replace graphics in your emails – CodeTwo supports both embedded and hosted images.
- Not only are signatures added directly below replies and forwards, but you can also easily set up different signature versions for your first and subsequent emails in a thread. Start your conversations with a complete signature (that includes marketing banners and legal disclaimers), then switch to a lightweight version.
- Complete control. You can handle any email signature scenario thanks to advanced conditions, AD filters, dynamic placeholders, and more.
- Forget about polishing your HTML skills – the WYSIWYG editor lets you compose any email signature design with no HTML knowledge.
- Use rules to rewrite email addresses and subjects of your emails.
- Delegate email signature management to the right team without the need to elevate anyone’s permissions.
- Introduce a smart unsubscribe mechanism.
- Compress, archive, drop, or add attachments to emails that meet certain conditions.
- Set up fully-branded automatic replies and email forwarding, and do more.

Recommended articles



CodeTwo sp. z o.o. sp. k. is a controller of your personal data.
See our Privacy Policy to learn more.