How to send test email from multiple Exchange users with PowerShell

When you set up a company-wide email signature on Exchange or Office 365 using, e.g. the built-in transport rules feature, you will probably want to verify whether it is correctly added to messages.

The most straightforward and foolproof method is for users to send a test email to you so you can check it.

Or, if you feel like taking a crowdsourcing approach, just have each user send the email to themselves and check the details, etc. personally.

The problem with both those methods is that they rely upon users correctly understanding your request, complying with it and carrying it out properly, all without assistance. Realistically, you have a higher chance of randomly meeting Bill Gates walking down your street with a pet iguana on a leash, than for all 3 of these circumstances to come together magically.

As in many cases, here also PowerShell scripts can save you a lot of time and effort.

The two scripts below utilize the Send-MailMessage cmdlet to send a test message from multiple Exchange/Office 365 users to either their own or your address.

Since company-wide email signatures are added on the level of the server, no additional actions need to be taken for the messages to be stamped with proper footers.

I included the –BodyAsHTML switch in both scripts because HTML emails are most common nowadays.

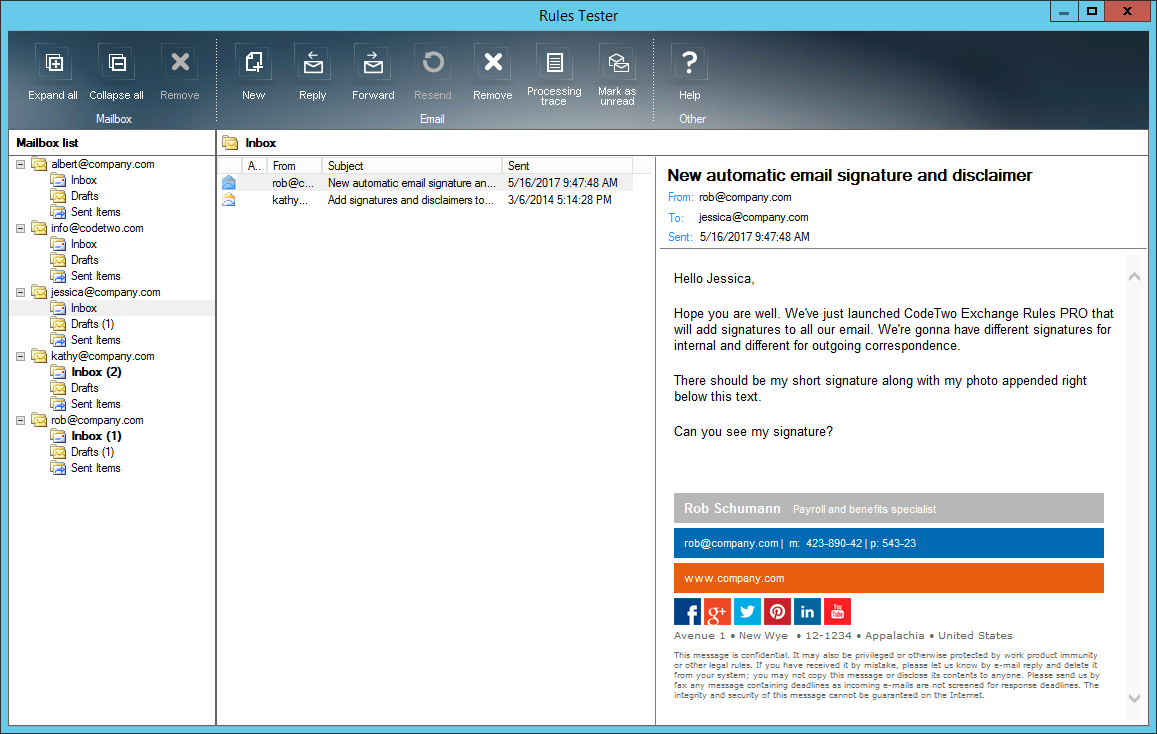
NOTE: If you are using a 3rd party tool like CodeTwo Exchange Rules Pro you can take advantage of the Rules Tester feature to test your email signature.
test email from multiple mailboxes Exchange PowerShell

Sending the test email to senders’ addresses

To learn how to remotely connect to Office 365 using PowerShell, see this article.

This script sends an email with the subject “Test of new company email signature” and body “Hello, Please check if your details are correct” from each user to themselves.

foreach ($Mailbox in (Get-Mailbox)) {
$Name=$Mailbox.Name
$UserSMTP=$Mailbox.PrimarySmtpAddress
Send-MailMessage -To "$Name <$UserSMTP>" -From "$Name <$UserSMTP>" -Subject "Test of new company email signature" [-BodyAsHTML] -Body "Hello, Please check if your details are correct" –SmtpServer Your_SMTP_server_FQDN
}

Sending the test email to one address

This script sends an email with the subject “Test of new company email signature” and body “Some text” from each user to a single (your) mailbox.

foreach ($Mailbox in (Get-Mailbox)) {
$Name=$Mailbox.Name
$UserSMTP=$Mailbox.PrimarySmtpAddress
Send-MailMessage -To "Your_display_name <Your_SMTP_address>" -From "$Name <$UserSMTP>" -Subject "Test of new company email signature" [-BodyAsHTML] -Body "Some text" -SmtpServer Your_SMTP_server_FQDN
}

Limiting the range of senders’

To limit the range of senders, use any of the Get-Mailbox cmdlet’s parameters.

Obviously, the one that allows for most precise targeting is the –Filter parameter. For example, to send messages from users belonging to only one department, use the following syntax:

…Get-Mailbox –Filter {Department –eq ‘Name_of_department’}…

Learn more about the Get-Mailbox cmdlet

Final actions

Having run this test, you can make any adjustments you feel are necessary and then enjoy your new email signature.

Software tips

Tools for Microsoft 365

Recommended articles

How to migrate from Exchange Server 2016/2019 to Microsoft 365

How to migrate from Exchange Server 2016/2019 to Microsoft 365

Migrating Exchange data to the cloud is not rocket science – explore your options and launch the migration stress-free. As you may already know, Exchange Server 2016 and 2019 have reached end of life and are no longer officially supported by Microsoft. If your organization still uses either of these platforms to manage email, contacts, calendars, and tasks, keep in mind that: Your environment may become vulnerable to newly discovered security threats – Microsoft will no longer provide security updates for Exchange 2016 and 2019 (unless you’ve enrolled in the Extended Security Update program, which ends in October 2026). Your emails may get blocked – Microsoft has started to throttle and block emails sent from unsupported Exchange Server versions to Exchange Online (as I covered in this article). That said, migrating to a supported platform is now the only viable long-term option for keeping your organization’s email environment secure, supported, and fully operational. If your organization wants or needs to keep things on‑premises (and continue using Microsoft’s solutions for that), upgrading to Exchange Server Subscription Edition (SE) is the only path forward. But given Microsoft’s clear preference for its cloud services – evident in the faster rollout of new features and the many security capabilities available exclusively in Microsoft 365 (Office 365) – now is a great time to leave your on‑prem environment behind and migrate to Exchange Online as part of Microsoft 365. While switching over to a new platform might seem like a rough ride, I’ll show you some easy ways to follow when migrating mailboxes from Exchange Server 2016/2019 to Microsoft 365. How to prepare for email migration to Microsoft 365 Before you start the migration process, you need to make sure your environment is ready for the move. For this purpose, you can use this guide in the Microsoft 365 admin center – it will help you connect your organization to Microsoft 365 and integrate your existing user accounts with Microsoft Entra ID. Microsoft also recommends completing the steps below: Set up an SPF record to determine valid email sources for your organization’s Microsoft 365 domain. Set up the Exchange Online Protection service as a means of protection against spam and malware. If you’re behind on updates, make sure to install the latest Cumulative Update (CU). And here is my quick, less obvious Microsoft 365 migration checklist: Verify if your software will work in Microsoft 365 (especially when it comes to server software). Microsoft 365 migration might be the time you learn that there is crucial legacy software that half the company uses and which is hard to replace. Encourage the whole company to clean up projects. It’s much easier to do this before the migration and start fresh. Gather as much information about your on‑premises environment as possible. For example, you might need to recreate access roles and permissions from scratch in the cloud or set up mail flow rules. Without prior research, it will be much more difficult. Verify if you need to migrate service accounts. There can be a lot of them on‑premises and in most cases, you won’t need them after the move. Review mailbox size limits in Exchange Online before migration to see which licenses you’ll need and whic
New-ComplianceSearch: how to use the newer version of Search-Mailbox

New-ComplianceSearch: how to use the newer version of Search-Mailbox

Microsoft retired the Search-Mailbox cmdlet – now what? Discover how to use New-ComplianceSearch, its key advantages and how to make the switch seamlessly.
How to start remote PowerShell session to Exchange or Microsoft 365

How to start remote PowerShell session to Exchange or Microsoft 365

One of many features of the PowerShell command line tool is its ability to connect with and manage the Exchange Server remotely. The procedure described below applies to the classic on-prem Exchange server and to the Microsoft 365/Exchange Online version.

Leave a Reply

Your email address will not be published.

You may use these HTML tags and attributes: <a href="" title=""> <abbr title=""> <acronym title=""> <b> <blockquote cite=""> <cite> <code> <del datetime=""> <em> <i> <q cite=""> <s> <strike> <strong>

*

CodeTwo sp. z o.o. sp. k. is a controller of your personal data.
See our Privacy Policy to learn more.