How to manually edit an existing transport rule to add or remove users receiving cloud signatures
Problem:
You have configured Exchange Online connectors and transport rule in your Microsoft 365 tenant for use with CodeTwo Email Signatures 365. You would like to manually change the scope of senders whose emails are routed through the CodeTwo service and stamped with signatures.
Solution:
It is possible to edit the CodeTwo Exchange transport rule manually and add or remove groups and users whose emails receive signatures. Bear in mind that the term ‘users' covers also shared mailboxes which are not group objects as per Microsoft 365 logics.
Follow the links below to learn how to:
- Open the transport rule for editing
- Limit the scope of users (senders) receiving cloud signatures
- Expand the scope of users (senders) receiving cloud signatures
- Add a user to a group in Microsoft 365
Important
The scope of senders is only configured in cloud and combo mode and controls which users get CodeTwo cloud signatures. If your licenses are assigned to wrong users or you don't want to sync specific users with the CodeTwo service, you can change the scope of licensed users instead. Find out more about this scope
Read also this article to learn more about licensing in CodeTwo Email Signatures 365.
Open the transport rule for editing
Follow these steps to access the transport rule and edit it:
- Open the Exchange admin center as a global administrator or Exchange administrator.
- Go to Mail flow > Rules.
- Select the CodeTwo Exchange transport rule and click the Edit rule conditions button (Fig. 1.).
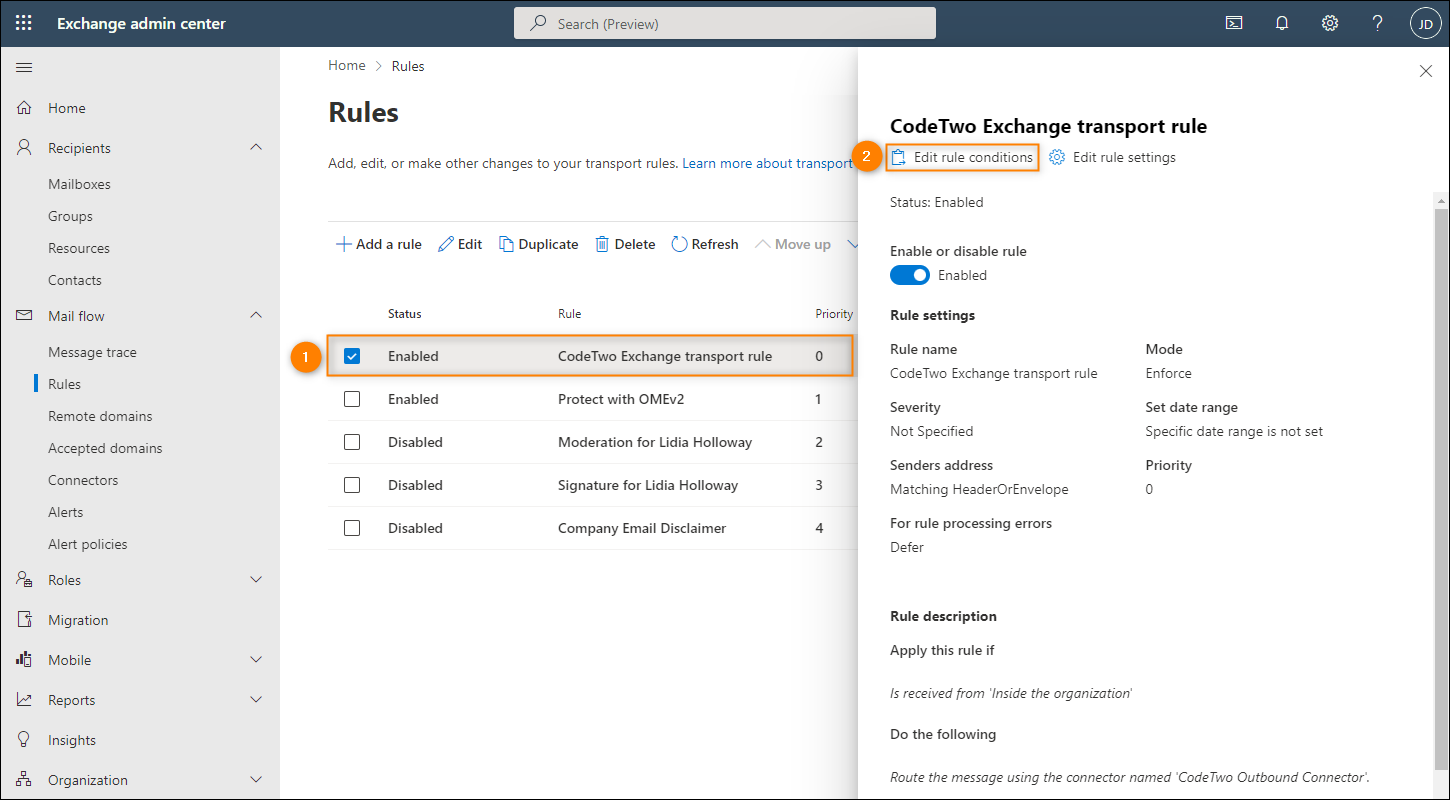
Fig. 1. Opening the CodeTwo Exchange transport rule in the Exchange admin center.
Limit the scope of users (senders) receiving cloud signatures
In the example below, the CodeTwo Exchange transport rule is configured to redirect all emails originating inside the organization to the outbound connector (Fig. 2.). No limit is set, all users receive signatures.
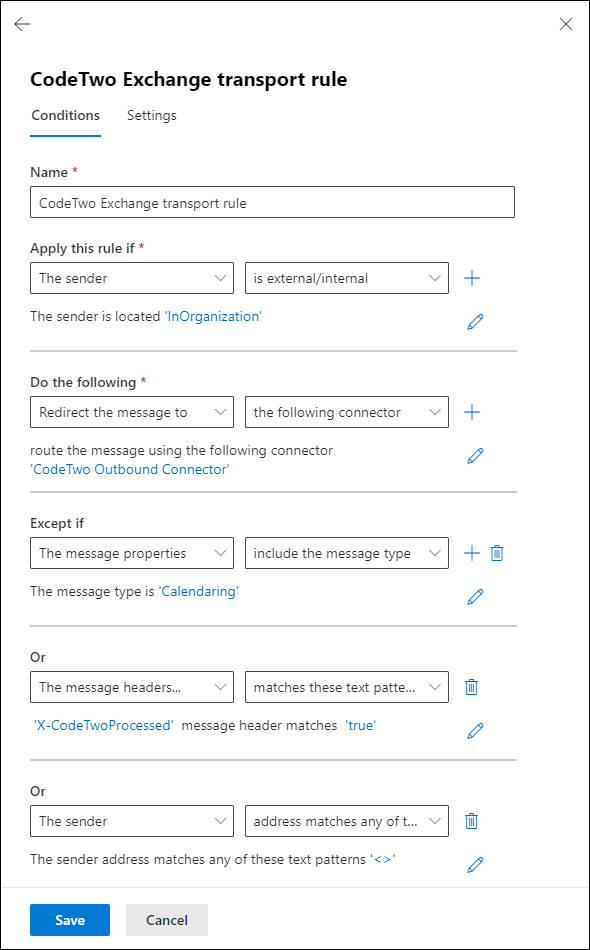
Fig. 2. Transport rule configured to add signatures to all emails from internal senders.
If you would like to limit the scope of users whose emails receive signatures to a specific group, follow the steps below:
- Open the transport rule for editing, as shown here.
- Click + in the Apply this rule if section to add a new condition and select The sender > is a member of this group.
- In the group picker, add a group as follows:
- (dynamic) distribution group / mail-enabled security group: select a group on the list or search it with the search box above (use the search box also if your group is not listed for some reason);
- Microsoft 365 group: enter/paste group’s full email address in the search box (only then the group will show up under Suggested results) and press Enter.
- Finally, confirm by pressing Save (Fig. 3.). Note that it is possible to add more than one group by repeating the actions from step 3 above.
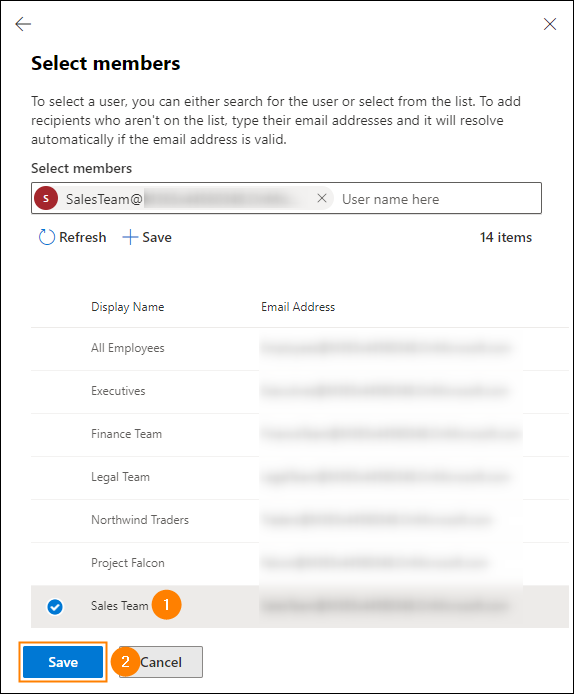
Fig. 3. Selecting a group of users who will receive signatures.
- Click Save again to submit changes made to the transport rule.
Expand the scope of users (senders) receiving cloud signatures
In this case, the CodeTwo Exchange transport rule is configured to only redirect emails originating from a specific group of users inside the organization to the outbound connector (Fig. 4.). Only members of the specified group receive signatures.

Fig. 4. Transport rule configured to add signatures only to emails sent by members of the Sales Team group.
There are two ways to allow more users to receive signatures by editing the transport rule:
- Remove the condition limiting the scope of senders to a specific group. This will cause all emails to be processed by the CodeTwo cloud service.
- Add further groups to the existing scope of senders.
Remove the condition limiting the scope of senders to a specific group
Make the following changes to the transport rule to remove the condition limiting the scope of senders to a specific group. As a result, signatures will be added to messages sent by all users inside your organization.
- Open the transport rule for editing, as shown here.
- Find condition The sender is a member of this group and remove it by clicking Delete (trash can icon), as shown in Fig. 5.
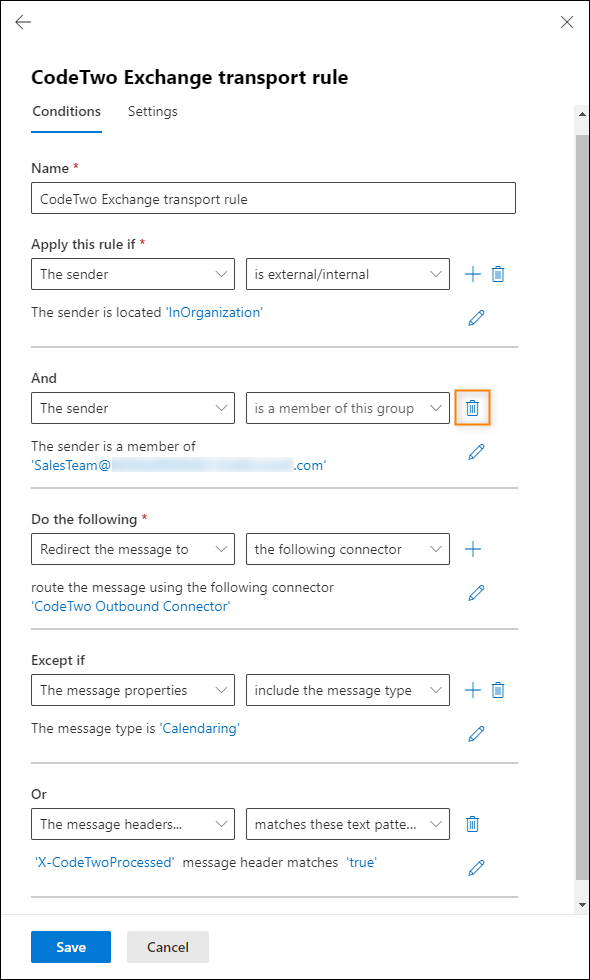
Fig. 5. Removing the condition that limits adding signatures to members of the Sales Team group.
- Submit changes by clicking Save.
Add further groups to the existing scope of senders
Edit the transport rule as shown below to add another group of users to the scope of senders who receive email signatures:
- Open the transport rule for editing, as shown here.
- Find the condition The sender is a member of this group and click on the email address of the group shown below it (Fig. 6.).
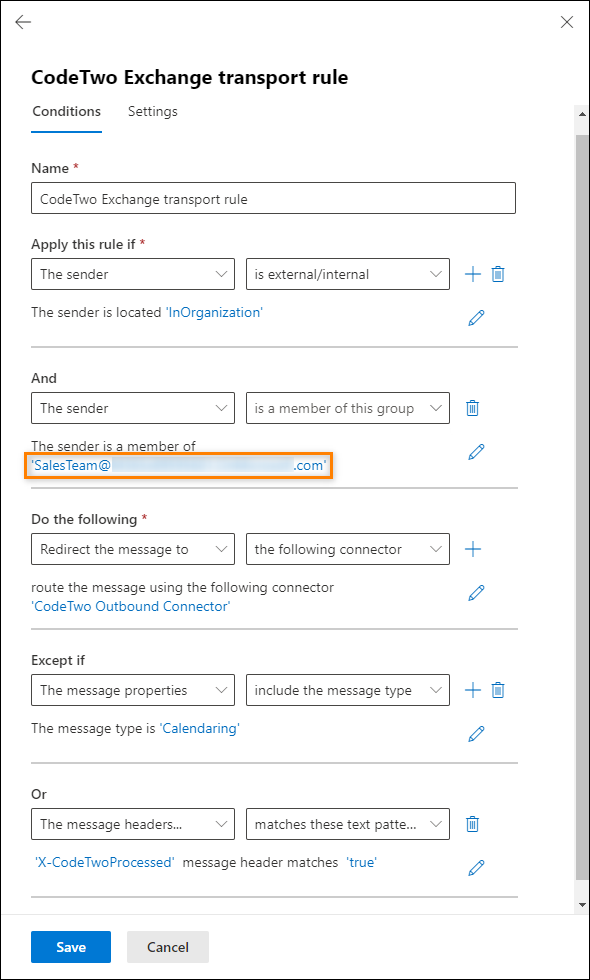
Fig. 6. Editing the condition that limits adding signatures to members of the Sales Team group.
- In the group picker, choose another group:
- (dynamic) distribution group / mail-enabled security group: select a group on the list or search it with the search box above (use the search box also if your group is not listed for some reason);
- Microsoft 365 group: enter/paste group’s full email address in the search box (only then the group will show up under Suggested results) and press Enter.
- Finally, confirm by clicking Save (Fig. 7.).
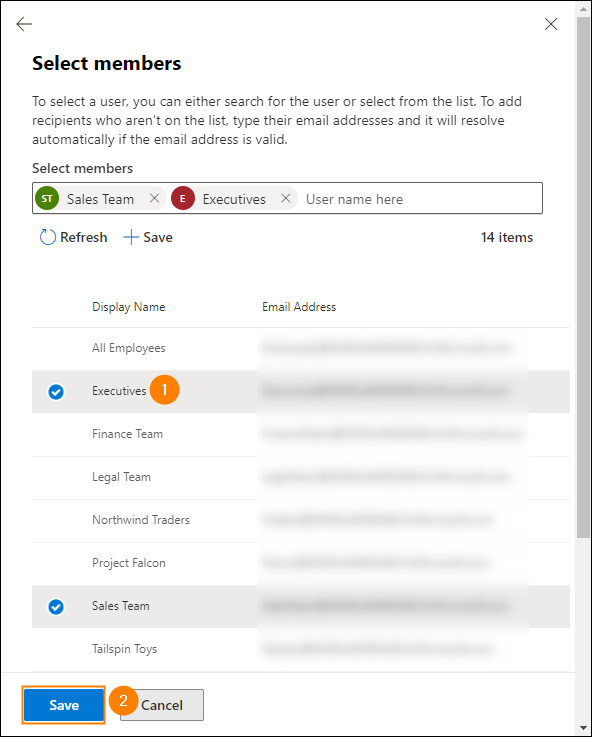
Fig. 7. Selecting an additional group of users.
- Click again Save to apply your changes to the transport rule.
Add a user / shared mailbox to a group
In this example, the CodeTwo Exchange transport rule is configured so that emails originating from a specific group of users receive signatures (Fig. 8.).

Fig. 8. Transport rule for adding signatures to messages of users in the Sales Team group.
To add a single user or a shared mailbox to the group of users already receiving signatures, follow the steps below:
- Open the Microsoft 365 admin center as a global administrator, group administrator, or Exchange administrator.
- Go to Teams & groups > Active teams & groups.
- Select the group to which you want to add a new user or a shared mailbox (Fig. 9.).
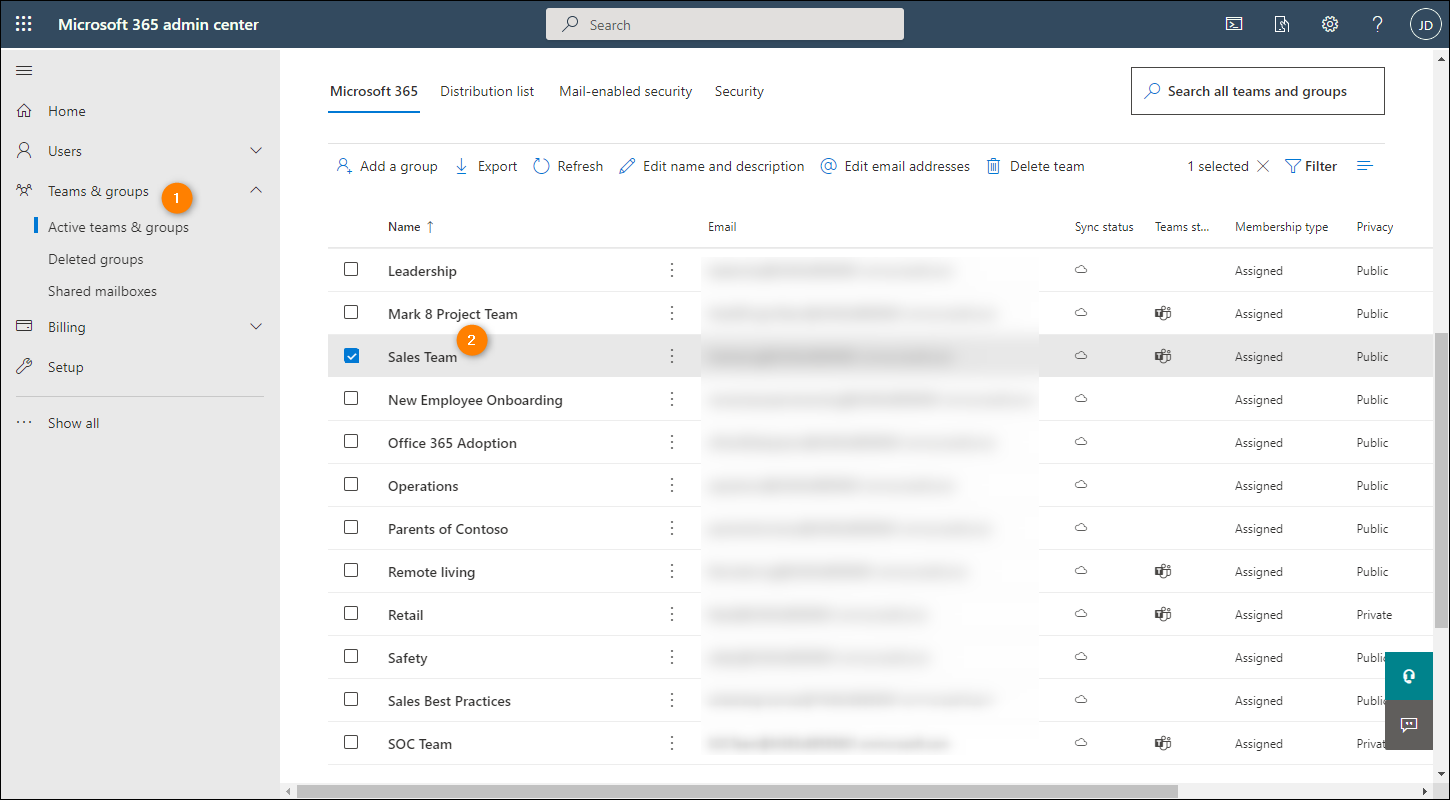
Fig. 9. Selecting a group in the Microsoft 365 admin center.
- Go to the Members tab, select Members, and then click the Add members button to open the user picker (Fig. 10.).
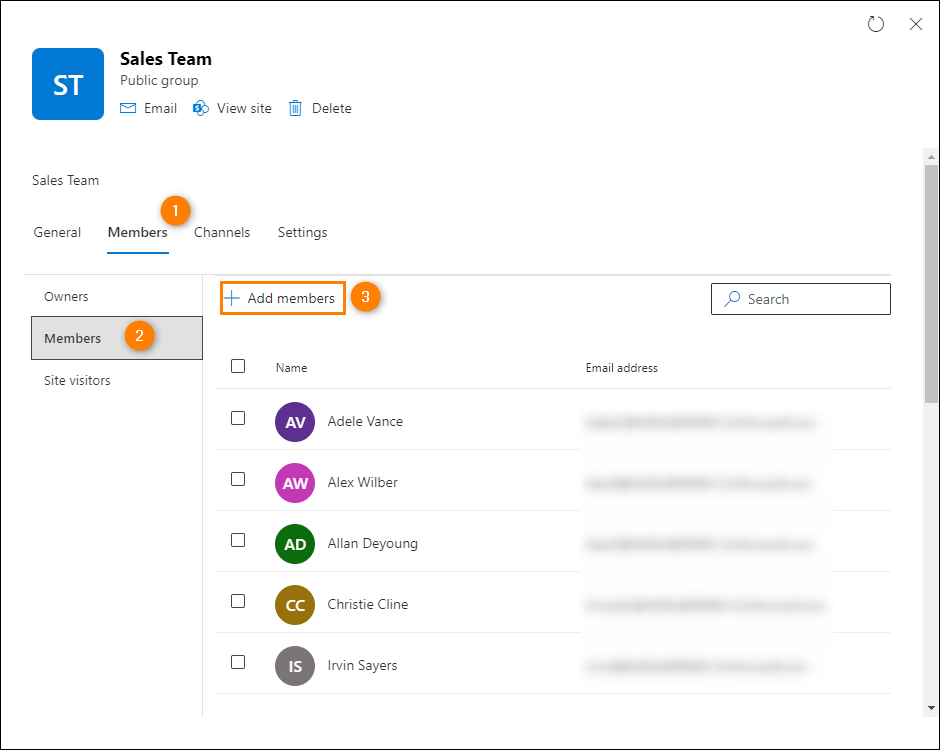
Fig. 10. Adding new members to the group.
- Click the search box to display a list of people and shared mailboxes you can add to the group or type the name or email address of a specific user or mailbox. Click Add to confirm your selection and close the group window (Fig. 11.).
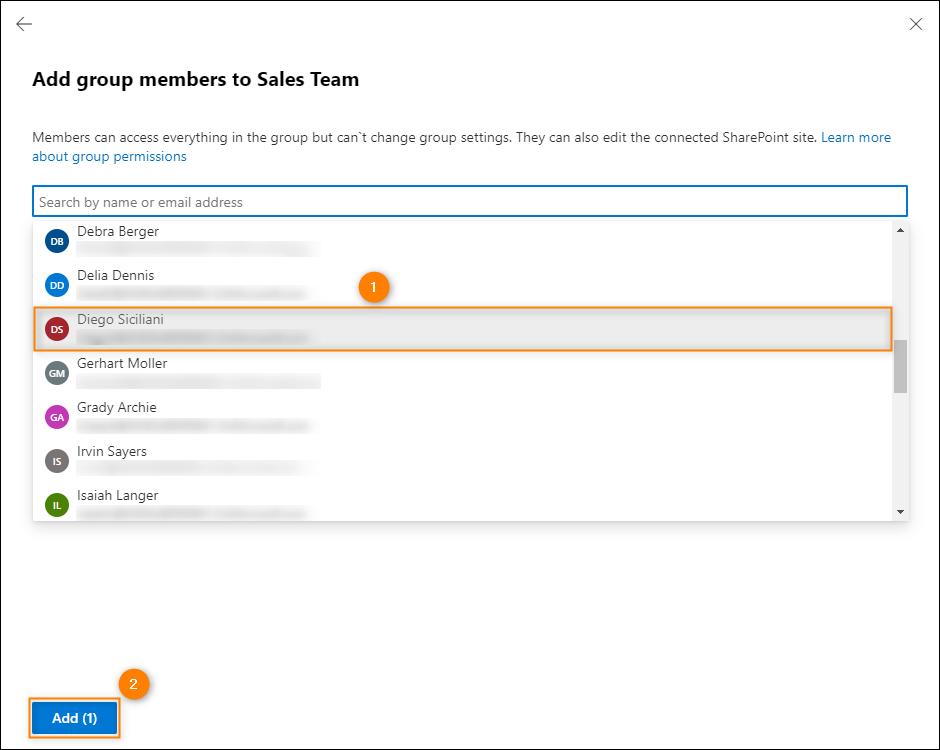
Fig. 11. Selecting a new member to add to the group and confirming changes.
See also:
| Related products: | CodeTwo Email Signatures for Office 365 |
| Categories: | How-To |
| Last modified: | February 4, 2025 |
| Created: | August 26, 2020 |
| ID: | 890 |


