How to add personalized email signatures to emails sent from shared mailboxes
Problem:
Emails sent from shared mailboxes, like [email protected], have a team-specific email signature added, but the signature doesn’t contain any information about the specific user who sent the email.
Solution:
Use the links below to find a solution for the CodeTwo software you use:
- CodeTwo Email Signatures 365: See how to set up personal cloud (server-side) or Outlook (client-side) signatures to work with shared mailboxes
- CodeTwo Email Signatures On-prem and CodeTwo Exchange Rules (Pro): Set up a combination of a native Outlook signature and a cloud (server-side) signature added by CodeTwo
Set up a combination of a native Outlook signature and a cloud (server-side) signature added by CodeTwo
You can use a combination of a native Outlook signature that will contain just sender’s personal details and a cloud (server-side) email signature (added by CodeTwo) that contains the remaining information (company logo, marketing banner, contact details, etc.) and is inserted to all messages sent from, for example, shared mailboxes.
Follow the links below for more information on how to:
- Set up a personal email signature in an email client
- Set up an email signature template for a shared mailbox in CodeTwo Exchange Rules family of products.
Set up a personal email signature in an email client
Users can create their own simple signatures by following these steps:
After setting up a personal email signature, the signature can be added to messages automatically or manually by the user. For example, a signed reply from a shared mailbox in Outlook will look as shown in Fig. 1.
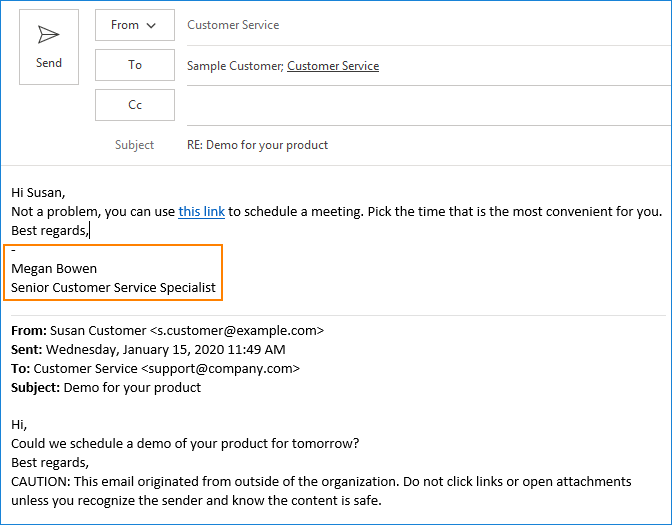
Fig. 1. A personal email signature added to a message sent from a shared mailbox.
Set up an email signature template for a shared mailbox in CodeTwo Email Signatures On-prem or CodeTwo Exchange Rules (Pro)
- To create a signature rule for shared mailboxes in CodeTwo Email Signatures On-prem or any version of the CodeTwo Exchange Rules (Pro) software (discontinued), first open the program’s Administration Panel and add a new signature-adding rule (Fig. 2.).
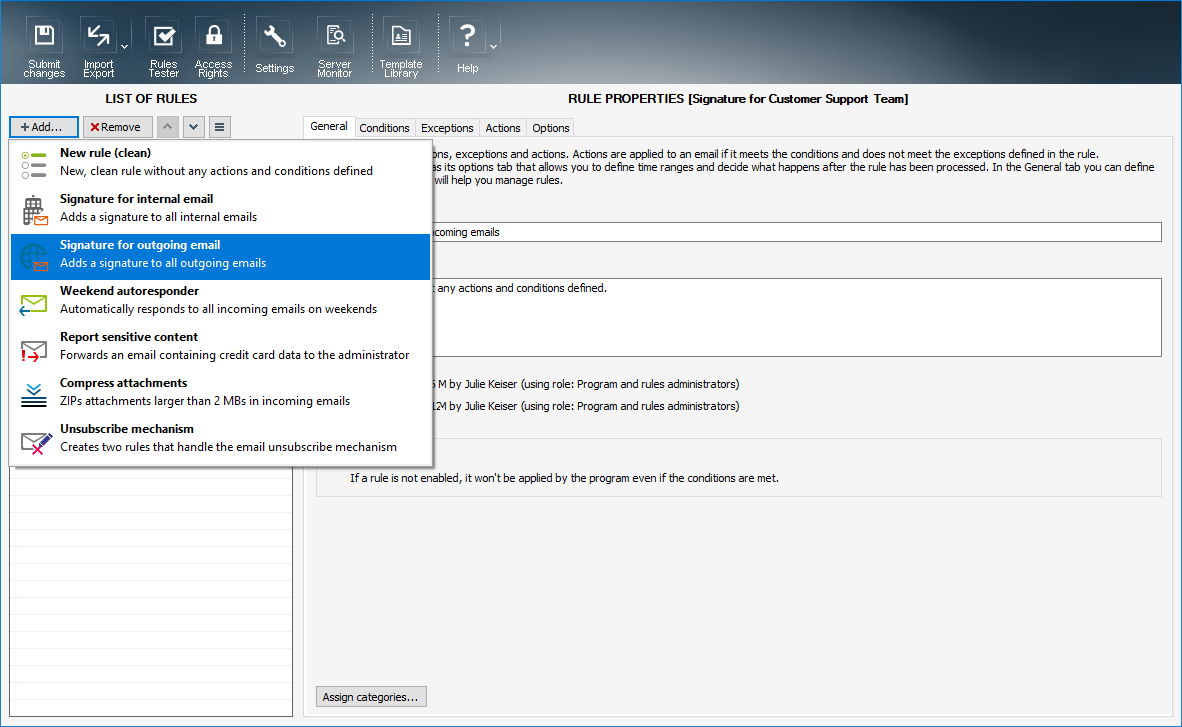
Fig. 2. Creating a new signature rule in CodeTwo Exchange Rules.
- Next, go to the Conditions tab and add a condition Sender matches email address (the email address of your shared mailbox) (Fig. 3.). You can add more than a single shared mailbox address by adding a similar condition with the OR operator between each entry.
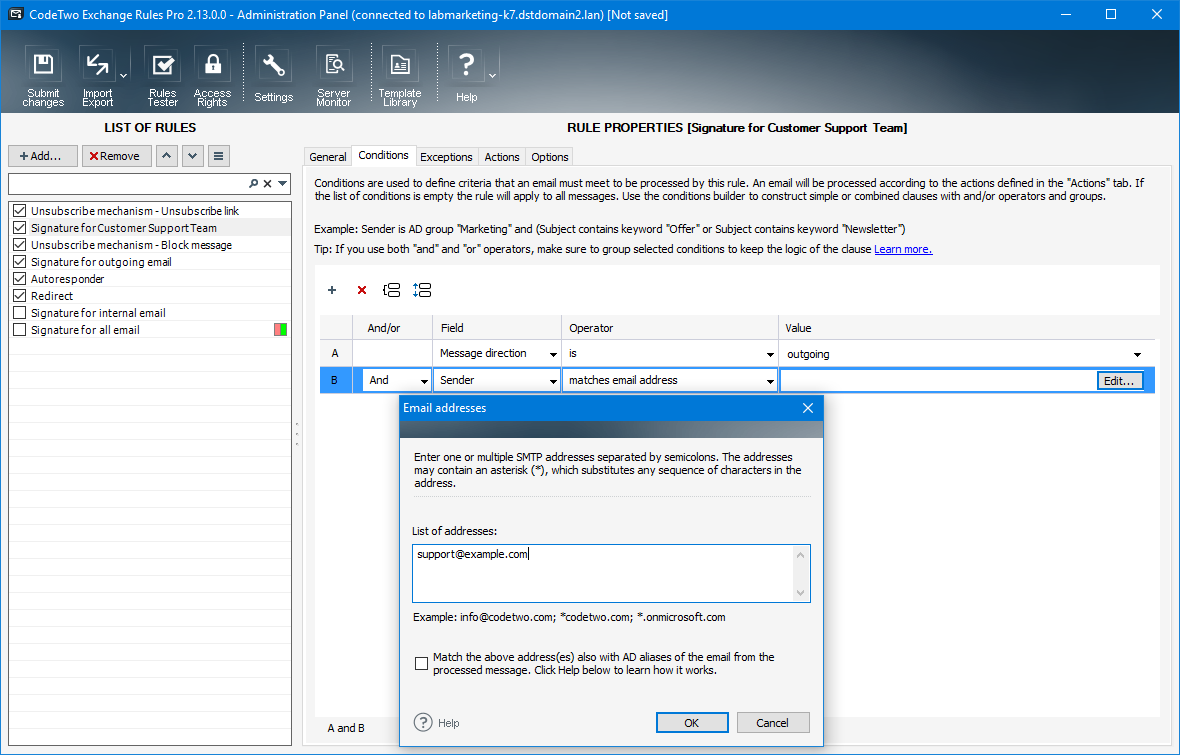
Fig. 3. Setting up signature rule’s conditions.
- After specifying the rule’s conditions, go to the Actions tab, and create a template adjusted to your shared mailbox (or mailboxes) by accessing the built-in signature editor (Fig. 4.).
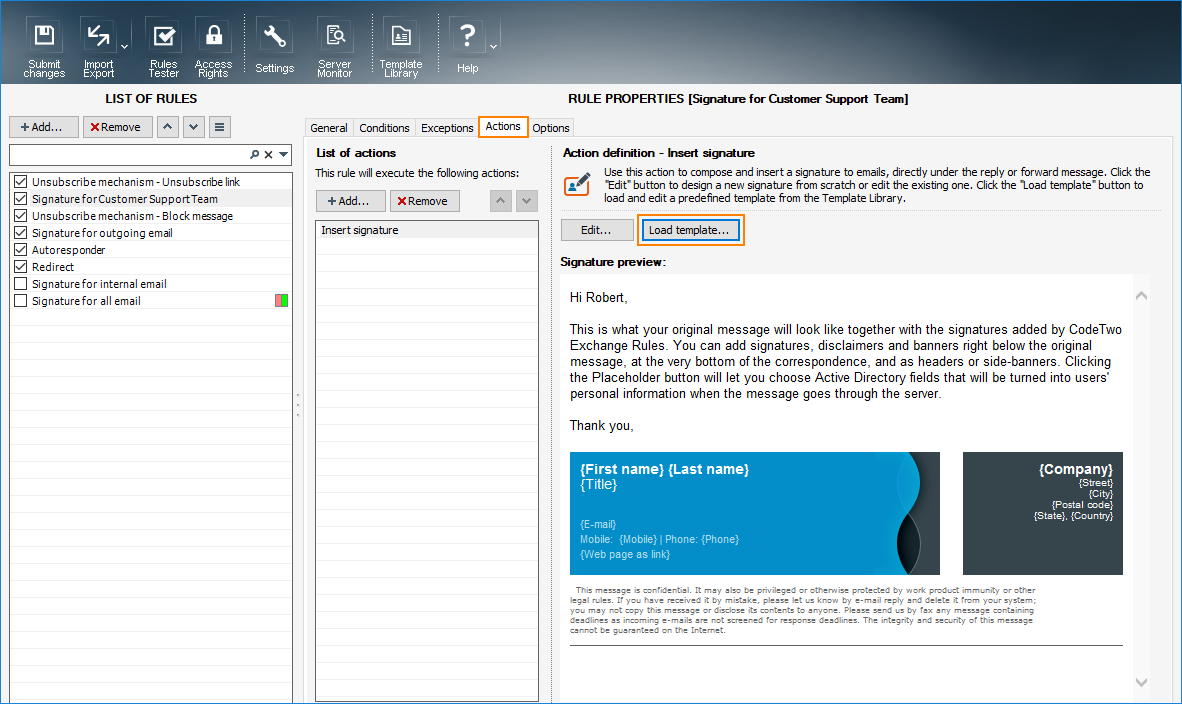
Fig. 4. Accessing the built-in email signature editor.
The rest of the email signature rule’s settings can be default. To learn more about creating email signature rules in your CodeTwo software for on-prem Exchange, visit the user’s manual for CodeTwo Email Signatures On-prem or CodeTwo Exchange Rules Pro (discontinued). The Actions tab can be used to preview what the signature template will look like in an email (Fig. 5.).
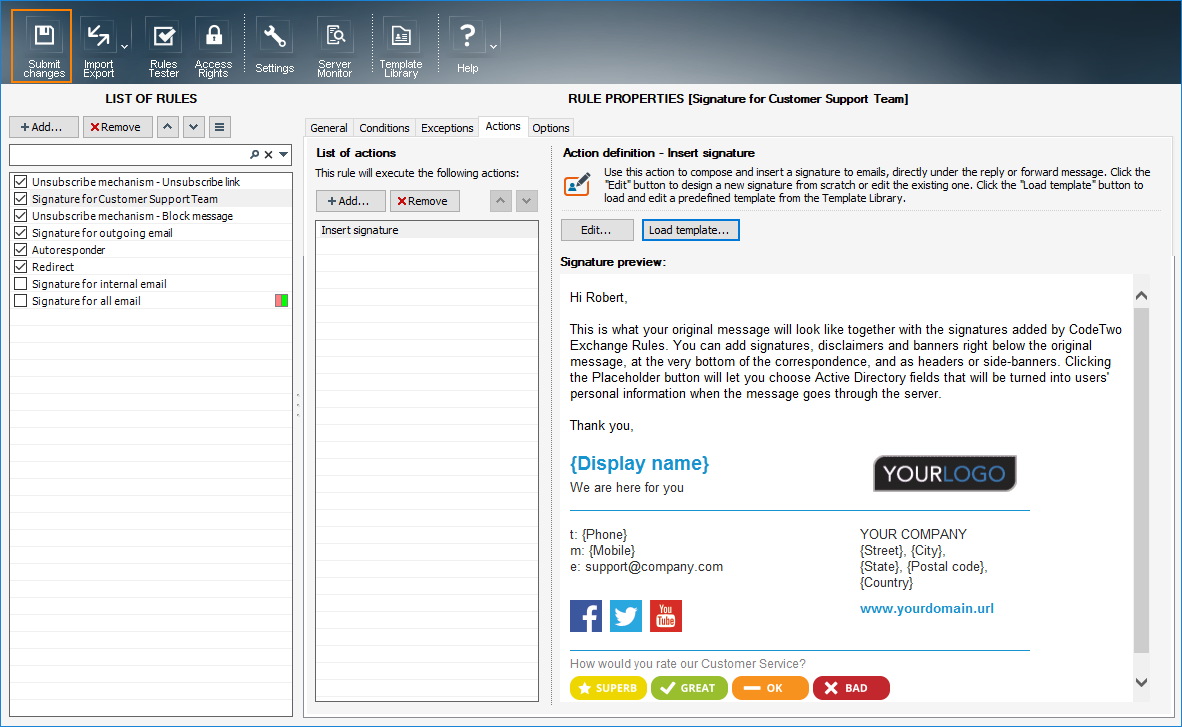
Fig. 5. Email signature preview on the Actions tab.
Once an email is sent from a shared mailbox, signature added by your CodeTwo program will appear under the sender’s name and job title inserted in an email client (Fig. 6.).
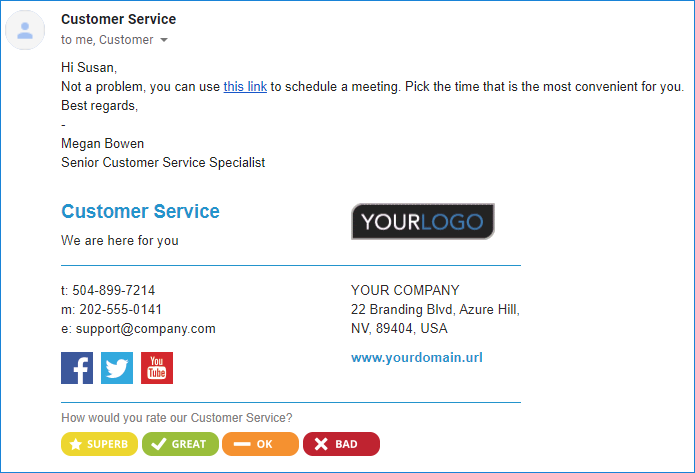
Fig. 6. A shared mailbox signature consisting of an Outlook (client-side) and cloud (server-side) signature.
See also:
| Related products: | CodeTwo Email Signatures for Office 365, CodeTwo Email Signatures On-prem, CodeTwo Exchange Rules 2007 4.x, CodeTwo Exchange Rules 2010 1.x, CodeTwo Exchange Rules 2013 1.x, CodeTwo Exchange Rules 2016 1.x, CodeTwo Exchange Rules 2019 1.x, CodeTwo Exchange Rules Pro 1.x, 2.x |
| Categories: | How-To |
| Last modified: | July 6, 2026 |
| Created: | April 9, 2020 |
| ID: | 856 |


