How to avoid converting physical address in a signature to a link
Problem:
You use an email signature template which includes physical address data (street, zip code, city, etc.). When you send a message and your recipient views it in Outlook on the web (OWA), Outlook.com, an Outlook desktop app, or Gmail, the address data is automatically displayed as a Bing Maps or Google Maps link. As a result, layout and, consequently, appearance of your signature changes.
Solution:
CodeTwo Email Signatures 365 does not modify signature contents (including physical address data) in any way. In the case of the Outlook ecosystem, the problem is most likely caused by the Bing Maps add-in that is enabled in your recipient’s Microsoft 365 account. As far as the Gmail service is concerned, physical addresses are most probably converted by certain smart features integrated into the Google’s solution. When physical address data is discovered in a message body (e.g. in a signature added by CodeTwo software), all the address content (street, zip code, city, etc.) is replaced with a link to the Bing Maps or Google Maps service. Consequently, it might negatively impact the layout of your message. It does not matter if you’ve added the address data to your signature by entering it manually or using placeholders.
Essentially, there are the two methods to fix the problem:
- Turning physical address data into a dummy link (Outlook and Gmail ecosystems)
- Disabling the Bing Maps add-in (Outlook ecosystem only)
Turning physical address into a dummy link
This method is universal (fixes the issue both in the Outlook and Gmail ecosystems) and you do not have to ask your recipients to perform any actions for you (=you’re in control).
The method preemptively turns physical address data into a dummy (non-working) link without the href attribute's value defined. This way, smart features integrated into Outlook and Gmail ignore the data (treating it as if it has been already linked) and won’t turn it into a map link.
Here is how to use this method:
- Copy the following HTML code snippet to text editing software of your choice, e.g. Notepad (Windows) or TextEdit (Mac):
<a href="" style="text-decoration:none; color:black;">YourPhysicalAddressDataHere</a>
- Next, sign in to the signature management app, select the signature containing physical address data, and open it in the signature template editor.
- Once in the editor, highlight and copy the physical address data from your signature (Fig. 1.).
Info
If you’ve defined the physical address using placeholders (e.g. you’ve used {Country} instead of manually typing ‘USA’), simply copy and paste them just like an ordinary text when following the steps below.
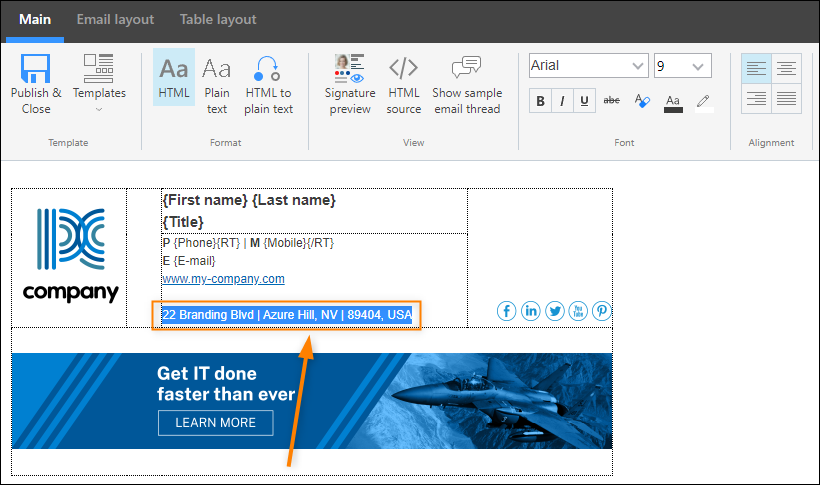
Fig. 1. Physical address data to be copied.
- Paste the address data into the text editing software, replacing the YourPhysicalAddressDataHere portion of the snippet from step 1. The resulting code should look as shown in Fig. 2.

Fig. 2. Physical address data pasted into the correct place of the snippet.
- Highlight and copy the entire code snippet. Next, go back to the signature template editor.
- Delete your ‘old’ physical address data in the signature, make sure the cursor is displayed in the place where you want to insert the address (inside a dummy link), and click HTML snippet on the ribbon (Fig. 3.).
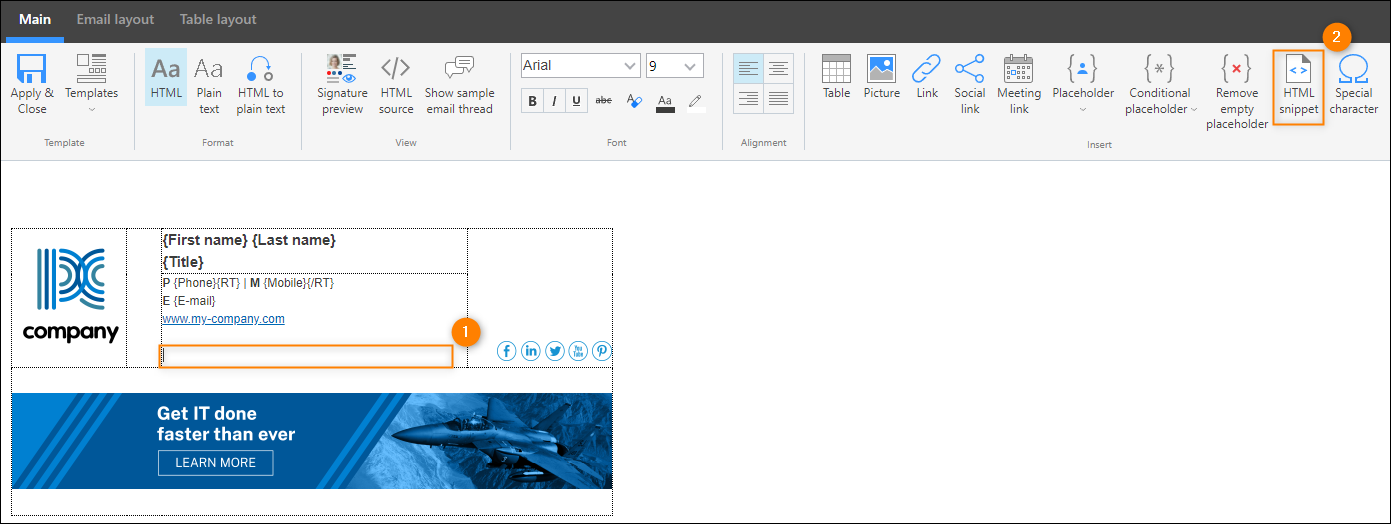
Fig. 3. Deleting the original physical address data and opening the Insert HTML snippet window.
- Next, paste the snippet (copied from text editor) into the Insert HTML snippet window and click Insert (Fig. 4.).
Info
If you wish to change the font color of the physical address in your signature (by default, the address is displayed in black), you can do it by using the standard color picker on the editor’s ribbon or by manually editing the code.
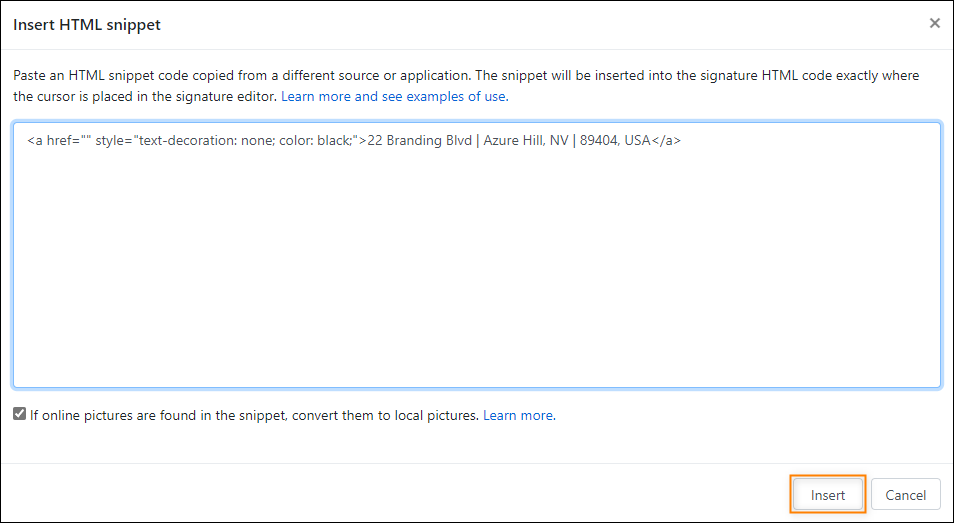
Fig. 4. Address data inside a dummy hyperlink in the Insert HTML snippet window.
- The address inside a dummy hyperlink will appear exactly in the same place as the ‘original’ address data (see Fig. 1.).
- Save changes to your signature template and close the editor, then submit changes to your signature rule by clicking Save & Publish.
Now, the layout of your signature should be displayed properly in recipients’ email clients. However, if the issue persists in the Outlook ecosystem, continue to the second solution below.
Disabling the Bing Maps add-in
The Bing Maps add-in is enabled by default and cannot be uninstalled from the Microsoft 365 account. To display the appropriate layout of your message, your recipient needs to disable it. This can be done in two ways:
- By disabling the add-in globally (by an administrator)
- By disabling the add-in individually (by a given user/recipient)
Disabling the add-in globally
If the issue is experienced by many users in an organization you email with a lot, asking the administrator of the organization to disable the add-in globally is the best solution. To do it, they need to complete the following steps:
- Sign in to the Exchange admin center.
- In the left-hand navigation menu, choose Organization > Add-ins.
- Select the Bing Maps add-in and either double-click it or click the Edit button to edit its settings (Fig. 5.).
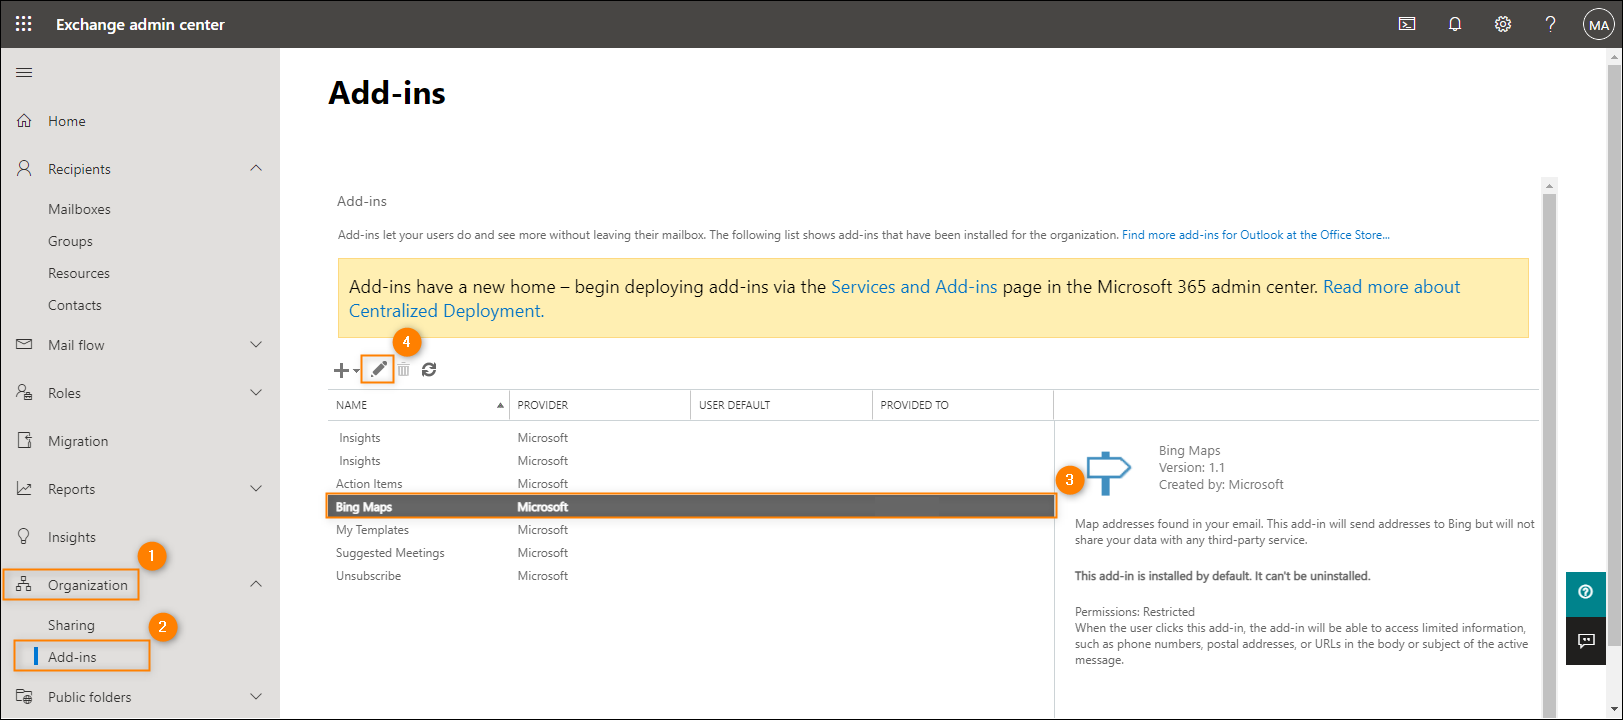
Fig. 5. Opening the Bing Maps add-in settings.
- In the pop-up window that opens, clear the Make this add-in available to users in your organization checkbox and click Save (Fig. 6.).
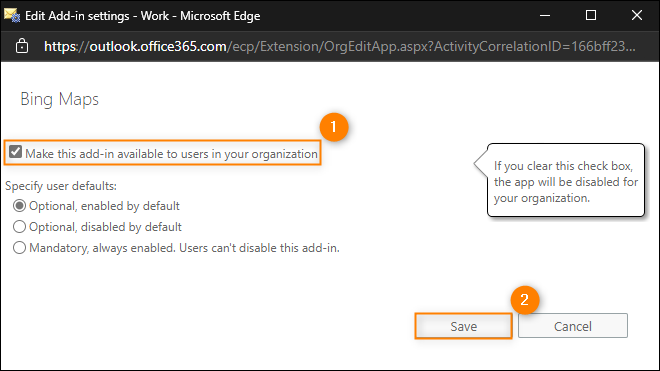
Fig. 6. Disabling the add-in globally for all users in an organization.
Once the changes propagate across the tenant, the add-in should become disabled for all the users.
Disabling the add-in individually
If the issue is experienced by a single user or few users only, it might be a better idea to ask them to disable the add-in just in their Microsoft 365 account. This can be achieved as follows:
- Open the Outlook desktop app and click the File menu on the ribbon. Next, select Info tab (if it’s not selected by default) and click Manage Add-ins (Fig. 7.).
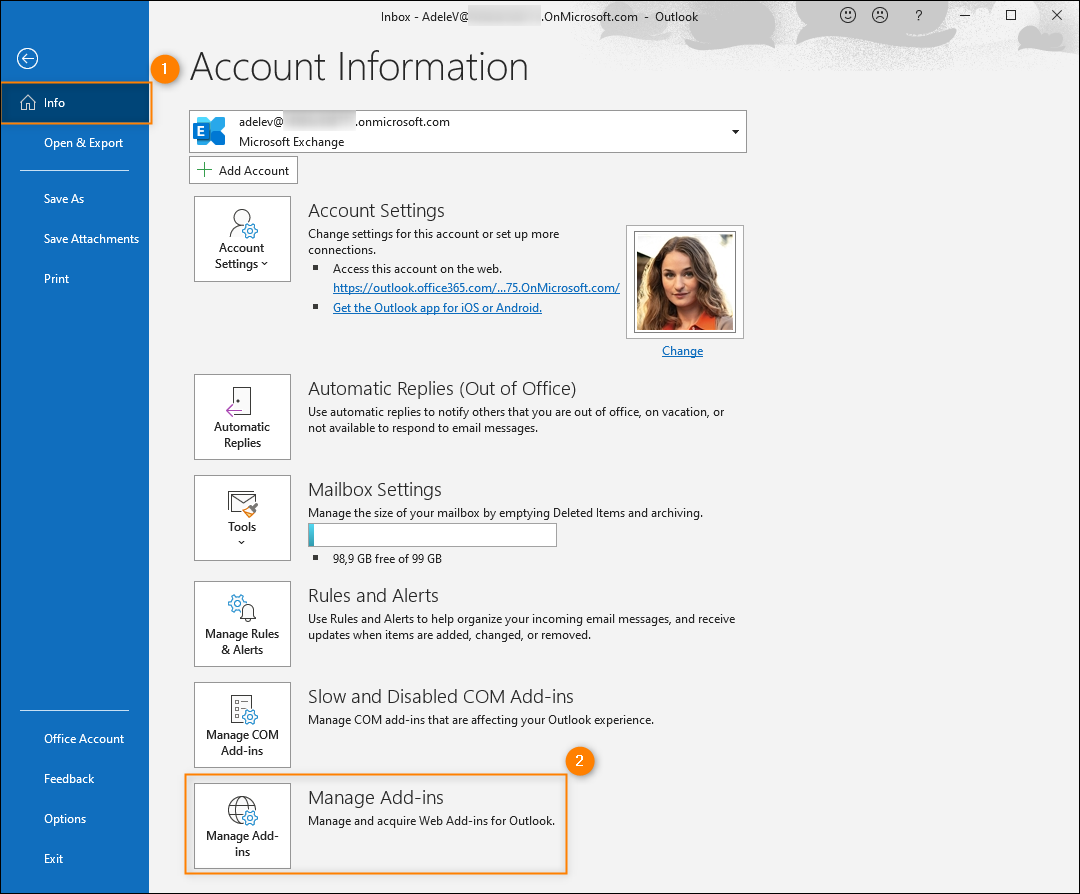
Fig. 7. Opening the add-ins management window from the Outlook desktop app.
- This will open the Add-Ins for Outlook settings in Outlook on the web.
Info
If the affected user’s organization has blocked access to Outlook on the web, they will not be able to access the Outlook add-ins settings (see Fig. 8.). In such a case, the user must ask the administrator to disable the add-in for them.
- Click My add-ins on the left. Next, locate the Bing Maps add-in, click its menu button (three dots), and select Remove (Fig. 8.).
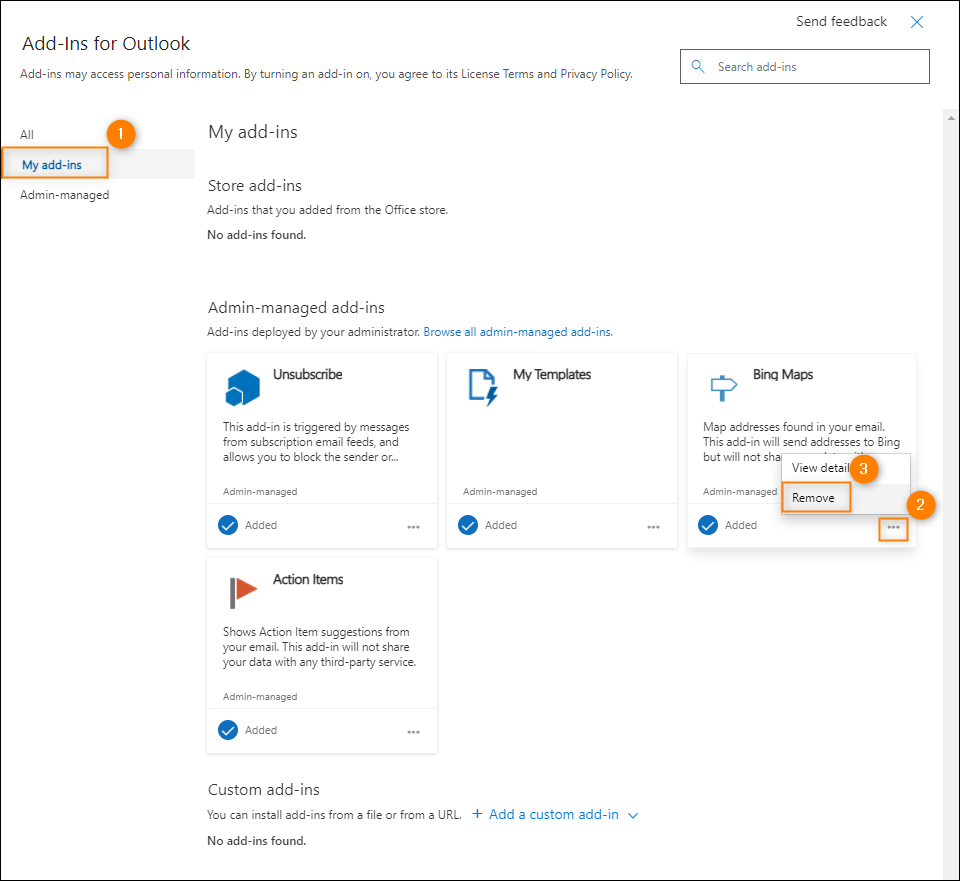
Fig. 8. Disabling the add-in for an individual user.
Once your recipient completes the procedure above, the add-in will become disabled in their Microsoft 365 account.
See also
| Related products: | CodeTwo Email Signatures for Office 365 |
| Categories: | How-To, Troubleshooting |
| Last modified: | July 14, 2026 |
| Created: | October 4, 2021 |
| ID: | 947 |


