How to set the correct image size in your email signature for different email apps and devices
Problem:
You would like to ensure that the image inserted in the signature template is displayed in the correct size across different email apps and devices.
Solution:
If you add an image to your email signature, you might either:
- use the image in the target size (highly recommended); or
- scale the image down (if it’s too big), using controls in the signature template editor available in the CodeTwo software.
In the latter case, however, some email apps (e.g., Apple Mail) might ignore the scaling settings – it’s often the case when your email is replied to. Consequently, the image can be displayed in its full size, completely corrupting the layout of your email signature, as shown in Fig. 1.
![]()
Fig. 1. The logo restored to its original dimensions corrupts the signature layout.
Because you can’t control which email app your recipients use (some, like Outlook, handle scaling correctly), the easiest method to ensure the correct image dimensions across email apps is to always add the image in the target size that fits your signature layout. This way, the image won’t require applying any settings to be resized correctly.
If your image’s original size is too large, you can use a free graphics editors (e.g., GIMP, see Fig. 2.) to resize the image before you insert it into your signature. While scaling an image down involves some minimal quality losses, you completely eliminate the incorrect image sizing problem.
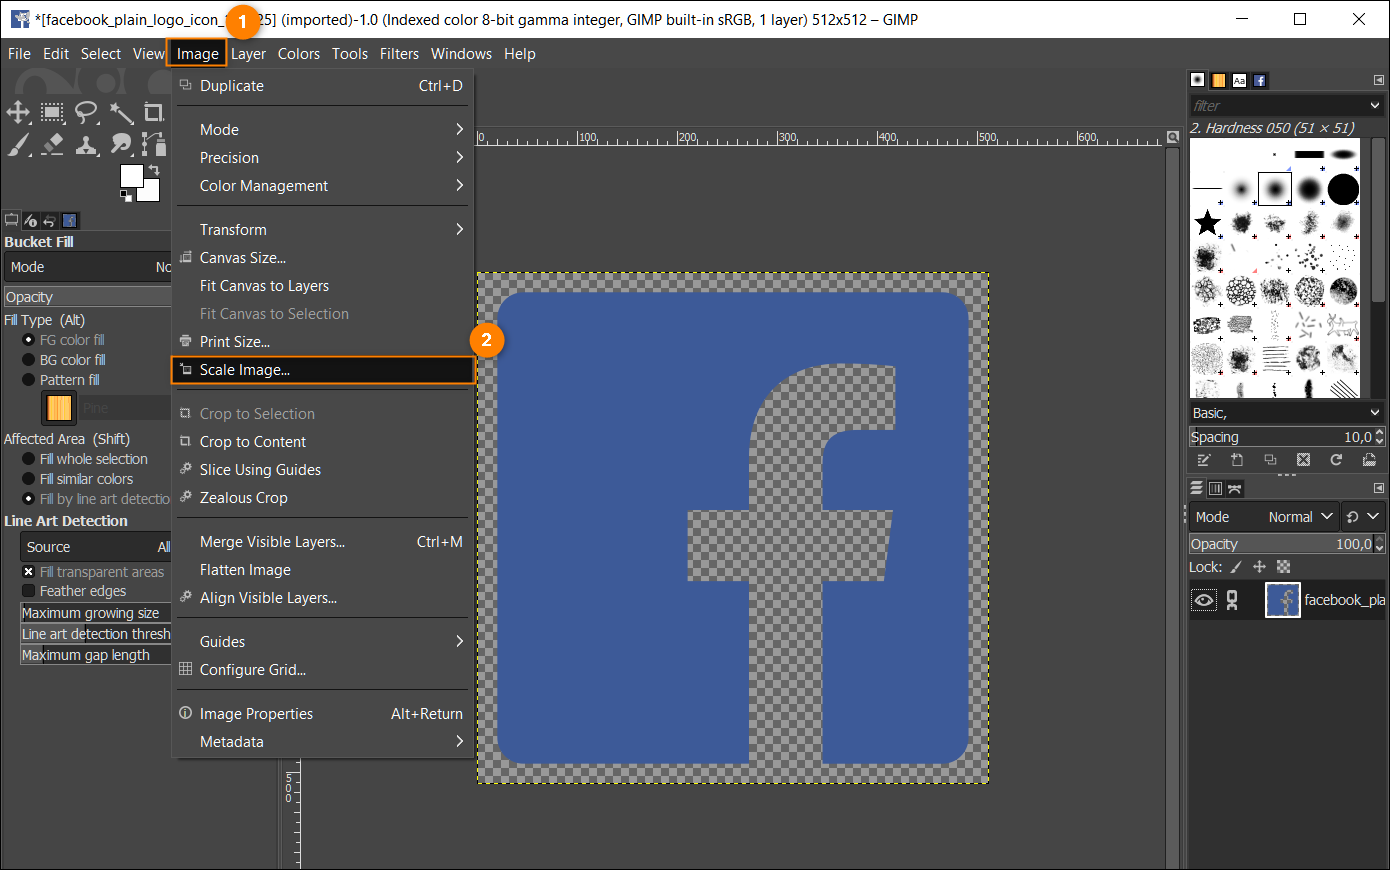
Fig. 2. Resizing an image in GIMP.
If you still want to use a high-resolution image and then scale it down (e.g., to achieve better results on 4K/retina screens), follow these steps in your CodeTwo software to:
- resize an image when adding it to your email signature template, or
- resize an existing image in your signature template.
Resize an image when adding it to your signature
- In the template editor, use the Picture option to insert an image into your email signature.
- Set the desired (smaller) image size by entering values in the With and Height fields (or just one of them, if the Keep aspect ratio option is selected), as shown in Fig. 3.
Info
When you define custom image dimensions, our template editor will automatically add the following extra layer of HTML and CSS coding to your signature:
<img src="..." width="XX" height="YY" style="width: XXpx; height: YYpx;">
where XX is the value you’ve set for width and YY for height. Thanks to that, your image should be handled properly by more than 90% of email clients available on the market.
Still, to be 100% sure that your image has the exact size you want, resize it before you insert it into your signature, as explained at the beginning of this article.
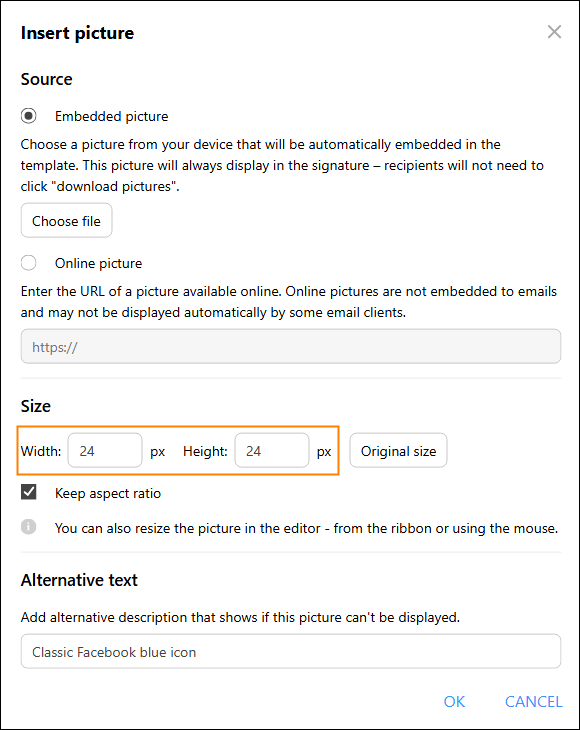
Fig. 3. The controls that allow you to resize the image on inserting it in the template editor.
Now, your image should be displayed correctly in all email clients that support CSS properties (or their HTML equivalents at least).
Resize an existing image in your signature template
If you want to change your image dimensions after you’ve inserted it into your signature template, you can do it in three ways:
- Click your image to select it, place the mouse cursor at one of its edges and drag it until you get the desired size.
- Click your image to select it, go to the Picture tab and set the dimensions using the Width and Height fields (Fig. 4.).
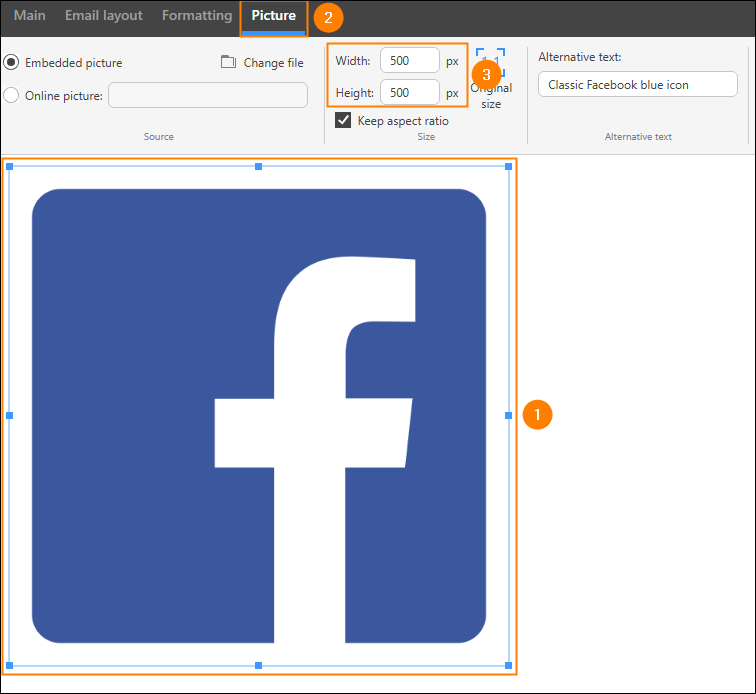
Fig. 4. Resizing an already inserted image with the controls on the Picture tab.
- Open the HTML code of your signature for editing (use the HTML source / Source button on the ribbon), locate your picture in the code, and modify the values for HTML and CSS width and height attributes/properties (Fig. 5.).
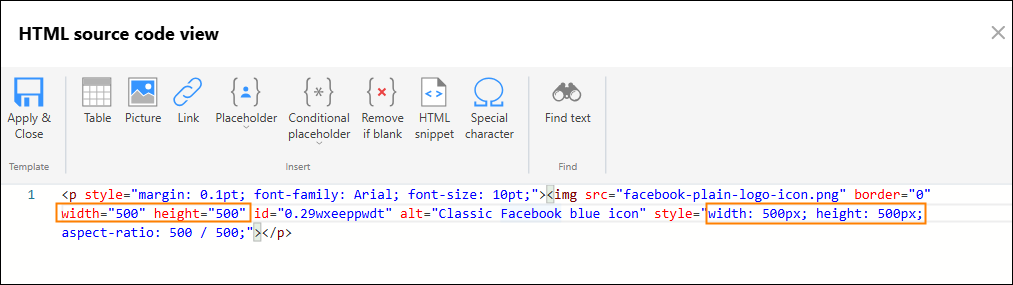
Fig. 5. Resizing an already inserted image by editing its HTML code.
| Related products: | CodeTwo Email Signatures for Office 365, CodeTwo Email Signatures On-prem, CodeTwo Exchange Rules 2.x, 3.x, CodeTwo Exchange Rules 2007 1.x, 2.x, CodeTwo Exchange Rules 2010 1.x |
| Categories: | How-To, Troubleshooting |
| Last modified: | September 18, 2025 |
| Created: | September 18, 2008 |
| ID: | 46 |


