How to find which users still have the retired COM Add-in installed
Problem:
Some users in your company still have the legacy CodeTwo COM Add-in installed. The add-in has been retired on October 31, 2025, and no loger works. You need a way to check your environment for any CodeTwo COM Add-ins to uninstall them.
Solution:
When you install the COM Add-in, the following key is added to the Windows Registry:
HKEY_CURRENT_USER\SOFTWARE\Microsoft\Office\Outlook\Addins\Esig365.Outlook.Add.Adx.AddInModule
You can use the scripts provided in this article to check the Windows Registry for information about CodeTwo COM add-in installations on all or selected machines.
Check all PCs in your environment for CodeTwo COM add-in installations
Prerequisites:
- PowerShell console
- The machine running the script and target PCs need to be in the same network
- The Remote Registry service must be enabled and running on the target machine
Get-ADComputercmdlet requires the ActiveDirectory PowerShell module installed or Exchange Management Shell
Script:
The script below queries all machines in your environment. For more information, see the comments in the script itself.
$pcnames = (Get-ADComputer -Filter *).Name #Gets a list of all computer names from Active Directory. Requires you to connect to the AD environment. Instead of using Get-ADComputer cmdlet, you can create a CSV file with all PC names.

foreach ($pcname in $pcnames){ #This loop goes through the list of all computeres from the list above.

$InstalledSoftwareKey="SOFTWARE\\Microsoft\\Office\\Outlook\\Addins" #Specifies the location in Windows registry, where Outlook add-ins are located.

$InstalledSoftware=[microsoft.win32.registrykey]::OpenRemoteBaseKey('CurrentUser',$pcname) #Remote query to access the target PC registry.

$RegistryKey=$InstalledSoftware.OpenSubKey($InstalledSoftwareKey)

$addincount=$RegistryKey.count; #Checks if the target PC has any Outlook add-ins installed. If not, the script returns a message that "No Outlook add-ins are found on this computer".

if ($addincount -gt 0){ #This part of the script verifies if one of the add-ins on the target machine is the CodeTwo COM Add-in.

$SubKeys=$RegistryKey.GetSubKeyNames()

Foreach ($key in $SubKeys){

$thisKey=$InstalledSoftwareKey+"\\"+$key

$thisSubKey=$InstalledSoftware.OpenSubKey($thisKey)

$obj = New-Object PSObject

$obj | Add-Member -MemberType NoteProperty -Name "ComputerName" -Value $pcname

$obj | Add-Member -MemberType NoteProperty -Name "DisplayName" -Value $($thisSubKey.GetValue("FriendlyName"))

$obj | Add-Member -MemberType NoteProperty -Name "DisplayVersion" -Value $($thisSubKey.GetValue("DisplayVersion"))

$ComputerName=$obj.ComputerName;

if($obj.DisplayName -eq "CodeTwo Signatures Add-in for Outlook"){

Write-Host "CodeTwo COM Add-in found on $ComputerName" -ForegroundColor Red

}

else{

}

}

}

else{

Write-Host "No Outlook add-ins found on $ComputerName" -ForegroundColor Green ;

}

}
If the script finds the CodeTwo COM Add-in installed on any machine, it will return information about which machines have the add-in installed, as shown in Fig. 1. If you get any errors instead, see the Troubleshooting section.

Fig. 1. Sample results of the script.
Once you have identified all CodeTwo COM add-ins in your environment, you can:
- Switch from the retired COM Add-in to modern CodeTwo Web Add-in; or
- If you have already deployed the Web Add-in, just uninstall the COM Add-in.
Check a single PC for CodeTwo COM add-in installation
Prerequisites:
- PowerShell console
- Connection to the target PC (if querying another machine)
- Remote Registry service turned on (if querying another machine)
Script:
To quickly check if a single machine in your environment has the CodeTwo COM add-in installed, run the following script:
$pcname=$env:computername;

$AddinFound=$false;

$InstalledSoftwareKey="SOFTWARE\\Microsoft\\Office\\Outlook\\Addins"

$InstalledSoftware=[microsoft.win32.registrykey]::OpenRemoteBaseKey('CurrentUser',$pcname)

$RegistryKey=$InstalledSoftware.OpenSubKey($InstalledSoftwareKey)

$SubKeys=$RegistryKey.GetSubKeyNames()

Foreach ($key in $SubKeys){

$thisKey=$InstalledSoftwareKey+"\\"+$key

$thisSubKey=$InstalledSoftware.OpenSubKey($thisKey)

$obj = New-Object PSObject

$obj | Add-Member -MemberType NoteProperty -Name "ComputerName" -Value $pcname

$obj | Add-Member -MemberType NoteProperty -Name "DisplayName" -Value $($thisSubKey.GetValue("FriendlyName"))

$obj | Add-Member -MemberType NoteProperty -Name "DisplayVersion" -Value $($thisSubKey.GetValue("DisplayVersion"))

$ComputerName=$obj.ComputerName;

if($obj.DisplayName -eq "CodeTwo Signatures Add-in for Outlook"){

$AddinFound=$true;

}

else

{};

}

if ($AddinFound){

Write-Host "CodeTwo COM Add-in found on $env:computername" -ForegroundColor Red;

}

else{

Write-Host "No CodeTwo COM Add-in found on $env:computername" -ForegroundColor Green;

}
Depending on the results, you will get one of the messages shown in Fig. 2. or Fig. 3.

Fig. 2. No CodeTwo COM Add-in found on the specific PC.

Fig. 3. CodeTwo COM Add-in found on the specific PC.
Once you have identified all CodeTwo COM add-ins in your environment, you can:
- Switch from the retired COM Add-in to modern CodeTwo Web Add-in
- If you have already deployed the Web Add-in, just uninstall the COM Add-in.
Troubleshooting
If you get the following error (Fig. 4.):
Exception calling „OpenRemoteBaseKey” (…) The network path was not found.

Fig. 4. Error indicating that the script could not reach the target PC.
this means that the PC you’re trying to reach:
- is offline, or
- has the Remote Registry service turned off.
To check if the machine is offline, you can ping its name or IP address.
You can turn on the Remote Registry service:
- using the Services app on the target machine to turn it on individually, or
- using GPO to turn it on globally.
Turn on Remote Registry service individually
- Use Windows Key + R to launch the Run window. Then, type in services.msc and click OK (Fig. 5.).
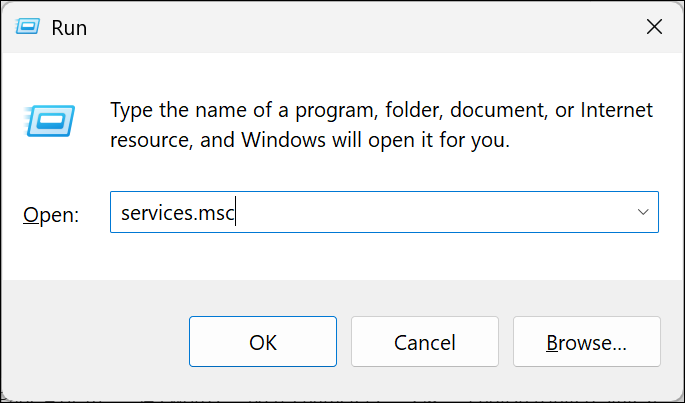
Fig. 5. Accessing the Services tool.
- Find the Remote Registry service, right-click it, and click Properties (Fig. 6.).
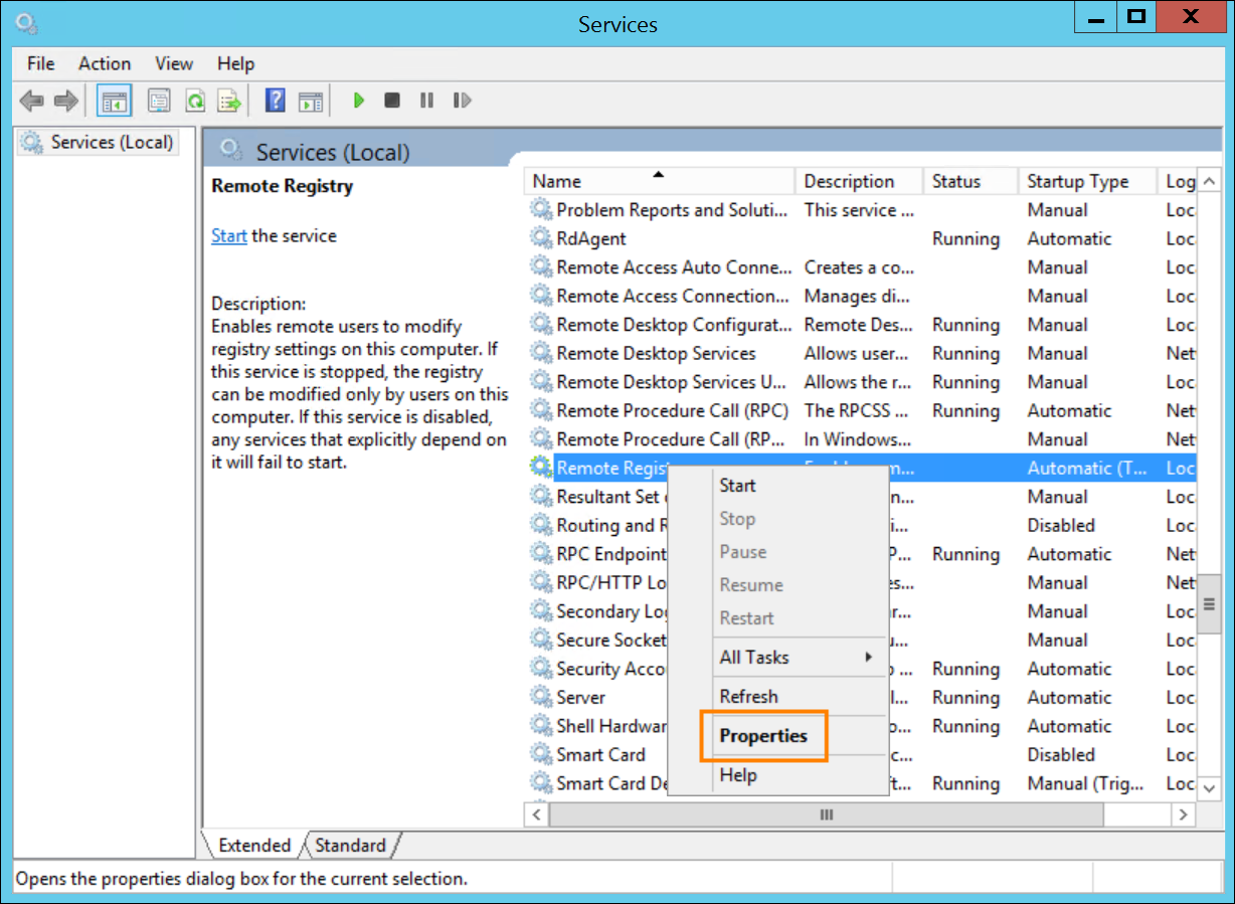
Fig. 6. Accessing Remote Registry service properties.
- Click Start to turn on the service (Fig. 7.). You can also change Startup type to Automatic if you want the service to turn on every time the machine is running.
Warning
It is recommended to turn on the Remote Registry service only when necessary. Turning it on indefinitely may cause risks, as the service allows changing registry settings without physical access to the PC.
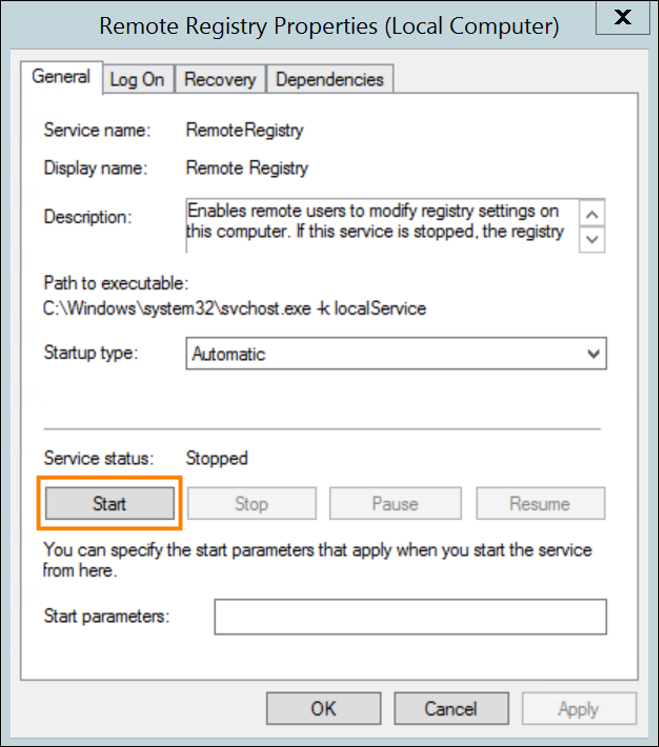
Fig. 7. Turning on the Remote Registry service.
Turn on Remote Registry service using GPO
To turn on Remote Registry using GPO, take the following steps:
- Use Windows Key + R to launch the Run window. Then, type in gpmc.msc and click OK (Fig. 8.) to launch the Group Policy Management console.
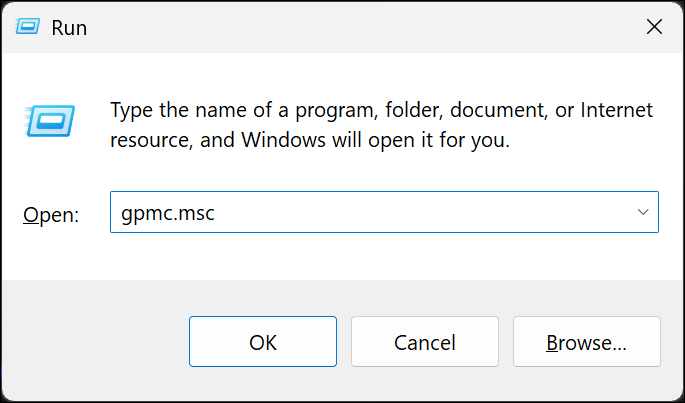
Fig. 8. Accessing the Group Policy Management console.
- Edit the Default Domain Policy linked to your domain by right-clicking it and choosing Edit (Fig. 9.).
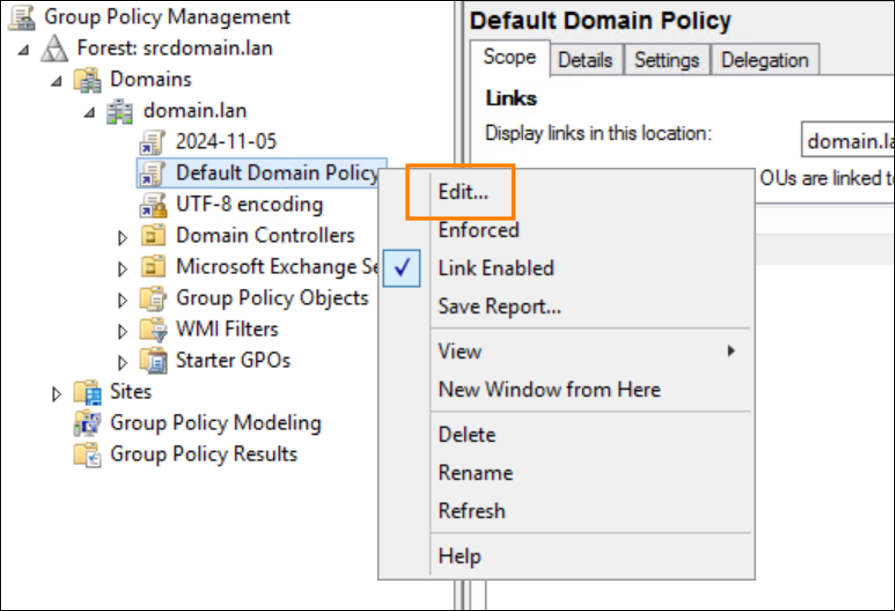
Fig. 9. Editing the Default Domain Policy settings.
- Go to Computer Configuration > Preferences > Control Panel Settings. Right-click on Services and choose New > Service from the context menu (Fig. 10.).
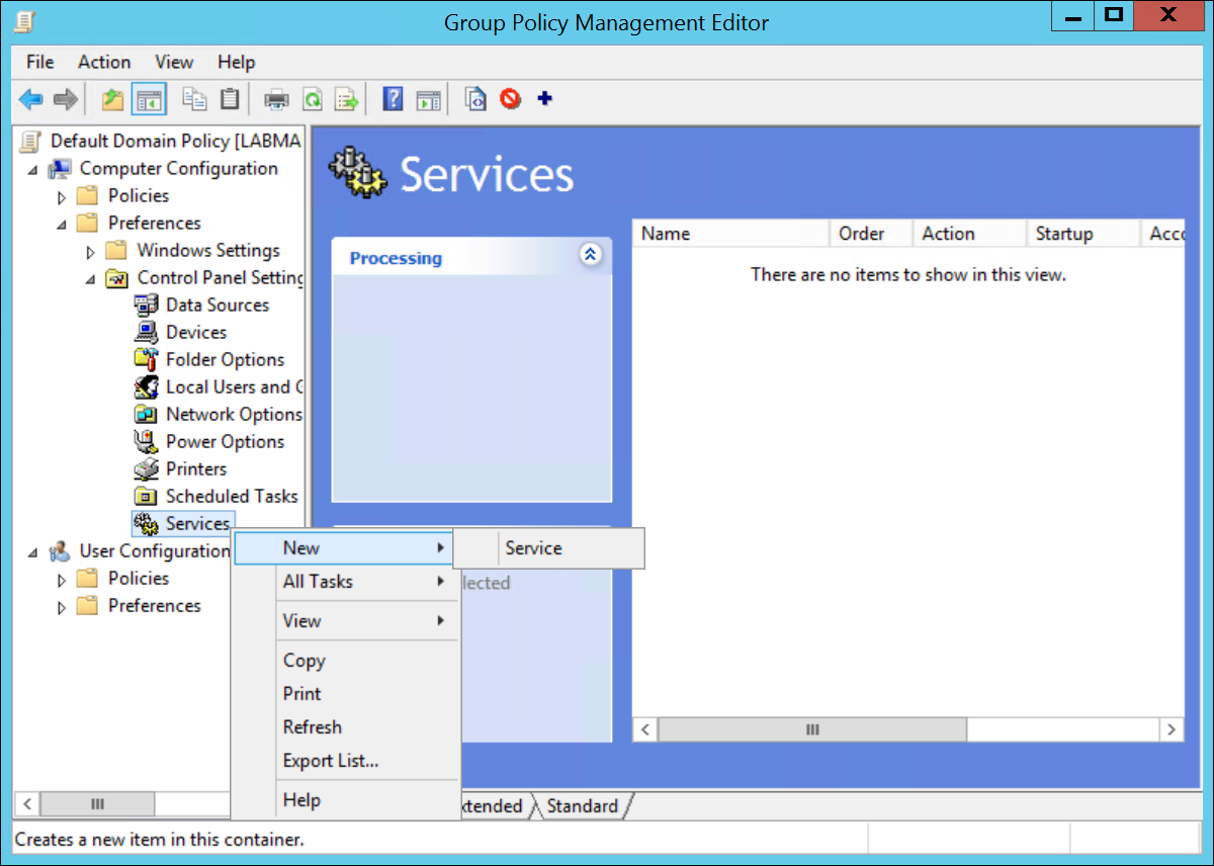
Fig. 10. Modifying the Services settings.
- In the New Service Properties window (Fig. 11.):
- Select Automatic from the Startup menu.
- Select RemoteRegistry in the Service name field.
- Select Start service in the Service action menu.
- Confirm by clicking OK.
Warning
It is recommended to turn on the Remote Registry service only when necessary. Turning it on indefinitely may cause risks, as the service allows changing registry settings without physical access to the PC.
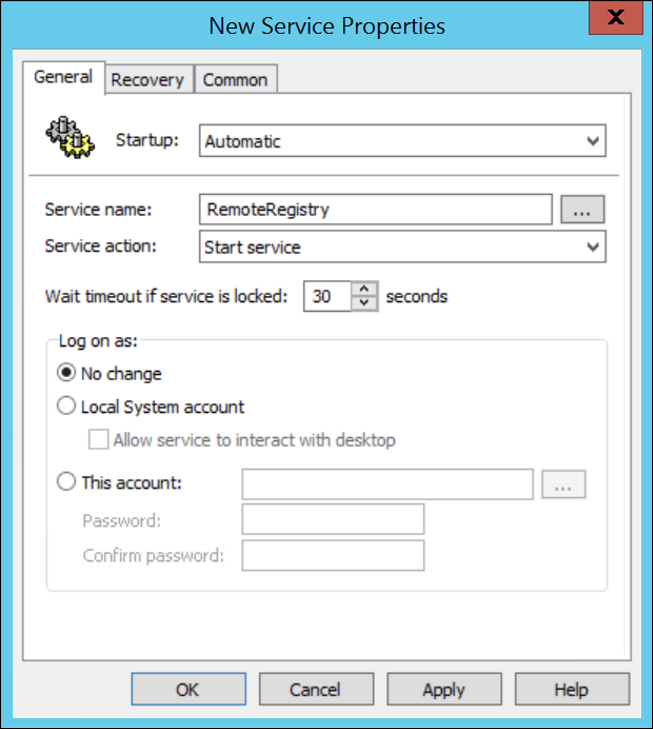
Fig. 11. Modifying the Remote Registry service settings.
After you save the settings, the Group Policy settings will be updated. Keep in mind that it may take some time before the settings are applied to all endpoints.
| Related products: | CodeTwo Email Signatures for Office 365 |
| Categories: | How-To |
| Last modified: | November 4, 2025 |
| Created: | August 26, 2025 |
| ID: | 1137 |


