How to add the alt text HTML attribute to an image in a signature
Problem:
You would like to add the alternative text (alt text) HTML attribute to images in your signature to make it more accessible to the visually impaired and comply with applicable requirements.
Solution:
The alt text (alternative text) attribute is used in HTML to describe the appearance or function of an image to people with visual impairment or blindness. This description (along with ordinary text in an HTML document) is read to them by a screen reader. Thanks to that, they can visualize the content they are unable to see. With no alt text added to an image, a screen reader will describe an image as ‘image,’ which is neither informative nor helpful at all.
Since modern, multimedia-rich email signatures, disclaimers, and auto-replies are - just like websites - HTML documents, you should also remember to add the alt text attribute to images that require a description.
Tips before you start
Not all images require the alt text attribute. The ones you use purely for decorative purposes should have the attribute with the null value (alt="").
For the images requiring the attribute, follow these few simple rules:
- Be specific (tell your user what’s specifically shown in a picture) and keep the description text relatively short. Don’t include the ‘image of’ or ‘picture of’ phrase, as screen readers typically ‘announce’ an image before reading its description.
- If your image is so complex that it requires a longer description, you can additionally use the longdesc attribute to provide a link to a resource that offers more information about the image.
- If your signature includes icons in the contract information section (e.g. a phone icon next to phone number), make sure to add alt text to them as well (e.g. alt="phone number"). Thanks to that, your recipient will not end up listening to screen reader reading merely numbers and wondering if they’ve just heard your phone or fax number.
- If your signature includes image buttons (e.g. as a part of one-click survey), add the alt text attribute that describes their function to them as well, e.g. alt="submit".
- To start, open the Administration Panel, choose your signature (or disclaimer or auto-reply*) rule, go to the Actions tab and click Edit (or Edit body for an auto-reply), as shown in Fig. 1. If you create a completely new rule, choose a template from template library and adapt it to your needs, or edit your template from scratch before moving on to step 2.
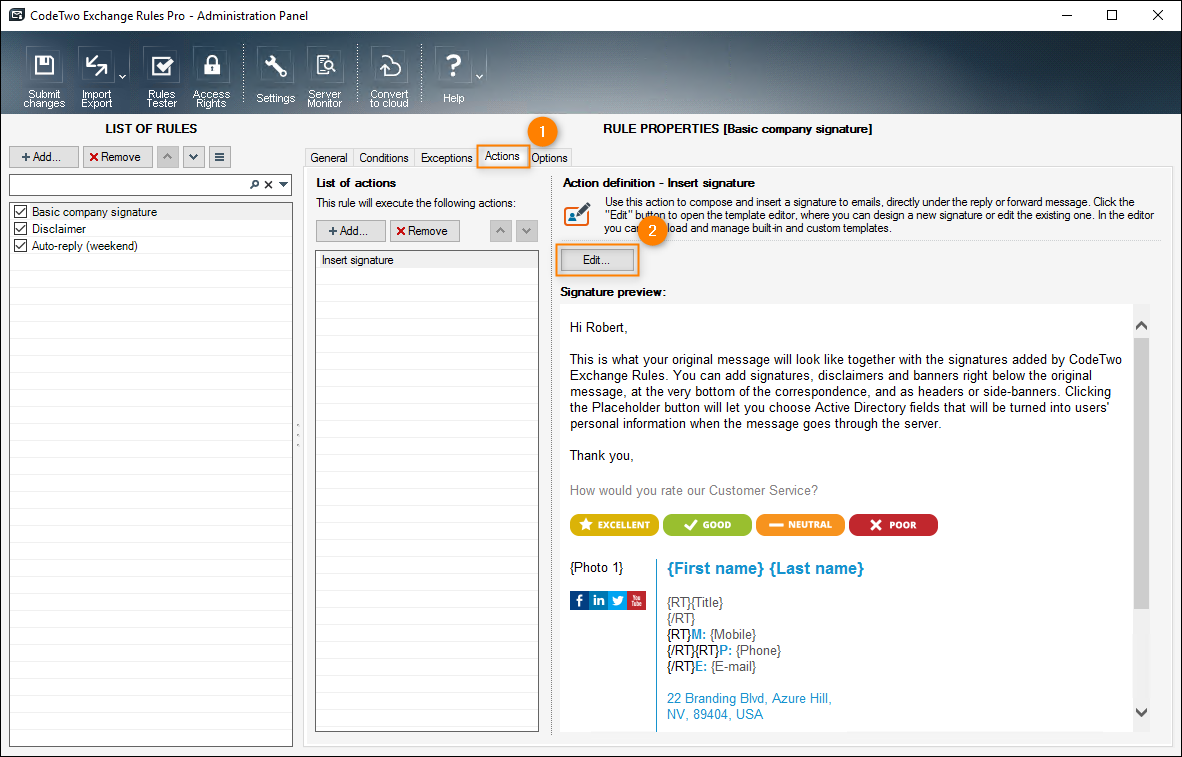
Fig. 1. Accessing signature template in CodeTwo Exchange Rules Pro to add alt text attributes.
* The Auto respond action is available in CodeTwo Exchange Rules Pro only.
- Click the Source button (Fig. 2.). The window with the source HTML code of your signature will open.
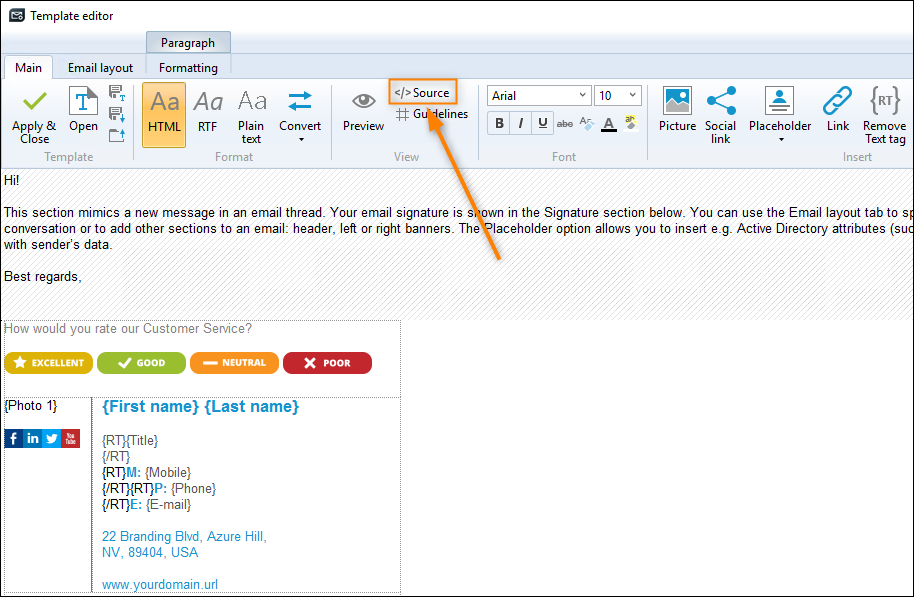
Fig. 2. Accessing the HTML source code of your signature template.
- Locate the first image in the code by using the Find text button (or the Ctrl+F keyboard shortcut) and typing <IMG (Fig. 3.).
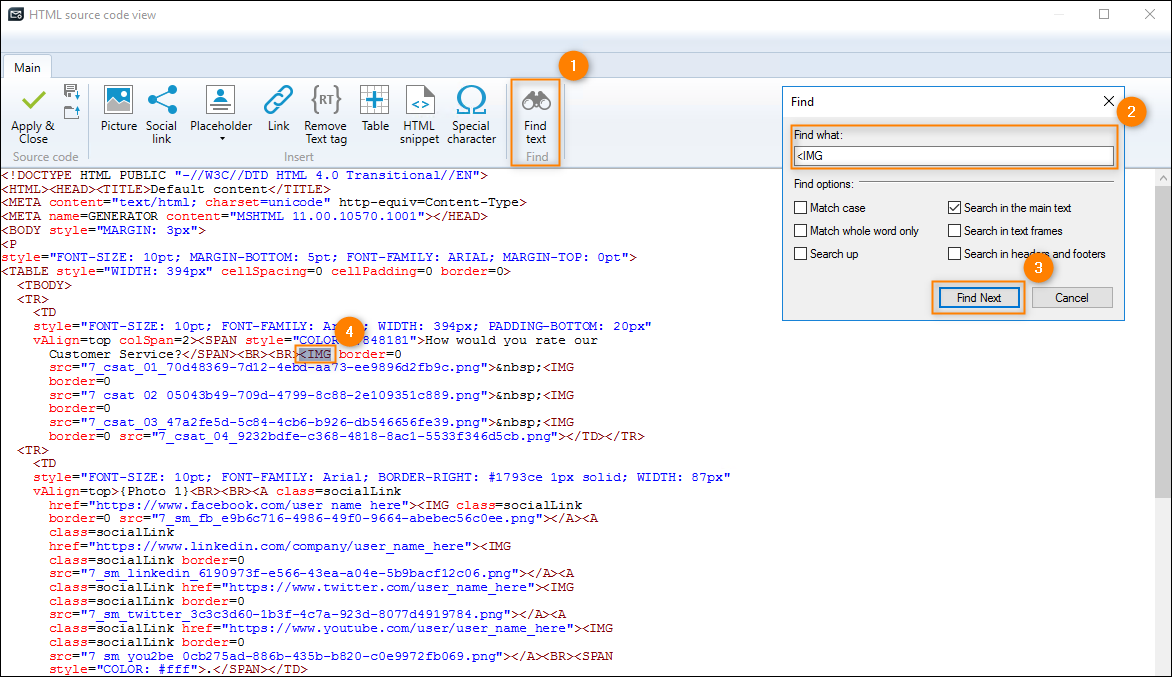
Fig. 3. Highlighting the first image HTML tag to locate it more easily.
- Now, add alt="" after <IMG, putting a single space in-between. Type the image description inside the quotation marks, as shown in Fig. 4.
Tip
To make sure you’re adding the description to a correct image, look for hints in the preceding attributes / code fragments, for example:
- the value of the src attribute that follows a <IMG tag might be of some help - you might find here words like 'csat' or 'banner';
- in the case of the social media icons, you can find web address value of the href attribute helpful, e.g. href="https://www.facebook.com/user_name_here" tells you that image (<IMG) that follows is the Facebook icon.
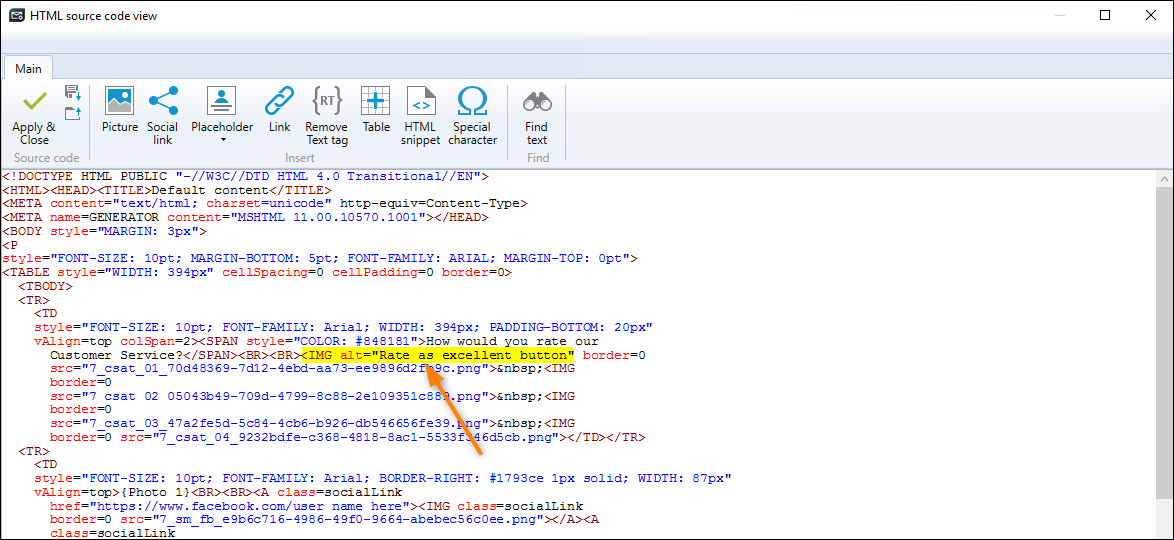
Fig. 4. Sample alt text attribute – this one describes the dark yellow button to rate Customer Service as excellent (see Fig. 2.).
- Repeat the procedure from step 4 for all the applicable images. A sample code with added descriptions might look, as shown in Fig. 5. below.
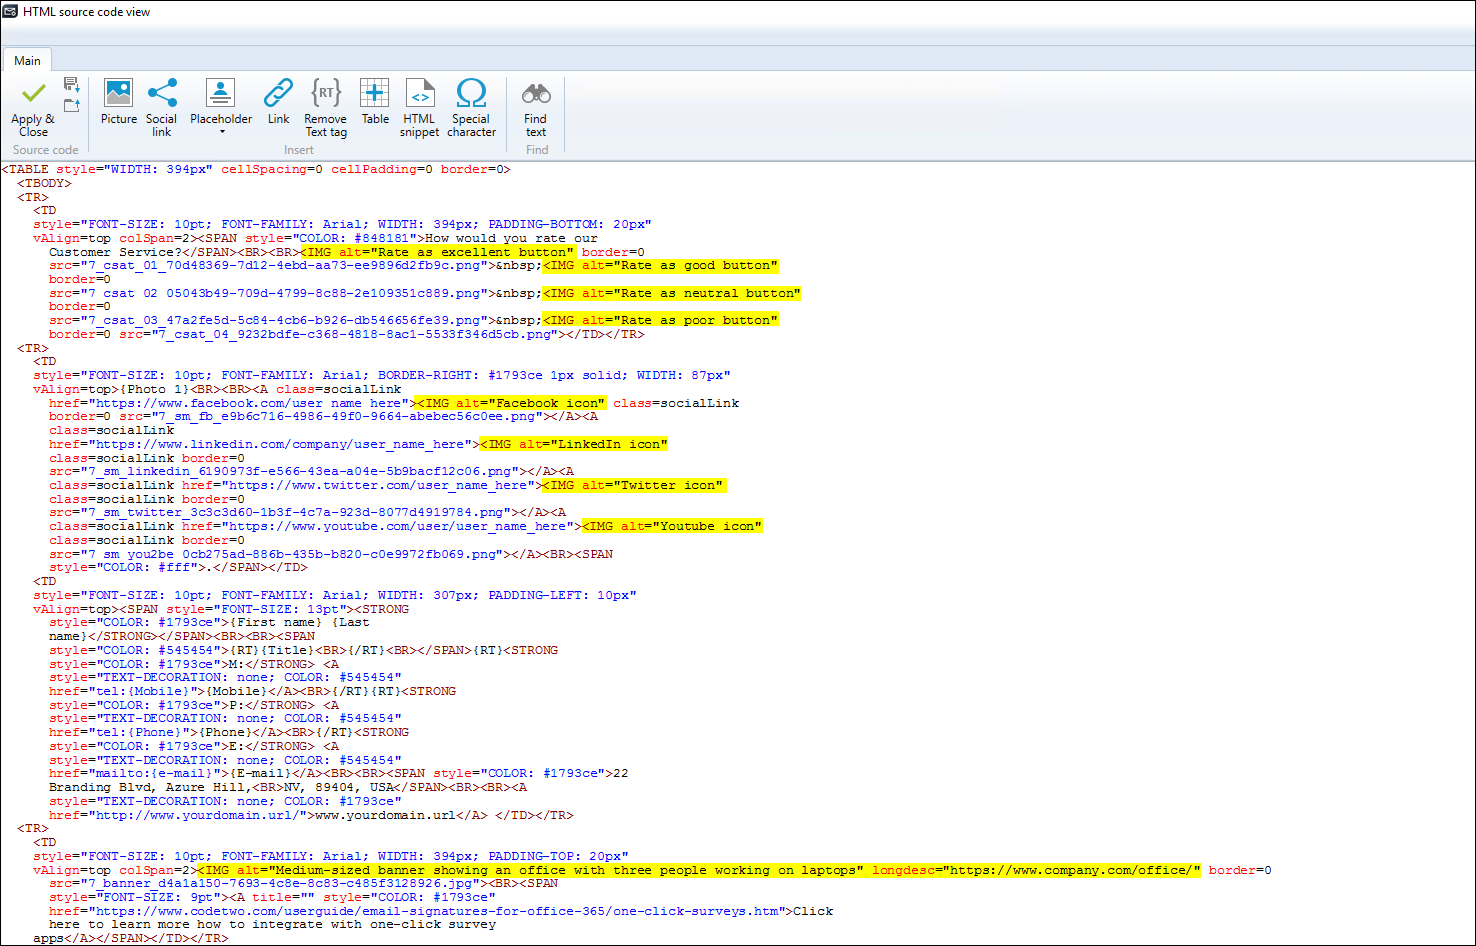
Fig. 5. All the images have the alt text with description. For the more complex banner, we additionally used the longdesc attribute to provide reference to a resource with more information.
- When you’re OK with all the changes, click Apply & Close to save them and close the HTML source code view window (see Fig. 5.).
- Finally, close the template editor by clicking Apply & Close once again and save the rule for your changes to take effect.
Now, when a person with a vision disability gets an email with your signature and uses a screen reader app, they will be able to better understand the context of your message by knowing more about visuals.
| Related products: | CodeTwo Exchange Rules 2010 3.x, CodeTwo Exchange Rules 2013 2.x, CodeTwo Exchange Rules 2016 1.x, CodeTwo Exchange Rules 2019 1.x, CodeTwo Exchange Rules Pro 2.x |
| Categories: | How-To |
| Last modified: | June 27, 2022 |
| Created: | May 20, 2022 |
| ID: | 988 |


