How to avoid recipient limit issues when using CodeTwo Email Signatures 365
Problem:
A recipient limit has been set for emails sent by users in your Microsoft 365 (Office 365) organization. When using CodeTwo Email Signatures 365 in cloud (server-side) mode, this limit is exceeded when sending emails to distribution lists.
Solution:
This is expected behavior in Exchange Online. When a message goes through Exchange Online connectors, each recipient in the distribution list is counted individually. CodeTwo Email Signatures 365 working in cloud (server-side) mode uses connectors to route messages through the CodeTwo cloud service to add signatures.
There are three ways to solve the recipient limit issue:
- Exclude emails sent to distribution lists from getting CodeTwo cloud (server-side) signatures
- Use Outlook (client-side) signatures for emails sent to distribution lists
- Increase the recipient limit in Exchange Online
Excluding emails sent to distribution lists from getting CodeTwo cloud (server-side) signatures
To avoid exceeding the recipient limit, you can prevent emails sent to affected distribution lists from receiving signatures. To achieve this, you can use a dedicated mail flow rule:
Important
The mail flow rule you’re about to create prevents CodeTwo cloud signatures from being added whenever the distribution lists you specify are among email recipients. In other words, if other recipients are included along with the excluded distribution lists, those recipients will also receive emails without CodeTwo cloud signatures.
- Before you begin, note down the exact email addresses of the distribution lists you wish to exclude – you’ll need them later on.
- Sign in to the Exchange admin center.
- Go to Mail flow > Rules.
- Click Add a rule and select Create a new rule from the drop-down list (Fig. 1.).
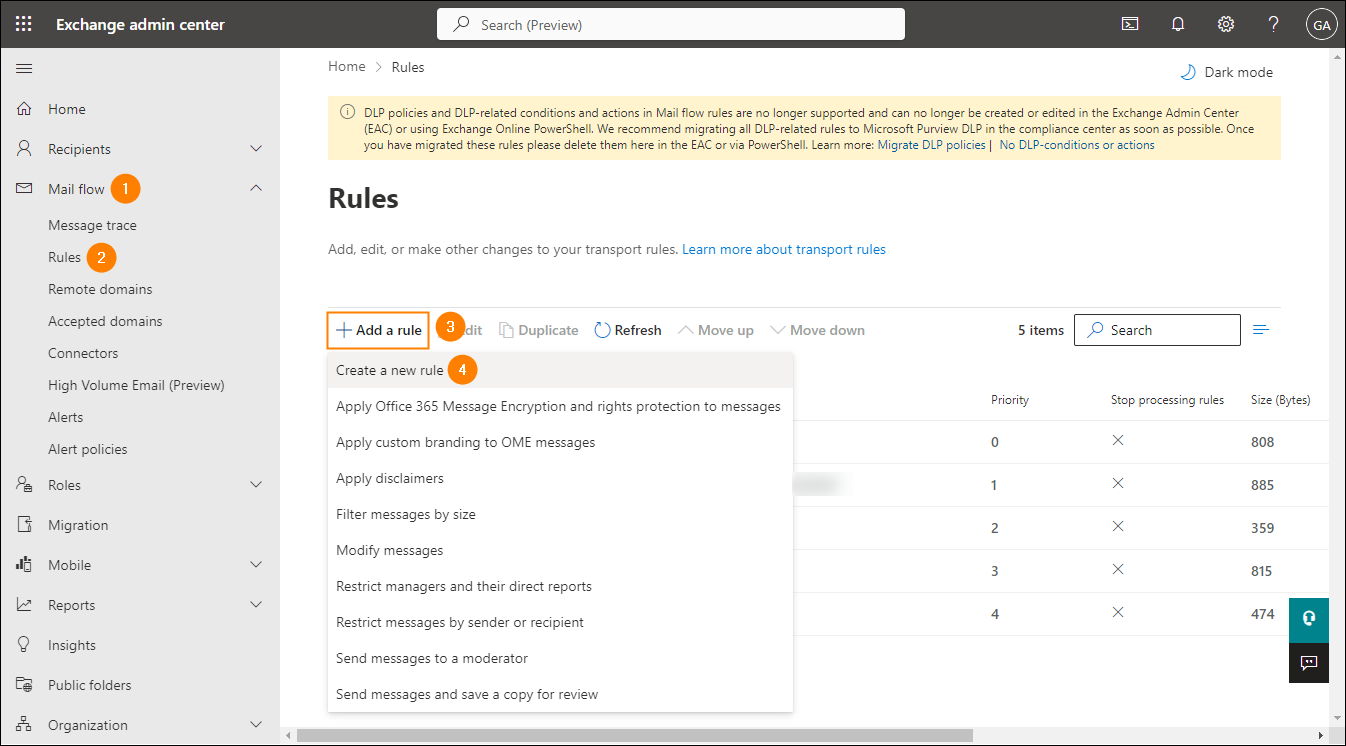
Fig. 1. Creating a new mail flow rule in the Exchange admin center.
- In the rule creation wizard, enter the name of your rule, e.g. Exclude distribution lists from cloud signatures.
- In the Apply this rule if section, select The message headers > includes any of these words (Fig. 2.).

Fig. 2. Naming the rule and defining its condition.
- Click the Enter text link below the drop-down lists (see Fig. 2.). In the pane that opens, type the following header name: To and click Save (Fig. 3.).
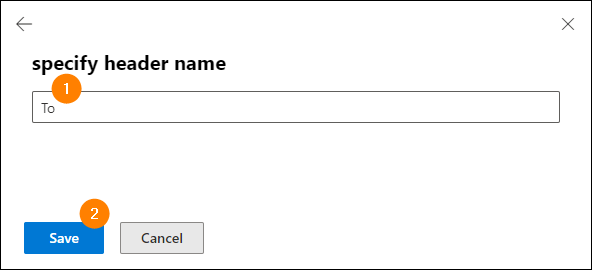
Fig. 3. Entering the To header that indicates email recipients.
- Click the Enter words link below the drop-down lists (see Fig. 2.). In the pane that opens, type or paste the exact email address of a distribution list you noted down in step 1, then click Add (Fig. 4.). To add more addresses, repeat these steps. Once done, click Save.
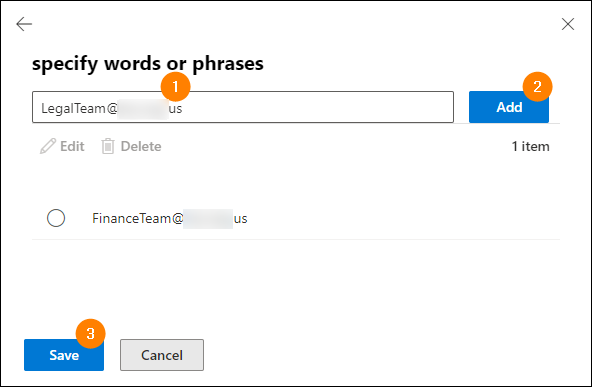
Fig. 4. Adding the email addresses of the distribution lists to be excluded.
- Under the Do the following section, select Modify the message properties > set a message header (Fig. 5.).
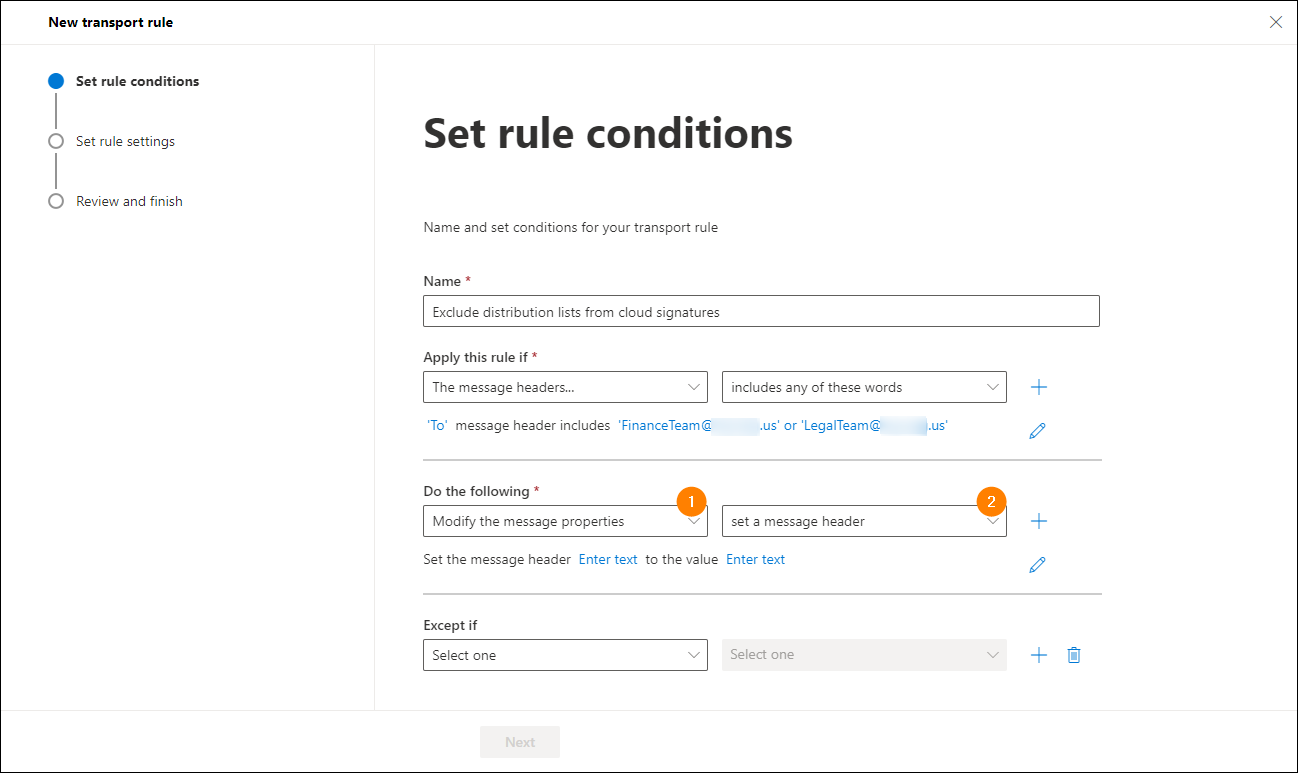
Fig. 5. Configuring the rule’s action.
- Click the first Enter text link below the drop-down lists (see Fig. 5.). In the pane that opens, type/paste the following header name: X-CodeTwoProcessed, then click Save (Fig. 6.).
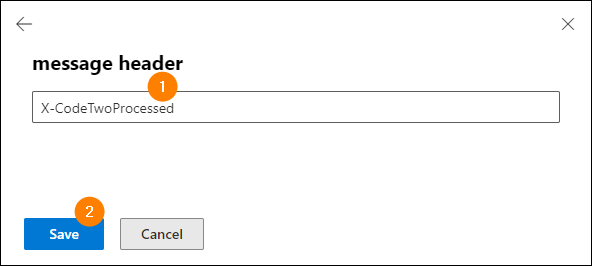
Fig. 6. Providing the CodeTwo header’s name.
- Click the second Enter text link below the drop-down lists (see Fig. 5.). In the pane that opens, type true, then click Save (Fig. 7.).
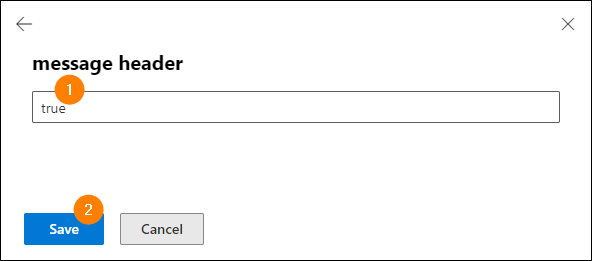
Fig. 7. Entering the CodeTwo header’s value.
- Verify if the rule conditions look similar to those shown in Fig. 8. If they do, click Next to proceed.
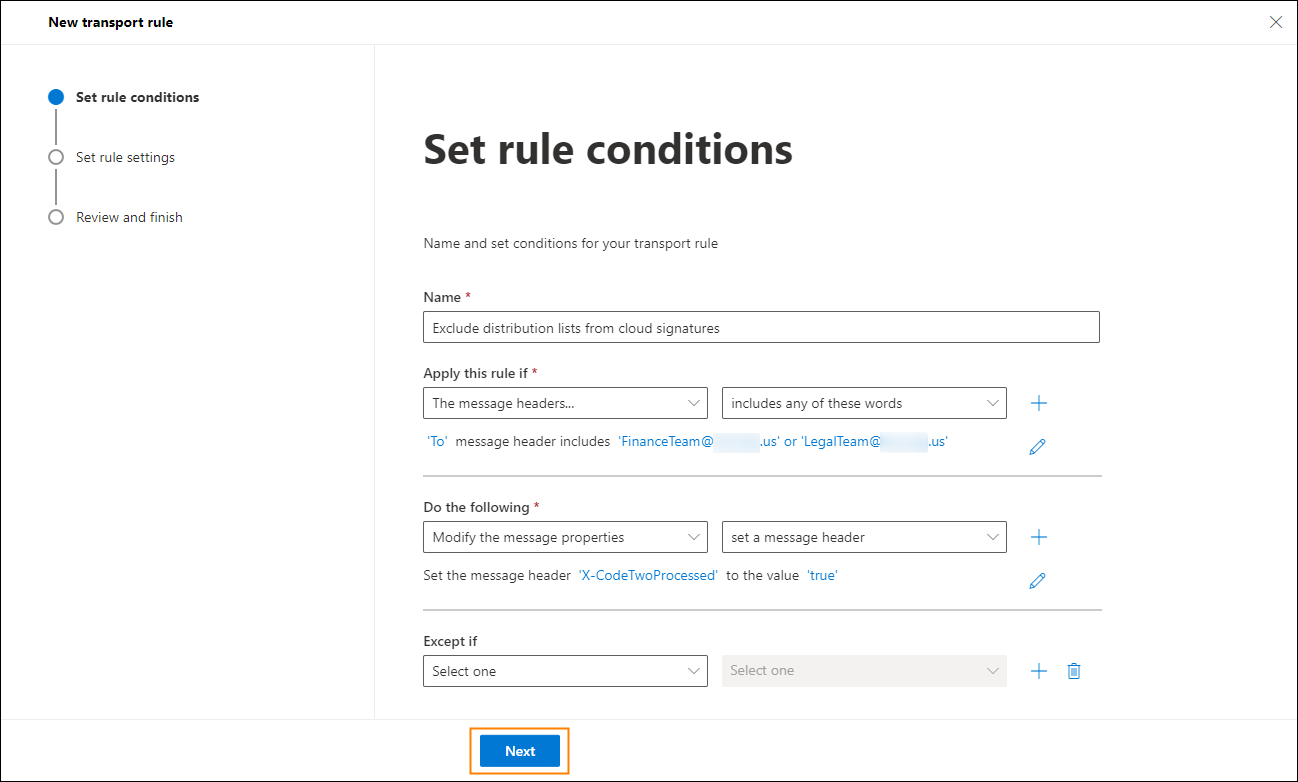
Fig. 8. The complete configuration of rule conditions.
- In the Set rule settings step, configure the following options only (Fig. 9.):
- Select the Defer the message if rule processing doesn’t complete checkbox.
- In the Match sender address in message drop-down menu, select Header or envelope.
Click Next to continue.
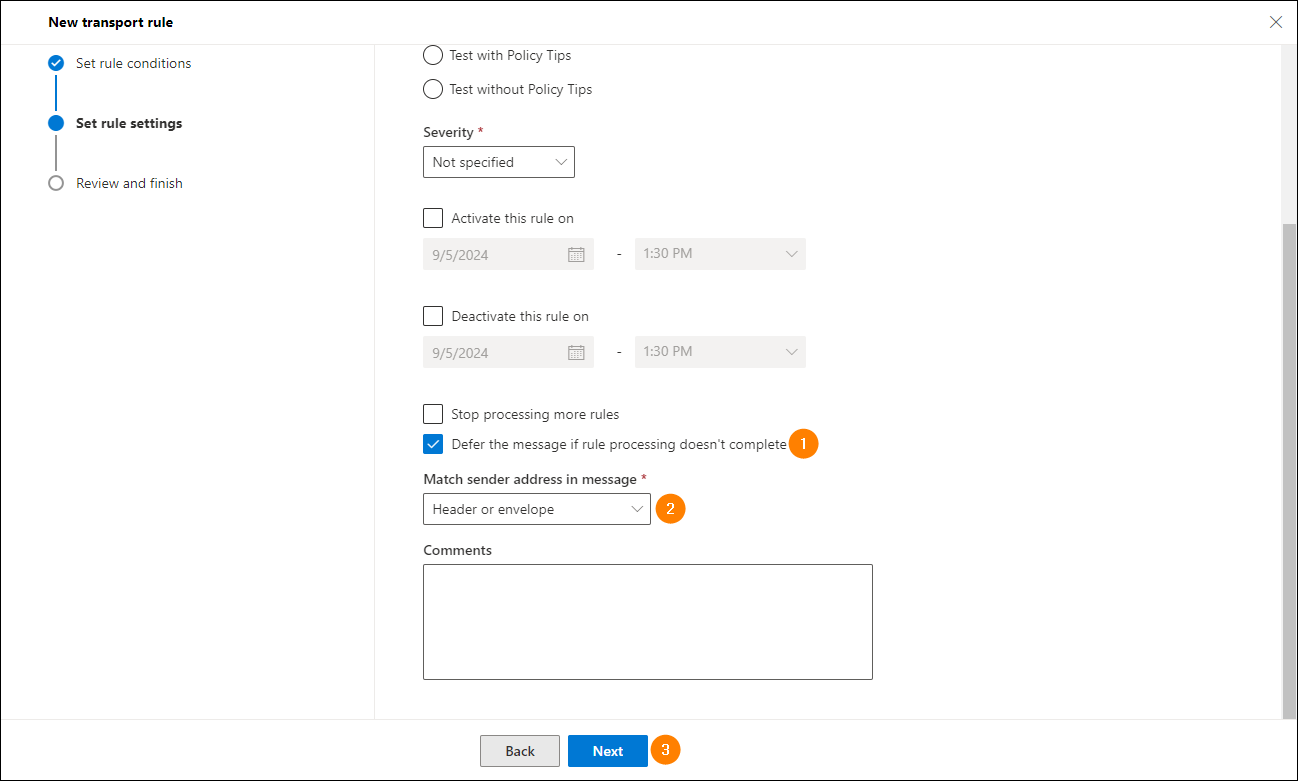
Fig. 9. Configuring the required rule settings.
- Complete the wizard by clicking Finish and Done – the rule will now appear on the rules' list.
- By default, the rule is disabled and has the lowest priority. For the rule to work correctly, you should click it (to select it) and:
- Use the Move up button to place the rule before the CodeTwo Exchange transport rule (Fig. 10.A).
- Turn it on by setting the toggle button to Enabled (Fig. 10.B).
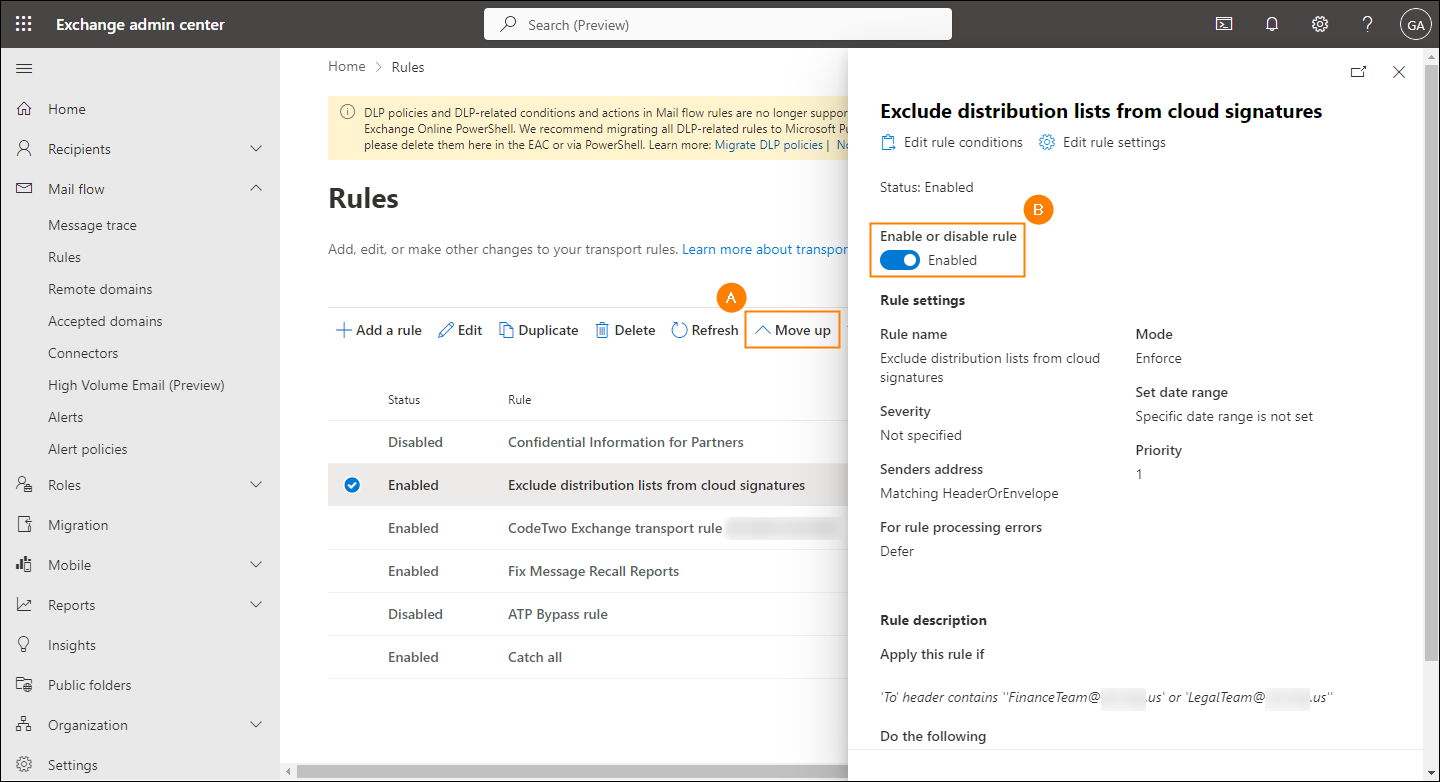
Fig. 10. Enabling the rule and setting its priority.
- Wait for the changes to propagate.
From now on, emails sent to the specified distribution lists will not pass through Exchange Online connectors to be stamped with CodeTwo cloud signatures. Consequently, the recipient limit won’t be exceeded.
Using Outlook (client-side) signatures for emails sent to distribution lists
When CodeTwo Email Signatures 365 works in Outlook/client-side (or combo) mode, it makes use of the CodeTwo Outlook Web Add-in to add signatures as users type their messages in Outlook (desktop & mobile versions) and Outlook on the web (OWA). Emails that get an Outlook signature are not routed through the CodeTwo cloud service, which means Exchange Online connectors are not used. And, because of that, when you send an email from Outlook to a distribution list, its members will not be counted individually, and so the recipient limit will not be exceeded.
Learn more about signature modes in CodeTwo Email Signatures 365
Increasing the recipient limit in Exchange Online
You can change the recipient limit in the Exchange admin center or by using PowerShell cmdlets. Note that Exchange Online has a limit of 1000 recipients per email, so this solution will only help if this limit has not already been reached.
Setting the recipient limit in the Exchange admin center
To change the recipient limit, first sign in to the Exchange admin center and go to Recipients > Mailboxes (see Fig. 11.).
- To change the limit for a single mailbox:
- Click the mailbox you want to edit.
- In the pane that opens, go to the Others tab and click Set recipient limit (Fig. 11.).

Fig. 11. Changing the recipient limit for a single mailbox in the Exchange admin center.
- Enter the maximum number of allowed recipients (from 1 to 1000) in the Maximum recipients field.
- Click Save to confirm.
- To change the limit for multiple mailboxes:
- Select mailboxes from the mailboxes list.
- Click Set recipient limit above the list (Fig. 12.).
Info
If you can't see the Set recipient limit button, maximize your browser window or click the ellipsis (…) button to the right of the search box (see Fig. 12.) and select Set recipient limit from the drop-down menu.
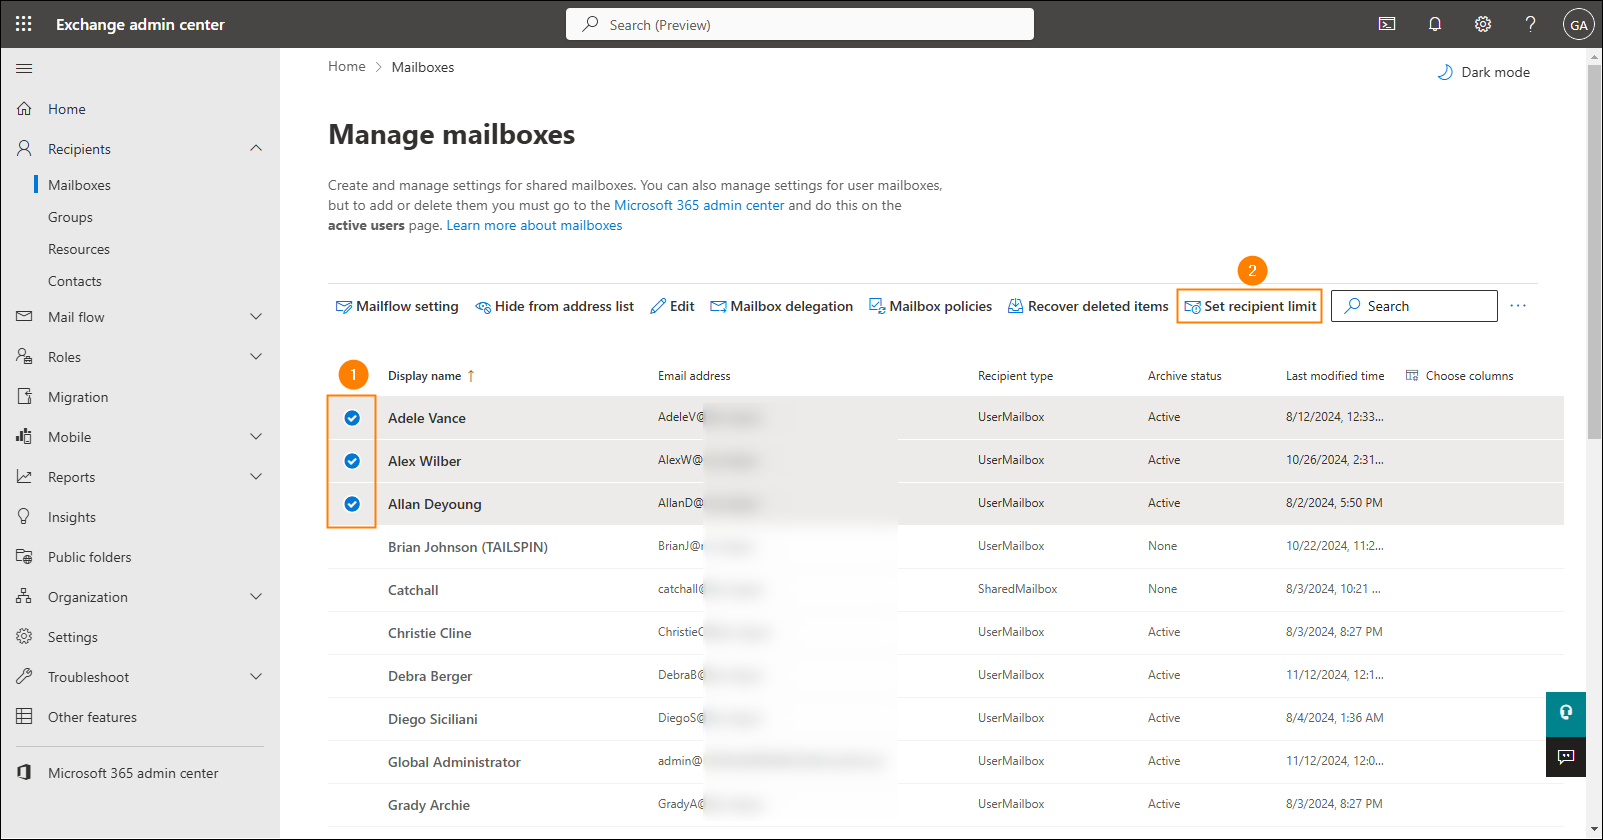
Fig. 12. Changing the recipient limit for multiple mailboxes in the Exchange admin center.
- Enter the maximum number of allowed recipients (from 1 to 1000) in the Maximum recipients field.
- Click Save to confirm.
Setting the recipient limit with PowerShell
First open the PowerShell console on a workstation and connect to Exchange Online by using the following cmdlet:
Connect-ExchangeOnline -UserPrincipalName <Your UPN>
Learn more about how to connect to Exchange via PowerShell
- To change the limit for a single mailbox, use this command:
Set-Mailbox <UserPrincipalName> -RecipientLimits <value>
where <UserPrincipalName> is the mailbox that you want to edit, and <value> is a number between 1 and 1000.
- To change the limit for multiple mailboxes belonging to a specific distribution list, first use the following cmdlet:
$members = (Get-DistributionGroupMember -Identity "<ListName>")
where <ListName> is the name of the distribution list. Next, to set the new recipient limit for all members of this list, use the cmdlet below:
Foreach ($member in $members) {Set-Mailbox -Identity "$member" -RecipientLimits <value>}where <value> is a number between 1 and 1000.
When you finish working with the remote PowerShell session, close it using the following cmdlet:
Disconnect-ExchangeOnline
| Related products: | CodeTwo Email Signatures for Office 365 |
| Categories: | How-To, Troubleshooting |
| Last modified: | November 21, 2024 |
| Created: | June 17, 2021 |
| ID: | 923 |


