How to create public folders in Microsoft 365 (Office 365) and Exchange Server
Problem:
You need to manually enable public folders in Exchange Online (Microsoft 365) or Exchange Server 2013, 2016, 2019.
Solution:
To enable public folders, you have to create an empty public folder tree. If you are using CodeTwo Office 365 Migration or CodeTwo Exchange Migration, the exact tree structure and content of the public folders from your old Exchange server will be automatically recreated in this new tree.
Exchange Online
Follow the steps below to enable public folders in Exchange Online (Microsoft 365). By following these guidelines, you will create an empty public folder tree.
- Sign in to the Exchange admin center using your Microsoft 365 global administrator account.
- In the left-hand navigation menu, click Public folders, select the Public folders mailboxes tab, and click Add a public folder mailbox (Fig. 1.).
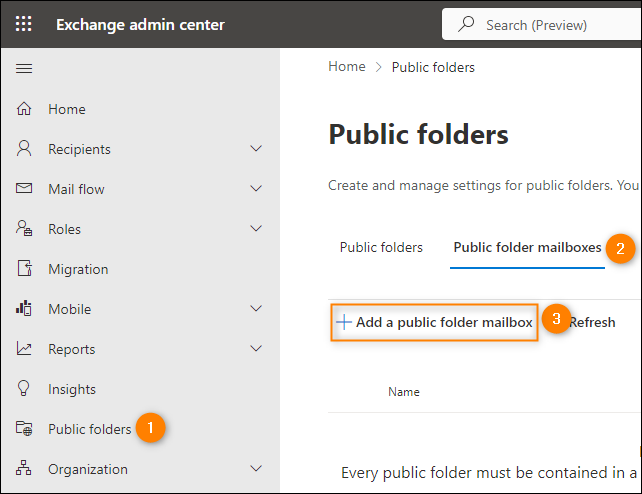
Fig. 1. Accessing the Public folders mailboxes page in the Exchange admin center.
- In the pane that opens, name the mailbox according to your preferences and click Add (Fig. 2.) to save your changes and close the pane.
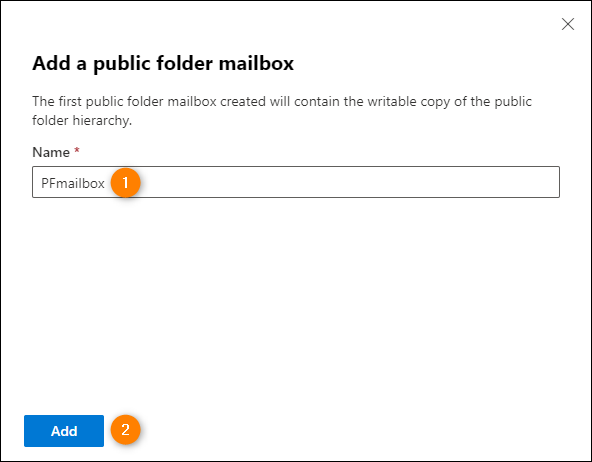
Fig. 2. Configuring a public folder mailbox in the modern Exchange admin center.
- Next, go to the Public folders tab and click Root permissions (Fig. 3.).
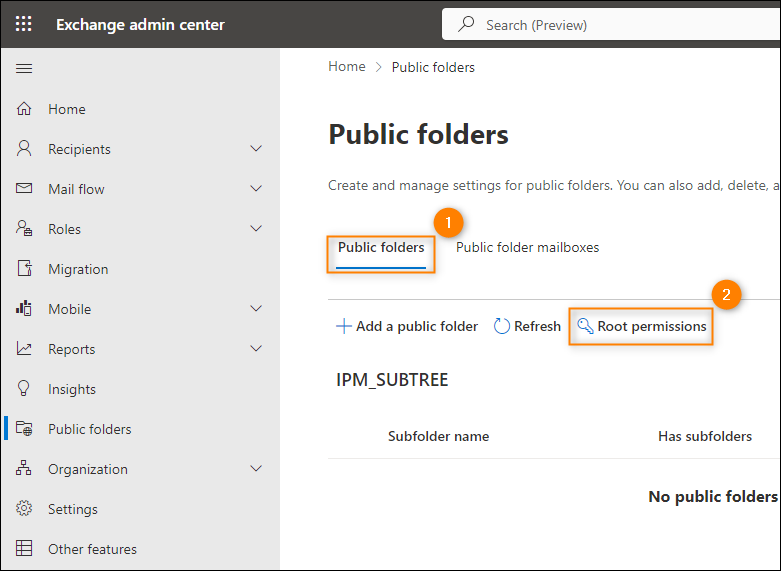
Fig. 3. Accessing the Root permissions settings.
- In the pane that opens, click Add permissions.
- Now, select your administrator account as the User, set the Permission level to Owner (by default, all the privileges will be granted, so you don't have to change anything), and click Save changes to apply your settings (Fig. 4.).
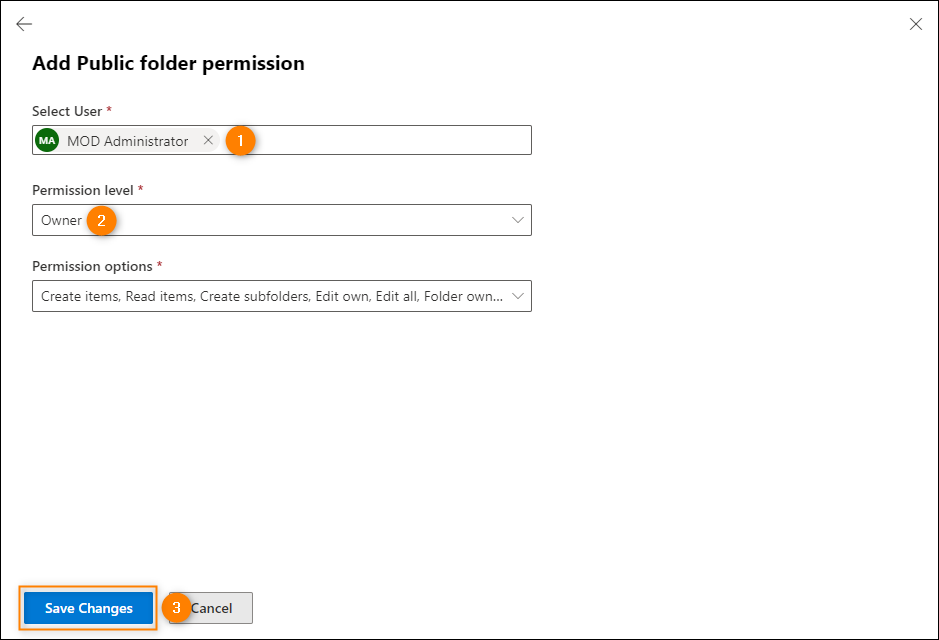
Fig. 4. Setting the Owner role for your administrator account.
Now, as the Owner you can freely manage your public folders (create subfolders, assign permissions, etc. ). If you would like to bulk update public folder permissions for multiple users, you can use the link to download an appropriate management script (Fig. 5.) and next adapt and run the script.
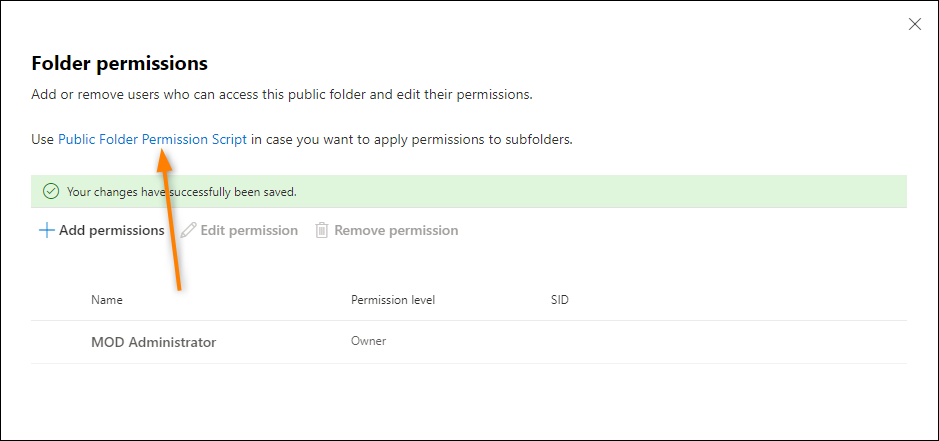
Fig. 5. Accessing the Public Folder Permission Script.
Exchange Server 2013, 2016, 2019
Follow the steps below to enable public folders on Exchange Server 2013–2019. By following these guidelines, you will create an empty public folder tree.
- Sign in to the classic Exchange admin center using your domain admin account. If you are accessing Exchange Server directly, the address is https://localhost/ecp.
- Go to public folders > public folder mailboxes and click on the plus icon (Fig. 6.).
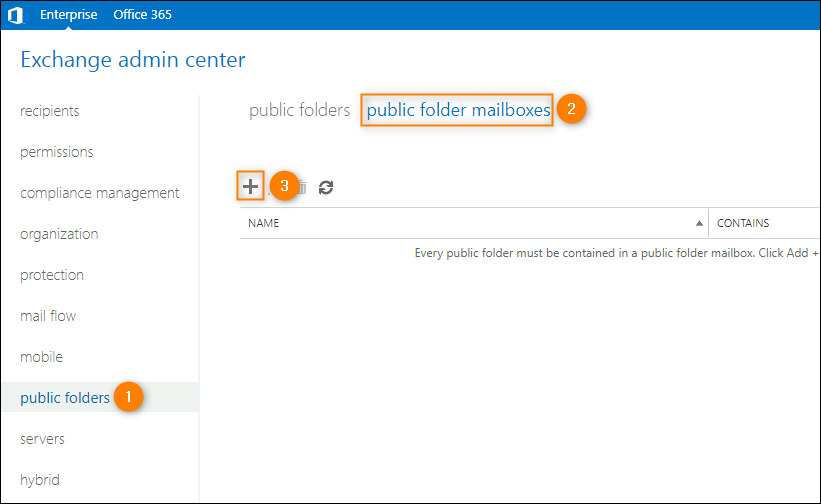
Fig. 6. Accessing the public folder mailboxes page in the classic Exchange admin center.
- Name the mailbox according to your preferences, select the location for the mailbox (Organizational unit), choose the database to store the mailbox, and click Save (Fig. 7.) to save the configuration and close the window.
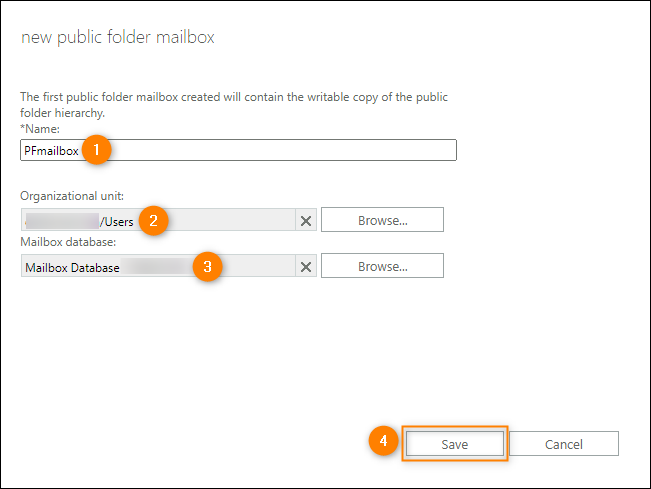
Fig. 7. Configuring a public folder mailbox.
- Now, go to public folders, click the ellipsis (...) button, and choose Root permissions (Fig. 8.).
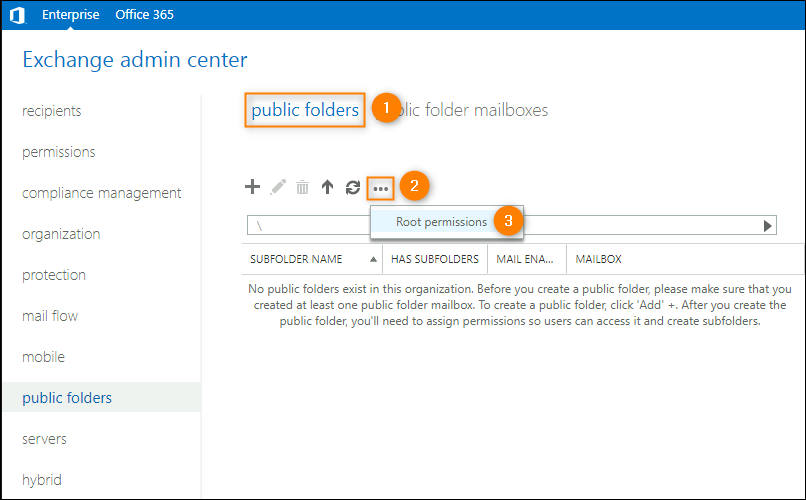
Fig. 8. Accessing the Root permissions settings.
- In the window that opens, click the plus icon.
- Now, select your administrator account as the User, set the Permission level to Owner (by default, all the privileges will be granted, so you don't have to change anything), and click Save to apply your settings (Fig. 9.).
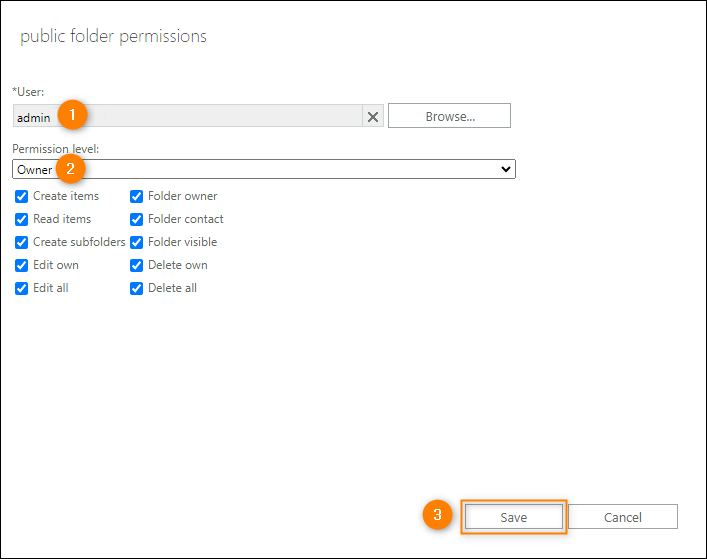
Fig. 9. Setting the Owner role for your administrator account.
Now, as the Owner you can freely manage your public folders (create subfolders, assign permissions, etc. ). If you would like to bulk update public folder permissions for multiple users, you can download an appropriate management script and next adapt and run the script.
| Related products: | CodeTwo Backup for Exchange, CodeTwo Backup for Office 365, CodeTwo Exchange Migration, CodeTwo Office 365 Migration |
| Categories: | How-To |
| Last modified: | July 10, 2023 |
| Created: | October 3, 2013 |
| ID: | 289 |


