How to whitelist emails with cloud (server-side) signature using DLP policy
Problem:
You’ve started using data loss prevention (DLP) policies in your Microsoft 365 organization. Even though you configured a special override in your custom DLP policy for emails with a cloud (server-side) signature added by the CodeTwo software, DLP still blocks them.
Solution:
Emails with a cloud (server-side) signature are blocked after they leave the CodeTwo service – when they are processed by DLP for the second time. At this stage, DLP removes the override flag that was applied via the DLP policy on the first processing of an email, and the email gets blocked.
To have 100% certainty that your emails stamped with a cloud signature are not blocked by DLP, you need to configure a custom DLP policy which is based on the header our software adds to each email it processes. Here’s how to do it:
- Sign in to the Microsoft Purview portal.
- Click Solutions > Data Loss Prevention in the left menu (Fig. 1.).
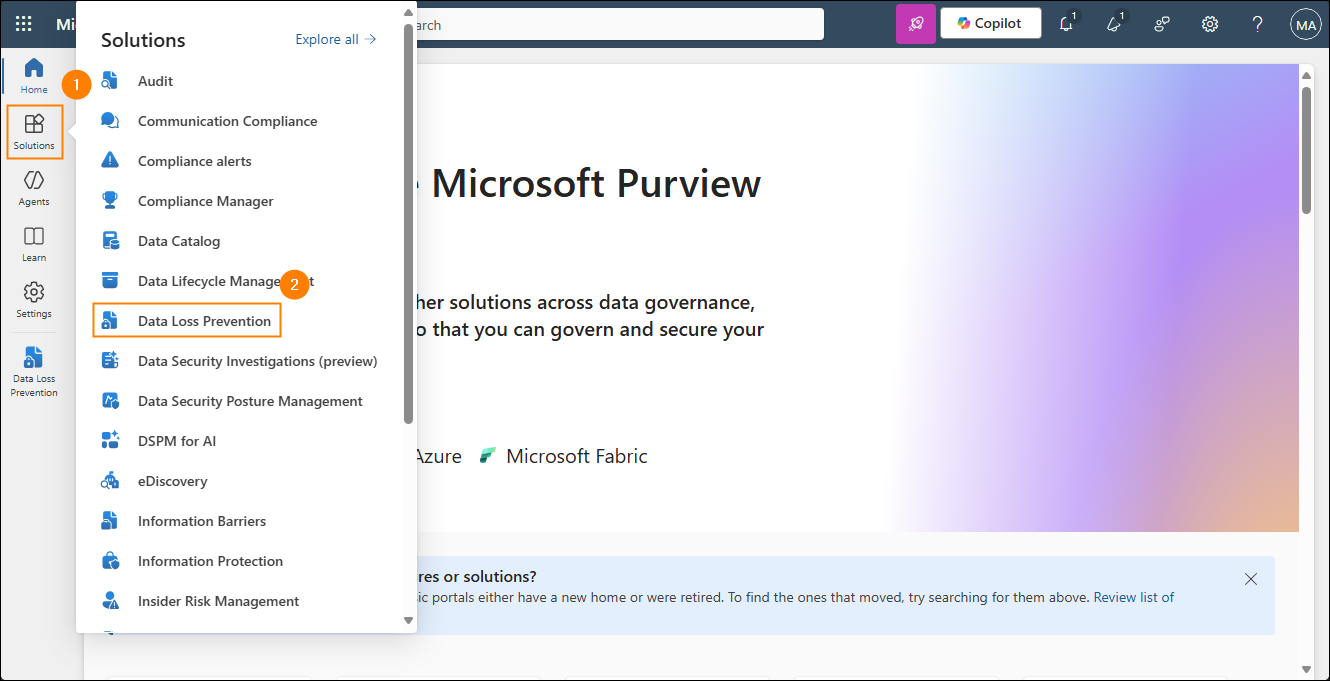
Fig. 1. Data Loss Prevention solution in Microsoft Purview.
- Choose the Policies tab and click the Create policy button (Fig. 2.).
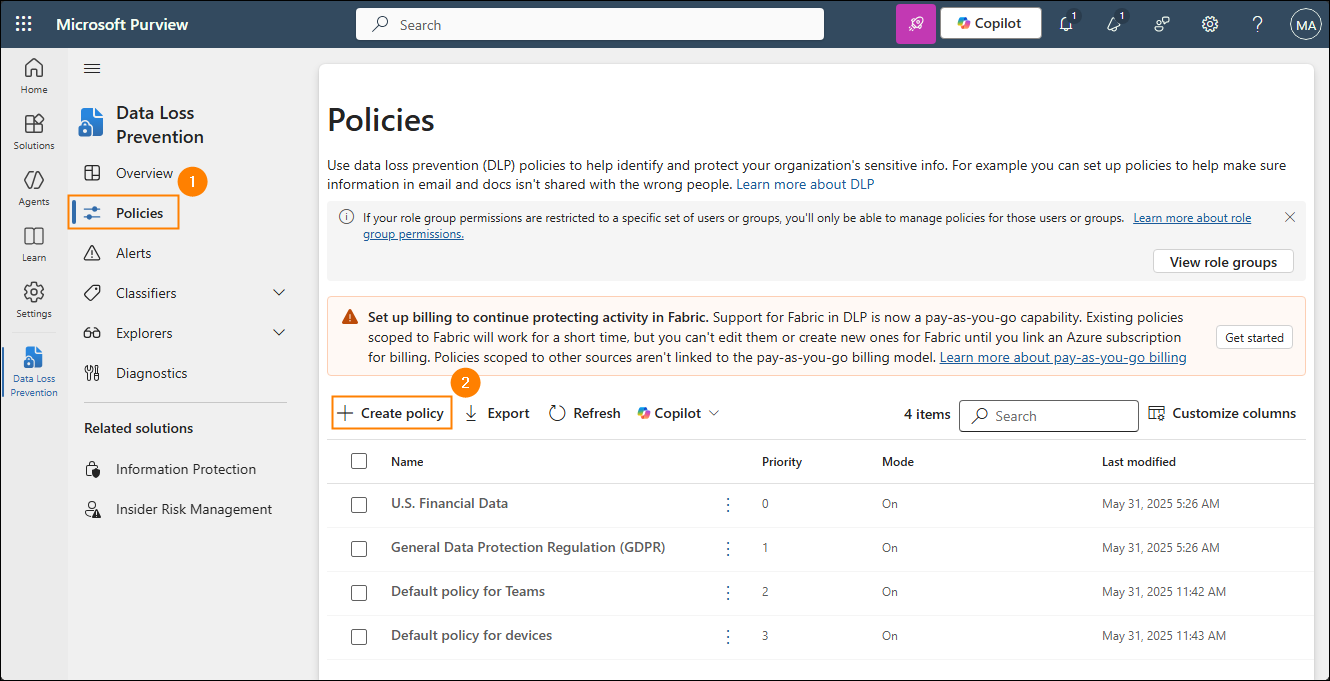
Fig. 2. Accessing the wizard to create a new DLP policy.
- In the wizard that opens, leave Data stored in connected sources as the type of data to protect.
- In the next step, choose Custom > Custom policy (Fig. 3.), then proceed to the third step and name your policy.
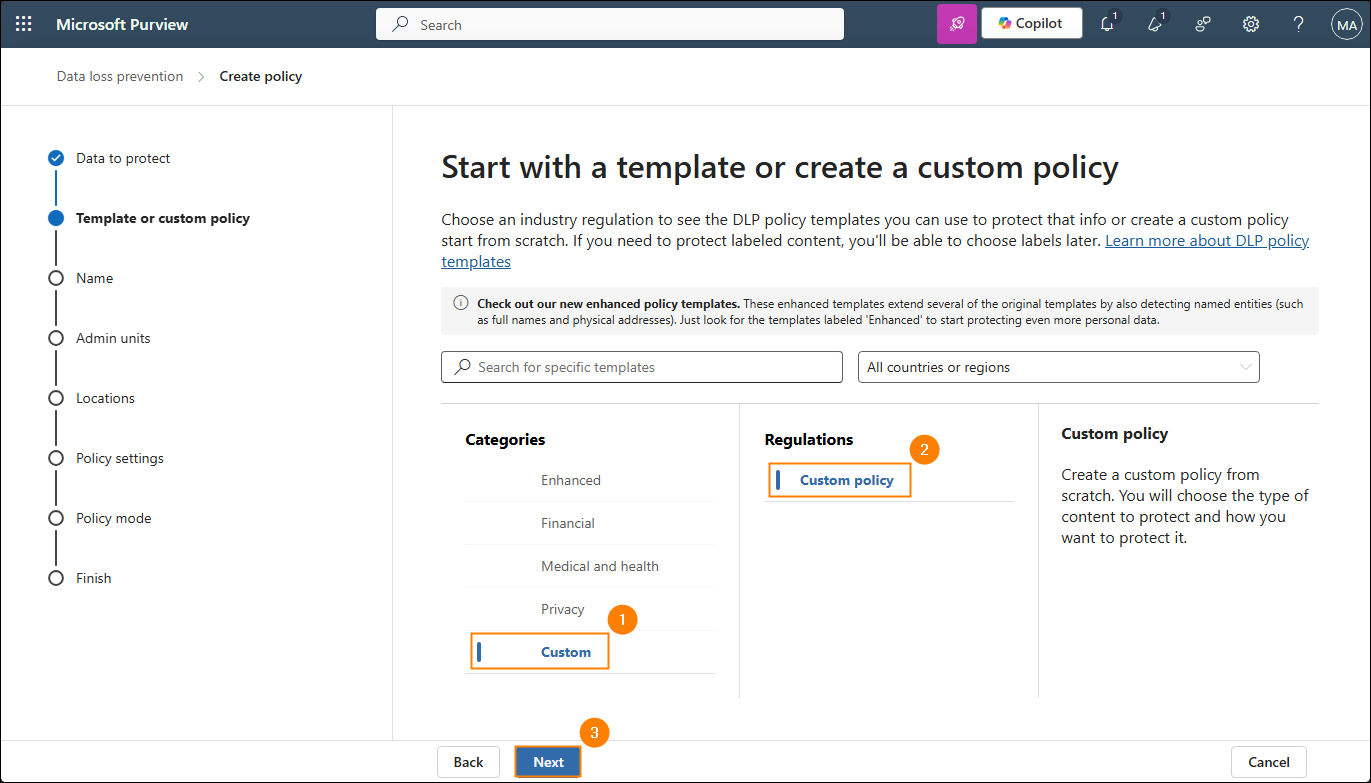
Fig. 3. Choosing the custom category of the DLP policy.
- If you have admin units created in Entra ID (Azure AD), you can restrict the policy to these units in the fourth step of the wizard. If you don’t add any admin units here, the policy will be assigned to all users and groups. Click Next to continue.
- In the next step, choose Exchange email as the only location to apply the policy (Fig. 4.).
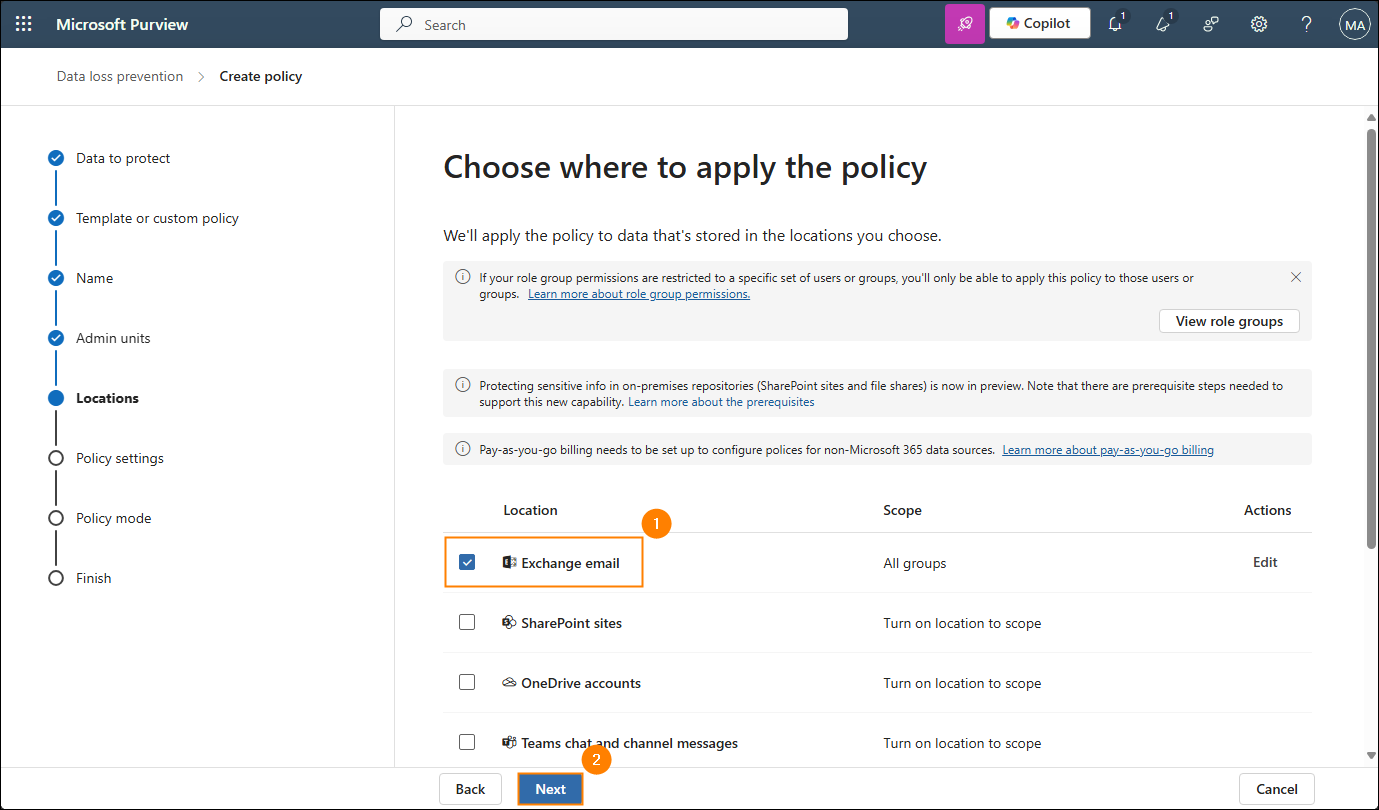
Fig. 4. Choosing the location to apply the policy.
- Next, in the Policy settings step, select the Create or customize advanced DLP rules option and click Next.
- In the Advanced DLP rules step, click Create rule to configure your custom rule.
- In the Create rule pane, enter the name of your rule, click Add condition, and choose Header contains words or phrases from the list (Fig. 5.).
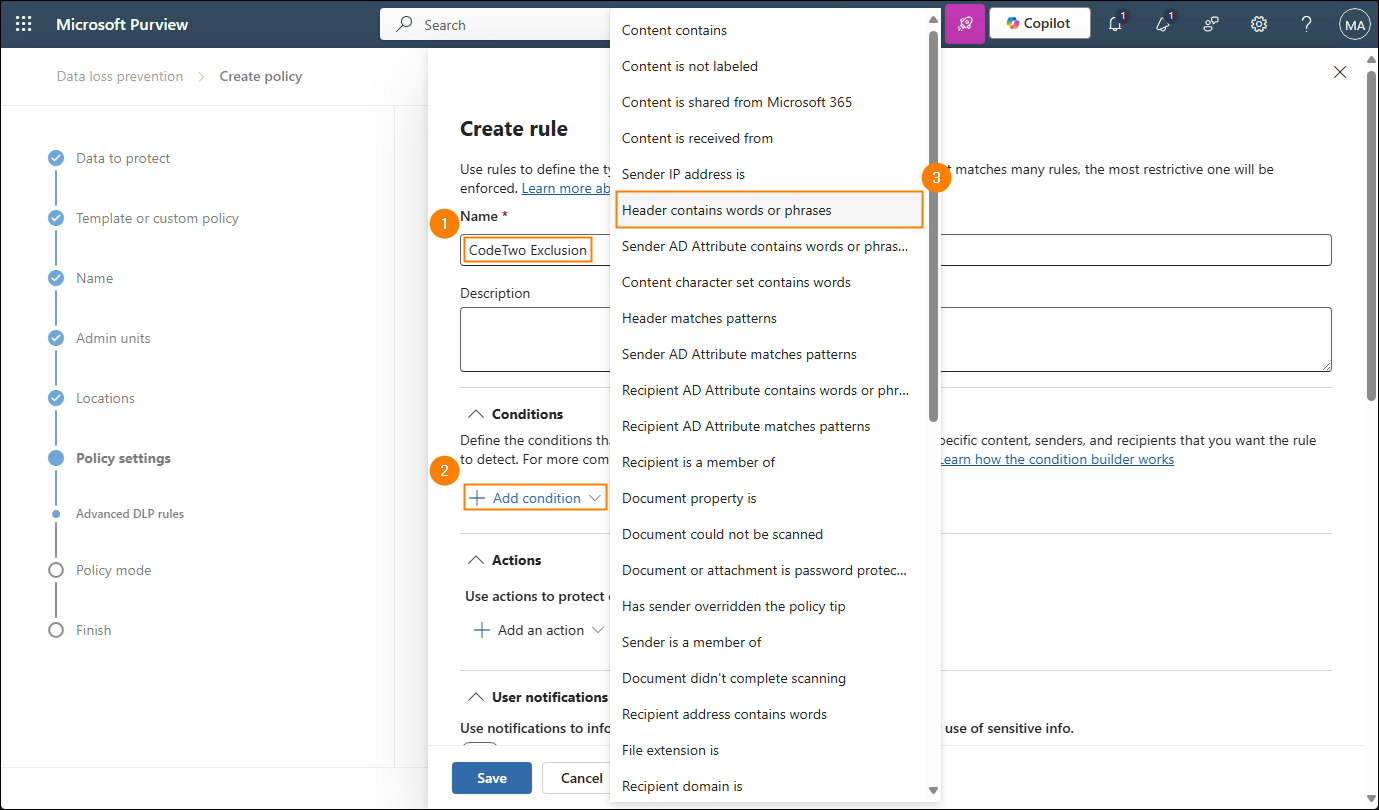
Fig. 5. Choosing the right condition type.
- Fill in the text fields with appropriate information:
- enter X-CodeTwoProcessed in the first field (Enter header name),
- enter true in the second field, and
- click the Add button (Fig. 6.).
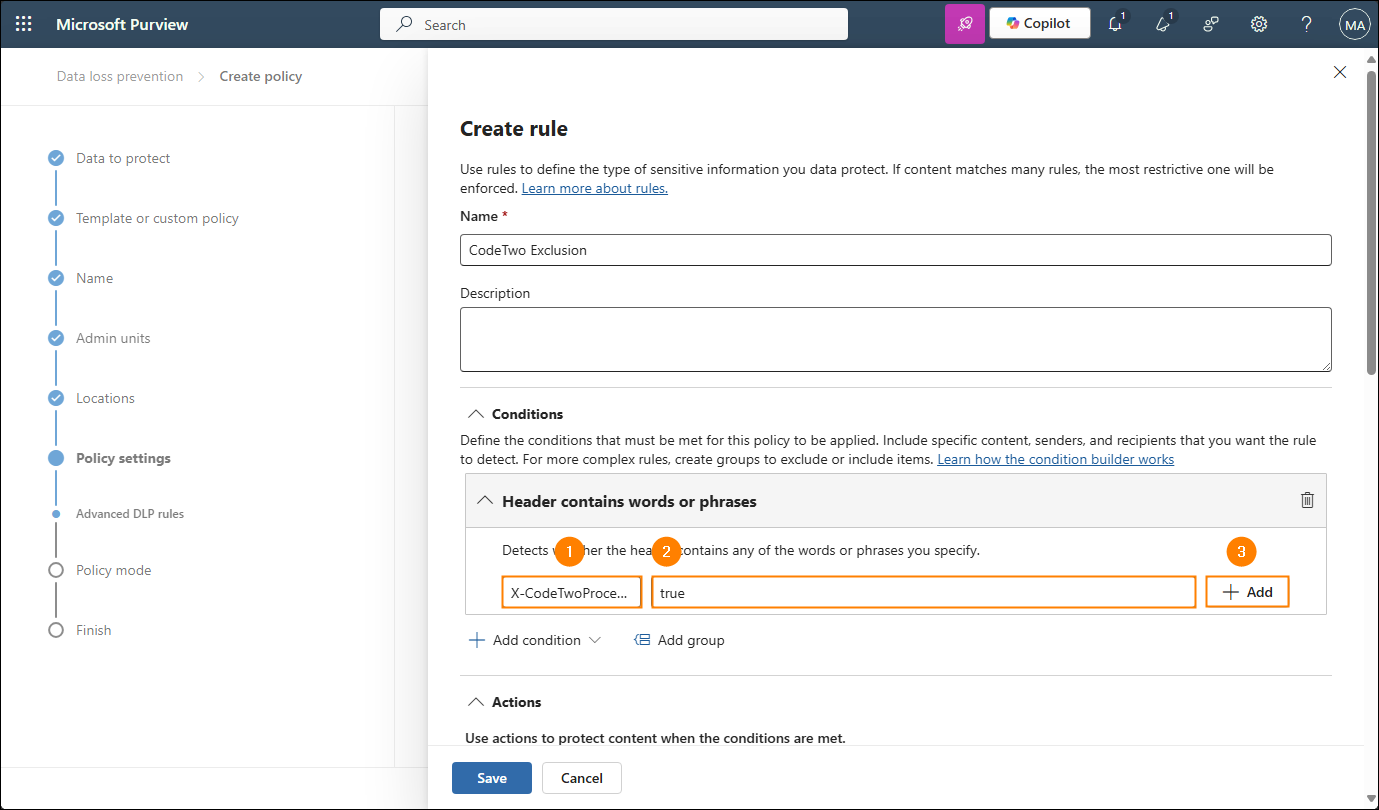
Fig. 6. Defining the condition to whitelist emails with a cloud (server-side) signature.
- Scroll further down and specify settings in the Additional options section:
- select the If there’s a match for this rule, stop processing additional DLP policies and rules checkbox,
- set rule’s priority to 0 (highest),
- optionally, adjust settings in the other sections of the Create rule pane (e.g. to receive email alerts and incident reports), and
- click Save to save the entire rule configuration (Fig. 7.).
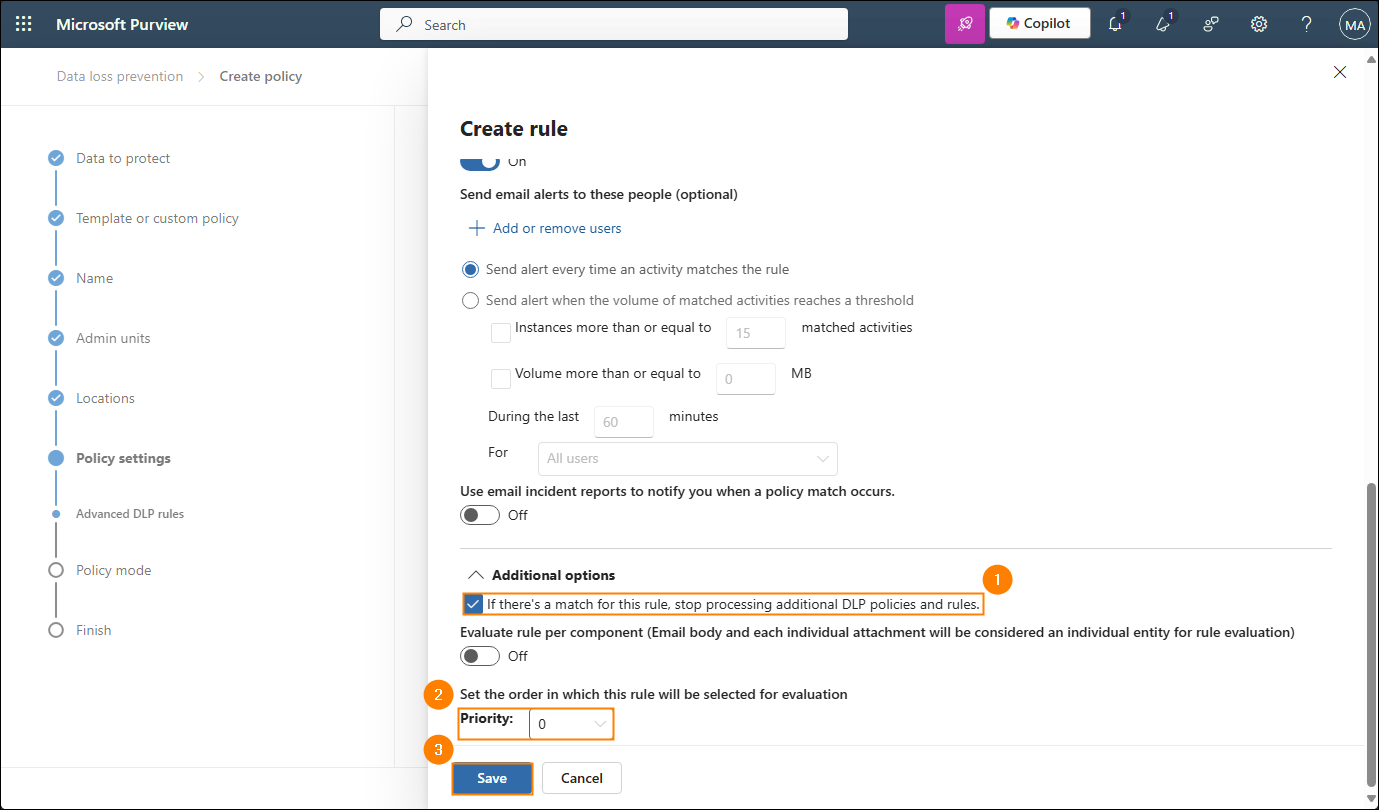
Fig. 7. Configuring additional options and saving the rule.
- The correct configuration of the rule should be the same as shown in Fig. 8.
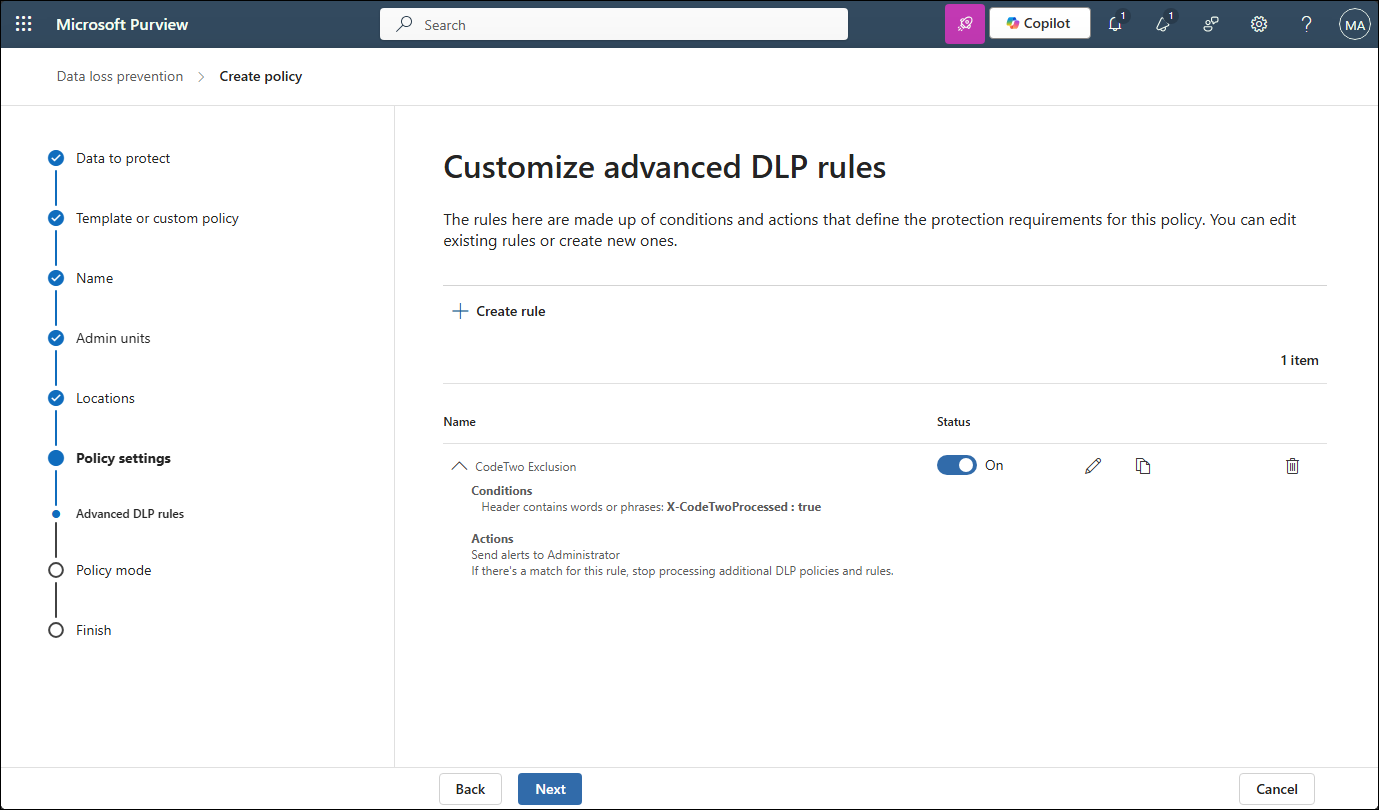
Fig. 8. Overview of the correct rule configuration.
- On the Policy mode page, select the second option (Turn the policy on immediately) to enable the policy (Fig. 9.).
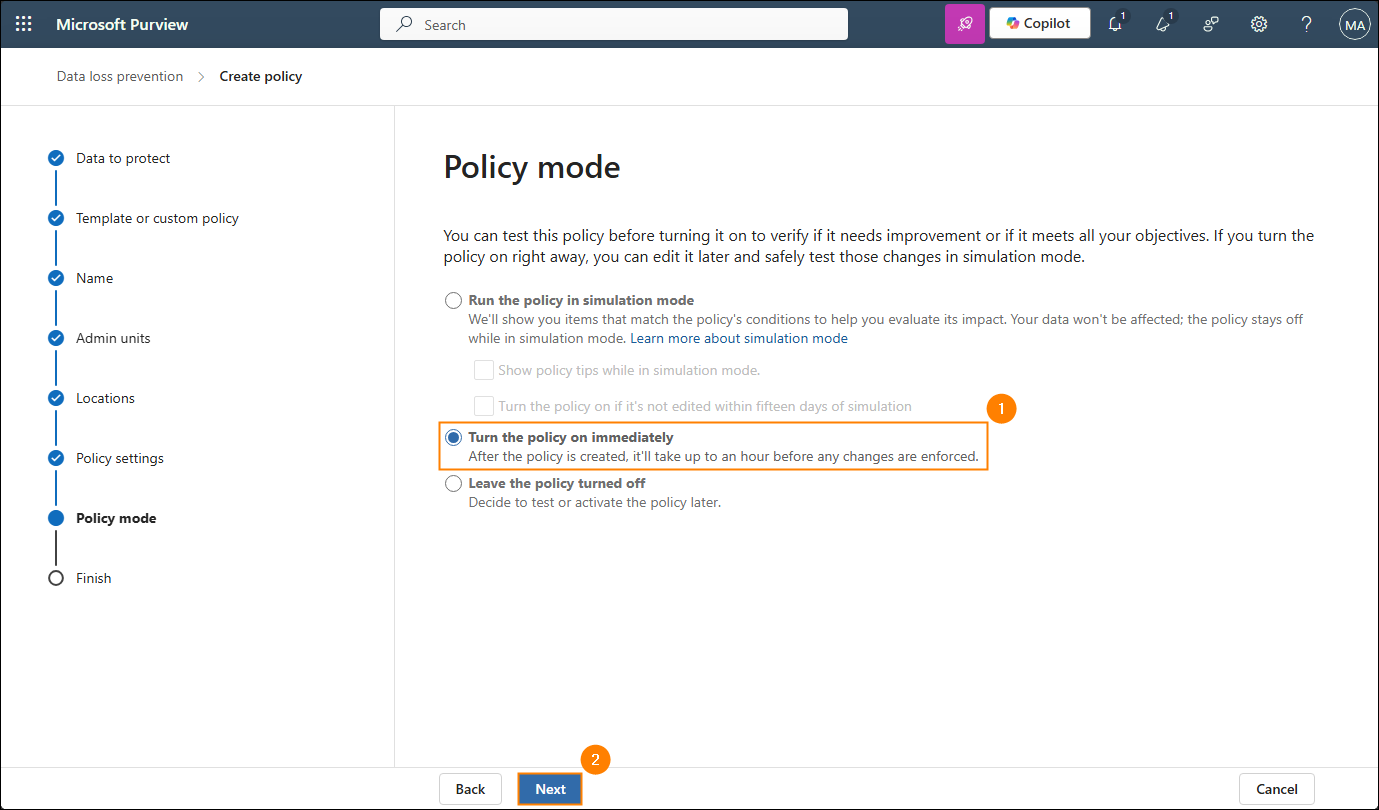
Fig. 9. The option to enable the policy right away.
- On the last page of the wizard, review your settings – if you’re OK with them, click Submit and Done to save and apply your policy.
- Now, your policy should be displayed on the Policies tab, and emails with a cloud (server-side) signature shouldn’t be blocked by DLP any longer.
Info
If, for some reason, your newly created policy is not displayed on the top of the policies’ list, click the three dots button and select Move to top (Fig. 10.). The highest priority plus the selected option to stop processing other DLP policies (see step 12) ensure that DLP will not process emails with a cloud (server-side) signature for the second time and, consequently, block them.
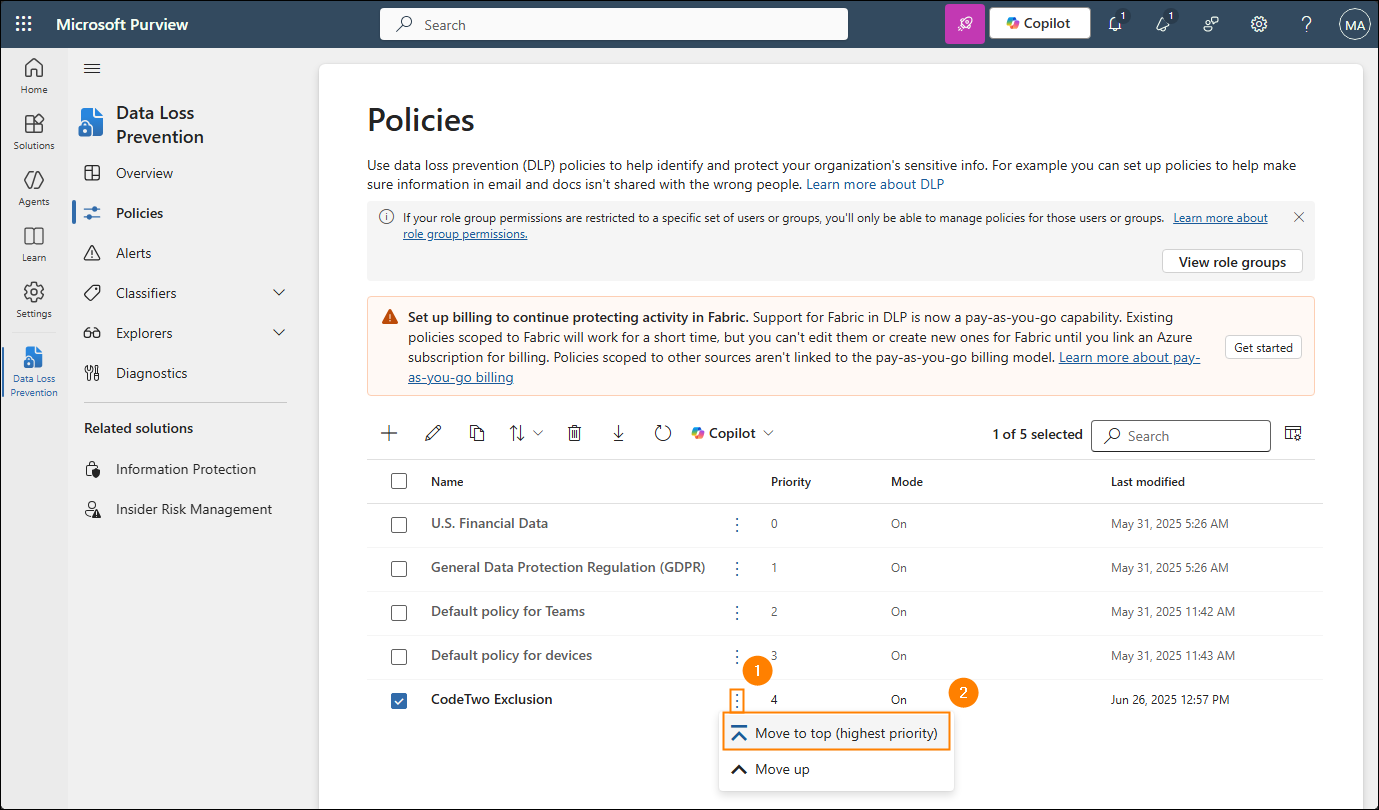
Fig. 10. Moving the policy for whitelisting the CodeTwo-processed emails to the top of the list.
See also:
| Related products: | CodeTwo Email Signatures for Office 365 |
| Categories: | How-To, Troubleshooting |
| Last modified: | June 30, 2025 |
| Created: | September 22, 2021 |
| ID: | 943 |






