This software has been discontinued. If your organization uses Office 365, check out
CodeTwo Email Signatures for Office 365.
Creating and deploying policies
CodeTwo Email Signatures for Email Clients lets you create policies including signatures that will be applied to your email clients while creating a new mail message. To have your end-users benefit from the program, you need to follow the three-step process below:
-
Configure deployment method for the policy.
To create and activate the policies created in the program, you need to define their deployment method first. Furthermore, the following two methods of the policy deployment can be used:
Note that you can use both methods of the policy deployment at the same time if the policies encompass different email clients. For example, if you deploy both, Outlook and OWA 2010/2013/2016 policies for the same user, the Client Application will update Outlook signatures and the Central Updating Service will update OWA 2010/2013/2016 settings.
-
Create and configure policy.
The policies along their settings can be easily created, modified, deleted, moved up/down the list to change their priority or activated/deactivated. Depending on the environment, there five types of policies available:
- Outlook policy - used for MS Outlook clients (applies to: non-domain environments, Exchange 2003, Exchange 2007, Exchange 2010, Exchange 2013, 2016)
- OWA 2007 policy - used for OWA 2007 ( applies to Exchange 2007)
- OWA 2010/2013/2016 policy - used for OWA 2010 or OWA 2013 (applies to: Exchange 2010, Exchange 2013, 2016)
- Office 365 policy - used for Office 365 (applies to Office 365)
- Google Apps policy - used for G Suite / Google Apps (applies to Google Apps)
-
Distribute policy's settings on email clients.
Once the policies are deployed, their settings need to be distributed to email clients embraced by the policies. If you are using OWA 2010/2013/2016, Office 365 or Google Apps (G Suite) policies, the settings will be distributed via the Central Updating Service automatically without any intervention from the end-users. On the other hand, if you are using Outlook or OWA 2007 policies in your environment, you need to distribute the Client Applications to client machines that will automatically deploy the policy's settings.
Study the table below to learn about the available policy deployment scenarios:
| Email Client | Central Updating Service | Client Applications |
|---|---|---|
| Office 365 in a web browser |
 |
 |
| Office 365 account configured in MS Outlook on desktop PC |
|
 |
| OWA 2010 / 2013 / 2016 in a web browser |
|
|
| On-premises Exchange account configured in MS Outlook on desktop PC |
|
|
| OWA 2007 in a web bowser |
|
|
| G Suite / Google Apps in a web browser |
|
|
| G Suite / Google Apps account configured in MS Outlook on desktop PC |
|
|
This article contains the following sections:
- Creating a new policy
- Modifying the existing policy
- Deleting the policy
- Changing the order of the policies
- Activating / deactivating the existing policies
Creating a new policy
To add a new policy, click the Add button in the Administration Panel. All available policy types will show in the context menu (Fig. 1.).
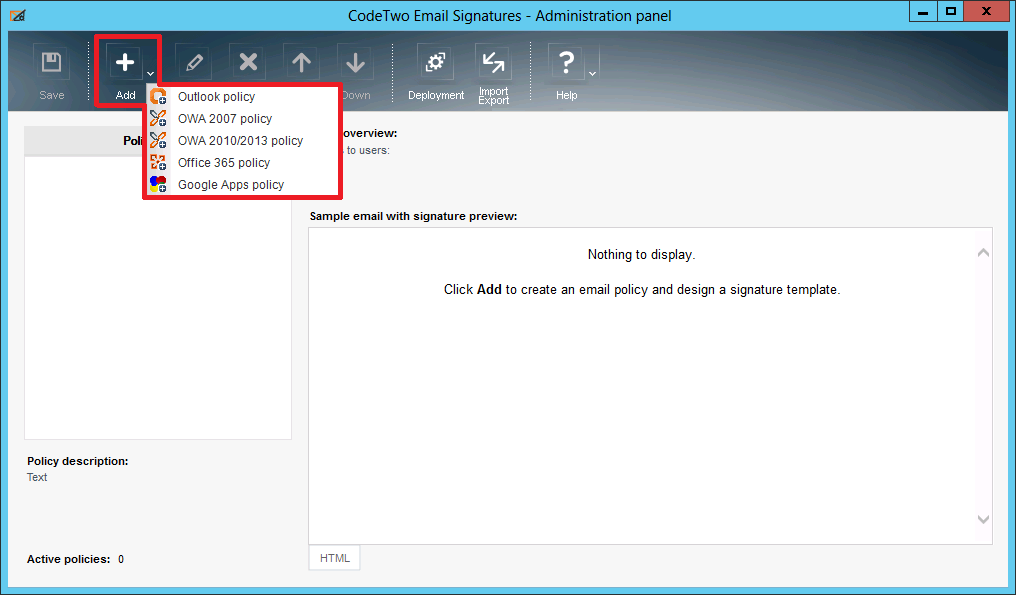 |
| Fig. 1. Choosing new policy type. |
Once you choose the desired policy type from the menu, the policy editor window will display where you will be able to define settings for the new policy (Fig. 2.).
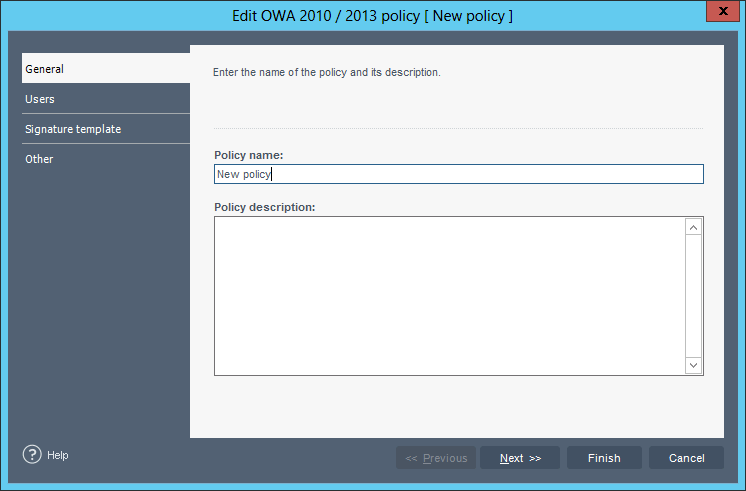 |
| Fig. 2. Editing new policy. |
The newly created policy will show on the list in the main window of the program. To confirm the changes yet apply the policy, click Save in the toolbar of the Administration Panel. Otherwise, neither the changes will be saved nor the policy applied.
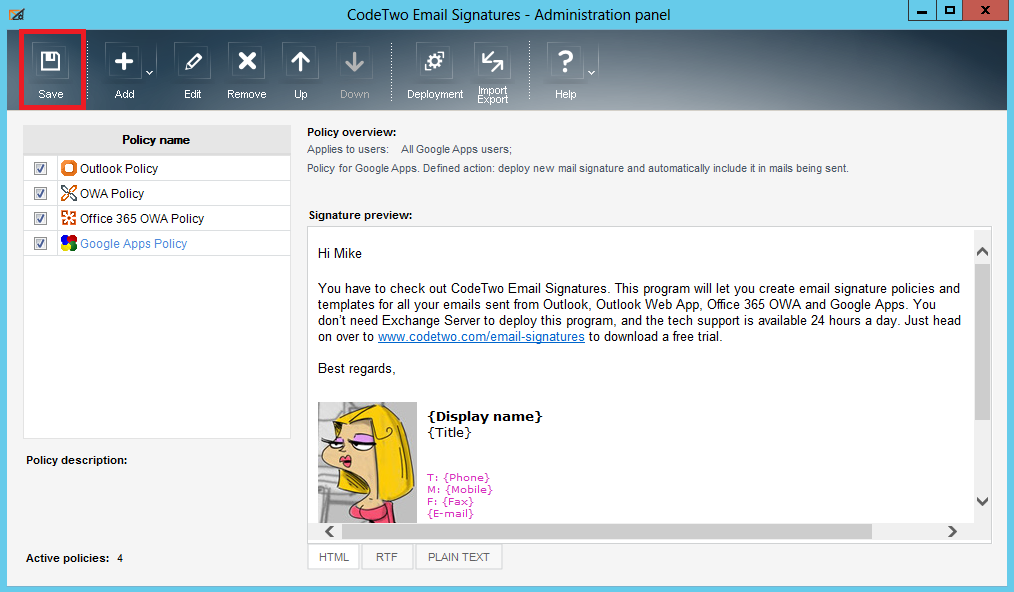 |
| Fig. 3. Confirming the changes made in the program. |
After a short while (up to 15 minutes if the update interval time hasn't been adjusted in the advanced mode), all the changes in policies will be pushed to clients either by Client Applications or Central Updating Service (depending on the chosen policy type). Furthermore, if you are using G Suite (Google Apps) / Gmail or Office 365 as your mail client, you can logout and login once again to your account to speed up the process of updating the signature.
Modifying the existing policy
If a policy is no longer valid (e.g. because the signature contains outdated information), it can be easily modified. Just select the policy you want to change from the list and click the Edit button in the toolbar of the Administration Panel (Fig. 4.) Adjust the policy in the editor and save changes. After a while all changes introduced within a policy will be applied by the Client Applications or the Central Updating Service. Simple as that.
 |
| Fig. 4. Editing a policy. |
Deleting the policy
Once a particular policy is no longer necessary, it can also be deleted with a single move. To do that, select the policy from the list and click Remove in the toolbar of Administration Panel (Fig. 5.).
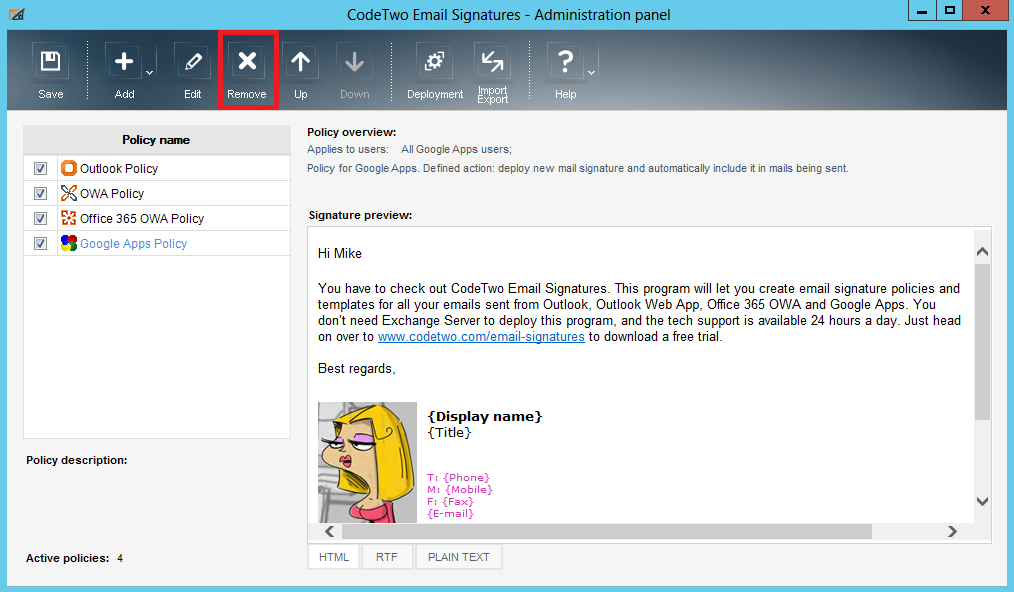 |
| Fig. 5. Deleting a policy. |
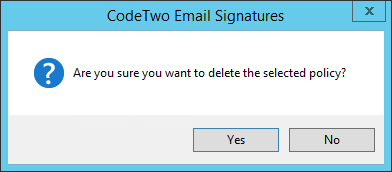
A dialog box will display asking for confirmation - click OK and the policy will be removed (Fig. 6.).
 |
| Fig. 6. Confirming the deletion of a policy. |
Last but not least the changes need to be confirmed with the Save button in the toolbar of the Administration Panel (Fig. 3).
Removing a policy does not mean that all changes it applied will automatically disappear from the mail clients. The policy will not be distributed anymore, but all its settings stay untouched. Only if a new policy is configured and deployed for the users which were encompassed by the deleted policy, their emails will be updated and changed. New settings can be also applied by manually configuring Outlook, OWA, Office 365 or G Suite (Google Apps) email clients.
Changing the order of the policies
Newly created policies are always added at the very bottom of the rules' list in the Administration Panel. That is also the order in which the policies are applied - the one at the bottom will always trigger as the last one. To change the order of the policies select the desired one and then move it up or down the list using the Up or Down buttons (Fig. 7.).
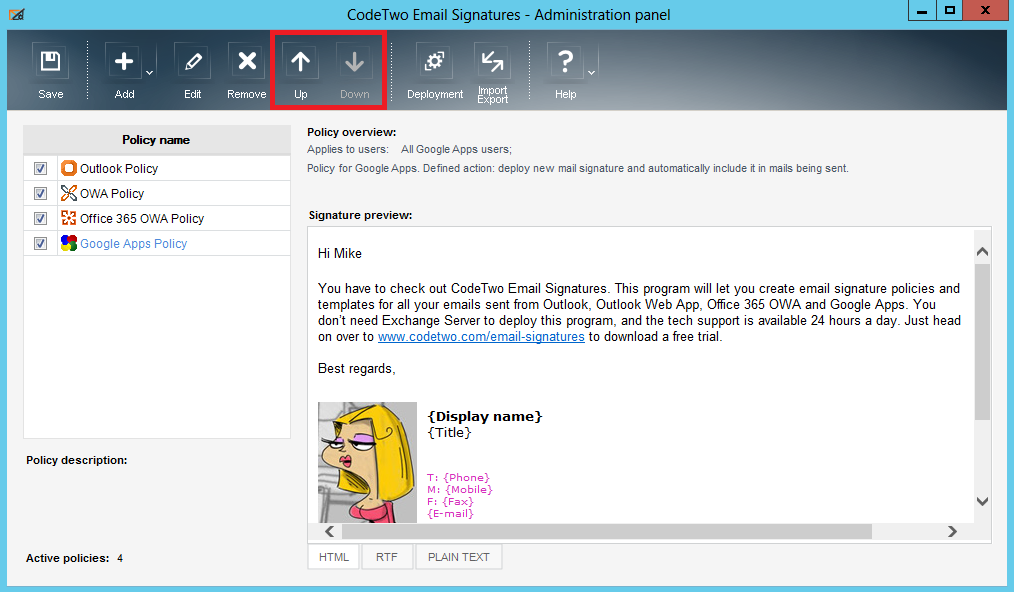 |
| Fig. 7. Changing the order of the policies. |
Alike creating, modifying or deleting policies, to save changes use the Save button in the toolbar of Administration Panel (Fig. 3). After a while, all changes made to the policy will be applied by the Client Applications or the Central Updating Service.
Please note that regardless of their position on the list, all Outlook policies will always be triggered first.
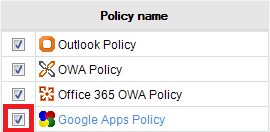
Activating / deactivating the existing policies
A newly created policy is active by default - as indicated in the checkbox on the left hand side of the policy (Fig. 8).
 |
| Fig. 8. View of an active policy. |
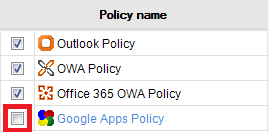
If an existing policy is not needed at the moment, but might become handy in the future, it can be easily deactivated instead of being removed. To deactivate a policy uncheck the box on the left hand side of its name (Fig. 9.) and save changes.
 |
| Fig. 9. Deactivating a policy. |
Deactivating a policy does not mean that all changes it applied will automatically disappear from the mail client. The policy will not be distributed anymore, but all its settings stay untouched. Only if a new policy is configured, deployed and left activated for the users which were encompassed by the deactivated policy, their emails will be updated and changed. New settings can be also applied by manually configuring Outlook, OWA, Office 365 OWA, or G Suite (Google Apps).
See also:
Creating and editing signatures - this article describes Signature/Disclaimer Template Editor used for the creation and edition of the signatures included in the policies.
Adjusting policy update time - description on how to adjust the update process of policies on email clients.
Importing / exporting policies - this article describes how to export and import the settings from/to the existing installation of CodeTwo Email Signatures for Email Clients.
Log files - information on the diagnostic files collected by the program.
Licensing - this article includes important information on the trial version of the program, how to activate the program and provides the Licensing Agreement.