Use Active Directory user photos in signatures
CodeTwo Email Signatures On-prem allows you to complement email signatures created in the program with user photos retrieved from Active Directory. Follow the steps below to create a new rule that will automatically pull Active Directory photos and insert them into signatures. If you want to insert the photos using an existing rule, open this rule in the template editor and proceed to the Add a {Photo} placeholder chapter.
Set up a new rule
- Run the Administration Panel of CodeTwo Email Signatures On-prem and create a new rule by clicking Add and selecting New rule (clean) in the List of rules pane.
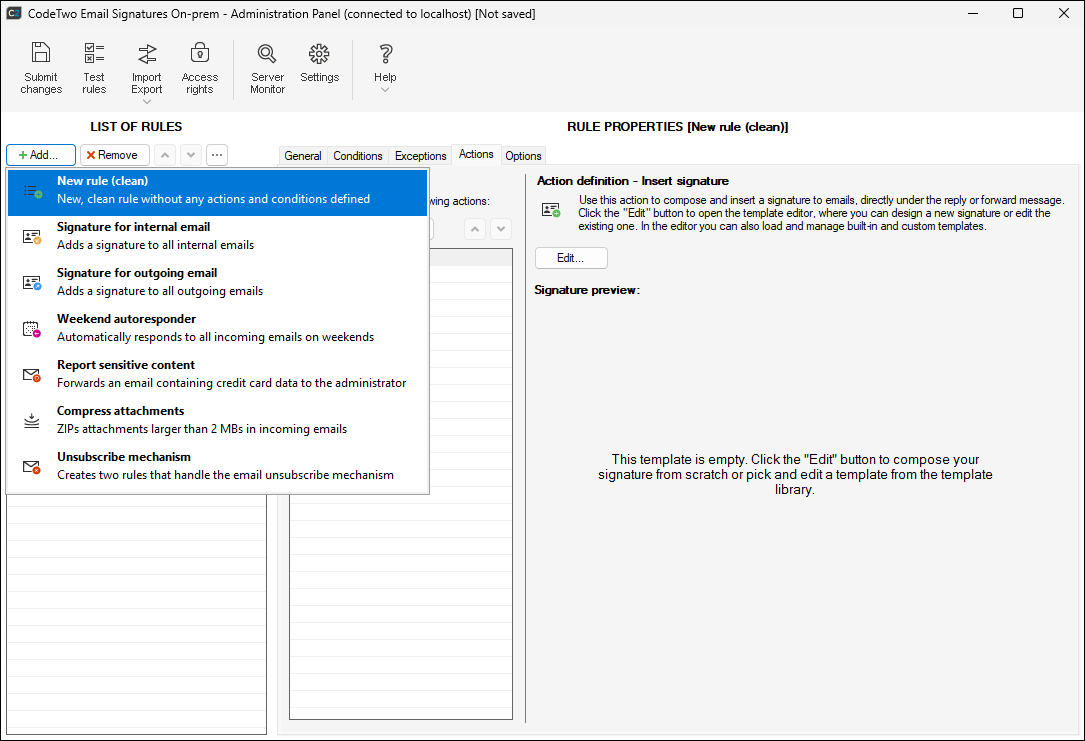
Fig. 1. Creating a new rule.
- In the Rule properties pane, name your rule (and enter a comment or description, if needed) on the General tab.
- Switch to the Conditions tab and select conditions that should trigger the rule. Usually, you would need to select the scope of senders to whom this rule will apply, e.g. all internal senders (as shown in Fig. 2.) or only selected Active Directory users. The program lets you also select different conditions, such as keywords in messages, specific email content, message direction, message header, and so on. Learn more about conditions
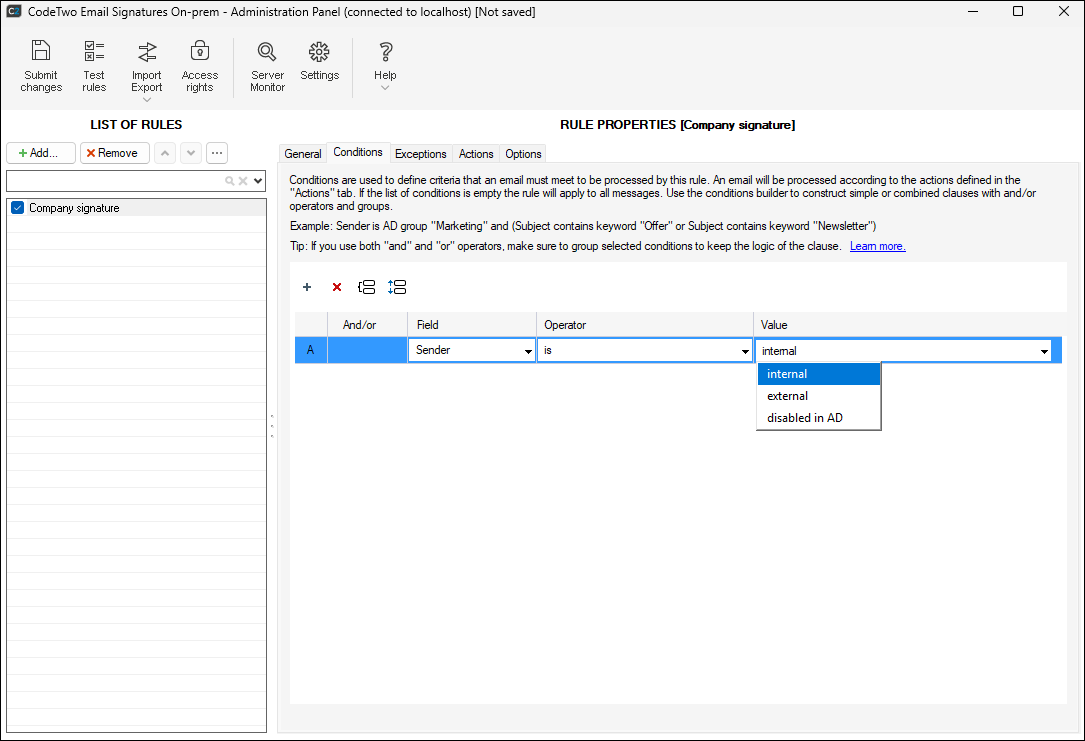
Fig. 2. Setting up rule conditions.
- Switch to the Actions tab. Click Add in the List of actions section and choose Insert signature from the drop-down menu (Fig. 3.). Selecting this action lets you easily compose an Exchange email signature in the program.
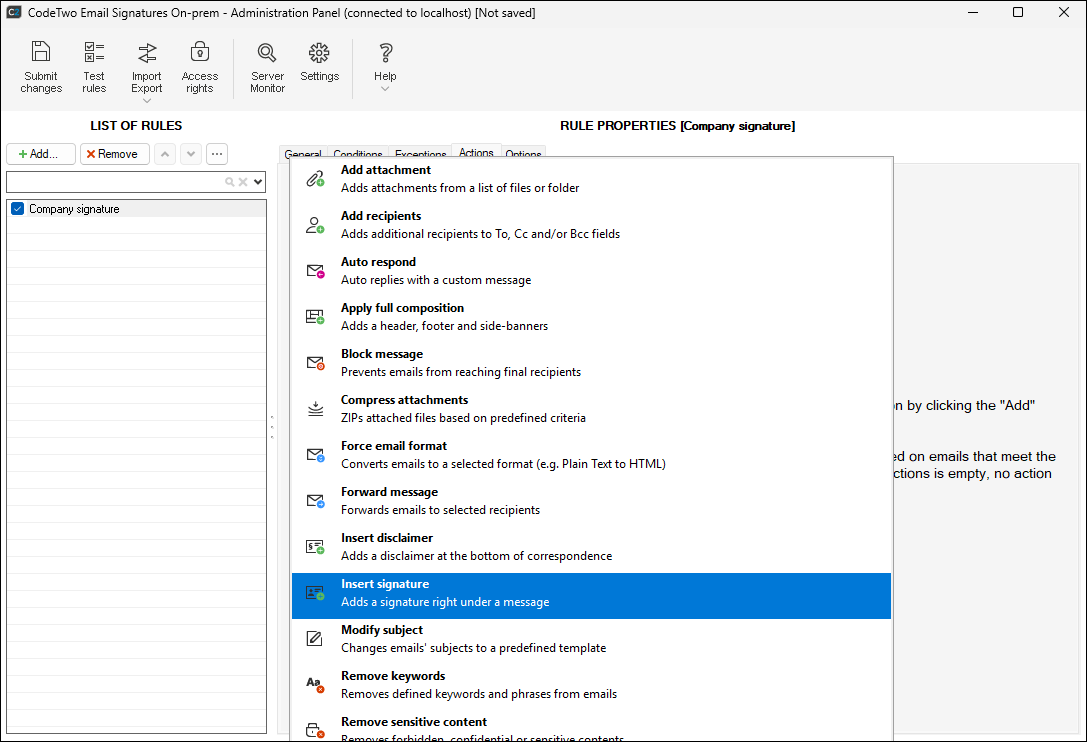
Fig. 3. Selecting the Insert signature action.
- Click Edit to open the built-in HTML template editor. Design your own signature template or use a ready-to-use template from the template library (Fig. 4.). To learn about all the features available in the template editor, see this manual.
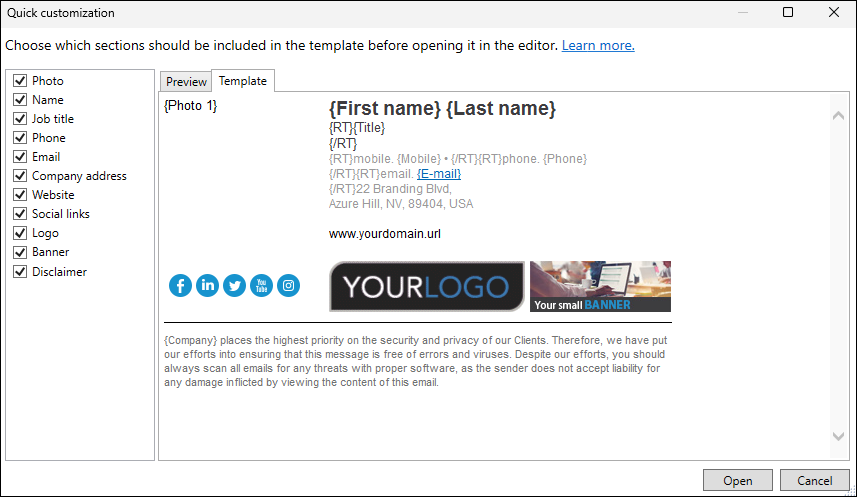
Fig. 4. Selecting a signature template from the template library.
Add a Photo placeholder
To insert a user photo into your email signature template, you will use a placeholder. Placeholders function as variables that are replaced with user-specific attributes, message details, and other pieces of information. In this case, you will use a {Photo} placeholder to fetch user photos from Active Directory.
To add the {Photo} placeholder that will append an appropriate user photograph to the signature template, place the cursor in the desired spot in the template, click the Placeholder button on the editor's ribbon, and select Message sender > Photo from the drop-down menu (Fig. 5.). This will add the {Photo} placeholder to your template.
To make sure that the user photos will be displayed in the correct size across different devices and email apps, always insert an image in the desired size. Read this article to learn how to do this
However, if you have to use large user photos, you need to adjust the {Photo} placeholder properties before using these photos in your email signatures. Otherwise, the large photographs will not fit into your signature template. Learn more
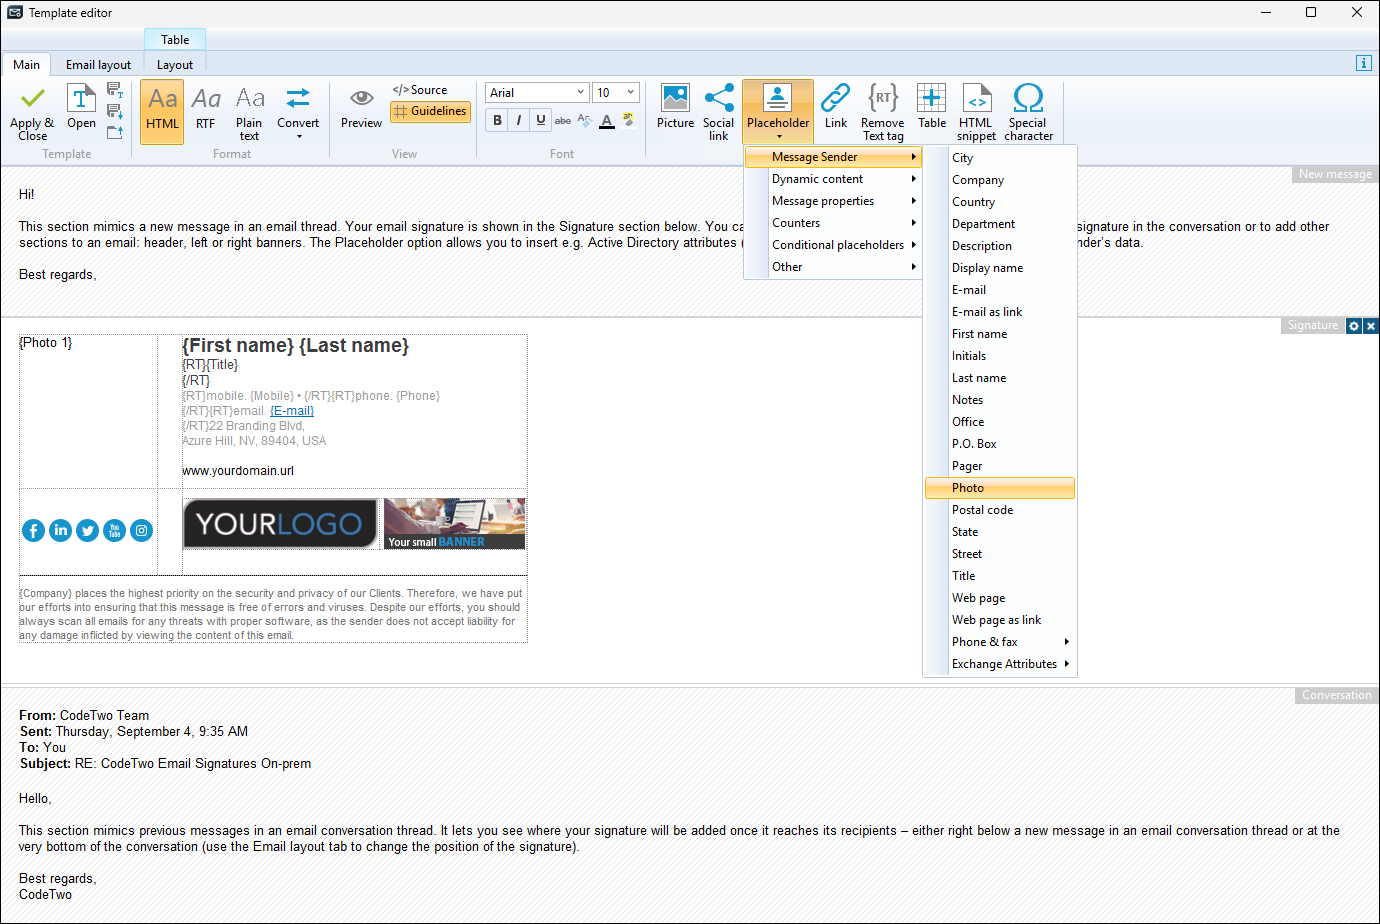
Fig. 5. Adding the {Photo} placeholder to an email signature template.
Once you have finished editing your template, click the Apply & Close button on the editor’s ribbon, and then Submit changes in the program’s Administration Panel. From now on, your rule is active and will add email signatures containing Active Directory user photos. Keep in mind that a different photo will be inserted for each individual sender of the message.
In this article