Insert
The Insert group on the ribbon (Fig. 1.) is used to add various objects into a signature or disclaimer.

Fig. 1. The Insert group on the Editor's ribbon.
The available commands allow you to insert the following items:
- Picture
- Table
- Social link
- AD attributes
- Hyperlink
- Remove Text tag
- Horizontal line & special character
- HTML snippet
Picture
When you click the Picture button (see Fig. 1.), the Insert picture window opens. It allows you to choose a picture either from a local library or an online resource. Additionally, you are able to define the size of your picture, either in pixels or percent. You can also enter just one dimension, and the other one is calculated automatically, keeping the aspect ratio (Fig. 2.).
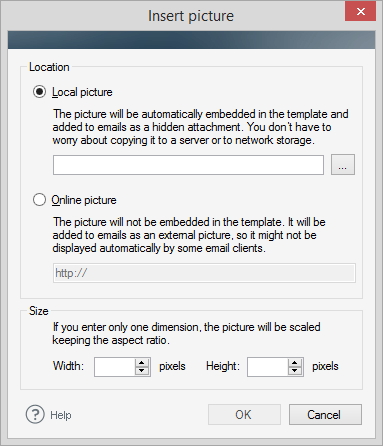 |
| Fig. 2. Insert picture options. |
To learn about the differences between online (linked) and local (embedded) images, see our Knowledge Base article.
Tip
Check out our free application - CodeTwo Active Directory Photos - if you want to quickly upload photos to Active Directory.
Table
The Table button enables complex definition of tables. You can add a table directly to a signature/disclaimer composition, define its size, layout, and borders, and obtain a consistent appearance of your signature in various mail clients (Fig. 3.).
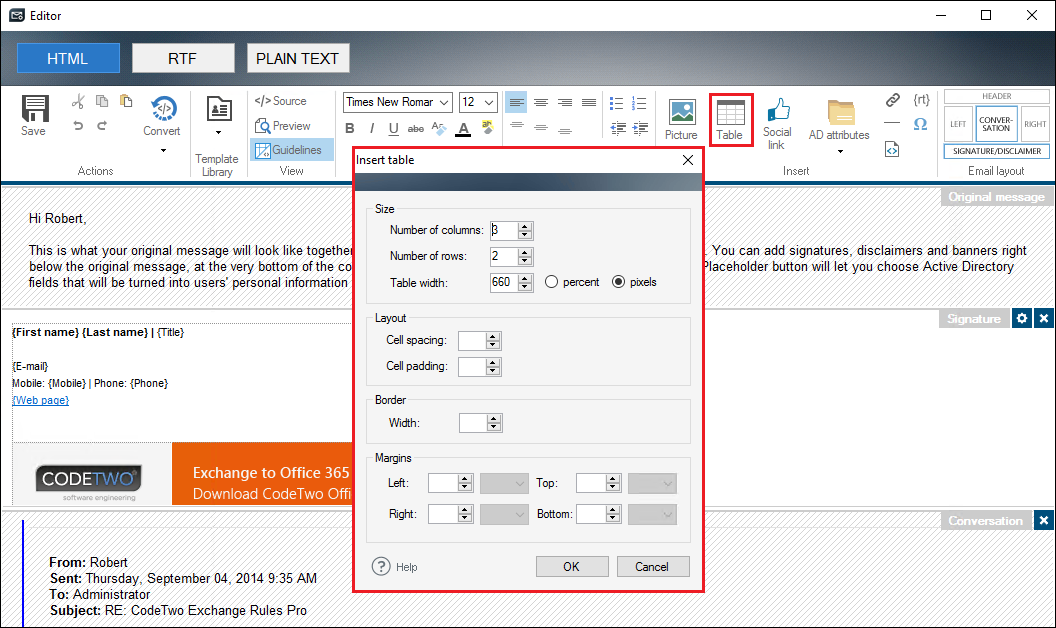
Fig. 3. How to add a table.
Once a table is added, you can modify its properties via the shortcut menu (Fig. 4.).
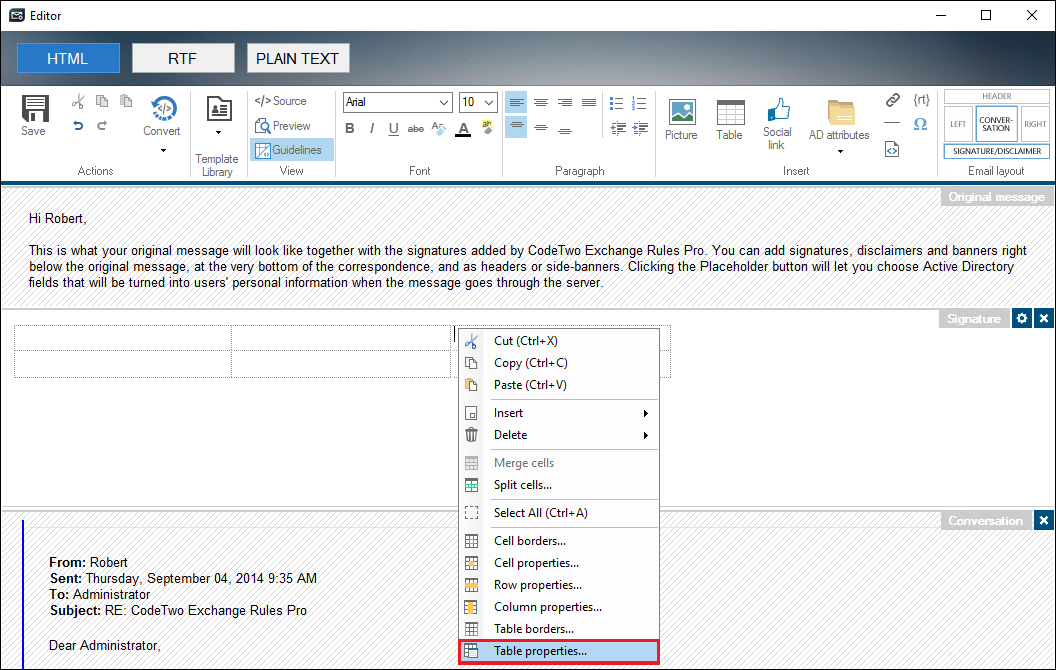
Fig. 4. The shortcut menu with the Table properties button highlighted.
Just right-click on any cell and choose Table properties (Fig. 4.) to modify the properties of the whole table (Fig. 5.). You can also change the properties of individual table elements: cells, columns, rows and borders.
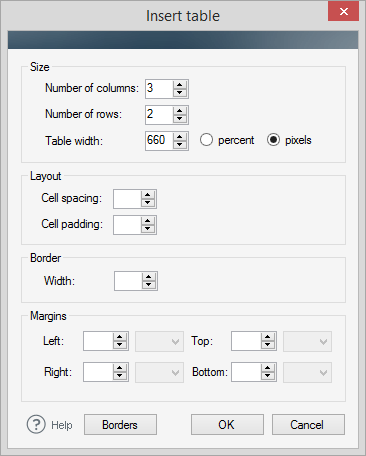 |
| Fig. 5. Table properties. |
Tip
The size of any row or column can be easily modified by dragging the borders with a mouse. In the shortcut menu, you can also find additional options to merge or split the table cells.
Social link
This function allows you to create a special kind of a hyperlink which includes a label as well as a related image, and redirects to one of the social media networks (Fig. 6.). The target URL is fully configurable and may contain a user's personal information (placeholders) so that the final link might refer to a particular employee's social profile. If you want to add a link to a social network like Facebook or Google+, you need to enter a username in the URL (it must not be the person's email address). Usually, the URL identifier can be obtained by opening the main profile page of a user.
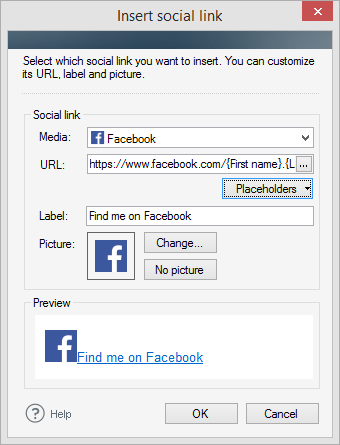 |
| Fig. 6. Insert social link options. |
AD attributes
The AD attributes button (Fig. 7.) allows you to add Active Directory (or Azure Active Directory, if you use Office 365) variables directly into a signature/disclaimer, in the form of placeholders. Once you choose a particular attribute from the drop-down menu, it occupies a place within your signature and is replaced (after processing by the program) with a corresponding value from the (Azure) Active Directory of your organization. Placeholders can contain message-related attributes, but also additional content such as date/time or message properties. The available choice of attributes depends on your environment and CodeTwo software.
For more details, see our dedicated article about AD attributes.
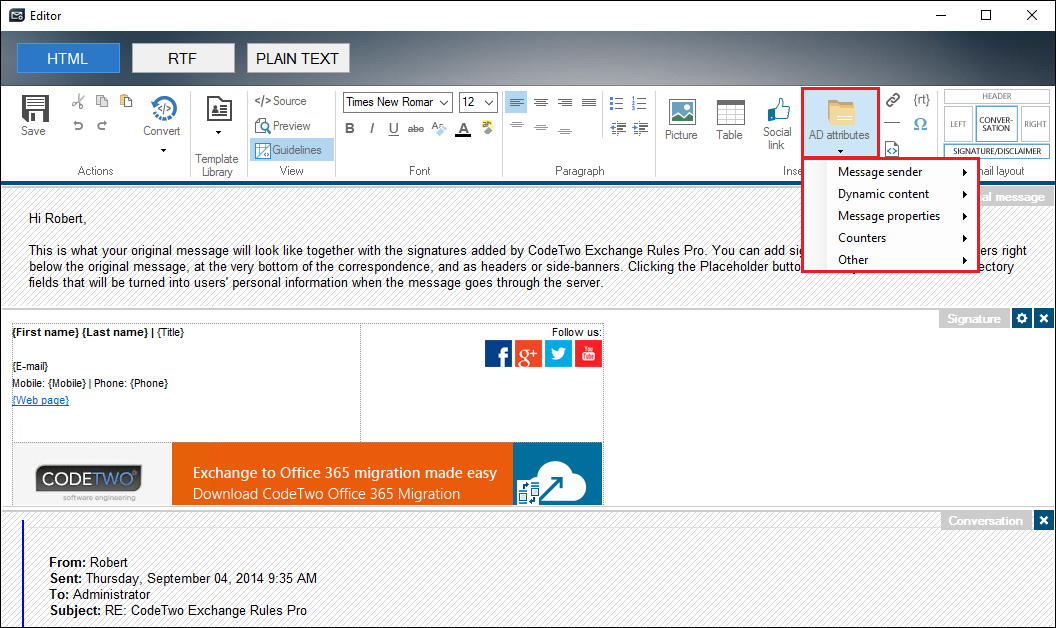
Fig. 7. The AD attributes menu in CodeTwo Exchange Rules Pro.
Hyperlink
Use the Hyperlink button (highlighted in Fig. 8.) to add hyperlinks to your signature/disclaimer. You can insert hyperlinks inside a text or add them to signature elements, such as images. Hyperlinks may refer to URLs of web pages (http/https), emails (mailto) and other resources (e.g. ftp).
To add a hyperlink to an email element (such as text or image), select this element and click the Hyperlink button on the ribbon. The Insert hyperlink window (Fig. 8.) offers several configuration options:
- Display text, URL address, Tooltip text - these options allow you to personalize the appearance of the hyperlink in your signature/disclaimer;
- Show email tracking parameters - click this link to expand additional settings and add campaign tracking parameters to your hyperlink. The most popular web analytics tools are supported: you can add UTM tags (Google Analytics), Woopra tags and Matomo (Piwik) tags.
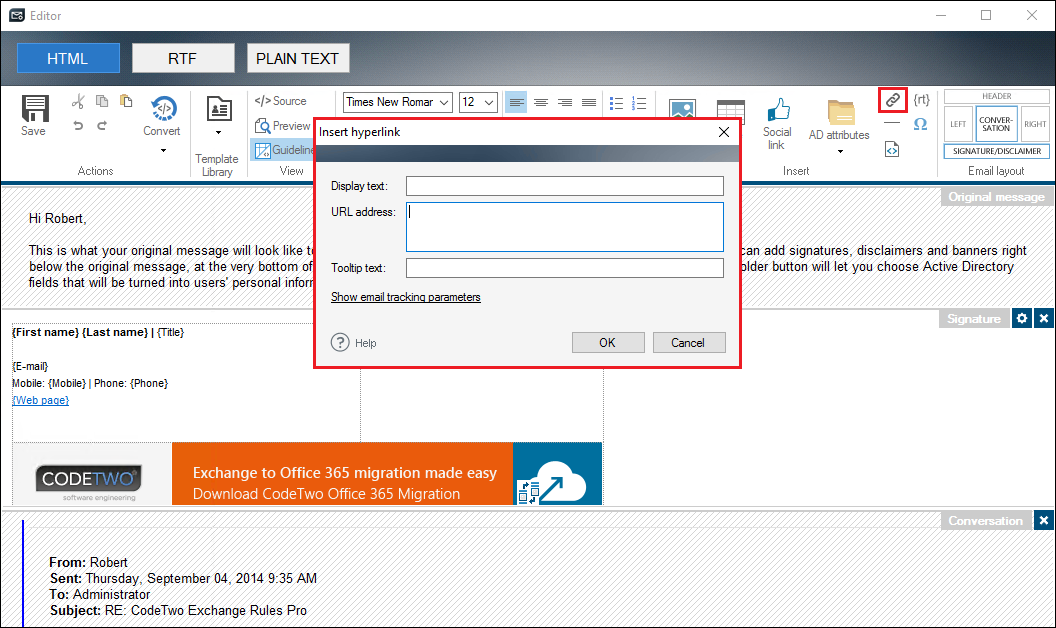
Fig. 8. The Insert hyperlink options.
Learn how to integrate CodeTwo Exchange Rules with web analytics tools
Learn how to integrate CodeTwo Exchange Rules Pro with web analytics tools
Learn how to integrate CodeTwo Email Signatures for Office 365 with web analytics tools
Tip: How to add a mailto hyperlink to an image?
You can add mailto hyperlinks to various elements, e.g. images, so that when a user clicks an image in your signature, their default email client opens and they are able to quickly send you an email. To add a mailto hyperlink, select an image and click the Hyperlink button. Define the URL address in the following way: mailto:[my-email-address] (Fig. 9.) and click OK.
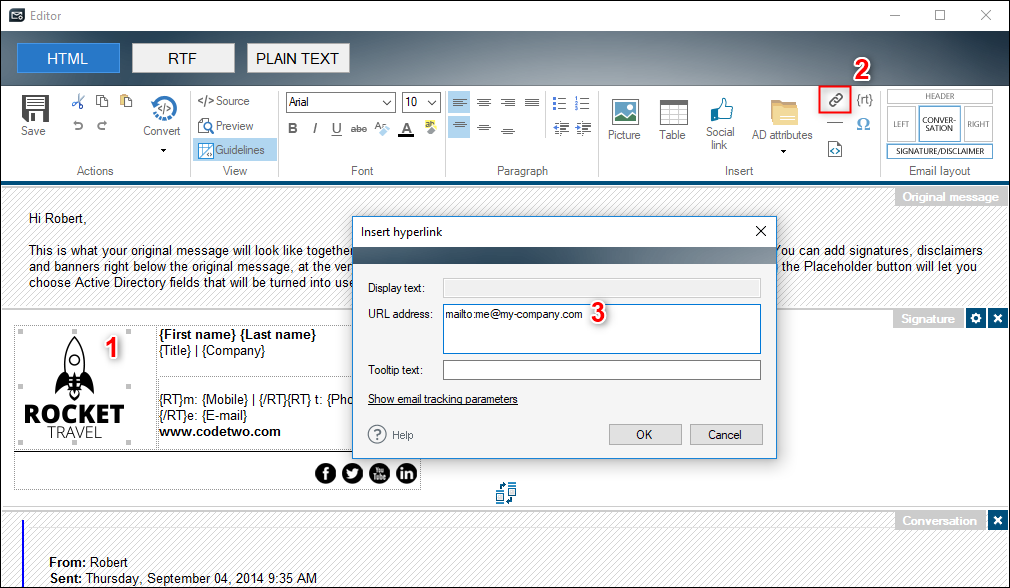
Fig. 9. How to add a mailto hyperlink to an image.
Remove Text tag
As some users may not have all of their attributes (some of which are required by particular placeholders) filled in Active Directory, it is a good idea to use the {rt} Remove Text tag to avoid adding empty dynamic fields to signatures/disclaimers (Fig. 10.).

Fig. 10. The Remove Text tag button.
Once the program processes the email of such a user, the empty dynamic fields (placeholders referring to attributes that are absent in the user’s AD) are removed from the signature/disclaimer along with the empty space they occupy (e.g. an empty line). This helps to keep a professional appearance of the message. If you want to remove any empty dynamic field from signatures, you need to surround the chosen dynamic field with the Remove Text tags. Note that if you insert the {rt} tags at the beginning and at the end of the same row, the empty dynamic field will be removed but the empty space will remain. The example below shows how to insert the {rt} tag to have the empty line removed along with the dynamic content:
|
|
Learn more about the Remove Text tags and see usage examples
Horizontal line & special character
These two buttons (Fig. 11.) allow you to insert horizontal lines and special characters to the section (e.g. a signature) you compose.

Fig. 11. The Insert horizontal line and Insert special character buttons.
HTML snippet
Select any place in your signature/disclaimer and click the HTML snippet button (Fig. 12.) if you want to add snippet codes copied from a different source or application. This feature allows you to easily integrate third-party solutions (such as one-click surveys) with your email signatures, for example to boost your email marketing campaigns.
Learn about third-party integrations in CodeTwo Email Signatures for Office 365
Learn about third-party integrations in CodeTwo Exchange Rules Pro
Learn about third-party integrations in CodeTwo Exchange Rules
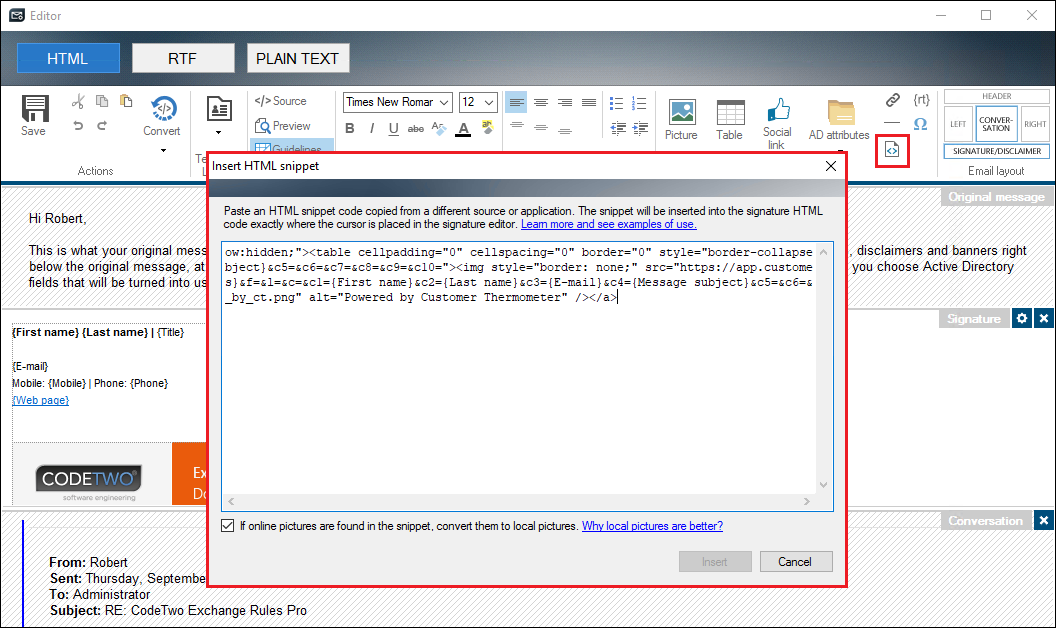
Fig. 12. The HTML snippet button and configuration window.
See also
CodeTwo Knowledge Base article on good and bad practices when using Editor