The editor described in this manual is featured in the following CodeTwo products:
CodeTwo Email Signatures On-prem (product page | user's manual)
CodeTwo Exchange Rules (Pro) (discontinued | user's manual)
If you're looking for instructions on using the editor in CodeTwo Email Signatures 365, go to this user's manual.
Quick guide
In this article you will find out how to create an email signature template step by step. You can design templates from scratch, but since the template editor comes with a lot of predefined templates that can be easily customized, this article focuses on using one of these templates. See the sections below to learn more.
- Launch the template editor
- Choose a template you want to use and quickly customize it before opening
- Customize the content of your template
- Preview your signature template
- Create the template for all message formats
- Save the template for future use, apply the changes to your signature rule, and close the editor
Launch the template editor
Open the Administration Panel, select a signature/disclaimer adding rule (or create a new one) and go to the Actions tab. In the List of actions section, select (or add) one of the following actions:
- Insert signature
- Insert disclaimer
- Apply full composition
and then click Edit (Fig. 1.) to open the editor.
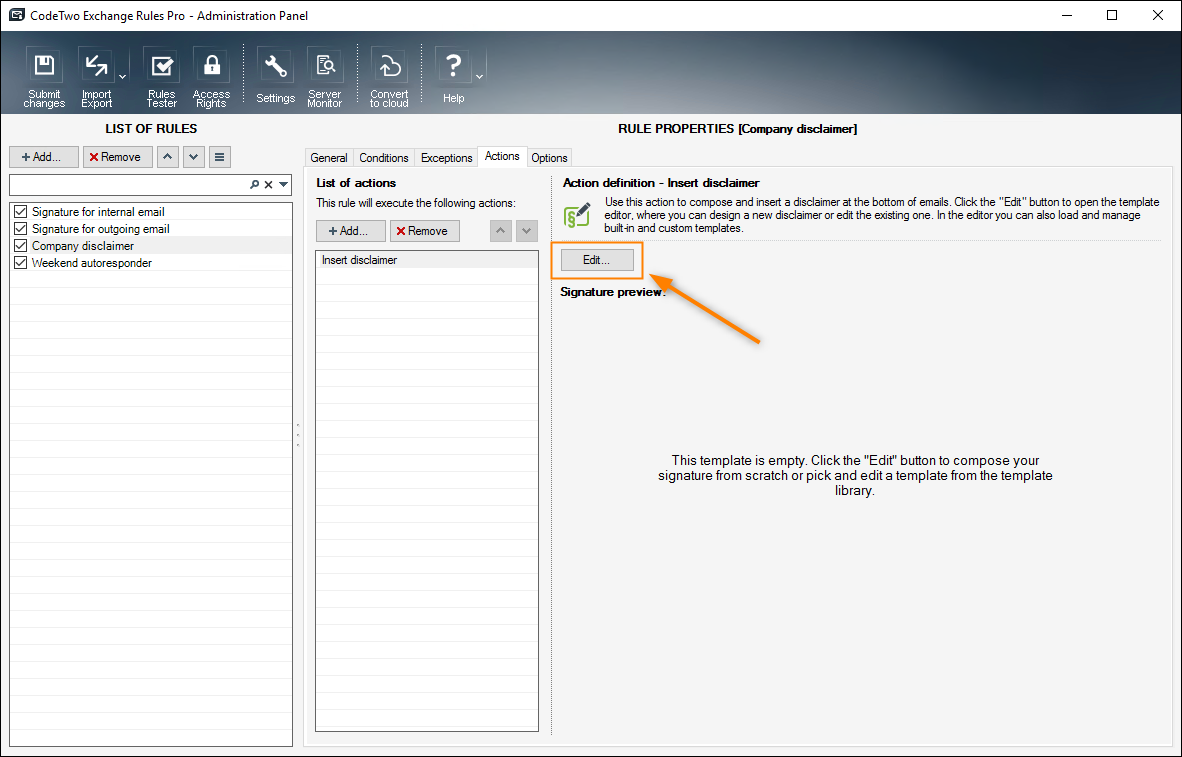
Fig. 1. Opening the template editor in CodeTwo Exchange Rules Pro.
Choose a template you want to use and quickly customize it before opening
The program launches with the Template library (Fig. 2.). You can select a signature template from the collection of built-in templates or from your own templates (if you created them). Click a template you want to use. In this guide, we show how to compose a signature based on a predefined template, but if you prefer to create a template from scratch, skip the template selection and close the window to open the template editor. Learn more about managing templates
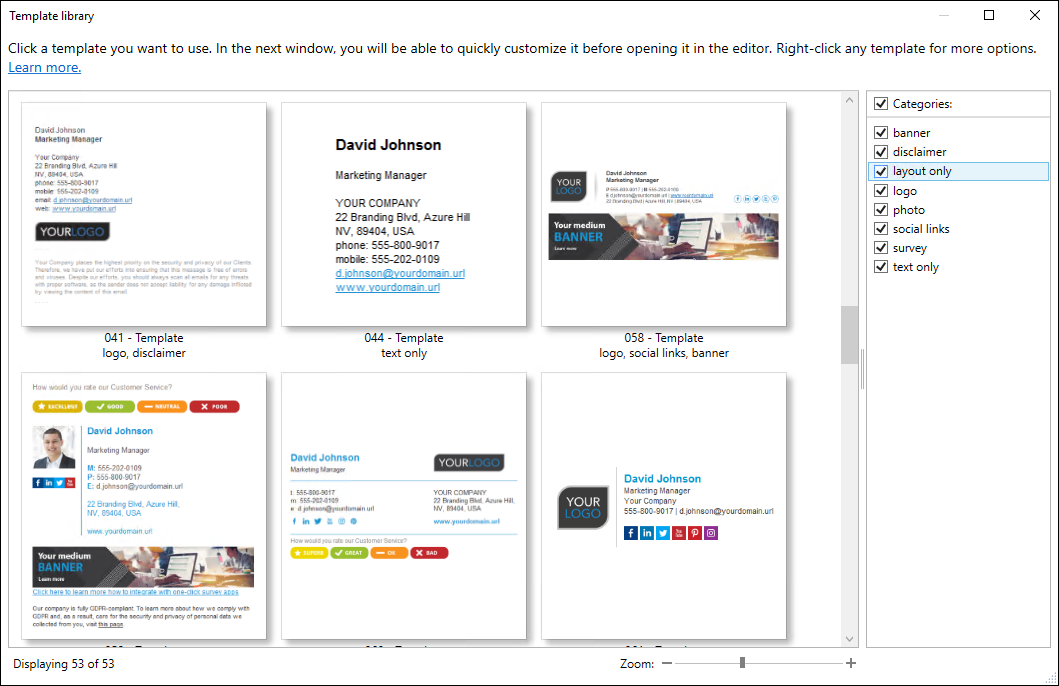
Fig. 2. Choosing a template from the template library.
Next, you can quickly customize the template you selected (Fig. 3.) before it's loaded into the editor. Select sections you want to include and preview how the template looks like in an email when it's filled with sample data (the Preview tab). To see how the template is built (e.g. which placeholders it contains), switch to the Template tab. When you're finished, click Open.

Fig. 3. Quick customization of the selected template.
Customize the content of your template
Your signature template opens in the editor (Fig. 4.). Here, you can design it to suit your needs. To help you visualize how your signature looks like in a correspondence, your signature template is displayed within a sample email conversation consisting of a new message (under which your signature is added) and a previous message.
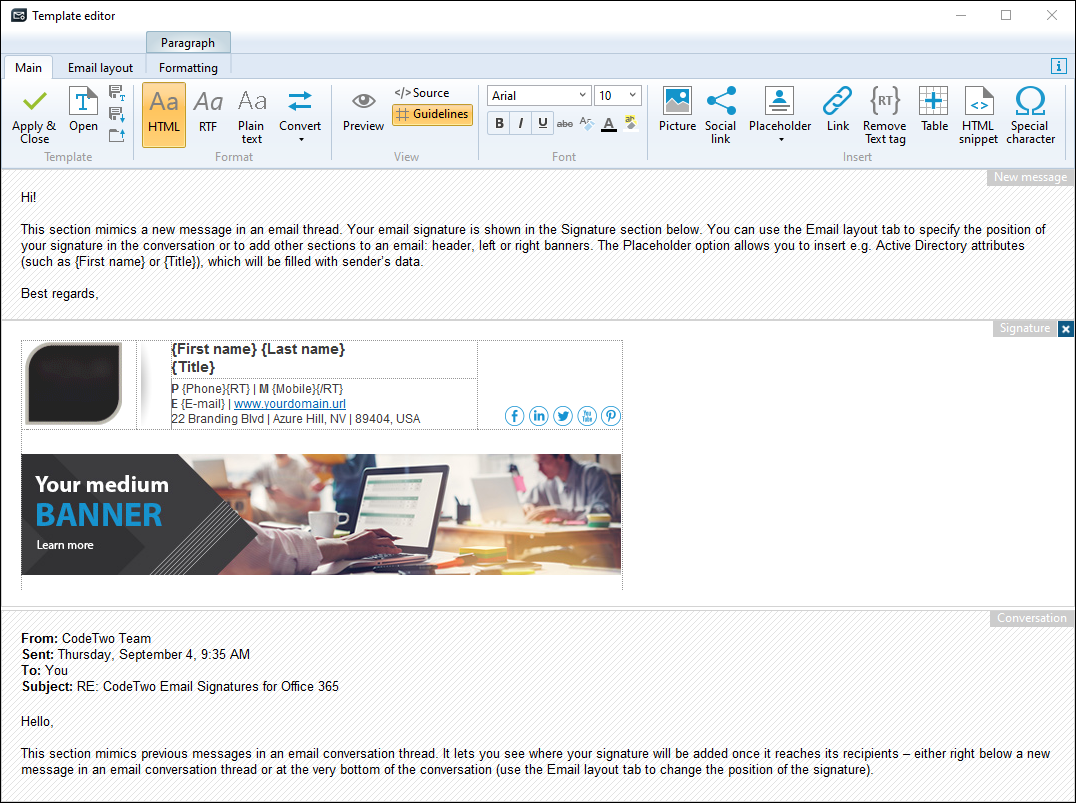
Fig. 4. A signature template opened in the editor.
Check template format
Start by checking which template format you're currently using - it's visible in the Format group on the ribbon (Fig. 5.). By default, the format is set to HTML because this is the format for the built-in templates and it offers you the most customization options. You should configure your template in all available formats. At this point, let's continue with the default format and configure the RTF and plain text versions of the template later.
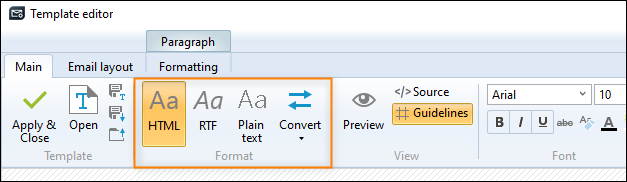
Fig. 5. The message format options.
Customize text, tables and other content
Now it's time to edit your template. Select (click) any part of the template and use commands on the ribbon to customize it. The ribbon changes depending on your selection. For example, if your template contains a table, and you click anywhere inside it, an additional Table tab appears, where you can change the table's appearance.
Use the options in the Font group to change the appearance of text in your signature template. The Insert group allows you to add pictures, placeholders (automatically filled with sender's AD attributes etc.), tables, and more. Find out how to insert various content into a template
Add placeholders to automatically pull information such as AD attributes into your template
The template selected earlier (see Fig. 4.) contains a table row with a company name, but no specific name is provided - there's only text: Your Company. You can replace this text with the name of your company by typing it manually, but the name will be the same for all users who get this signature. You can also replace this field with a placeholder so that it's automatically filled with the sender's company name pulled from their Active Directory. This may be a better solution, especially if your organization has subsidiaries (daughter companies), and different users belong to different companies. See the video below to learn how to replace a text phrase with a placeholder, and how to preview what the placeholder looks like when it's filled with information. In a similar way, you can add sender-related information to the template by inserting placeholders such as First name and Last name via the Placeholder button. Learn more about placeholders
Video: How to replace text with a placeholder and preview the final effect.
Tip
You can surround your placeholders with the Remove Text tags (RT tags) to avoid empty spaces in your signature when a placeholder inside your template cannot be filled because the corresponding value (e.g. an AD attribute) is empty. Learn more
Add other email sections
Your template can include more than just a signature. If you want to add side banners or a header, go to the Email layout tab and use the Insert email section group commands (Fig. 6.) to turn email sections on/off. Then design the newly added sections in the same way as your signature. See this article for guidelines.
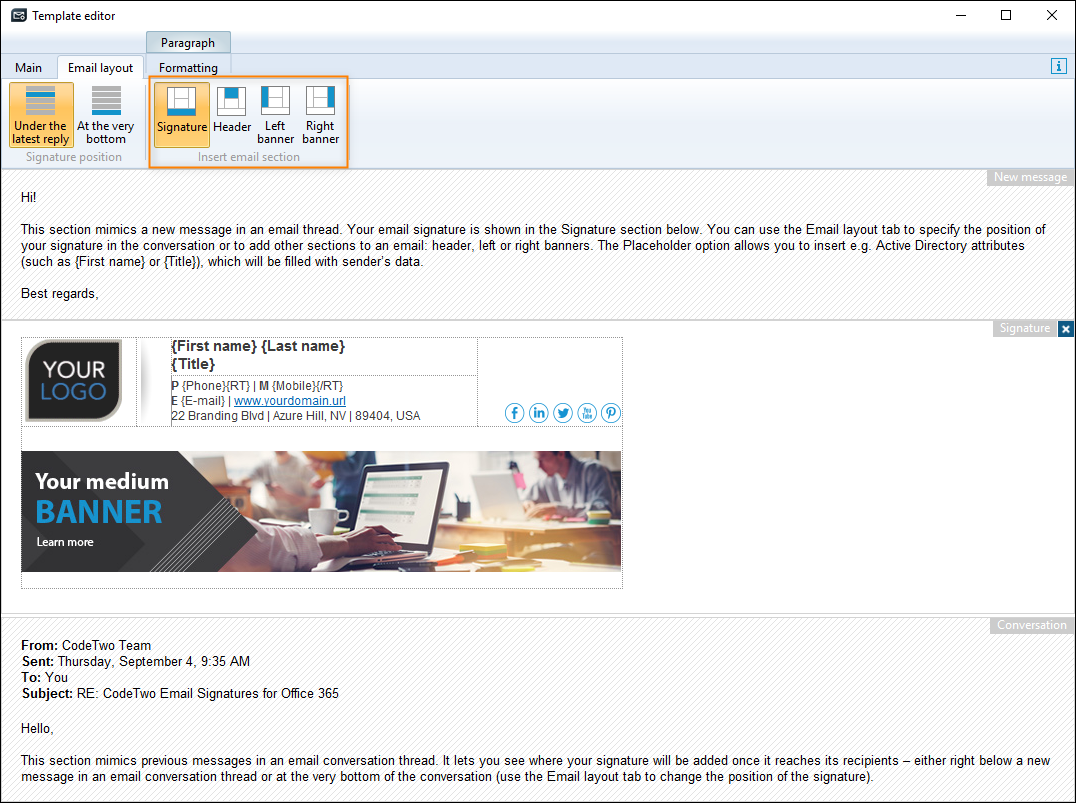
Fig. 6. You can insert other email sections on the Email layout tab.
Manage how your template is added to email conversations
The Email layout tab also allows you to manage if your signature should be added directly under the latest reply in an email conversation, or at the very bottom. You can also specify if you want to add your signature to every email or to the first email only. For details, read this article.
Preview your signature template
To see how your template looks like when it is filled with real user data, click the Preview ( ) button on the Main tab of the ribbon. Select a user in your organization, and the program shows how the signature of this user looks like (Fig. 7.). If you have any placeholders, they are automatically filled with information related to the selected user. You can preview your template for all message formats - if the template is missing for RTF or plain text, you need to design it.
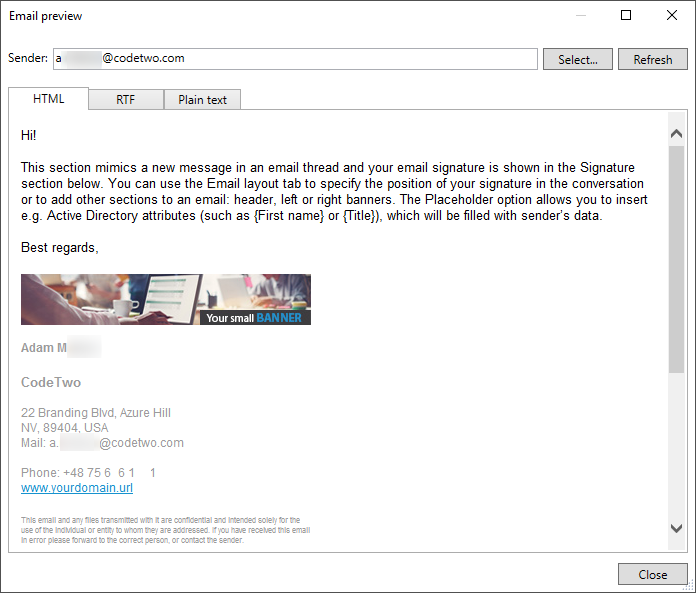
Fig. 7. You can preview the signature for a specific user in your company.
Create the template for all message formats
When you're finished with designing your HTML signature template, you need to create the version of this template for the other available message formats. Otherwise, messages sent from email clients and devices set up to send only RTF or plain text emails will not get any signature if a template in that format is missing. You can design a template individually for each message format, by selecting a format in the Format group on the ribbon (see Fig. 5.), or you can automatically convert your HTML template to the other formats. Learn more about managing template formats
Save the template for future use, apply the changes to your signature rule, and close the editor
When your template is complete, you can apply it to the related signature rule. Before you do that, it's a good idea to save your template for future use. The corresponding options are available on the Main tab of the editor (Fig. 8.). You can add the current template to the template library ( ) or as a template file (
 ) on your local computer. Learn more about template management
Fig. 8. You can save and apply your signature template via the commands in the Template group.
Finally, to apply the template to your signature rule and close the editor, click Apply & Close. After you save the rule in your CodeTwo software, emails that meet the conditions of this rule will get the signature you designed.