Filtering users
This article applies to an old version of CodeTwo Active Directory Photos.
We strongly recommend that you visit the product page and download the latest version.
Note that the navigation menu on the left side refers to the latest version of the program.
The main window of CodeTwo Active Directory Photos consist of Active Directory Containers pane on the left, and the Users and Contacts pane on the right to list the objects contained in the container selected in the left pane. The top part is occupied by a toolbar and a handy search tool (Fig. 1.).
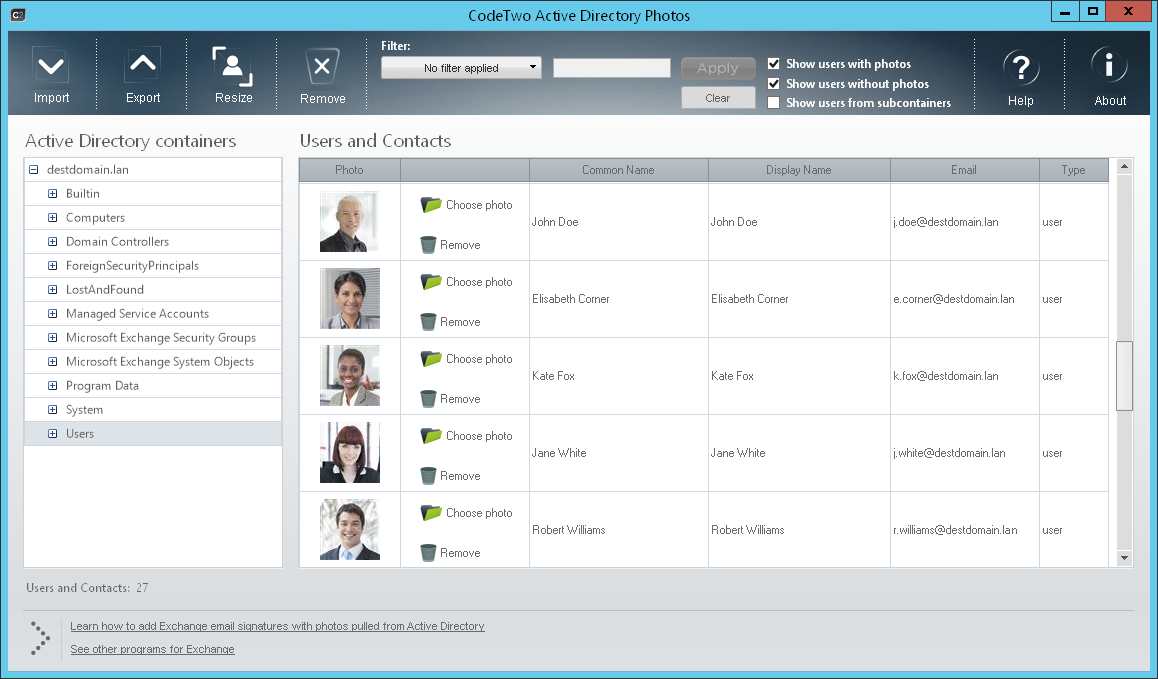 |
| Fig. 1. Main program window. |
After choosing a container in the left pane, the Users and Contacts pane will list the available objects. If a photo is available for a user/object, it will display in the entry. If not, the photo spot will be replaced by a default avatar.
To modify an object, you can use the buttons shown in the object entry, or alternatively the toolbar buttons or the context menu options available after right clicking the object. If you want to select more than one user, use the left mouse button while holding the Ctrl or Shift key to select particular users or a range respectively. Use Ctrl+A to select all users or right-click anywhere in the Users and Contacts window and choose Select All from the context menu.
If you want to get more information on a specific user from your database, hover the mouse cursor over the displayed picture to see a tooltip displaying the photo in full size and all the details such as its resolution, format and size.
Double-clicking a user will open the User details window displaying, apart from all the picture data, the most important information about the user that is available in the Active Directory.
Filters
CodeTwo Active Directory Photos offers advanced options for searching the Users and Contacts list based on data found in Active Directory. The search is powered by the filters located in the toolbar. The following options are available:
Show users with photos (turned on by default),
Show users without photos (turned on by default),
Show users from subcontainers (turned off by default), the list of containers is located in the left panel.
Custom filter
Users can also be filtered according to the data contained in Active Directory. Choose the filter in the Filter section of the toolbar e.g. City. In the search field enter the phrase that must be found in the objects and click Apply to start the search. To turn off the filter click Clear.
Example:
- In the list of fields choose Department.
- In the text field next to the list enter Mark*.
As a result, program will seek and display those Active Directory users whose Department field in Active Directory entry is populated with words starting with mark or Mark.
CodeTwo Active Directory Photos users can also save their own filters using the Define a custom filter option in the drop down list in the Filter section. In the window that opens (Fig. 2.) define your own filter based on the values in Active Directory fields.
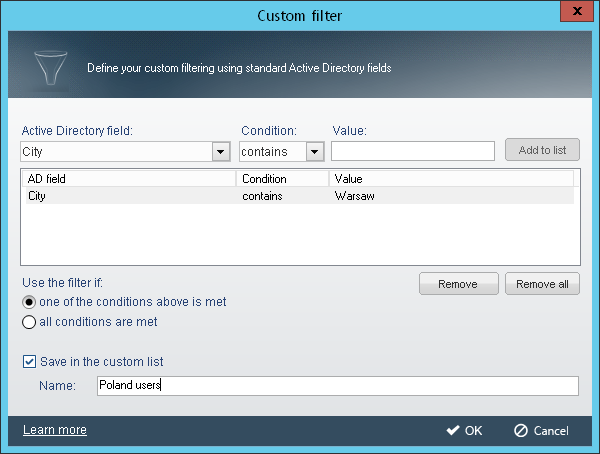 |
| Fig. 2. Window that allows user to create his/ her own search filters. |
In the Active Directory field choose the field that will be used by the filter. In the Condition field choose contains if the phrase in defined in the Value field must match partially, or equals if the phrase defined in the Value field must match exactly the object's properties. Click Add to list to add the new filter to the list. Use the Remove and Remove All buttons to remove individual filter or clear the list respectively.
The section below the list Use the filter if is used to configure the logic of the filtering mechanism:
- If One of the conditions above is met is selected, the filter will list AD objects that meet at least one of the conditions;
- If All of conditions are met is selected, the filter will list AD objects that meet all of conditions.
The custom filter can be saved by selecting the Save in the custom list checkbox and entering the name in the Name field. Click the OK button to confirm your selection in this window. The list of users will populate with the objects that have been filtered out by the defined criteria while the Filter section will display the name of the saved filter. If you had decided not to save the filter, it will show Example custom filter name.
To use the saved filter, expand the Filter menu and click Saved custom filters. The save filters will appear in the list. To disable a filter, click Clear.
The Manage saved filters option is used to manage saved filters. To open it, go to Filter, Saved custom filters, Manage saved filters. A list of saved filters will display (Fig. 3.). To add a filter click the Add button; to modify a selected filter click the Edit button; and finally to remove a selected filter click the Remove button. To save the changes click the OK button or Cancel to abort.
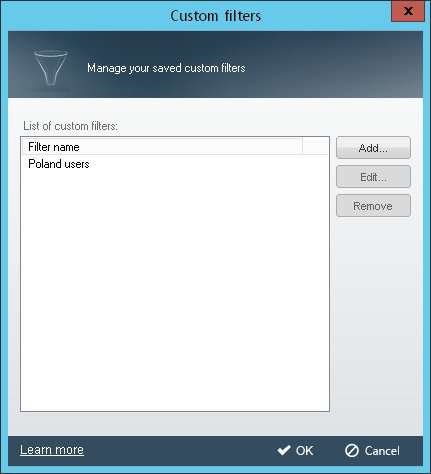 |
| Fig. 3. Custom saved filters managing window. |
When defining a filter using Active Directory field values, you can enter the exact phrase or part of it using asterisk(*) for its random portion e.g. entering manag* in the field value will accept the following expressions: manager, managing etc.