Exporting photos
This article applies to an old version of CodeTwo Active Directory Photos.
We strongly recommend that you visit the product page and download the latest version.
Note that the navigation menu on the left side refers to the latest version of the program.
CodeTwo Active Directory Photos gives the administrator an option to export existing photos of Active Directory users. To export a photo, select a user whose photo you want to export on the list in main window. You can choose more than one user, or export photos of all users at once. Next, click the Export button in the toolbar (or right-click any user and choose Export Photos). The Export window will appear (Fig. 1.) with following options:
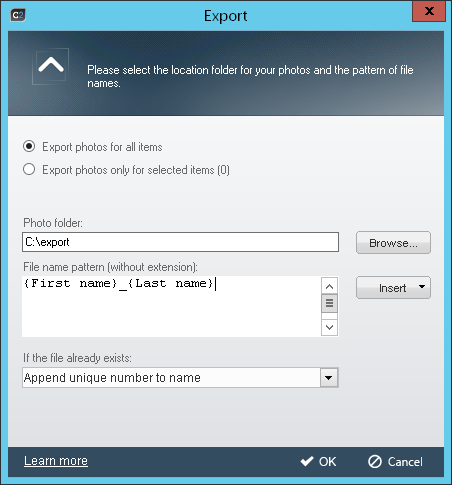 |
| Fig.1. First Export window. |
Export photos for all items will export photos of all users.
Export photos only for selected items (number of selected users) will export photos of selected users only. Use this option if you want to export a photo of one user only.
Use the Photo folder section to specify the location where you want to export the photos. Use the Browse button to point to the folder on your disk.
In the File name pattern field specify the filename pattern for the exported photo(s). Name of the file must be provided given without the file extension. In addition, the filename pattern can be specified using AD fields so that a unique filename is provided for photos exported from multiple objects.. To add an AD field click the Insert button.
In the If the file already exists section you choose which action is performed if the file with the same name already exists in the given location. You have the following options to choose from:
- Append unique number to the name – a unique number will be appended to the name of the file to prevent the original file from being overwritten.
- Overwrite – the existing file with the same name will be overwritten by the newly exported file.
- Do nothing – the program will skip the export action if a file with the same name already exists in the destination folder.
When you finish configuring the export action, click OK to begin exporting photos. Click Cancel to abort.
When the export is complete the summary will display. The window will contain the following information:
- number of photos successfully saved,
- number of photos saved with a unique number,
- number photos saved by overwriting,
- number of skipped photos (due to the Do nothing option),
- number of errors while saving photos.
Click OK to finish the export.
File name pattern can consist of several dynamic fields as well as static text.