There are three options to choose from for adding different signatures to user and shared mailbox emails. See how to set them up.

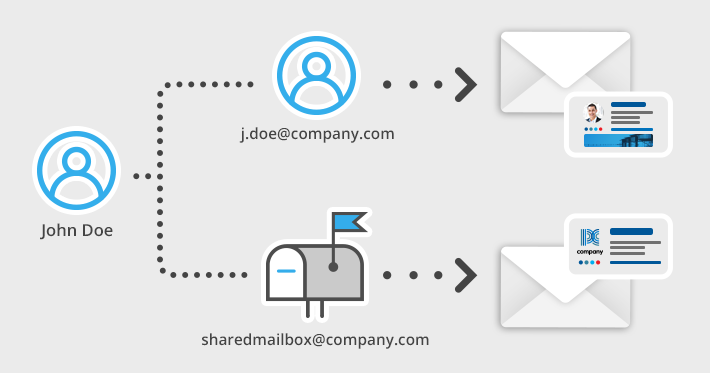
It is a common and widely-spread practice in business email communications to differentiate signatures depending on the sender. Companies very often want to put different contact details, banners and even change the entire layout to indicate that the message arrives from a general mailbox like sales@ or from an individual like j.doe@.
There are three ways to achieve this: creating two separate signatures in Outlook, setting up mail flow rules on the server side or using CodeTwo Email Signatures 365 – an email signature management solution.
Method 1 – Use Outlook 2021, 2019 or 2016
For this, you need to add a shared mailbox to your Outlook as a second account. If you already have access to your company shared mailbox in Outlook, the steps are rather simple:
- In Outlook, go to File > Options > Mail > Compose messages > Signatures.
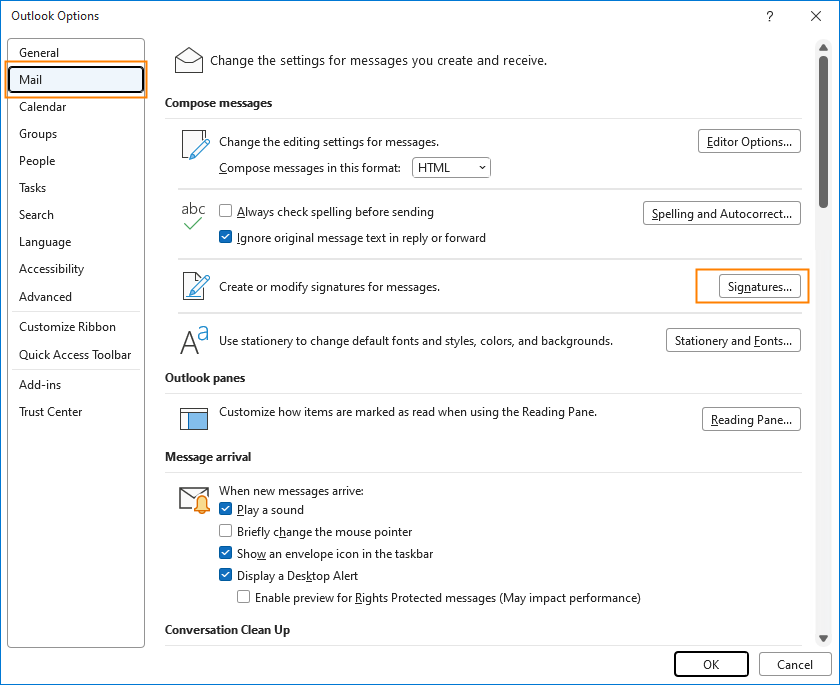
- In the Signatures and Stationery window, on the E-mail Signature tab, click New.
- Type the name for your shared mailbox signature and click OK.
- Use formatting tools available in the Edit signature section to create the signature. You can also prepare the signature in a signature generator and then just copy/paste it into your Outlook.
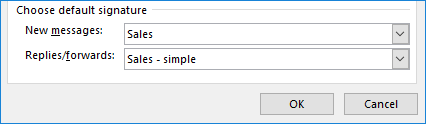
- In the Choose default signature section, select the shared mailbox and define whether the email signature should automatically appear in new messages or replies and forwards. Click OK to apply the changes.
- Repeat the steps to set up another signature, this time for your personal account.

Plus points:
- No additional costs.
- Relatively easy to set up.
Minus points:
- Every time you write a new email you need to remember to manually select the shared mailbox in the From field and select the shared mailbox’s signature back and forth.
- Limited formatting tools and options in the Outlook signature editor.
- Relatively difficult to create advanced signatures (because of limited editor functionalities).
Method 2 – Server-based rules in Microsoft 365/Exchange Online
In this method, you can set up user and shared mailbox signatures directly on the server, not in email clients:
- Open the Exchange admin center.
- Navigate to Mail flow > Rules.
- Click Add a rule and select Apply disclaimers.
- Set up the rule for a shared mailbox:
a. In the Apply this rule if section, select your shared mailbox.
b. In the Do the following section, enter the disclaimer text and select one of the fall back actions.
Note: If you want your signature to look nice, you will need to wrap it in HTML code. If you don’t feel very comfortable with HTML coding, you can get some help from this signature generator. It’s free and allows you to convert one of the predefined email signatures (filled in with data you provided) to HTML, which you can later copy/paste into your mail flow rule.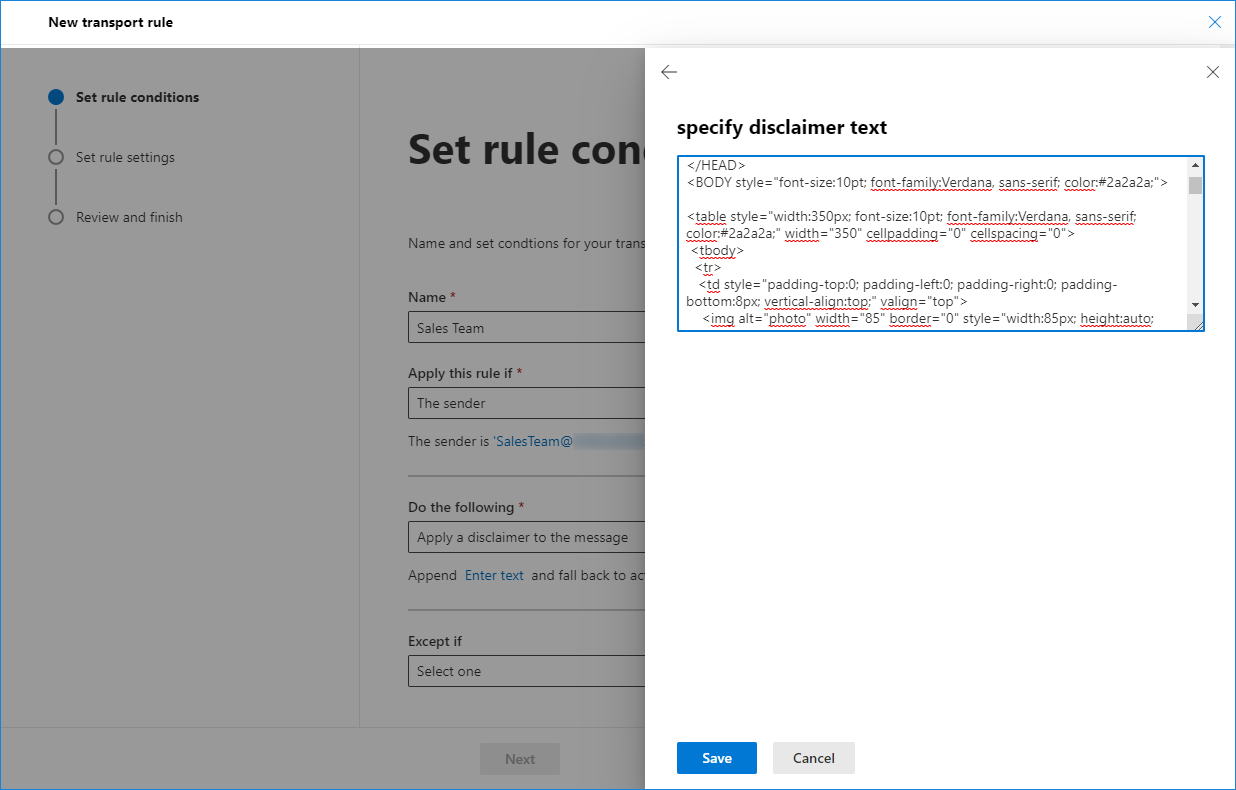
- If you don’t want the signature to show up on replies, set up an exception to the rule in the Except if section (for example, The subject or body > subject includes any of these words). In the pane that opens, type RE:, then click Add and Save.
- Complete the remaining steps of the rule creation wizard. Take a final look at the rule settings, and if everything is set up correctly, click Finish.
- Once created, the mail flow rule is disabled by default. Select it from the rules list and use the toggle to enable the rule.
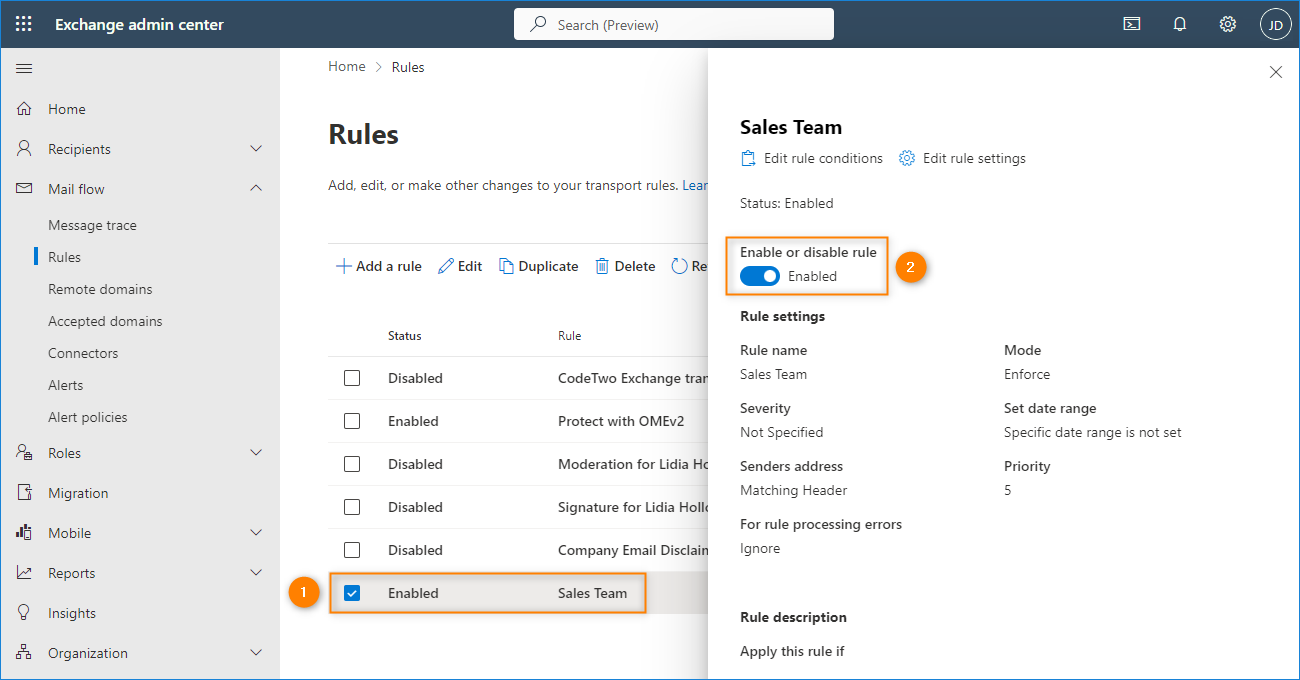
- Repeat all the above steps to create a signature for a user mailbox.
Note: Keep in mind that a user sending emails from a shared mailbox will get either the shared mailbox or their own signature depending on what delegate rights are assigned to the user. If the user has the Send as rights to a shared mailbox, emails will be stamped with a signature created for the shared mailbox. If the user has the Send on behalf of rights enabled, the signature specified for a user mailbox will be added.
Plus points:
- The rule is handled on the server side so there is no need to manipulate signatures on the client side.
- You can create both user and shared mailbox signatures from one place.
Minus points:
- You need to have at least the basic HTML knowledge to code fairly professional signatures.
- In replies, the signature will always appear at the very end of the conversation thread.
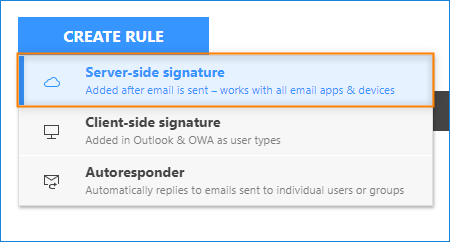
Method 3 – CodeTwo Email Signatures 365
In this method, you need CodeTwo Email Signatures 365 – a third party signature manager for Office 365, which allows you to control email signatures on the server’s or client’s side. To set up automatic signatures for shared mailboxes and user mailboxes, follow the steps below:
Note: To go with this method, you need a valid subscription of CodeTwo Email Signatures 365. If this solution is new to you, you can sign up for a free 14-trial here.
- Sign in to the signature management app.
- Add a new server-side rule and name it.
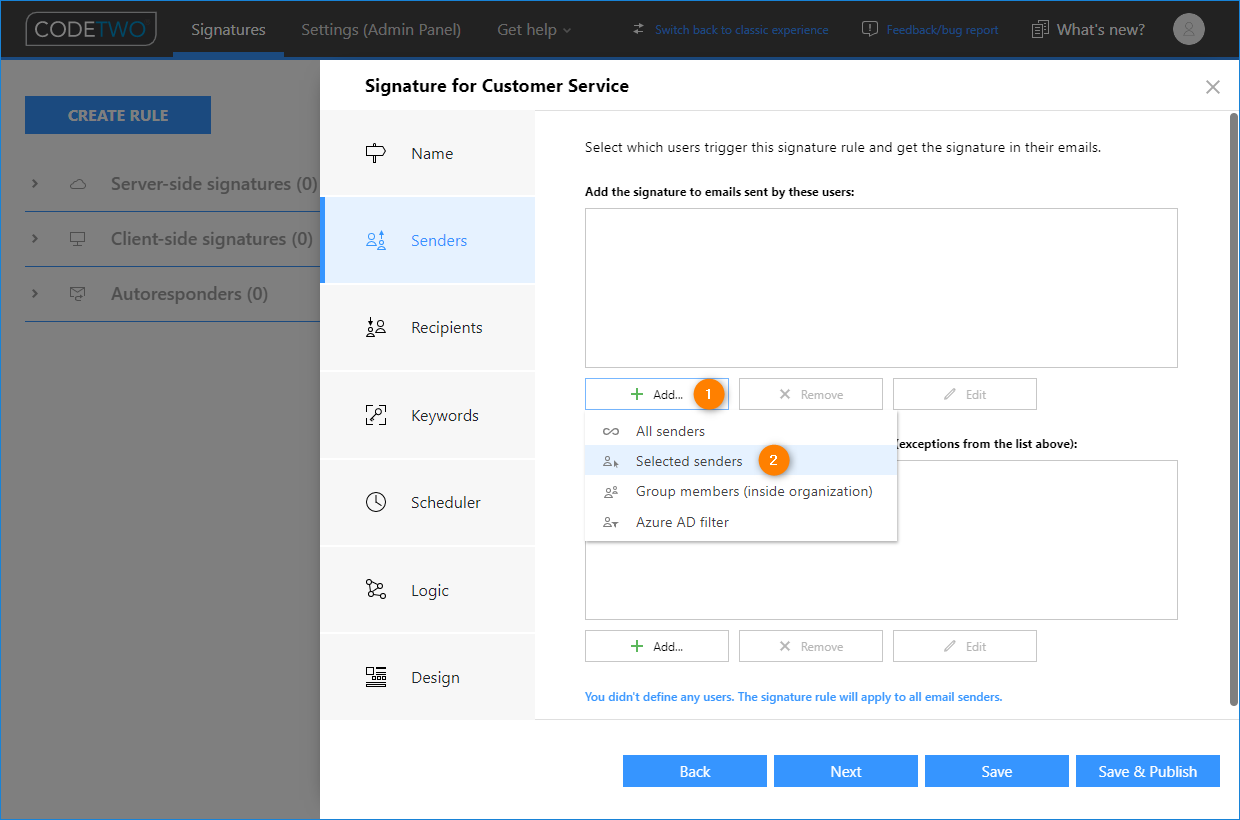
- In the Senders step, use the Add button, click Selected senders and select the shared mailbox address.
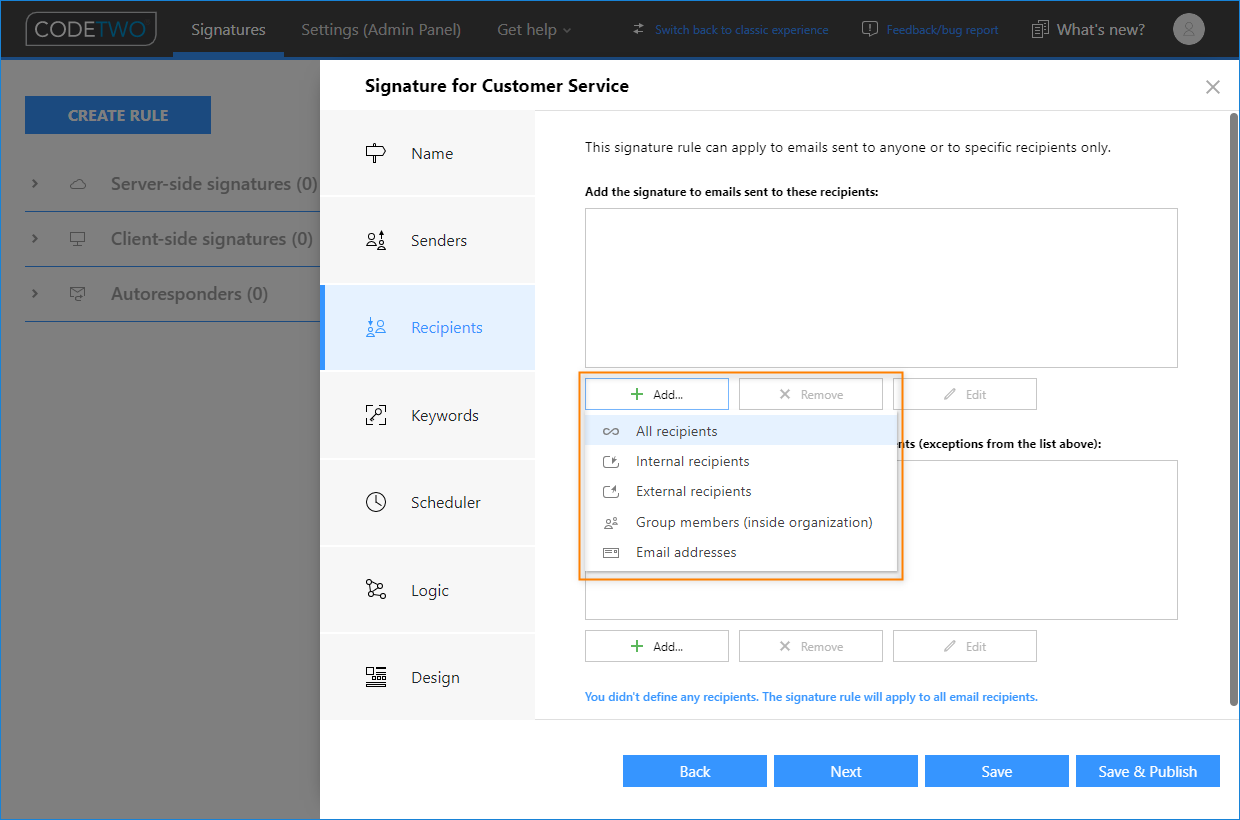
- Optionally, you can use the Recipients step if you want to add the signature to emails sent to selected recipients only, as shown on the screen below. You can also go to the Keywords step to set up specific keywords that will trigger or suppress this rule.
- Configure the settings in the Scheduler and Logic steps according to your needs.
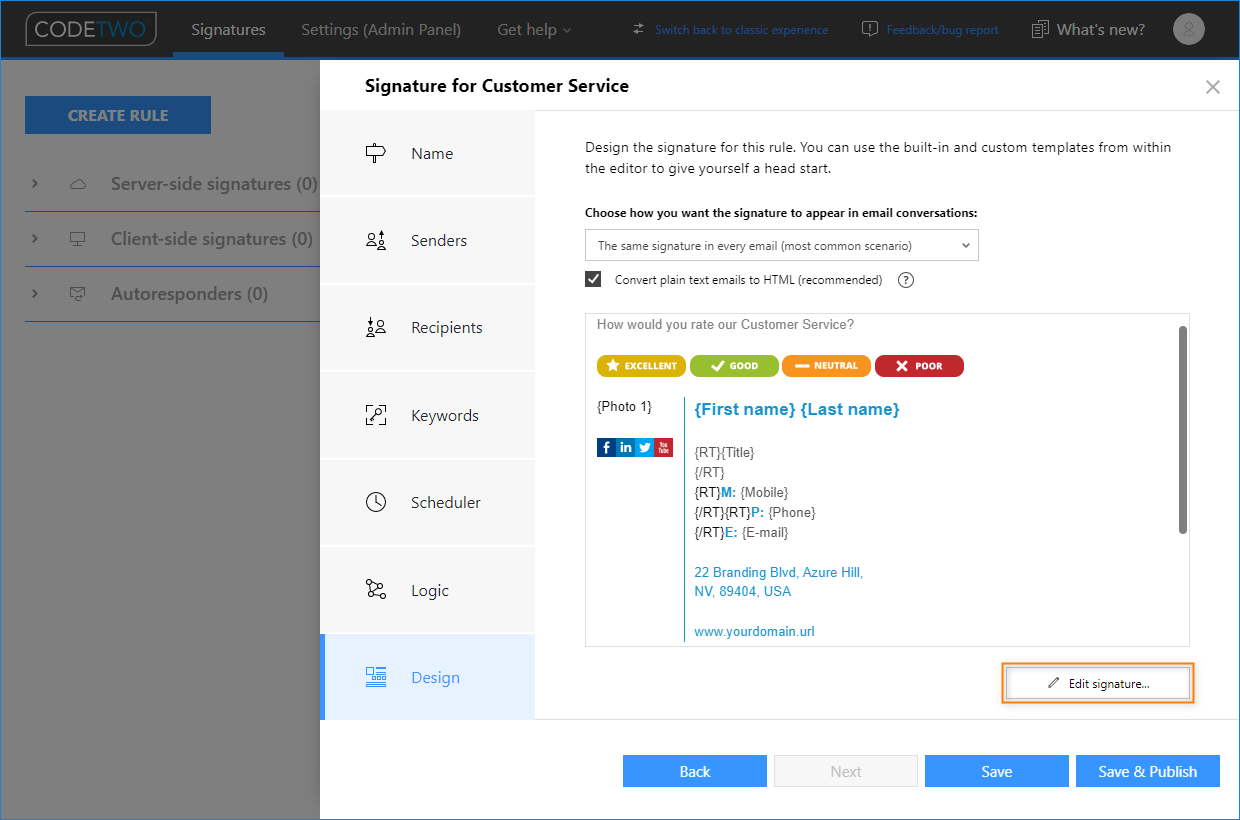
- Finally, go to the Design step and click Edit signature to create your shared mailbox signature. You can either choose one of the templates available in the signature template library and adjust it to your needs or create your email signature from scratch in program’s signature template editor.
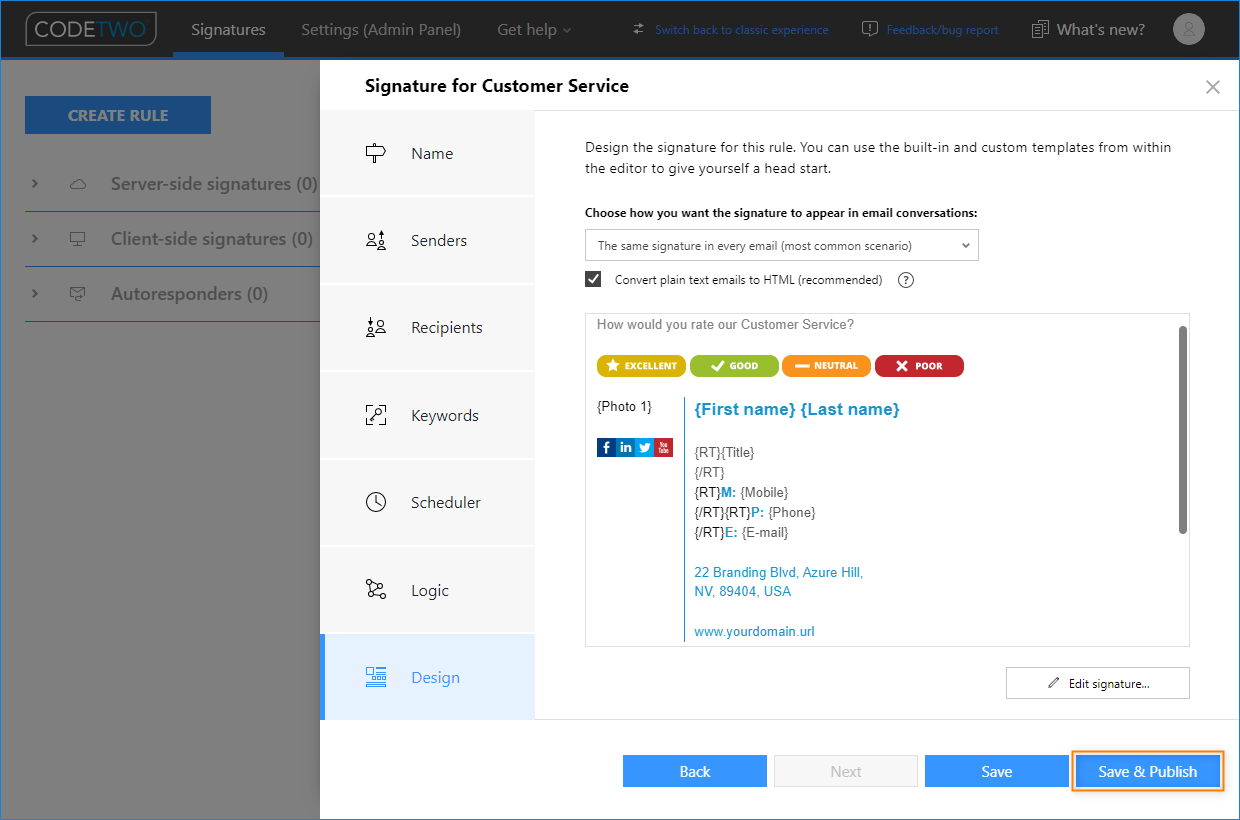
- Once everything is set up correctly, click Save & Publish to save your changes and apply the rule in your organization.
- Repeat the procedure to set up the signature for a user mailbox.

Now all emails sent from the shared mailbox will be stamped with either shared or user mailbox signature, depending on the delegate rights of the sender.
Top benefits:
- Set up and forget. Once configured, signatures are added automatically to emails.
- Users don’t have to switch between accounts to send emails with a proper signature.
- Each signature lands right under the reply, not at the bottom of an email conversation.
- You can control all company signatures from one place.
- Use graphical editor to create HTML and Plain Text signatures. No HTML knowledge required.
- And many more…
Downsides:
- You need to buy a subscription to be able to use this solution in your organization. For some first-hand experience, there is an option to try the solution for 14 days at no cost.
For more details on adding signatures to Microsoft 365 shared mailboxes, see this article.
Useful links: